Tubes vs TPU vs Tubeless: The honest road bike tyre comparison
Compare standard butyl inner tubes, TPU ultralight tubes, and tubeless systems on road bikes: puncture resistance, rolling speed, roadside repairs, cost, and maintenance reality.
 Field guide / tubes-vs-tpu-vs-tubeless-road-bike
Before you buy
Check the starter kit first
Print the one-page buying brief for helmet, lights, water, phone, and repair compatibility before comparing upgrades.
Every road cyclist eventually faces the great tyre debate: do you stick with traditional black butyl inner tubes, switch to featherweight thermoplastic polyurethane (TPU) tubes, or convert your wheels to liquid-sealed tubeless tyres?
The cycling industry often presents tubeless as the only modern choice and tubes as obsolete relics. But the reality out on the road is far more nuanced. Each system involves distinct trade-offs between speed, puncture defense, setup mess, upfront cost, and roadside sanity.
The short answer: For most beginner and recreational road cyclists riding under 100 km a week, TPU or standard butyl inner tubes remain the simplest, cleanest, and most reliable setup. TPU tubes offer the ultimate upgrade: they roll as fast as tubeless, weigh 70% less, and pack down to the size of a matchbox for easy saddle-bag storage. Tubeless is unbeatable for high-mileage riders (150+ km/week) and flint-strewn country lanes because liquid sealant plugs small thorn punctures automatically—but it demands workshop tools, sticky sealant top-ups every few months, and messy roadside contingency plans.
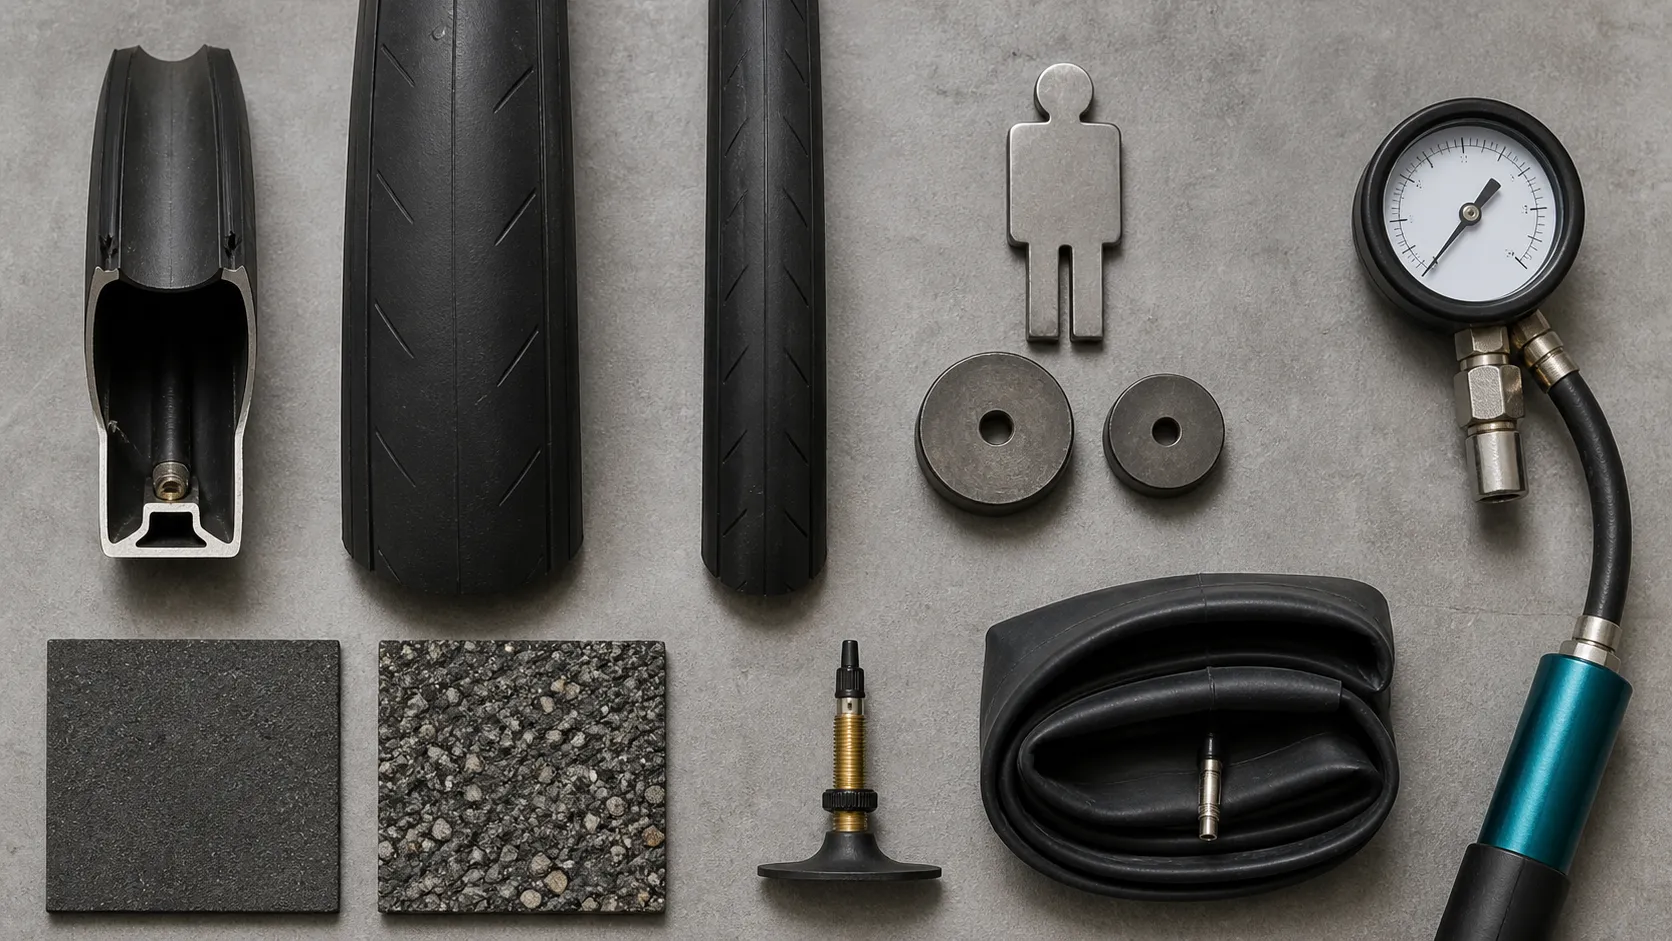
Head-to-head comparison table
Here is how standard butyl tubes, modern TPU tubes, and tubeless systems compare across the metrics that actually affect your daily riding:
| Feature | Standard Butyl Tube | TPU Ultralight Tube | Tubeless System (TLR) |
|---|---|---|---|
| Weight per wheel | 100 – 140 g | 25 – 45 g | ~70 – 90 g (sealant + valve + heavier tyre casing) |
| Rolling resistance | Baseline (moderate internal friction) | Very Fast (saves 2–4 W per wheel) | Fastest (zero tube friction; saves 3–5 W per wheel) |
| Small thorn/glass defense | Vulnerable (instant flat) | Resilient against small pinpricks | Automatic self-healing with liquid sealant |
| Pinch flat (snakebite) risk | High if underinflated | Moderate (elastic material resists pinching) | Immune (no inner tube to pinch) |
| Operating tyre pressure | Moderate to High (65–95 PSI) | Moderate to High (65–95 PSI) | Low to Moderate (50–75 PSI; maximum comfort & grip) |
| Setup complexity | Effortless (5 mins, hand pump) | Simple (gentle handling required) | Complex (rim tape, airtight valve, compressor/booster, liquid) |
| Ongoing maintenance | Check pressure weekly | Check pressure weekly | Top up sealant every 2–6 months |
| Cost per wheel (upfront) | £4 – £7 ($5 – $9) | £12 – £24 ($15 – $30) | £35 – £65 ($45 – $85 for tyre, tape, valves, sealant) |
| Roadside flat fix time | 8 – 12 mins (clean tube swap) | 8 – 12 mins (clean tube swap) | 0 mins (if seals) or 15+ mins (messy plug/tube install) |
| Saddle bag pack size | Bulky (fist-sized rubber bundle) | Microscopic (size of an energy chew) | Small (tubeless plug tool + emergency tube) |
| Rim brake heat tolerance | High | Check model rating (some melt under alpine dragging) | High |
1. Standard Butyl Tubes: The reliable, zero-fuss baseline
Butyl rubber has been the standard inner tube material for nearly a century. If you bought a complete road bike off the shop floor, it almost certainly came fitted with black butyl tubes.
Standard Butyl Tube Profile:
Weight               : [████████░░] ~120g each (heavy rotating mass)
Rolling Efficiency   : [█████░░░░░] Baseline rubber friction
Puncture Self-Repair : [░░░░░░░░░░] None (punctures immediately deflate)
Ease of Ownership    : [██████████] Universal parts, zero mess, 100% predictable
The advantages of butyl
- Ubiquitous and affordable: You can buy a standard 700c butyl tube for £4 to £7 ($5 to $9) at any bike shop, sports retailer, or rural convenience station worldwide.
- Forgiving installation: Butyl rubber is supple, durable during tyre fitting, and tolerates plastic tyre levers without tearing easily.
- Reliable air retention: A butyl tube holds air for 7 to 14 days before needing a meaningful top-up with a floor pump.
- Cheap, proven patching: A standard £3 vulcanizing patch kit permanently fixes small punctures at home.
The real-world downsides
- Weight penalty: A pair of standard butyl tubes adds 200 to 280 grams of rotating weight to your wheel rims.
- Higher rolling resistance: When your tyre rolls, the thick butyl tube rubs against the inside of the tyre casing, generating internal friction (hysteresis loss). This robs you of 4 to 8 watts of pedalling energy across both wheels compared to tubeless or TPU.
- Pinch-flat vulnerability: If you hit a sharp pothole edge or railway crossing with low pressure, the inner tube gets pinched between the tyre and the metal rim edge, creating a classic two-slit “snakebite” puncture.
- Bulky saddle bag clutter: A single butyl tube consumes more than half the internal volume of a standard saddle bag, leaving little room for a multi-tool, tyre levers, and keys. See our guide on essential road cycling gear for smart pack layouts.
[!NOTE] Who it is best for: Beginners building confidence, riders on strict budgets, indoor smart-trainer bikes, and casual weekend cyclists who want a zero-maintenance bike that can sit in the hallway for three weeks and be ready to roll immediately.
Before buying tubes, patches, or inflation, write down your tyre size, valve type, and valve length in the starter gear checklist. That small compatibility step prevents most wrong-spare purchases.
2. TPU Inner Tubes: The lightweight clincher revolution
Thermoplastic Polyurethane (TPU) is an engineered polymer that combines the elasticity of rubber with the strength and lightness of plastic. Originally popularised by brands like Tubolito and Schwalbe (Aerothan), and now widely available from brands like RideNow and Barbieri, TPU tubes have transformed traditional clincher cycling.
TPU Ultralight Tube Profile:
Weight               : [██░░░░░░░░] ~30g each (saves up to 200g per pair)
Rolling Efficiency   : [█████████░] Near-tubeless speed (low hysteresis)
Puncture Resistance  : [███████░░░] High tensile strength against road grit
Packability          : [██████████] Rolls down smaller than a CO2 cartridge
The advantages of TPU
- Dramatic weight savings: A TPU tube weighs between 25 g and 45 g, shaving 150 to 200 grams of rotational mass from your wheels for under £30. On climbs and during acceleration, this difference is immediately noticeable.
- Rolling speed matching tubeless: TPU material is wafer-thin and highly elastic, producing almost zero friction against the tyre carcass. Independent lab testing by Bicycle Rolling Resistance demonstrates that TPU tubes match the rolling efficiency of latex tubes and tubeless setups within a fraction of a watt.
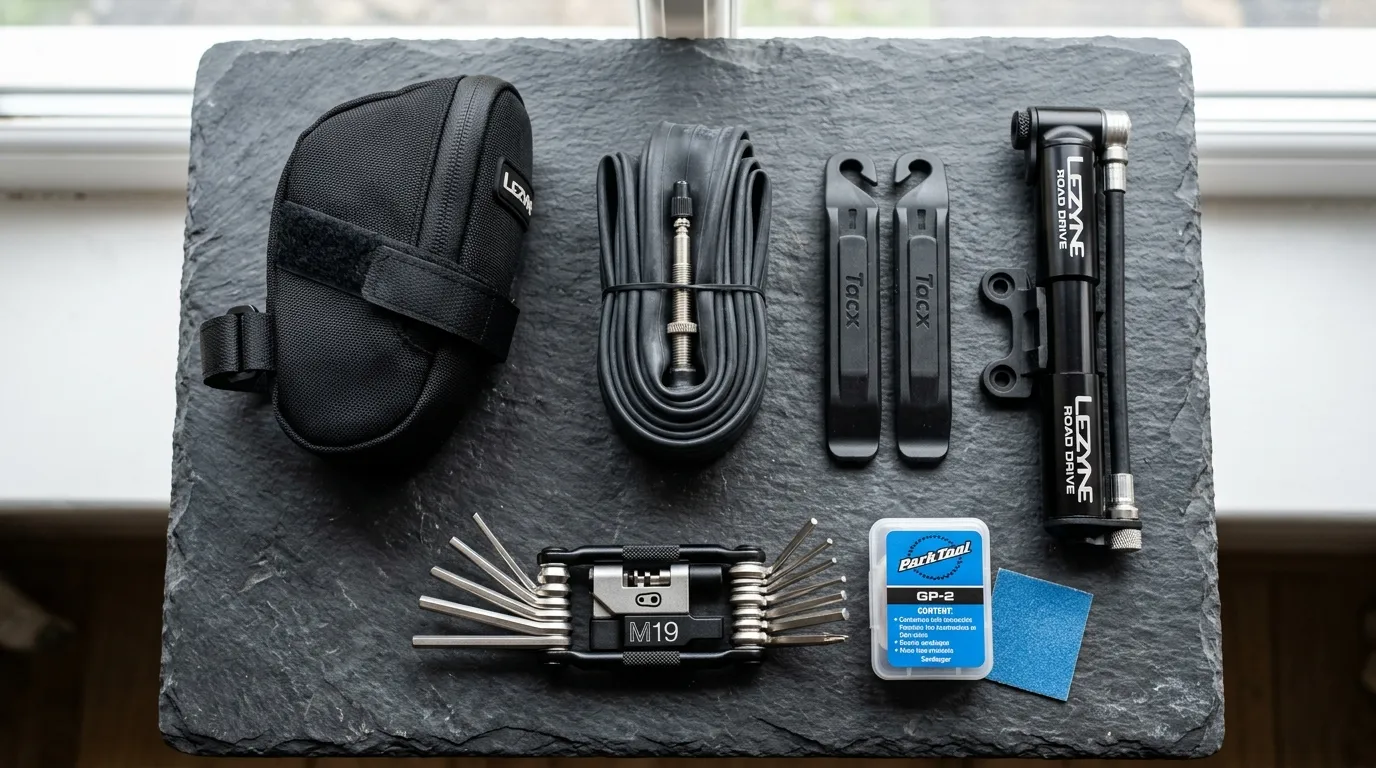
- Microscopic pack size: A rolled-up TPU tube is roughly the size of a cigarette lighter. You can easily pack two spare TPU tubes, two tyre levers, and a mini pump into a compact pocket without needing an oversized saddle pack.
- Superior pinch and thorn resistance: High-grade TPU has a much higher tensile puncture resistance than soft butyl rubber. It stretches significantly before tearing, offering noticeably better defense against small flints and curb pinches.
- Excellent air retention: Unlike latex tubes (which leak air within 24 hours), TPU tubes hold pressure just as well as standard butyl.
The critical TPU rules and gotchas
- Never inflate above 0.3 bar (5 PSI) outside the tyre: TPU does not have shape memory like rubber. If you pump up a bare TPU tube outside the tyre, it will balloon and permanently deform, ruining the tube before installation.
- Dedicated repair patches only: Standard rubber cement (vulcanizing fluid) will not bond to thermoplastic polyurethane. You must carry specialized self-adhesive TPU patches or dedicated alcohol-wipe repair kits.
- Rim brake heat sensitivity: While modern disc-brake bikes have zero limitations, prolonged rim-brake friction on steep mountain descents can heat the rim surface past 150°C, potentially softening or bursting ultra-thin TPU tubes. Always confirm your TPU brand’s rim-brake rating if you use rim calipers.
- Higher replacement cost: At £12 to £24 ($15 to $30) per tube, a botched installation or bad tyre slice hurts the wallet more than a disposable butyl tube.
[!TIP] Even if you run standard butyl tubes or tubeless tyres in your wheels, carrying a single TPU tube as your roadside emergency spare is the smartest upgrade you can make. It saves precious saddle bag space while delivering maximum get-home reliability.
3. Tubeless Systems: The self-healing, high-mileage standard
A tubeless system eliminates the inner tube entirely. A tubeless-ready (TLR) tyre forms an airtight seal directly against a specially taped rim, secured by a dedicated valve stem. Inside the tyre, 30 to 50 millilitres of liquid latex sealant sloshes around as the wheel turns.
Road Tubeless Profile:
Rolling Speed        : [██████████] Maximum speed and suppleness
Puncture Defense     : [█████████░] Automatically seals holes up to 2-3mm
Comfort & Grip       : [██████████] Safely run lower PSI with zero pinch flats
Maintenance Burden   : [████████░░] Requires regular sealant top-ups & setup tools
The advantages of tubeless
- Self-healing punctures: When a tiny thorn, wire strand, or glass splinter penetrates the tread, the escaping air pressure forces liquid sealant into the hole. The latex particles coagulate within seconds, sealing the leak while you keep pedalling. Most small punctures seal with only a 5–10 PSI loss before you even notice.
- Zero pinch flats and lower operating pressure: Because there is no tube inside the tyre to pinch against the rim, you can safely drop tyre pressure by 10 to 15 PSI. This dramatically increases tyre compliance over rough chipseal, smooths out road buzz, and provides immense cornering grip in the wet.
- Lowest rolling resistance: Without an inner tube flexing and rubbing against the tyre, tubeless setups offer class-leading rolling efficiency.
- Hookless rim compatibility: Many modern carbon road wheels use hookless (TSS) rim profiles that strictly require tubeless tyres (though inner tubes can still be inserted inside an approved tubeless tyre for emergency repairs).
The maintenance reality and beginner friction
While marketing suggests tubeless is “set-and-forget”, the mechanical reality involves clear maintenance commitments:
- Initial setup complexity: Seating a tubeless road tyre requires airtight tubeless rim tape, a well-tightened valve stem, and a sudden burst of high-volume air (often requiring a dedicated booster pump chamber or workshop compressor) to snap the tight tyre beads onto the rim shelf.
- The sealant countdown clock: Tubeless sealant is a liquid that slowly evaporates and cures into a latex film inside the tyre. You must inject 20–30 ml of fresh sealant every 2 to 6 months, depending on ambient temperature and riding frequency. If you let the sealant dry out, you are riding a heavier tyre with zero puncture protection.
- Messy catastrophic punctures: If a flint slashes the tyre with a cut larger than 2 to 3 millimetres, the sealant cannot plug the gap against high road pressures (60–80 PSI). Liquid sealant will spray over your frame, brakes, and legs until you stop.
- Roadside plug insertion: To fix a puncture that sealant cannot handle, you must insert a rubberized tubeless plug (“bacon strip” or dart) into the cut using a sharp prong tool, trim the excess, and re-inflate.
- The worst-case scenario: If a tubeless tyre suffers a large sidewall tear or refuses to seal with plugs, you must remove the tubeless valve (which often has a tight locknut coated in dried sealant), wipe sticky fluid from the inside of the tyre, and fit an emergency inner tube at the roadside.
[!WARNING] When seating a new tubeless road tyre, never exceed the rim manufacturer’s maximum seating pressure (usually 72.5 PSI / 5.0 bar for hookless rims). Always wear eye protection when blasting high air volumes during initial bead seating.
Roadside flat comparison: How the three systems behave
To understand which system fits your riding, imagine getting a flat tyre on a cold, drizzly morning 25 km from home:
┌─────────────────────────────────────────────────────────────────────────┐
│                     ROAD PUNCTURE SCENARIO                              │
└────────────────────┬───────────────────────────────┬────────────────────┘
                     │                               │
            Small Thorn / Glass             Major Cut / 4mm Slash
                     │                               │
    ┌────────────────┼───────────────┐               │
    ▼                ▼               ▼               ▼
┌──────────────┐ ┌──────────────┐ ┌─────────────┐ ┌──────────────────────┐
│ Butyl Tube   │ │ TPU Tube     │ │ Tubeless    │ │ All Systems          │
│ Full flat in │ │ Full flat in │ │ Liquid seals│ │ Must stop in safe    │
│ 15 seconds.  │ │ 30 seconds.  │ │ in 3 sec.   │ │ spot away from cars. │
│ 10-min clean │ │ 10-min clean │ │ Lose 5 PSI, │ │ Tubeless needs plug  │
│ tube swap.   │ │ tube swap.   │ │ keep riding!│ │ or emergency tube.   │
└──────────────┘ └──────────────┘ └─────────────┘ └──────────────────────┘
Scenario A: A small 1 mm thorn or flint shard
- With Butyl or TPU: The tube punctures. You must pull over, remove the wheel, unseat the tyre, extract the thorn, install a spare tube, and inflate with your hand pump (8 to 12 minutes of roadside work).
- With Tubeless: The sealant hisses for three seconds, sprays a tiny dot onto your seat tube, and seals the leak permanently. You continue riding without unclipping.
Scenario B: A 4 mm glass cut or pothole rim pinch
- With Butyl or TPU: You get a flat, swap the tube (or boot the tyre casing if slashed), and ride home. The repair is clean and predictable. Learn the step-by-step method in our guide on how to fix a puncture on a road bike.
- With Tubeless: Sealant sprays onto your frame. You pull over, locate the cut, push a tubeless plug (such as a Dynaplug or Stan’s DART) into the hole, wait 30 seconds, top up the pressure with a mini pump, and roll on. If the plug fails, you must install an emergency tube inside a sealant-coated tyre carcass.
How to choose: A beginner decision framework
Match your weekly riding habits, technical comfort, and budget to find your ideal setup:
                               ┌─────────────────────────────┐
                               │ How much do you ride weekly │
                               │ and how do you feel about   │
                               │ garage maintenance?         │
                               └──────────────┬──────────────┘
                                              │
            ┌─────────────────────────────────┼─────────────────────────────────┐
            ▼                                 ▼                                 ▼
   Under 80 km / week;               80 – 150 km / week;               150+ km / week;
   Clean dry roads;                  Wants speed & low weight;         Rough country lanes;
   Wants zero maintenance            Hates liquid sealant mess         Hates stopping for flats
            │                                 │                                 │
            ▼                                 ▼                                 ▼
┌───────────────────────┐         ┌───────────────────────┐         ┌───────────────────────┐
│ STANDARD BUTYL TUBES  │         │ TPU ULTRALIGHT TUBES  │         │ ROAD TUBELESS SYSTEM  │
│ Cheap, proven, simple │         │ Fast, tiny, pure win  │         │ Self-healing mileage  │
└───────────────────────┘         └───────────────────────┘         └───────────────────────┘
Choose Standard Butyl Tubes if:
- You ride once or twice a week for casual fitness or short commutes.
- Your bike sits unused for weeks at a time during winter or busy work periods.
- You want the lowest possible running costs and the ability to buy replacement parts anywhere.
- You dislike dealing with sticky sealants, special valves, and air compressor seating.
Choose TPU Tubes if:
- You ride a clincher road bike and want the rolling speed and suppleness of tubeless without any of the liquid hassle.
- You want to shave 150 to 200 grams of rotational wheel weight on a modest budget.
- You want a tiny, featherweight saddle bag setup that leaves room for phones, snacks, and tools.
- You want a clean, fast home repair process that never requires scrubbing dried latex from tyres and rims.
Choose Tubeless if:
- You ride over 150 km (100 miles) per week across varied road surfaces, rural hedge-cuttings, or wet city lanes.
- You ride 28 mm, 30 mm, or 32 mm tyres and want to run lower pressures (50–65 PSI) for maximum comfort and road grip. Read our full breakdown on tyre pressure for beginner road cyclists.
- Your bike came pre-equipped with tubeless-ready rims and tyres from the factory.
- You are comfortable checking sealant levels with a dipstick and topping up fluid every 3 months.
The smartest beginner hybrid strategy
If you are torn between systems, here is the exact strategy recommended by experienced mechanics and long-distance cyclists:
- In your wheels: Run high-quality clincher tyres (like Continental Grand Prix 5000 or Schwalbe One) paired with TPU inner tubes. This gives you 98% of the rolling speed and comfort of tubeless with zero liquid maintenance.
- In your saddle bag: Pack one spare TPU tube, two plastic tyre levers, a self-adhesive TPU patch kit, and a compact hand pump.
- If you already have tubeless wheels: Keep running them! Buy a mini tubeless plug tool (like a Dynaplug or Muc-Off Stealth plug) for quick tread repairs, but always carry one ultra-compact TPU tube in your bag as the ultimate fail-safe backup in case of a major tyre slash.
Before heading out on your maiden ride with any new tyre setup, run through our first ride preparation checklist and perform the five-minute pre-ride bike check to verify tyre pressure and bead alignment.
Common tyre setup mistakes to avoid
| Mistake | Why it happens | What to do instead |
|---|---|---|
| Over-inflating bare TPU tubes | Pumping air into a TPU tube before fitting to check for leaks | Only add 0.3 bar (5 PSI) to give it shape; never pump a bare TPU tube until it balloons |
| Using rubber patch glue on TPU | Assuming all tube patches work the same | Use dedicated TPU glueless adhesive patches or TPU solvent kits |
| Letting tubeless sealant dry out | Forgetting that sealant evaporates after 3–6 months | Set a calendar reminder every 90 days to shake the tyre or top up 25 ml of fresh sealant |
| Using metal tyre levers on tubeless rims | Fighting a tight tyre bead with force | Use sturdy plastic levers and push the opposing tyre bead into the centre rim channel |
| Relying on tubeless without an emergency tube | Assuming sealant can fix a 10 mm tyre sidewall gash | Always carry an ultra-compact TPU tube and tyre boot in your saddle pack |
| Pumping tyres to sidewall maximum PSI | Confusing maximum safety limit with optimal riding pressure | Use a pressure calculator based on rider weight and tyre width (see our tyre pressure guide) |
Your next step
Take a look at your road bike’s front and rear tyres right now:
- Check the sidewall labels: Look for markings like Tubeless Ready, TLR, Tubeless Easy (TLE), or standard Clincher.
- Inspect your saddle bag: Remove your spare tube. If you are still carrying a heavy, oversized butyl tube that takes up all your storage space, consider swapping it for an ultra-compact TPU spare tube.
- Practise at home: If you have never removed a tyre bead or changed a tube, do one calm practice puncture repair in your living room before you are forced to do it in the cold on the roadside.
Before rolling out on your next route, explore our companion guides:
- How to fix a puncture on a road bike — The complete step-by-step roadside repair masterclass.
- Tyre pressure for beginner road cyclists — How to calculate the ideal PSI for speed, comfort, and grip.
- Essential road cycling gear — What to carry in your saddle bag and jersey pockets on every ride.
- Practise one puncture repair at home — Build muscle memory and confidence without roadside stress.
- Maximum tyre pressure is not a target — Why over-inflating your tyres slows you down and hurts your hands.
Sources and technical references
- Continental Tyres: Clincher, Tubeless, and Inner Tube Technical Overview
- Schwalbe: Aerothan TPU Tube Technology & Air Retention Testing
- Bicycle Rolling Resistance: Butyl vs Latex vs TPU vs Tubeless Lab Comparison
- SILCA: Tyre Pressure, Casing Tension, and Rolling Resistance Optimization
- Stan’s NoTubes: Tubeless Tyre Sealant Care & Maintenance Manual
- Park Tool: Tubeless Tyre Maintenance, Plugging, and Tube Repair Guides