How to fix a puncture on a road bike
Fix a road-bike puncture by moving somewhere safe, removing the wheel, finding the cause, replacing or patching the tube, reseating the tyre, and checking the bike before riding.
 Field guide / how-to-fix-a-puncture-on-a-road-bike
Before you buy
Check the starter kit first
Print the one-page buying brief for helmet, lights, water, phone, and repair compatibility before comparing upgrades.
Fixing a road-bike puncture is mostly a calm sequence: get out of danger, remove the wheel, remove one side of the tyre, find what caused the flat, install a good tube or patch the old one, inflate carefully, reinstall the wheel, and test the brakes before riding away.
The short answer: for a normal clincher tyre with an inner tube, the fastest beginner roadside fix is usually to install a spare tube, keep the punctured tube for patching later, and inspect the tyre carefully so the same thorn, glass, or rim problem does not puncture the replacement. Stop and get help if the tyre, rim, wheel fastening, or brakes are not clearly safe afterward.
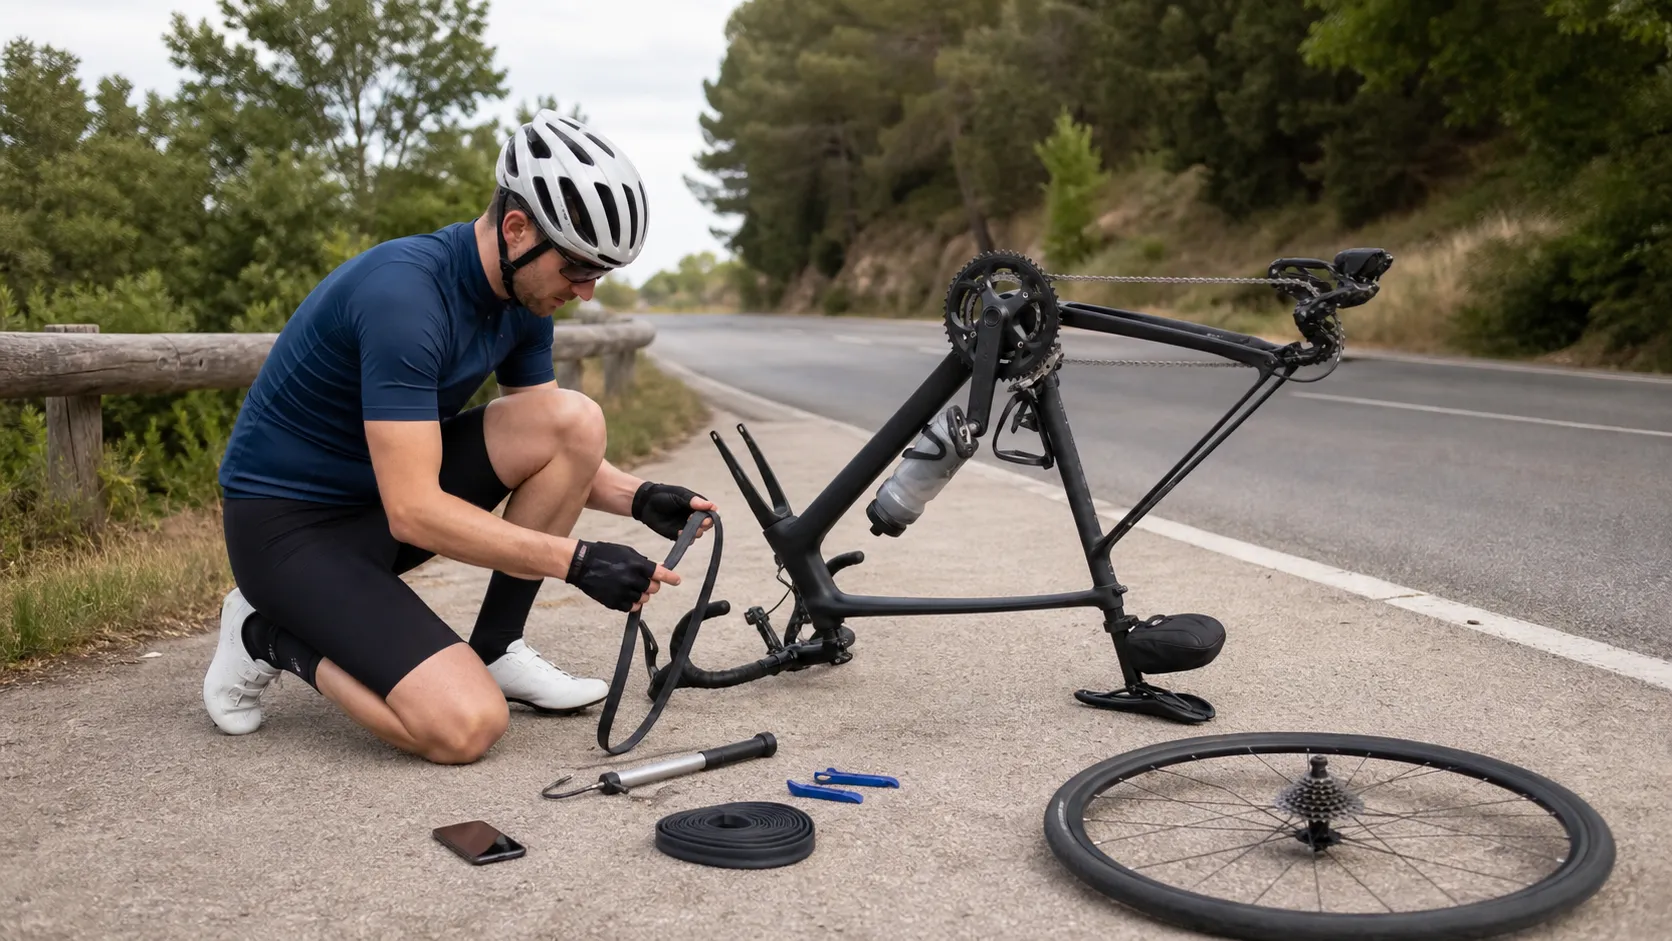
First, decide whether this is a repair or a rescue
Not every flat tyre deserves a roadside repair attempt. A clean puncture through the tread is a normal get-home job. A torn sidewall, damaged rim, loose wheel, unclear axle, contaminated brake, or tyre that will not seat correctly is a stop-riding problem.
Community wording around flats is refreshingly blunt: beginners ask whether to swap the tube or patch it, why the tyre keeps going flat after a new tube, how to avoid pinching the tube, and whether tubeless means they no longer need a backup plan. Those are the right questions, because the hard part is not memorising one trick. It is knowing the order and the safety boundary.
REI’s flat-tyre guide teaches the same broad sequence this guide uses: remove the wheel, remove the tube, find the cause, patch or replace the tube, and reinstall the wheel. Park Tool’s tyre and tube guide gives the workshop version of removing and reinstalling the tyre and tube. The beginner roadside version below keeps those steps, but adds the decisions that matter when you are not in a shop.
What you need in the saddle bag
For a road bike that uses inner tubes, carry:
- one spare tube that matches the tyre diameter, tyre width range, valve type, and valve length;
- two plastic tyre levers;
- a pump or CO2 inflator that fits the valve;
- a patch kit as a second chance or for repairing the old tube later;
- any hex key or axle tool your wheel system requires;
- a small boot or sturdy temporary patch material only if you know how to use it and the tyre cut is minor enough to ride cautiously.
If you are still building the kit, essential road cycling gear explains the repair bundle in the context of a whole beginner setup. If the tools are already packed but you have never used them, do one calm home rehearsal before relying on them in the rain, cold, or traffic noise.
1. Move out of danger before touching the bike
The first step is not mechanical. Move to a driveway, verge, lay-by, trail entrance, car park, or wide pavement where you are not kneeling beside moving traffic. If there is no safe workspace, walk the bike carefully on the flat tyre until there is one, or call for help.
REI’s repair guidance says to move out of danger before starting a repair when the flat happens somewhere unsafe. That matters more than saving the tube. A road-bike rim can be expensive, but your attention should not be split between traffic and tiny tyre parts.
Before removing anything:
- Shift to a small rear sprocket if the rear wheel is flat. This gives the chain a straighter, easier path when the wheel comes out.
- Turn the bike so you can work away from the road edge.
- Put small parts, levers, cap, axle, and tube where they cannot roll into traffic or grass.
- Keep oily hands, lubricant, and dirty cloth away from disc rotors and rim-brake tracks.
If the flat arrived after a crash, pothole hit, kerb strike, or sudden loss of control, slow down. Check the rim, tyre, fork, frame, bars, and brakes before treating it as an ordinary puncture.
2. Remove the wheel without guessing
Wheel removal depends on your bike. Some road bikes use quick releases, some use thru-axles, and some older or utility bikes use nuts. Rim brakes may need a release opened for the tyre to clear the pads. Disc brakes usually do not need a brake release, but the rotor can be hot, sharp, or easy to contaminate.
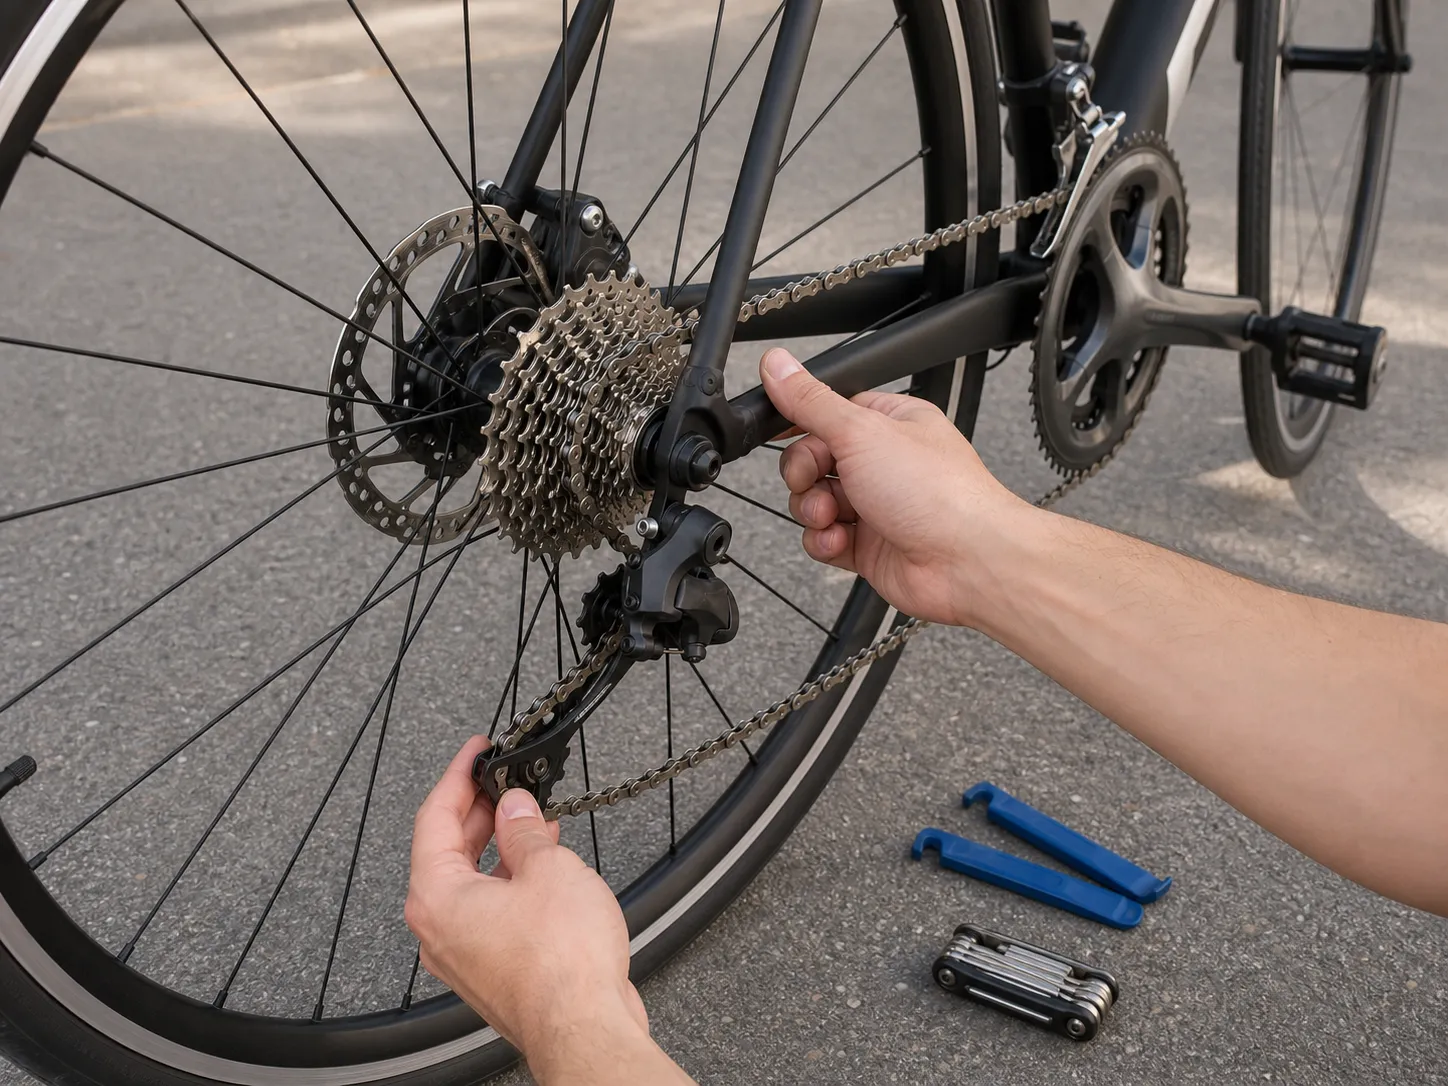
Use this beginner decision rule:
- Front wheel: support the bike, open or loosen the correct axle system, then remove the wheel without squeezing a disc brake lever while the wheel is out.
- Rear wheel: shift to a small rear sprocket first, open or loosen the correct axle system, guide the derailleur back gently, and let the wheel drop clear of the chain.
- Unknown axle or brake: stop and use the bike or wheel manual. Do not invent a fastening method at the roadside.
The safety warning is not theoretical. Trek’s 2026 owner manual warns that an improperly secured wheel can become loose or fall off and cause serious injury. Shimano’s E-THRU axle manual says incorrect use of the axle release lever can let the wheel come off the bicycle. Those are reasons to learn your own bike’s axle before the first longer ride.
If you are unsure about part names, use road bike anatomy for beginners later, but treat your manufacturer’s wheel instructions as the source for fastening.
3. Remove one side of the tyre and take out the tube
Deflate the tyre completely. Even a small amount of remaining air can make a tight road tyre feel impossible.
Then:
- Push both tyre beads inward toward the centre channel of the rim all the way around. The centre channel gives you the slack you need.
- Start opposite the valve, not right beside it.
- Use a plastic tyre lever to lift one bead over the rim.
- Use the second lever a short distance away if needed, then work one side of the tyre off the rim.
- Pull the tube out, leaving the tyre mostly on the wheel.
- Remove the valve from the rim hole carefully.
For a normal tube change, you usually do not need to remove the tyre completely. Leaving one bead on the rim helps preserve orientation, which makes it easier to match the hole in the tube to the matching place in the tyre or rim.
Avoid metal levers unless your wheel or tyre instructions specifically permit them. Metal tools can damage tubes, rim tape, and some rims. If the tyre is impossibly tight, push the bead into the centre channel again around the whole wheel before adding force.
4. Find the cause before installing the spare
This is the step that prevents the classic second flat five minutes later. Do not install a new tube until you have looked for the reason the first one failed.
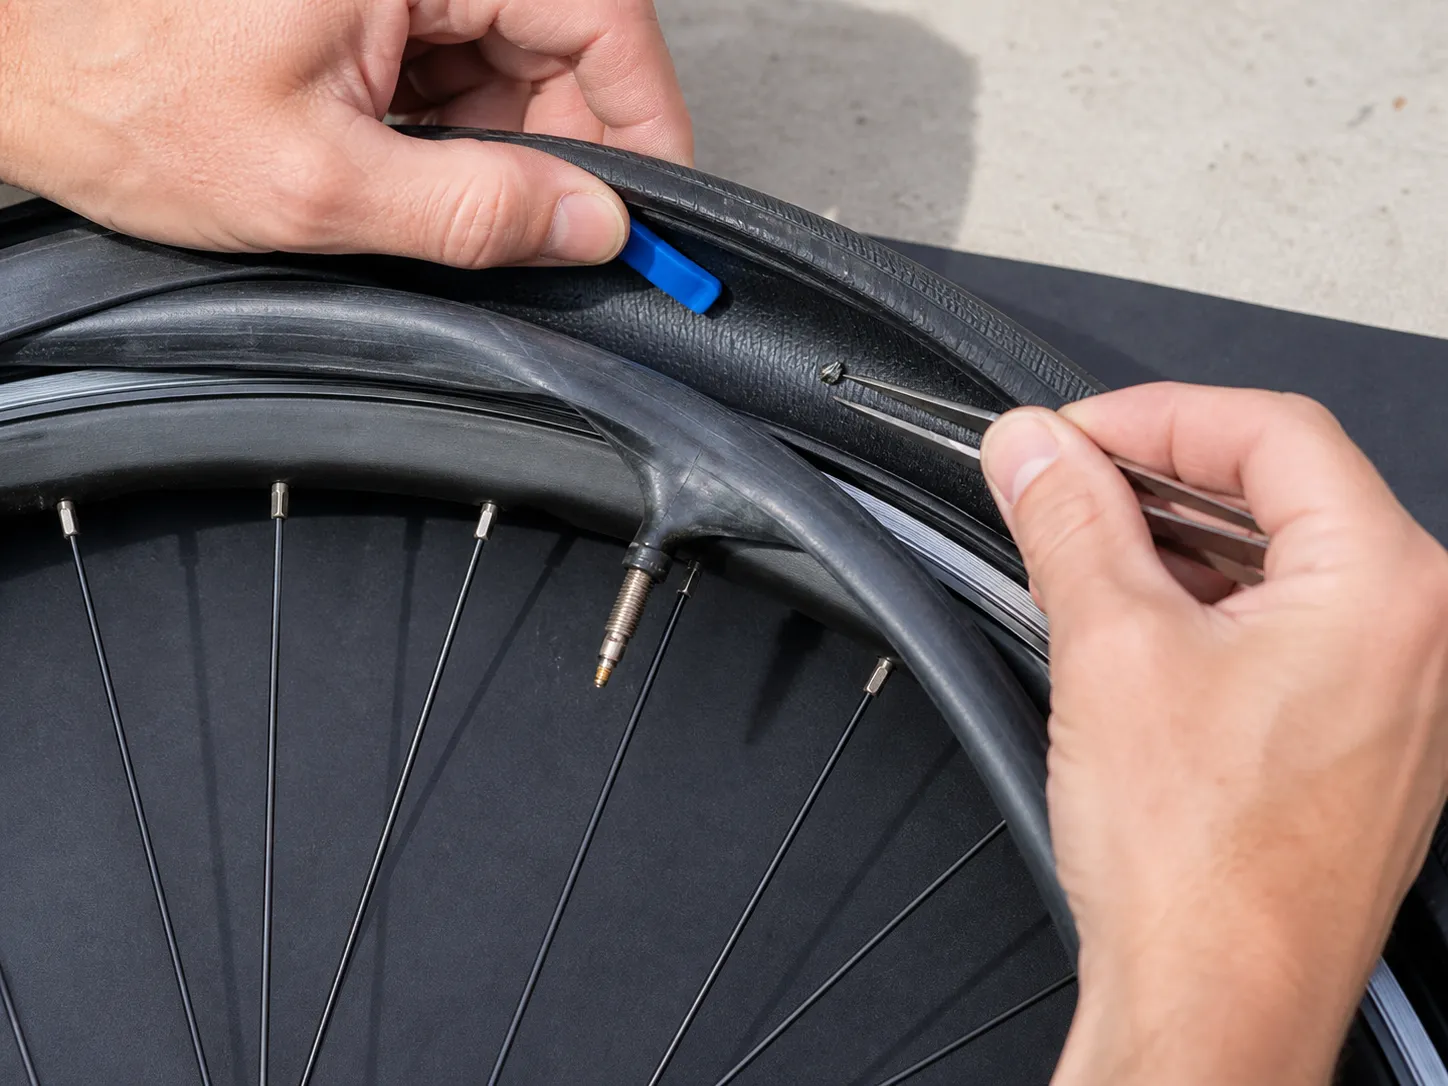
Check in this order:
- The outside tread: look for glass, flint, wire, thorns, staples, cuts, or a small dark spot.
- The inside of the tyre: use sight first, then a tyre lever, cloth, or very careful fingertip sweep. Do not drag a bare finger across an unknown sharp point.
- The tube: inflate it slightly if possible and listen or feel for air. The hole position gives clues.
- The rim tape: make sure spoke holes are covered and the tape is not split, folded, or shifted.
- The valve area: check for a torn valve base, crooked valve, or sharp rim edge around the hole.
REI specifically tells riders to inspect the wheel, tyre, tube, valve, and rim, and to look for protruding spoke ends or rim areas where the tube may have pinched. Continental’s tyre-rim compatibility guidance also tells riders to check the rim, tyre, inner tube, and rim tape for damage before mounting tyres and to check inside the tyre for sharp obstacles.
Here is how the evidence changes the decision:
| What you find | Likely action |
|---|---|
| Tiny thorn, glass, or wire in the tread | Remove it, install spare tube, inflate carefully |
| Two small parallel slits in the tube | Pinch flat is likely; inspect rim and tyre, then use appropriate pressure and smoother riding over impacts |
| Hole near the valve base | Replace the tube; check valve alignment and rim-hole sharpness |
| Split or displaced rim tape | Stop or get help; a new tube may puncture again from the rim |
| Large tyre cut, bulge, exposed casing, or bead damage | Do not ride normally; call for help or use only a cautious emergency boot if the damage is minor and you know the method |
5. Spare tube or patch?
At the roadside, a spare tube is usually the simpler beginner choice. It avoids waiting for glue, working on dirty rubber in bad light, and betting the ride on a rushed patch. Keep the punctured tube, patch it later at home if the damage is small enough, and carry it as a backup only after it holds air.
A patch kit still earns a place in the bag because it can save the ride after a second puncture. Park Tool’s inner-tube repair guide separates pre-glued patches from vulcanizing patches and shows the more careful process needed for a durable repair. The lesson for a new rider is simple: patching is useful, but it is not magic tape slapped onto a dirty, stretched, or torn tube.
Do not patch a tube if the valve is damaged, the rubber is torn widely, the hole is at the valve base, or the patch will sit across a seam in a way the patch instructions warn against. Replace it.
6. Install the tube without pinching it
Put just enough air into the spare tube that it takes a soft round shape. A limp tube twists and hides. A firm tube fights the tyre.
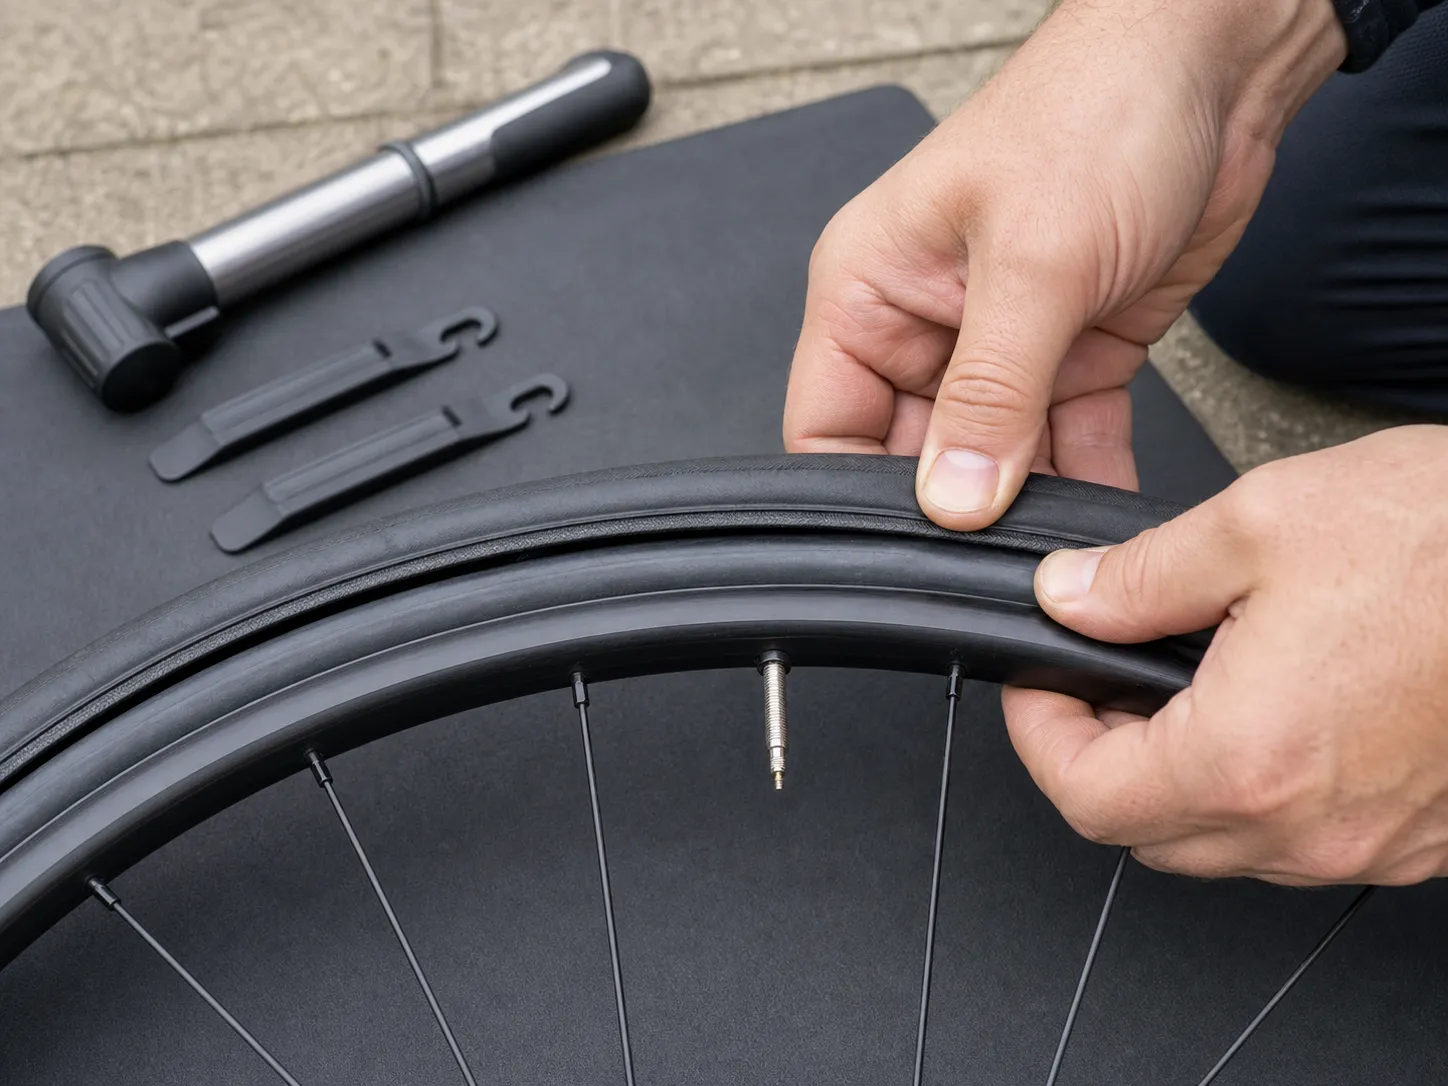
Use this order:
- Fit one tyre bead on the rim if it came off.
- Insert the valve straight through the rim hole.
- Tuck the lightly inflated tube into the tyre all the way around.
- Starting opposite the valve, press the second bead onto the rim by hand.
- Keep pushing the already-mounted bead into the rim’s centre channel as the last section gets tight.
- Finish near the valve, then push the valve upward slightly to make sure the tube is not trapped under the bead.
- If you must use a lever for the last section, use a plastic one carefully and protect the tube from the lever tip.
Continental’s mounting instructions tell riders to lightly inflate the tube so it takes shape, prevent folds, avoid pinching the tube between tyre and rim, and check that the tyre sits evenly after inflation. That is why rushing the last tight section often creates another puncture.
7. Inflate in stages and check the bead
Do not blast the tyre to full pressure without looking. Inflate a little, stop, and inspect both sides of the tyre.
Look for:
- an even bead line around the rim;
- no tube peeking out under the tyre;
- a straight valve;
- no bulge, dip, or section where the tyre sits unusually high or low;
- pressure within both the tyre limit and rim limit.
If anything looks wrong, deflate and reseat the tyre. Do not trust a tyre that wobbles, bulges, or exposes the tube.
This is also where beginners can confuse two different pressure ideas. The sidewall maximum is a limit, not a target. For the broader pressure decision, use the maximum tyre pressure is not a target now and the fuller tyre-pressure guide when it publishes.
8. Reinstall the wheel and test the bike
Put the wheel back according to the bike or wheel instructions. Do not settle for “it looks close enough.”
Before riding:
- Confirm the axle or quick release is fully secured by the correct method.
- Confirm the wheel sits straight in the frame or fork.
- Reconnect or reset any rim-brake release you opened.
- Spin the wheel and listen for rubbing.
- Squeeze both brakes while standing still.
- Roll slowly in a safe space, brake gently, and check that the bike feels normal.
If a disc brake lever was squeezed while the wheel was out, the pads may close too far for easy wheel installation. Do not force the rotor between pads or contaminate the brake. Use the brake maker’s instructions or get help.
Trek’s owner manual treats wheel fastening as safety-critical, and Shimano’s axle instructions point riders back to the relevant service instructions for tightening position. Your roadside repair is not complete until the wheel and brakes are safe.
Common mistakes that cause a second flat
| Mistake | Why it happens | Better habit |
|---|---|---|
| Installing the spare without finding the sharp object | Stress makes the tube swap feel like the whole job | Inspect tyre, tube, valve, rim tape, and rim before reinstalling |
| Starting at the valve when removing the tyre | The valve area has less room to move | Start opposite the valve |
| Leaving the bead on the rim shoulder | Tight tyres feel impossible | Push the bead into the centre channel all the way around |
| Using the lever hard on the last section | The lever can pinch the new tube | Add a little tube air, check placement, and finish by hand if possible |
| Inflating fully without stopping | A trapped tube may only become obvious under pressure | Inflate in stages and check both sides |
| Forgetting the brake or axle check | The flat feels fixed, so attention moves on too soon | Wheel secure, brake reset, slow roll, then ride |
What about tubeless road tyres?
Tubeless tyres can seal many small tread punctures, but they do not remove the need for judgment. Sealant can fail, a cut can be too large, the bead can unseat, a valve can leak, or a rider may still need to install a tube to get home.
For this beginner guide, the key boundary is simple:
- If the puncture seals and the tyre holds rideable pressure, check the tyre, rotate the repair area away from the ground briefly if needed, inflate within limits, and ride home cautiously.
- If it does not seal, follow your tyre and sealant maker’s repair method. That may mean a plug, a tube, or stopping.
- If the tyre has a large cut, damaged bead, exposed casing, or will not stay seated, do not treat sealant as permission to ride normally.
The planned tubes-versus-tubeless guide can cover the full setup choice later. This page is about getting a beginner with a flat tyre home safely.
Your next step
Before your next ride, open your saddle bag and prove three things: your spare tube matches the tyre and valve, your pump actually fits the valve, and you know how your wheel fastens. Then use the five-minute pre-ride bike check before leaving, because the best puncture repair is still the one you never need to do at the roadside.
Sources and further reading
- REI: How to fix a flat bike tire
- Park Tool: Tire and tube removal and installation
- Park Tool: How to patch a bicycle inner tube
- Continental: Tire/rim combinations and inner tube setup checklist
- Continental: Mounting and care instructions for clincher and folding tyres
- Trek Bicycle owner manual, Rev. 6, March 2026
- Shimano E-THRU axle user manual