Essential road cycling gear: what you need and what can wait
Build a safe, practical road-cycling starter kit, match repair gear to your bike, and postpone upgrades until your rides show what you actually need.
 Field guide / essential-road-cycling-gear
Before you buy
Check the starter kit first
Print the one-page buying brief for helmet, lights, water, phone, and repair compatibility before comparing upgrades.
You do not need a complete cycling wardrobe or a drawer of specialist tools to start road cycling. You need equipment that helps you control the bike, be seen, drink, handle a likely roadside stop, and contact someone when the ride does not go to plan.
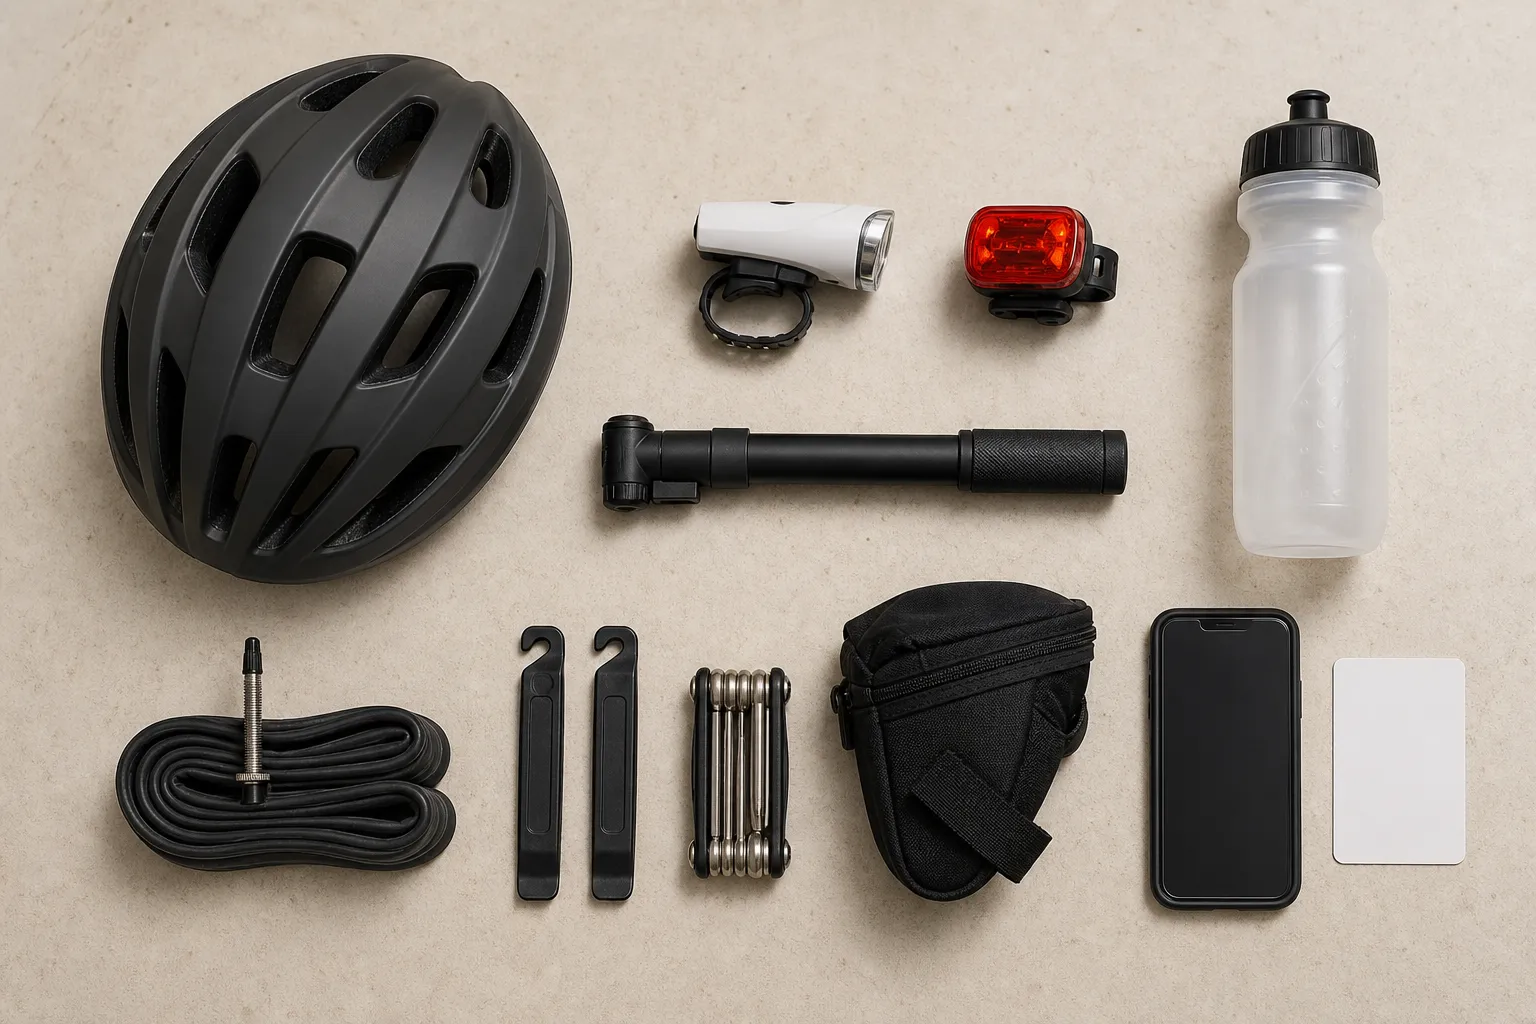
The short answer: start with a correctly fitting helmet, legal and reliable lights and reflectors, water, ordinary clothes and shoes that cannot catch in the bike, and a small get-home kit matched to your tyres. Add comfort clothing, electronics, and performance equipment only when a real ride reveals a problem they would solve.
Build the kit around four jobs
Shopping by category makes every product look necessary. Shopping by job exposes what is missing and what is merely appealing.
| Job | Start with | Add when the ride demands it |
|---|---|---|
| Protect and control | A suitable, correctly fitted helmet; secure shoes and clothing | Glasses, gloves, or weather layers for a specific comfort or protection need |
| See and be seen | Legal reflectors and charged front and rear lights | Backup lights for darkness, long rides, or unreliable charging access |
| Drink and manage the route | Water, route access, identification, and a way to call or pay for help | Food, another bottle, offline navigation, or a power bank as duration and isolation increase |
| Solve the likely stop | A compatible tube or repair method, tyre levers, pump, and realistic way home | More spares or specialist tools after you know how to use them |
This is a minimum decision framework, not a universal packing list. A daylight loop near home and an evening ride through quiet countryside do not have the same failure consequences.
Buy these before the first ordinary road ride
A helmet that is certified and fits your head
Choose a bicycle helmet that carries the safety certification required where it is sold and ridden. Certification is the baseline; fit is what keeps the helmet positioned as intended. It should sit level, feel snug without painful pressure, stay stable when fastened, and leave your vision clear. The NHTSA helmet-fitting guide provides a simple visual fit check, while US readers can confirm the required label through the Consumer Product Safety Commission.
Head shapes differ. A more expensive helmet is not automatically a better-fitting one, so try alternatives instead of accepting pressure points or a shell that rocks around. Follow the manufacturer’s instructions for adjustment, care, and replacement, particularly after an impact.
Helmet laws vary by age, bicycle type, and jurisdiction. Check the rules for the place where you will ride rather than treating advice from another country as law.
Front and rear lights you can operate without guesswork
Start with a white front light and a red rear light that mount securely, remain visible around your luggage and clothing, and have enough charge for the planned ride plus a margin. A front light used on an unlit road must help you see the surface; a small visibility light may not do that job.
Lighting and reflector rules genuinely differ. For example, the UK Highway Code permits flashing lights under its conditions, while Dutch government guidance says bicycle lights must not flash and specifies where separate lights may be attached. Check local requirements for colour, position, reflectors, flashing modes, and the times or conditions in which lights must be used.
Charge the lights before they become urgent. Poor weather, shade, tunnels, a delay, or a wrong turn can make a planned daylight ride darker than expected.
Clothing and shoes that let you control the bicycle
Ordinary sports clothing is enough for a first ride. Choose layers that let you move, keep loose fabric and laces away from the chain and wheels, and make sure no coat, bag, or trouser cuff blocks a light. The practical test is whether you can turn your head, reach the brakes, pedal freely, and put a foot down without fighting your clothing.
Flat pedals and secure trainers are a sound beginner setup. Clipless pedals—the type that attach a cleated shoe to the pedal—are an optional system, not an entry requirement.
Water and a way to handle an unplanned finish
Carry water in a bottle or pack that you can use safely. The amount depends on weather, effort, ride time, body size, and refill access, so avoid copying a fixed quantity without considering the ride. Practise removing and replacing a bottle somewhere calm before trying it in traffic; stopping safely to drink is always an acceptable choice.
Also carry a charged phone, identification, an emergency contact, and a payment method or transport option appropriate to the route. These are not substitutes for preparation. They are the fallback for a mechanical problem, changing weather, illness, a navigation mistake, or a repair you cannot complete safely.
Pack a repair kit that matches your bicycle
A repair item is useful only when it fits the bike and you can operate it. Start by reading the size printed on the tyre sidewall and identifying the valve in your wheel. A narrow Presta valve and a wider Schrader valve may need different pump settings or pump heads.
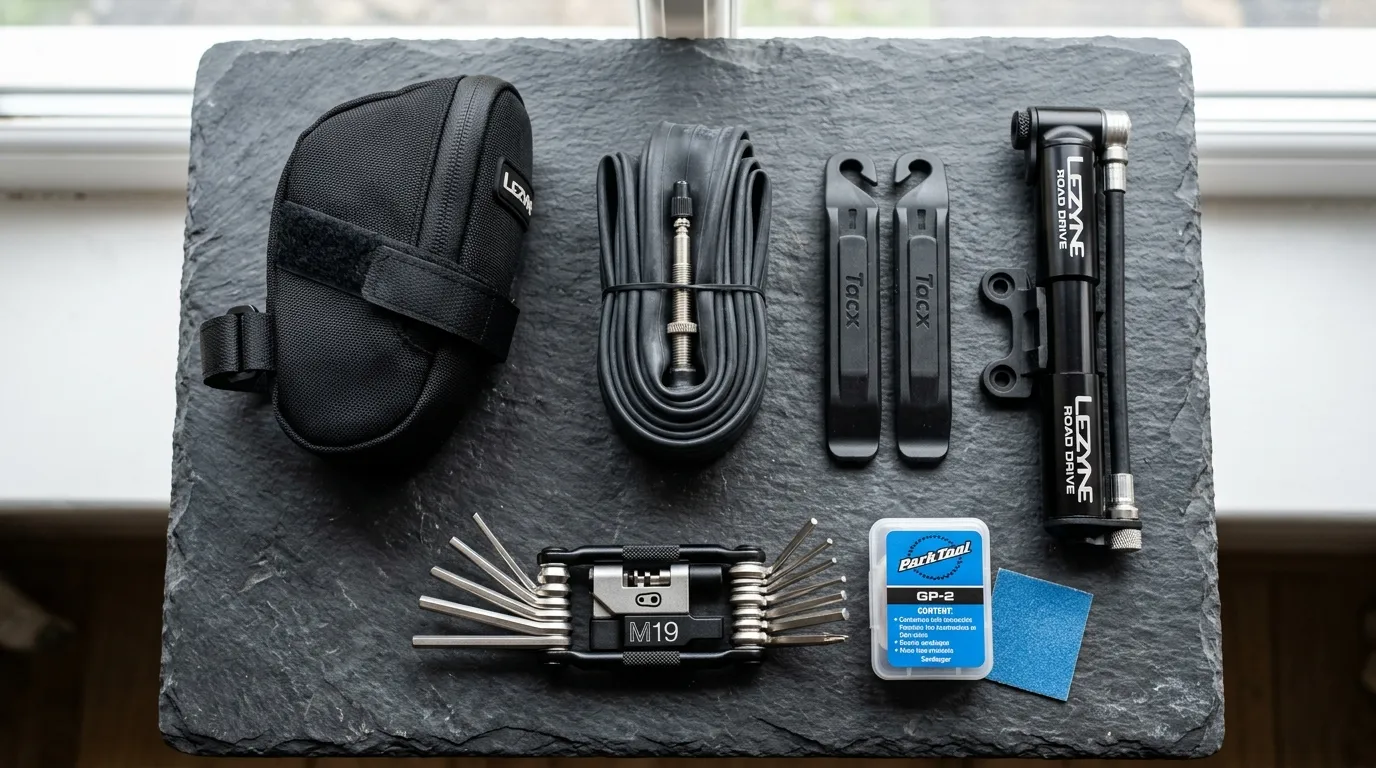
For a road bike with inner tubes, a practical starting kit is:
- one spare tube in a size range that covers your tyre, with the correct valve type and enough valve length for the rim;
- two tyre levers suitable for your tyre and rim;
- a compact pump that connects securely to that valve;
- a small patch kit as a lightweight second chance;
- a compact multi-tool with only the functions your bicycle actually uses;
- a small bag that holds everything without rubbing the frame or obscuring a light.
If the bike is tubeless, learn the tyre and sealant manufacturer’s roadside procedure. A plug tool may solve some tread punctures, but tubeless does not eliminate cuts, damaged valves, unseated tyres, or the need for a compatible backup plan. Many riders still carry a tube that fits the wheel.
Practise removing a wheel and replacing a tube at home before depending on the kit. Check the bicycle and component manuals first: axle systems, brake designs, tyre-rim combinations, and recommended tools vary. If the wheel will not reseat securely, the tyre bead will not seat correctly, or the brake no longer works normally, do not ride the bike.
Adjust the kit to the consequences of the ride
Distance alone is a poor packing rule. Ask what happens if you stop at the farthest point.
For a short, familiar ride near help
Carry the core kit, or make a conscious alternative plan such as a pickup, public transport, or a short walk from anywhere on the route. “Near home” is useful only if somebody is available and the route is actually walkable in your shoes.
For a longer or less familiar ride
Add what prevents a small delay from becoming a larger problem: simple food, another drink or known refill points, a weather layer, offline access to the route, and enough phone battery. Tell someone the broad route and expected return when you will be away from easy help.
For darkness, poor visibility, or uncertain weather
Use lights that meet the local rules and the real road conditions, not merely the smallest lights that fit in a pocket. Add a backup light when one failure would leave you unable to continue legally or see the road. Choose layers that keep the controls and lights unobstructed.
For remote routes
Carry more only when it addresses a plausible problem you can solve: perhaps a second tube, tyre boot, chain quick-link, or extra pump. Tools cannot repair every damaged tyre, wheel, brake, chain, or frame. A route exit and communication plan remain part of the equipment.
Let these upgrades wait
Optional does not mean useless. It means the item should answer a need you have actually observed.
- Padded cycling shorts: useful when saddle pressure or seam friction limits otherwise comfortable rides. Check bike fit and saddle position as well; padding cannot correct every comfort problem.
- Cycling jersey: convenient pockets and a close fit help on longer rides, but an ordinary breathable top works at the start.
- Gloves and glasses: can improve grip comfort and protect hands or eyes from weather and debris. Fit and clear vision matter more than matching an outfit.
- Clipless pedals and shoes: can provide a consistent foot position, but require compatible parts and calm practice. They are not proof of skill.
- Bike computer: useful when navigation, battery separation, or ride data solves a real problem. A safely mounted phone or memorised local loop may already be enough.
- CO₂ inflator: fast and compact, but it contains a limited supply and needs practice. A pump is slower but can be used repeatedly.
- Premium or aerodynamic kit: may reduce weight, drag, or bulk, but it does not replace a fitting helmet, working lights, compatible repair equipment, or basic bike maintenance.
Borrowing, buying used where safety and condition permit, and adding one item at a time can reveal what earns space in your kit. Treat helmets and any safety-critical equipment with unknown history cautiously.
Use a three-place check before leaving
Turn the gear into a routine rather than rebuilding the list from memory.
- On you: helmet fastened, clothing secure, phone, identification, contact method, and weather layer if needed.
- On the bike: charged lights attached and visible, reflectors present where required, water secure, and bags closed without touching wheels or controls.
- In the bag: compatible tube or repair method, tyre levers, pump, useful tool, and the route-specific extras you deliberately chose.
Then perform the bicycle check. Tyres need appropriate pressure, wheels and axles need to be secure, brakes must operate correctly, steering must move normally, and the drivetrain should run without obvious damage. Road bike anatomy for beginners will help you identify each system; equipment in a saddle bag cannot compensate for a bike that is unsafe before departure.
Common starter-kit mistakes
- Buying by popularity instead of compatibility: confirm tube size, valve, pump head, fasteners, mounts, and charging cables against your own bicycle.
- Carrying a repair you have never rehearsed: practise at home, where a missing adapter or impossible tyre is a lesson rather than a rescue call.
- Letting a bag hide the rear light: view the loaded bicycle from directly behind and from an angle.
- Leaving every light on its brightest setting: understand the controls and expected runtime before the ride; brightness, beam shape, traffic, and road lighting all affect the useful mode.
- Packing for the outward leg only: the return may be darker, colder, or farther from help than expected.
- Trying to buy away discomfort immediately: record where and when discomfort begins, then check fit and technique before replacing several items at once.
Your next step
Place your current equipment on a table and sort it into the four jobs: protect and control, see and be seen, drink and manage the route, and solve the likely stop. Fill only the dangerous or ride-ending gaps, verify that every repair item fits your bike, and rehearse one tube change before the first longer ride.
Then use your first month of road cycling to turn the kit into a calm preparation and riding routine.