Numb hands and tingling fingers while cycling: 4 easy handlebar fixes
Stop hand numbness and finger tingling on a road bike: ulnar nerve relief, brake hood alignment, saddle tilt corrections, and bar reach adjustments.
 Field guide / numb-hands-and-fingers-road-cycling
Numb fingers and tingling palms are among the most common complaints for new road cyclists, but they are not an unavoidable rite of passage. Hand numbness happens when sustained upper-body pressure or bent wrists compress the delicate nerves running into your fingers. You do not need an expensive new bike or professional racing fitness to fix it. In most cases, four targeted adjustments—aligning your brake hoods, leveling your saddle, softening your reach, and damping road vibration—will take the crushing weight off your hands and restore full sensation.
The short answer: hand numbness is caused by pressure on your ulnar or median nerves from bent wrists, locked elbows, or a saddle tilted too far forward. Level your saddle with a smartphone app so you do not slide into the handlebars, rotate your brake hoods to keep your wrists neutral like a handshake, raise your stem stack to allow a slight bend in your elbows, and drop tyre pressure to absorb road buzz.
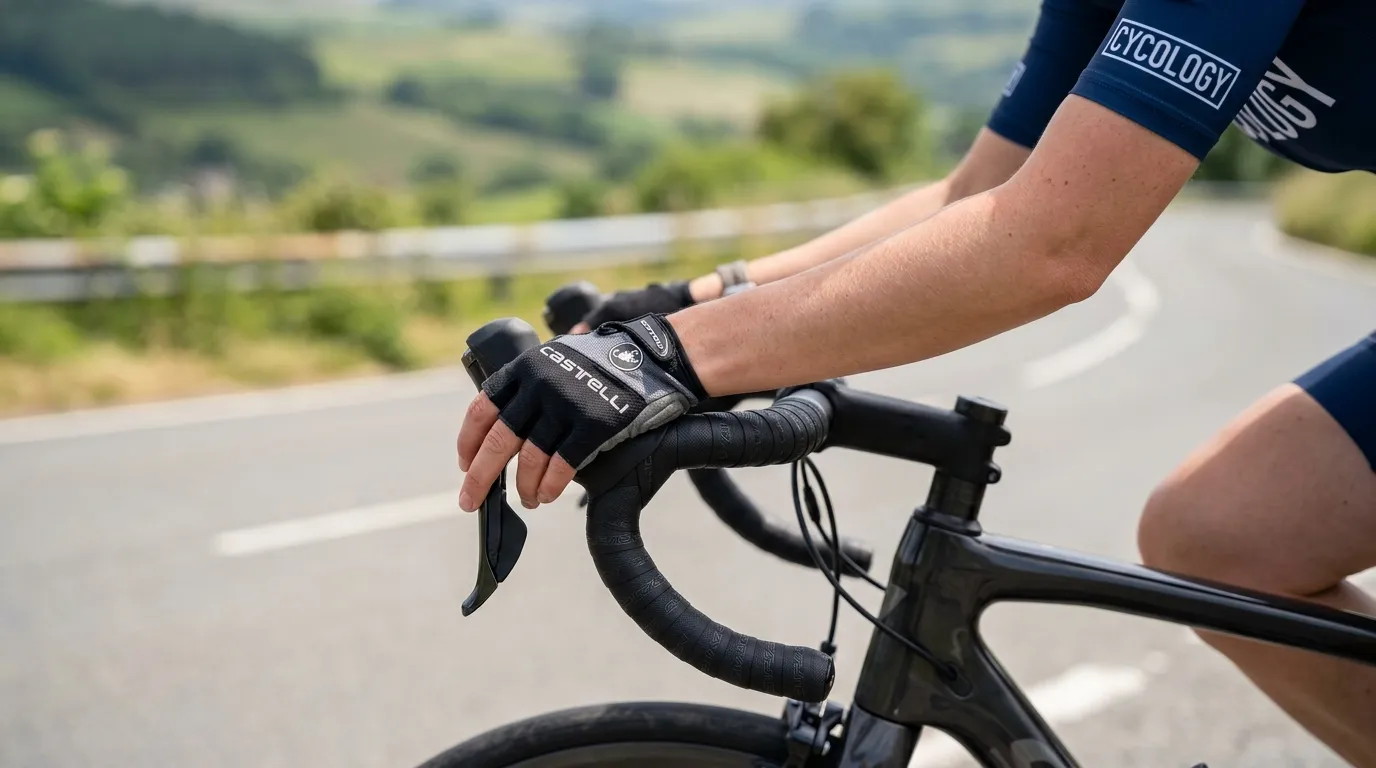
Why your hands go numb: the two nerve pathways
To fix hand numbness, you first need to identify which nerve is being irritated. Two primary nerves travel across your wrist and palm into your fingers, and each produces distinct symptoms when compressed or overstretched during a ride.
1. The ulnar nerve (Cyclist’s Palsy)
The ulnar nerve runs along the outer edge of your forearm, passes through a narrow anatomical space on the pinky-side of your palm called Guyon’s canal, and supplies sensation to your little finger and the outer half of your ring finger.
When you rest the fleshy outside heel of your hand on the handlebar drops or the edge of the brake hoods, direct pressure and road vibrations compress Guyon’s canal. In cycling medicine, this condition is widely known as cyclist’s palsy or handlebar palsy. According to Cleveland Clinic’s nerve compression guidance, prolonged pressure on the ulnar nerve can cause tingling, numbness, and, in severe cases, weakened grip strength or difficulty pinching your fingers together.
2. The median nerve (Carpal Tunnel compression)
The median nerve travels straight down the center of your wrist through the carpal tunnel, supplying sensation to your thumb, index finger, middle finger, and the thumb-side half of your ring finger.
When you ride with hyperextended wrists—meaning your wrists are bent backward so the base of your palm bears the entire weight of your torso—the carpal tunnel narrows under heavy tension. Mayo Clinic’s carpal tunnel research notes that sustained wrist flexion or extension combined with direct mechanical pressure irritates the median nerve, leading to burning, tingling, and numbness across the front fingers and palm.
The three underlying culprits
Nerve compression on a road bike rarely happens because your hands are weak. It happens because of three mechanical and postural factors:
- Excessive weight distribution: Too much of your body mass is resting on the cockpit rather than being supported by your saddle and core.
- Aggressive joint angles: Hyperextended wrists or locked, rigid elbows channel impact shocks straight into delicate soft tissue.
- Continuous road chatter: High-frequency vibrations from coarse asphalt act like a mini-jackhammer on nerve sheaths when tyres are overinflated or bar tape is worn thin.
Symptom diagnostic guide
Before turning a single bolt on your bike, use this diagnostic table to match what you feel on the road with the exact mechanical cause:
| Symptom | Affected Nerve | Primary Mechanical Cause | Immediate Garage Fix |
|---|---|---|---|
| Numb pinky & ring finger | Ulnar Nerve (Guyon’s canal) | Hand resting heavily on outer palm edge; wrists flared outward | Rotate brake hoods slightly inward; level saddle to reduce hand load |
| Tingling thumb, index & middle finger | Median Nerve (Carpal tunnel) | Wrists hyperextended (bent back); brake hoods tilted too high or low | Align hood ramp flat with handlebars; shorten reach to cockpit |
| Dull ache in palms & triceps fatigue | Muscular & pressure overload | Saddle nose tilted downward; rider sliding forward onto bars | Level the saddle horizontally; check saddle fore-aft position |
| Numbness across the whole hand after 15 mins | Combined nerve compression + road buzz | Cockpit reach too long; locked elbows; rock-hard tyre pressures | Flip or raise stem stack; drop tyre pressure by 5–10 PSI; fit 3mm bar tape |
| Persistent hand weakness lasting >2 hours | Severe nerve neuropathy | Excessive prolonged nerve ischemia (restricted blood flow) | Stop riding; consult a medical professional or clinical bike fitter |
Fix 1: Adjust brake hood angle and wrist rotation
On a modern drop-bar road bike, you will spend roughly 70% to 90% of your riding time resting your hands on the rubber brake hood covers. If the hoods are tilted at an awkward angle or misaligned with the handlebar curve, your wrists will bend unnaturally with every pedal stroke.
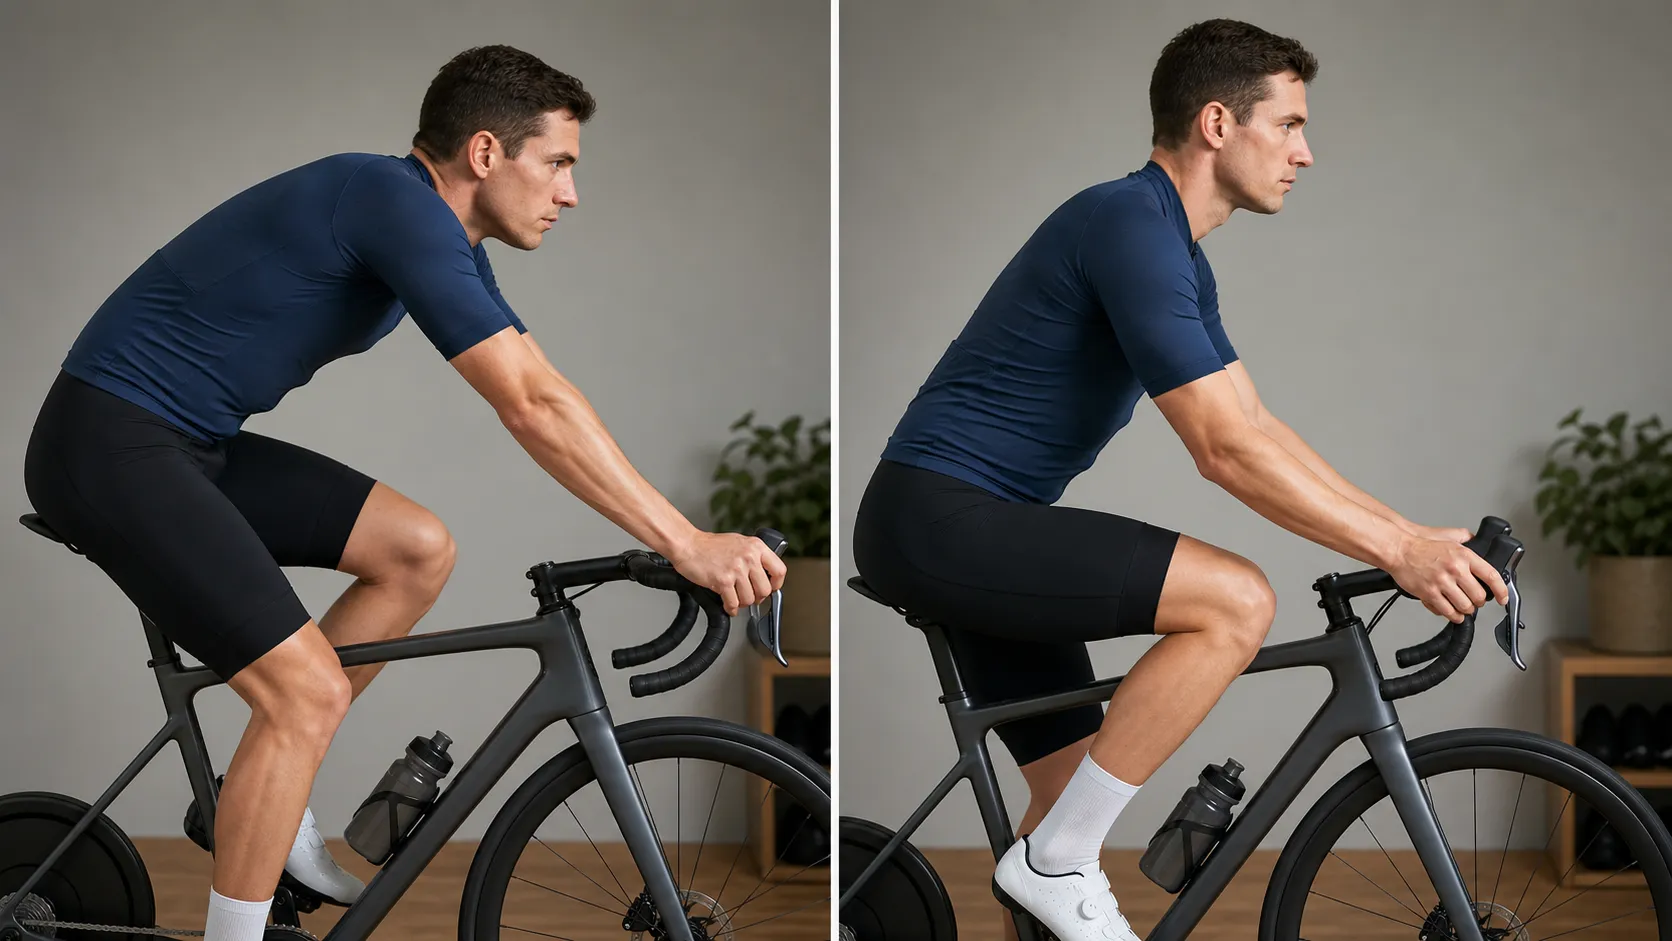
Aim for a neutral “handshake” grip
When you reach out your hand to shake someone’s hand, your wrist sits naturally straight in line with your forearm. That identical straight line should exist when you hold your road bike hoods:
- Create a flat transition: The flat top section of the handlebar (the “ramp”) should flow smoothly into the rubber hood without a steep dip or an upward hump. A deep valley between bar and hood forces your wrist to collapse downward into hyperextension.
- Angle the hoods slightly inward (toe-in): Natural human anatomy means your hands do not point dead straight ahead when your elbows are relaxed. Tilting both brake hoods slightly inward by 3 to 5 degrees matches the natural angle of your forearms and distributes your palm pressure evenly across both the thenar (thumb) and hypothenar (pinky) muscle pads.
- Rotate the handlebar in the stem clamp: Loosening the four faceplate bolts on your stem allows you to rotate the entire bar slightly up or down. A subtle upward rotation can bring the hood platform closer to your palms and flatten out a severe wrist bend.
Workshop Tip: When tightening stem faceplate bolts, tighten them in an “X” criss-cross pattern using a 4mm or 5mm hex key. Tighten evenly in small increments until snug (typically 4–6 Nm). Never overtighten bolts on carbon components without a torque wrench.
Fix 2: Level your saddle to unweight your hands
A surprising truth of bike mechanics is that hand numbness is frequently a saddle problem, not a handlebar problem.
Your saddle, pedals, and handlebars form the three contact points that support your body mass. The saddle is designed to support the majority of your upper-body weight through your pelvic sit bones (ischial tuberosities).
   NOSE-DOWN SADDLE (WRONG)               LEVEL SADDLE (CORRECT)

   [\\]  ===> Slides pelvis forward       [---]  ===> Pelvis supported
     \                                      |
      \                                     |
       ===> Hands must push back            ===> Core balances torso
            with 15–25 kg of force               Hands rest lightly
The “sliding ramp” effect
If the nose of your saddle is pointed even 3 or 4 degrees downward, your pelvis will constantly slide forward on the smooth vinyl cover. To prevent yourself from sliding off the front of the saddle, your arms and triceps are forced to push back against the handlebars continuously.
This places 15 to 25 kg of constant, unnecessary braking force directly into the palms of your hands. Within 20 minutes, the ulnar and median nerves are crushed against the rigid aluminium or carbon bar.
How to set a true level saddle:
- Place your road bike on completely flat, level ground (not on a sloped driveway or uneven rug).
- Place a traditional spirit level or open a smartphone leveling app across the middle two-thirds of the saddle surface.
- Loosen the seatpost clamp bolt underneath the saddle rails using a 4mm or 5mm hex key.
- Adjust the saddle until it reads 0° (dead flat) or at most a minuscule 0.5° downward tilt for relief if using an anatomical cut-out saddle.
- Tighten the clamp securely to the manufacturer’s torque specification (usually 8–12 Nm).
- Test your balance: Sit on the bike on a stationary trainer or leaning against a doorway in your riding shoes. Pedal backward. You should be able to float your hands 1 cm above the hoods for 3 seconds using your core muscles without immediately falling forward onto the handlebars.
For a complete walkthrough on dialling in your baseline saddle height and tilt, read our comprehensive guide to beginner road bike fit and comfort.
Fix 3: Shorten excessive reach and raise cockpit stack
If your handlebars are positioned too far away (excessive reach) or too low (excessive drop), your body cannot support itself comfortably. To bridge the gap, beginner cyclists reflexively lock out their elbows.
Locked elbows turn your arms into solid, unyielding shock-transfer rods. Every pothole, expansion joint, and asphalt seam slams directly up your forearm into the soft tissues of your wrists.
Two fast, free cockpit adjustments:
1. Move headset spacers under the stem
Most road bikes come with 10mm to 30mm of round headset spacers stacked on the fork steerer tube. If your stem is currently sitting low with spacers stacked on top of it, moving those spacers underneath the stem will raise your handlebars (“increasing stack height”).
Raising the handlebars by just 10mm brings the controls closer to your body, eases the bend in your lower back, and allows your elbows to naturally bend at a comfortable 10–15° shock-absorbing angle.
2. Flip the stem orientation
Road bike stems are manufactured with an angle—typically 6 or 7 degrees. Most factory bikes are assembled with the stem installed in a “negative” position (pointing slightly downward for a sporty profile).
By loosening the top cap and steerer clamp bolts, removing the stem, and flipping it upside down into a “positive” rise position, you immediately raise your handlebars by 15mm to 25mm without buying a single new component.
If your road bike still feels stretched out after these adjustments, consider swapping your stem for one that is 10mm to 20mm shorter (e.g., swapping a 100mm stem for an 80mm or 90mm model). Always confirm that your bike frame size is appropriate for your height before spending money on custom components; see our guide on how to choose your first road bike.
Fix 4: Dampen road vibration with tape, tyre pressure, and gloves
Even with flawless posture and a level saddle, coarse asphalt generates high-frequency vibrations (“road buzz”) that gradually fatigue hand muscles and inflame nerve sheaths. Three simple equipment tweaks will isolate your hands from road chatter.
1. Upgrade to 3.0mm–3.5mm cushioned bar tape
Factory bar tape on many entry-level road bikes is paper-thin vinyl or basic EVA foam that offers virtually zero shock absorption. Replace it with modern high-density polyurethane or gel-backed cork tape with a thickness of 3.0mm to 3.5mm (such as Lizard Skins DSP 3.2mm, Supacaz Super Sticky Kush, or Brooks Cambium Rubber Tape).
For severe hand sensitivity, many experienced endurance riders apply reusable silicone gel pads directly under the bar tape along the tops and drop curves.
2. Stop over-inflating your tyres
Pumping your road tyres up to the maximum sidewall number (such as 110 or 120 PSI) does not make you faster—it turns your wheels into concrete rocks that transmit every microscopic road imperfection straight into your palms.
Modern 25mm and 28mm road tyres perform best at significantly lower pressures (often between 65 and 85 PSI depending on your body weight and rim width). Lower pressure allows the tyre casing to deform smoothly over asphalt micro-bumps, damping vibrations before they ever reach the fork or handlebars. Check our detailed guide on tyre pressure for beginner road cyclists to find your exact pressure sweet spot.
  OVER-INFLATED (110 PSI)                 OPTIMAL PRESSURE (75 PSI)

  [--- Tyre bounces off bumps ---]        [~~~ Tyre flexes over bumps ~~~]
            ||                                      ||
            \/                                      \/
  Vibrations hammer wrists & nerves       Vibrations absorbed by casing
3. Choose gloves with anatomical relief channels
Padded cycling mitts can protect your skin in a fall, but overly thick, flat gel gloves can actually make hand numbness worse. Bulky gel pads that sit directly across the center of your palm or directly over Guyon’s canal increase pressure on the ulnar and median nerves when you grip the bar.
Look for modern cycling gloves that feature ergonomic relief channels (a groove or cutout in the padding over the center of the palm and outer wrist) that elevate the bony structures while leaving the nerve pathways uncompressed.
4. Practice dynamic hand shifts on the road
Never keep your hands glued to one spot for the entire duration of a ride. Road handlebars offer three distinct grip positions for a reason:
- The Brake Hoods: Your default primary position for cruising, climbing, and covering the brakes in traffic.
- The Bar Tops: The flat horizontal section near the stem. Ideal for long, seated uphill climbs to sit more upright, open your chest, and completely unweight your wrists.
- The Drops: The lower curved hooks. Excellent for headwinds and descending, offering maximum brake lever leverage and a locked-in grip.
Make a conscious habit of shifting your hand position every 5 to 10 minutes. At red lights or on quiet flat stretches, take one hand off the bar, drop it to your side, and shake out your fingers for five seconds to encourage fresh arterial blood flow.
15-Minute garage check: step-by-step
Follow this straightforward sequence to adjust your cockpit before your next ride:
- Check your tools: Grab your 4mm and 5mm hex keys, a smartphone with a leveling app, and a torque wrench if you have one.
- Inspect the pre-ride mechanicals: Run through the five-minute pre-ride bike check to verify that your headset is snug with zero front-end play.
- Level the saddle: Park on level ground, place your phone across the middle of the saddle, and set the angle to 0.0°.
- Check hood transition: Look at your handlebar from the side. Ensure the rubber hood forms a continuous horizontal platform with the bar ramp. Rotate the bar or loosen the hood clamp underneath the rubber boot to correct any severe dips.
- Add slight hood toe-in: Sight down the handlebars from above. The hoods should point 3–5° inward toward each other rather than straight ahead.
- Verify brake lever reach: Sit on the bike and rest your hands on the hoods. Ensure your index and middle fingers can comfortably hook the brake lever blades without overextending your knuckles. (Most Shimano, SRAM, and microSHIFT levers have a small reach-adjust screw beneath the hood cover).
- Adjust tyre pressures: Pump tyres according to your rider weight, not the maximum number stamped on the tyre sidewall.
- Pack your essentials: Review our first ride checklist before heading out for a 15-minute test loop.
When tingling is a medical warning sign
While most hand numbness is simple mechanical compression that clears quickly once you stand up or adjust your bike, persistent nerve symptoms must never be ignored.
Mayo Clinic warns that untreated peripheral nerve compression can lead to permanent axonal damage, chronic sensory loss, and muscle atrophy in the hands.
Stop riding and seek medical evaluation if you experience:
- Tingling or numbness that persists for more than 2 to 3 hours after finishing your ride.
- Noticeable loss of hand strength, such as struggling to turn a doorknob, button a shirt, hold a pen, or squeeze a water bottle.
- Visible muscle wasting in the fleshy web between your thumb and index finger (a sign of advanced ulnar nerve entrapment).
- Constant “pins and needles” or electric shooting sensations traveling up your forearm into your neck or elbow.
If your symptoms resolve within minutes of finishing a ride but return every time you get on the bike despite leveling your saddle and adjusting your hoods, schedule an appointment with a professional clinical bike fitter or a cycling physiotherapist. To understand how your body distinguishes between normal muscular adaptation and nerve warning signs, read soreness versus pain on a new bike.
4 Common beginner mistakes to avoid
1. “Death-gripping” the handlebars
Beginner cyclists often grip the handlebars with white knuckles because of road tension, traffic anxiety, or steep descents. Squeezing the grips tightly contracts your forearm muscles, clamps down on your nerve tunnels, and restricts capillary blood flow. Maintain a relaxed grip—hold the bars like you are gently holding a small bird: firm enough that it cannot fly away, but soft enough that you do not crush it.
2. Buying thicker gloves before checking your saddle
Throwing £40 at thick gel gloves when your saddle is tilted 5° nose-down is treating a flood with a paper towel. Gloves cannot compensate for 20 kg of torso weight sliding into your palms. Always fix your saddle angle first.
3. “Slamming” your stem to copy professional racers
Professional riders train for years to develop the core stability, hamstring flexibility, and pelvic rotation needed to ride in an ultra-low aerodynamic tuck. Dropping your handlebars to the bottom of the steerer tube before your body is conditioned for it forces you to lock your elbows and collapse your wrists. Keep your stem high while building your endurance baseline.
4. Pedaling with a lazy cadence in a massive gear
Grinding a heavy gear at a slow pedaling speed (50–60 RPM) produces uneven pedal resistance and forces your upper body to yank on the handlebars to stabilize your hips. Spinning a lighter, faster cadence (80–90 RPM) keeps your legs engaged in a continuous fluid motion, allowing your leg drive to naturally support your torso and unweight your hands. Review how to use road bike gears to master smooth pedaling cadence.
Your next step
Take 15 minutes today to check your saddle tilt with a smartphone level app and inspect your brake hood alignment in your hallway or garage. Set the saddle flat, rotate your hoods so your wrists sit in a neutral handshake posture, and drop your tyre pressures by 5 to 10 PSI.
Then, take your bike out for a quiet 20-minute test loop on a familiar, flat route. Focus on keeping your elbows soft, changing hand positions every few minutes, and breathing through your shoulders. If you are setting up your bike from scratch or planning your first month of rides, check our guides on beginner road bike fit and comfort and clean and lubricate your road bike chain to keep your entire machine running smoothly.
Sources and further reading
- Mayo Clinic: Carpal Tunnel Syndrome – Symptoms and Causes
- Cleveland Clinic: Ulnar Nerve Entrapment and Guyon’s Canal Compression
- Mayo Clinic: Peripheral Neuropathy Overview and Medical Red Flags
- Trek Bicycle Owner’s Manual: Bicycle Fit and Handlebar Positioning
- Cycling UK: How to Make Your Road Bike More Comfortable
- British Cycling: Cockpit Setup and DIY Road Bike Fit
- Cannondale Bicycle Owner’s Manual: Fastener Torque and Handlebar Safety