Beginner road bike fit and comfort
Set a sensible starting road-bike position, check saddle height, reach, and brake access, and know when discomfort needs a shop or medical help.
 Field guide / beginner-road-bike-fit-and-comfort
Before you view or pay
Check fit, condition, and starter gear first
Use the buying checklist to choose the right path: used-bike viewing, first-bike fit and type, hidden repair costs, or starter gear.
A beginner road-bike fit should make the bike controllable, repeatable, and comfortable enough to learn on. You are not trying to copy a professional rider’s position. You are trying to place your saddle, bars, and controls so you can pedal smoothly, see ahead, reach the brakes, and finish short rides without numbness or sharp pain.
The short answer: start with a frame size that is already close, set the saddle so your hips stay still and your knee is not locked at the bottom of the stroke, keep the saddle close to level, then check that the hoods and brake levers are reachable with relaxed shoulders and slightly bent elbows. Change one thing at a time and stop treating symptoms as normal if they are numb, sharp, worsening, or affecting control.
What a beginner fit is for
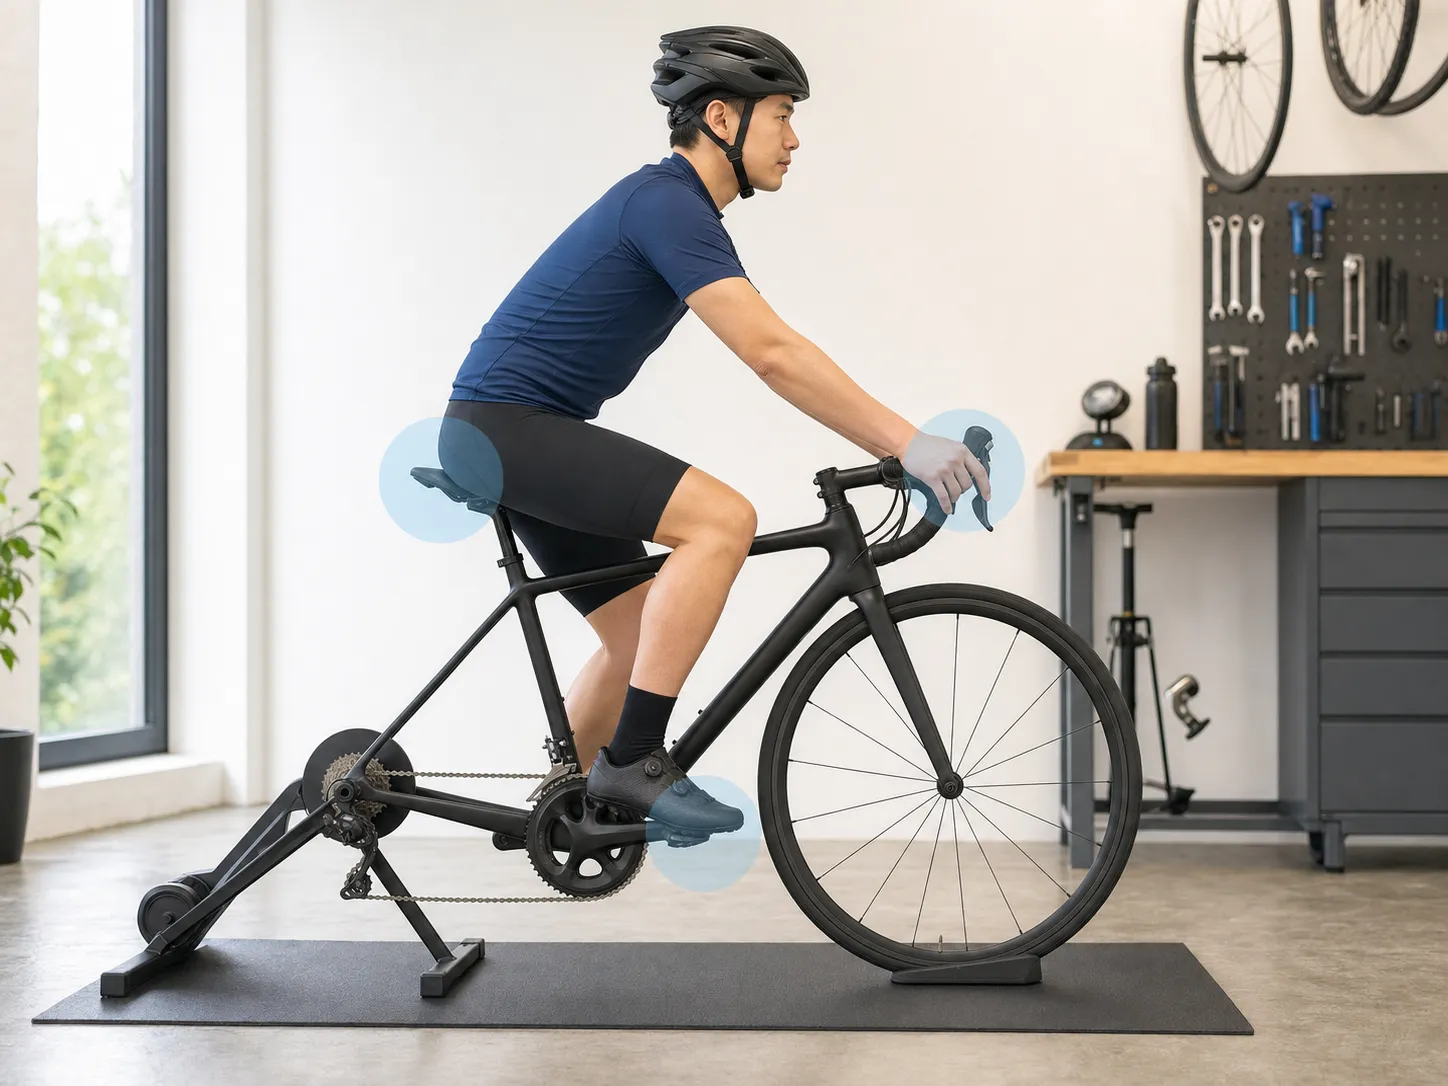
Good fit is not one perfect set of numbers. Trek’s fitting guidance says riding position is a blend of comfort, efficiency, and balance, and that after an initial adaptation period a bicycle should not cause aches, pains, or numbness. That is a useful beginner standard: the bike should let you ride, handle, and learn without your body becoming the loudest problem.
This guide is for the first practical setup after buying, borrowing, or dusting off a road bike. If you are still choosing the bike, start with how to choose your first road bike because a badly wrong frame size is hard to rescue with small adjustments. If you already feel pain or numbness after a ride, read soreness versus pain on a new bike alongside this guide so you do not normalize a warning sign.
Beginner fit has three jobs:
- Put you in a position where you can control the bike.
- Reduce avoidable pressure at the saddle, hands, neck, knees, and feet.
- Give you a repeatable baseline for short test rides.
It does not need to maximize power, aerodynamics, race handling, or a social-media side profile.
Set up safely before changing anything
Use a stable place where the bike will not roll away: a stationary trainer, a doorway, a helper holding the bike, or a quiet flat area for a slow roll test. British Cycling’s DIY fit guidance begins with making the bike stationary, level, and upright because you need to see your position without fighting balance.
Before loosening bolts, check three things:
- Find the correct tool size. Rounded bolts make a simple fit check expensive.
- Know the torque requirement for the part you are touching. Cannondale’s owner manual warns that fasteners that are too tight or too loose can fail and cause loss of control.
- Mark the current saddle height and position with a small piece of tape or a photo so you can return to the starting point.
Avoid changing a stem, brake hose, cable routing, carbon steerer, carbon seatpost, integrated cockpit, or unfamiliar clamp unless the bike or component instructions clearly tell you how. Trek’s stem guidance tells riders to follow printed torque specifications and consult a shop if unsure, especially around carbon steerers.
Start with the saddle height
Saddle height is the first fit setting most beginners notice, and it affects more than leg comfort. Too low can make pedalling feel cramped. Too high can make you rock your hips, point your toes, slide around, or reach for the bottom of the stroke instead of pedalling through it.
Use this as a starting check, not a universal formula:
- Put the bike in a stable support.
- Sit squarely on the saddle in the shoes you will ride in.
- Place one pedal near the bottom of the stroke.
- Pedal slowly and watch or feel whether your hips stay level.
- Look for a comfortable bend at the knee when your foot is in its normal pedalling position.
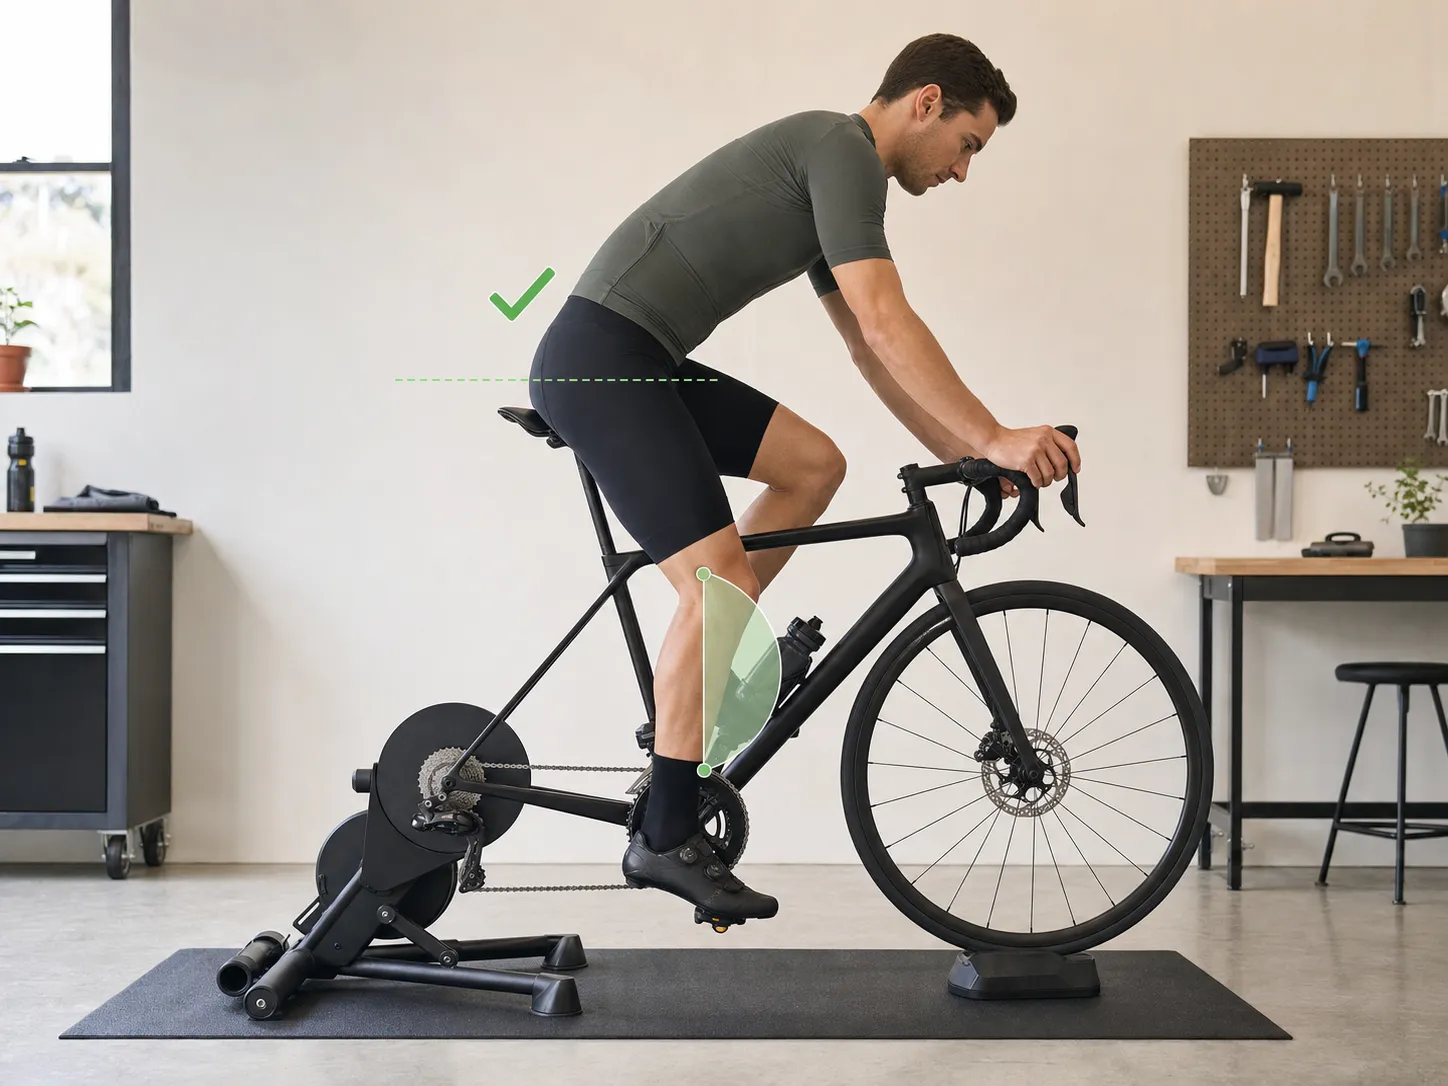
Do not chase a famous saddle-height formula before you can describe what you feel. Bodies, shoes, pedals, crank lengths, flexibility, injuries, and riding goals vary. A formula can be a measuring aid for a fitter or an experienced rider, but the beginner question is simpler: can you pedal smoothly without rocking, stabbing pain, or losing control?
If you adjust the saddle height yourself, move in small steps, tighten the clamp correctly, and stay within the seatpost insertion marks. If the saddle has to sit at the very top or bottom of its safe range to feel usable, the frame size or component choice deserves a bike-shop conversation.
Keep the saddle close to level
The saddle supports your pelvis; it is not just a perch you tolerate. Start close to level, then make only small changes if a clear problem remains. Trek says its bicycles are designed for the seat to be level with the ground and warns that a poorly adjusted seat or one that does not support the pelvic area can contribute to nerve and blood-vessel injury. Cycling UK gives the same practical starting point: set the saddle dead level first, and do not point the nose upward because that can increase perineal pressure and numbness.
Nose-down is not automatically better. It can reduce pressure in one place while making you slide forward and brace more weight through your hands. That can turn a saddle problem into hand, wrist, shoulder, or neck discomfort.
Use a simple test:
- If you feel one sharp point under you immediately, stop and inspect saddle position, clothing, and whether the saddle suits your anatomy.
- If you keep sliding forward, check whether the saddle is tilted down or whether the reach is pulling you forward.
- If your hands get heavy after a few minutes, do not assume gloves will fix it. Your saddle angle, saddle fore-aft, bar height, reach, and posture all interact.
Saddle choice matters, but avoid buying three saddles before checking the basics. Clothing seams, a ride that was too long, a nose-up saddle, or an unsuitable position can all make a reasonable saddle feel wrong.
Check reach before buying a shorter stem
Reach is how far you have to go from the saddle to your normal hand position. On a road bike, that is usually the brake hoods for beginners. Your reach is probably too long or too low if your elbows lock, shoulders shrug, neck cranes upward, wrists collapse, or you feel as if you are holding yourself up by the bars.
Trek’s fitting page says most rider weight should generally be on the saddle and that the handlebar should be within a few inches higher or lower than the saddle, with a higher position usually favoring comfort or balance. Cycling UK describes stem length and height as ways to place the contact points where you need them, but only within the limits of a bike that is your size to begin with.
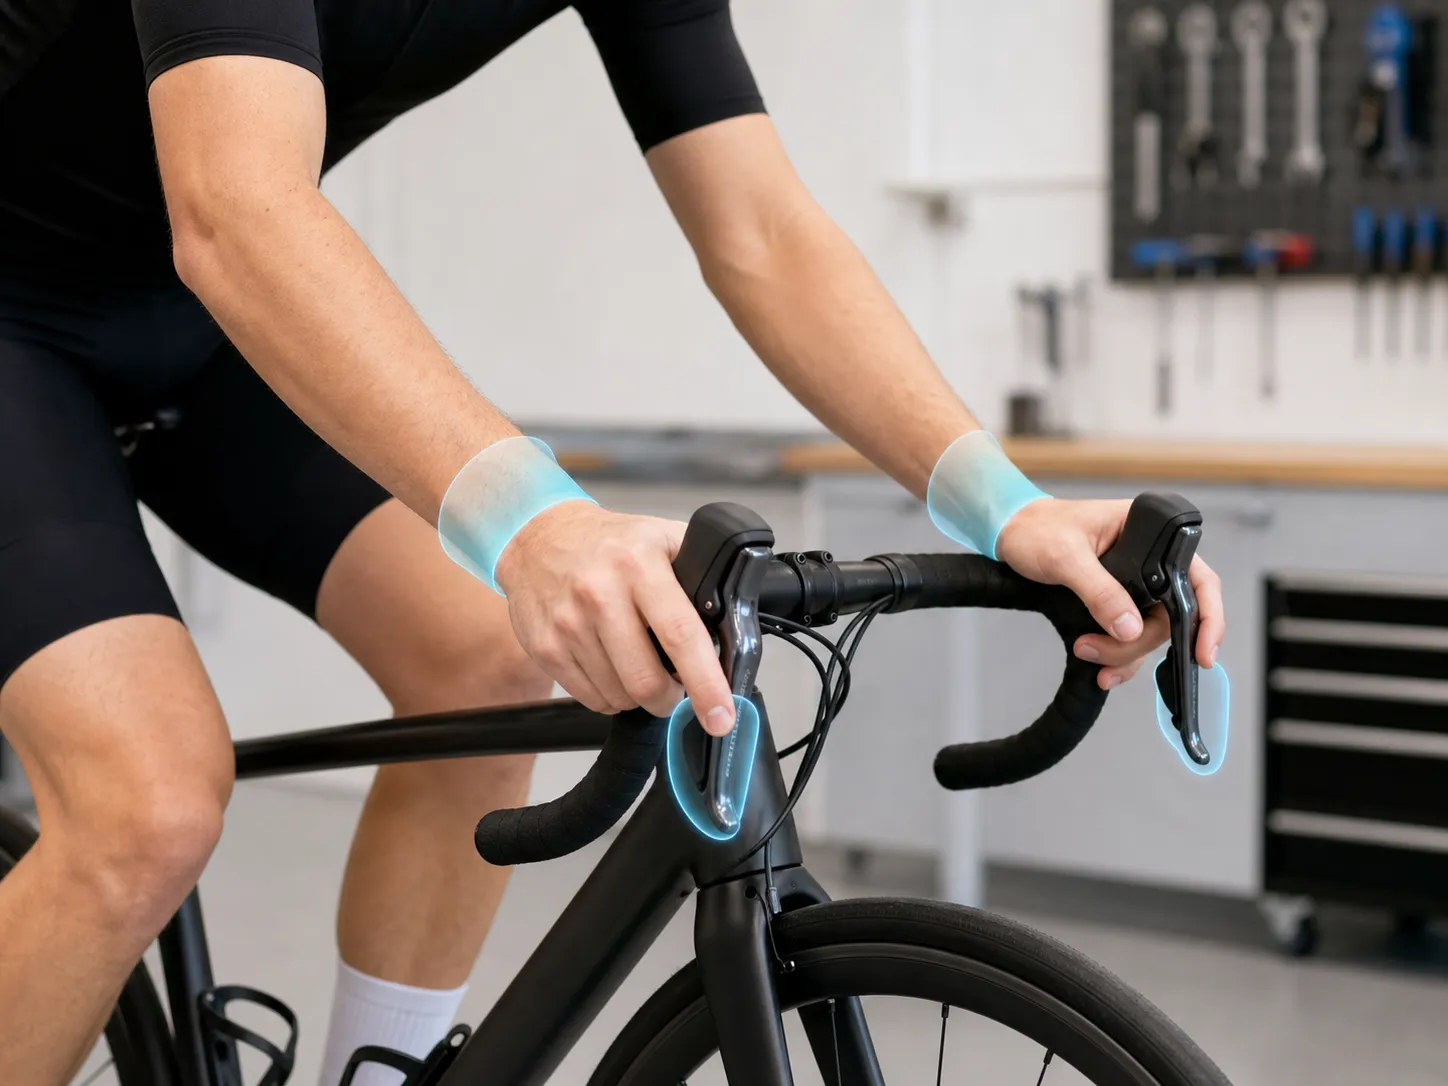
Use this cockpit check:
- Sit on the saddle with your hands on the hoods.
- Relax your shoulders down rather than reaching with your neck.
- Let your elbows bend slightly.
- Keep your wrists close to neutral, not sharply folded.
- Look ahead. If looking forward strains your neck, the position may be too long, too low, or both.
Do not use saddle fore-aft as a crude handlebar adjustment. Moving the saddle changes weight distribution, hip position, and how the bike handles. Trek notes that fore-aft changes alter both reach to the bars and weight distribution. That means saddle position can affect hand pressure, but it should still be set as part of the whole fit, not used to hide a frame that is too long.
Make the controls reachable
Fit is unsafe if you cannot operate the bike from the position you actually use. Before a ride, confirm that you can brake from the hoods with your normal grip and that the lever movement has enough travel to stop the bike properly.
Cannondale’s owner manual says brake and shift lever angle and position can be changed, and that many brake levers can be adjusted for reach if small hands or difficult lever access are a problem. It also warns that shorter brake-lever reach makes correct brake adjustment more critical because the brake must still produce full power within the available lever travel.
That means the right beginner answer is not “just wind the levers closer.” The right answer is:
- check which lever controls which brake;
- make sure you can reach and squeeze both levers from your normal hand position;
- ask a shop to adjust lever reach, hood position, or brake setup if you are not certain;
- stop riding if a lever pulls too close to the bar, braking feels weak, or the setup feels unfamiliar.
If road-bike controls still feel new, pair this with road bike anatomy for beginners so the hoods, drops, stem, spacers, brake levers, and drivetrain names make sense.
Use a short fit test ride
Once everything is tightened correctly, test the fit on a boring route. Do not make the first fit test a fast group ride, a long climb, or a busy descent. Use the same idea as your first month of road cycling: reduce the number of things you are learning at once.
Ride for 10 to 20 easy minutes and ask:
| What to notice | Acceptable early signal | Stop-and-check signal |
|---|---|---|
| Hands | Light pressure that changes when you move hand position | Numbness, tingling, wrist pain, or gripping to stay upright |
| Saddle | Mild sit-bone awareness on a short new-bike ride | Numbness, sharp pressure, swelling, or sliding forward constantly |
| Knees | Smooth pedalling with no one-sided strain | Sharp pain, repeated joint pain, or hips rocking to reach the pedal |
| Neck and shoulders | Mild unfamiliar posture that eases after the ride | Straining to look ahead or pain that changes steering or braking |
| Feet | Stable contact with pedals | Hot spots, numbness, or foot position you cannot keep without tension |
Write down what happened before changing anything:
- ride length and terrain;
- where the discomfort appeared;
- when it started;
- whether it faded when you changed hand position or stood briefly;
- what adjustment you made afterward.
British Cycling recommends changing one thing at a time and giving your body time to adapt. That is especially important for beginners because several problems can feel similar. Heavy hands might be reach, saddle tilt, saddle fore-aft, weak posture habits, overlong rides, bar height, or a bike that is simply the wrong size.
Know when to get help
A professional fit is most useful when the problem is repeated, confusing, or limiting your riding. It is also worth considering if you are buying an expensive bike, returning from injury, using clipless pedals for the first time, or trying to solve pain that did not improve with sensible basic checks.
Use a bike shop or fitter for:
- a frame that only feels usable at the extreme end of saddle or stem adjustment;
- brake levers you cannot reach securely;
- a slipping seatpost, saddle, handlebar, or stem;
- carbon parts or integrated cockpits you do not know how to torque;
- repeated knee, hand, saddle, neck, or foot discomfort;
- a position that makes the bike hard to steer, brake, or look ahead.
Use medical help, not fit tinkering, for warning symptoms. Mayo Clinic says tingling, weakness, or pain in the hands or feet deserves medical care because nerve symptoms should not be ignored. Cleveland Clinic gives the same direction around alarm symptoms after injury, including increasing pain and numbness.
Common beginner fit mistakes
Copying a fast rider’s position
A lower, longer position can be useful for some riders, but only if they can support it and control the bike. Beginners usually learn faster from a calmer position that leaves attention for braking, shifting, traffic, and route choice.
Raising the saddle until it looks serious
A high saddle can look efficient in a photo while forcing the rider to rock side to side. Smooth pedalling beats a dramatic seatpost.
Tilting the saddle to fix everything
Small tilt changes matter. Big tilt changes often move the problem somewhere else. Start close to level and be suspicious of any setup that makes you slide, brace, or go numb.
Ignoring brake access
Comfort is not separate from safety. If you cannot cover and squeeze the brakes from your normal hand position, the fit is not ready for traffic.
Changing three things after every ride
That makes the next ride impossible to interpret. One adjustment, one short test, one note.
Your next step
Do a 20-minute home setup: mark your current saddle position, check saddle height, level the saddle, sit on the hoods, and confirm brake access. Then ride one easy route and record only what you feel. If the bike feels controllable but you notice discomfort, use soreness versus pain on a new bike to decide whether to shorten the next ride, adjust one variable, visit a shop, or stop and seek medical advice.
Sources and further reading
- Trek owner manual: fitting your bicycle
- Trek owner manual: inspecting and adjusting your stem
- Cannondale bicycle owner’s manual
- Cycling UK: how to make your bike more comfortable
- British Cycling: DIY road and mountain bike fit
- Mayo Clinic: peripheral neuropathy symptoms and when to seek care
- Cleveland Clinic: soft tissue injury warning symptoms