How to choose your first road bike
Choose a first road bike by matching its fit, riding position, gearing, tyre clearance, and total cost to the rides you actually want to do.
 Field guide / choose-your-first-road-bike
Before you view or pay
Check fit, condition, and starter gear first
Use the buying checklist to choose the right path: used-bike viewing, first-bike fit and type, hidden repair costs, or starter gear.
Your first road bike does not need to be the lightest, fastest, or most expensive option. It needs to fit your body, suit your roads, feel predictable, and leave enough money for the equipment that gets you home safely.
The short answer: start with the rides you want to do, look for a comfortable riding position and manageable gears, then test whether you can steer, shift, and brake without stretching. Buy the complete setup, not the most impressive specification sheet.
Describe your real rides before choosing a bike
Write down what you expect to do during the bike’s first year. A relaxed weekend loop, a fast club ride, a commute, and a light-gravel adventure ask different things of a bicycle.
Use these questions before browsing models:
- Will you mostly ride smooth tarmac, rough lanes, light gravel, or a mixture?
- Are your local roads flat, rolling, or steep?
- Do you want short relaxed rides, longer days out, faster group rides, or transport?
- Will you need mudguards, luggage, or wider tyres?
- Where will the bike be stored and serviced?
Your answers are more useful than choosing a frame material or component tier first.
Endurance, race, gravel, or another bike?
These labels are starting points, not guarantees. Geometry and equipment vary between brands and models.
| Bike direction | Usually suits | Check before buying |
|---|---|---|
| Endurance road | Recreational road rides, comfort, long days, newer riders | Tyre clearance, easy gears, mounting points, riding position |
| Race road | Fast handling, lower position, competitive riding | Whether the reach and handling still feel calm at ordinary speeds |
| Gravel or all-road | Mixed surfaces, wider tyres, luggage flexibility | Weight, gearing, and how it feels on your usual tarmac |
| Fitness or flat-bar road | Familiar controls, urban riding, a more upright position | Hand-position options and suitability for longer rides |
An endurance road bike is often a sensible place to begin, but it is not automatically the right answer. A gravel or flat-bar bike can be the better road bike for someone whose routes, confidence, or carrying needs point that way.
Treat size as the start of a fit conversation
A size label such as small, medium, or 54 cm does not describe the whole bicycle. Two bikes with the same label can differ in reach, handlebar height, wheelbase, and how they distribute your weight.
Use the manufacturer’s size chart to narrow the options, then ask a good shop to confirm the starting size. The goal is a frame that gives useful adjustment room—not a poor fit rescued by extreme component changes.
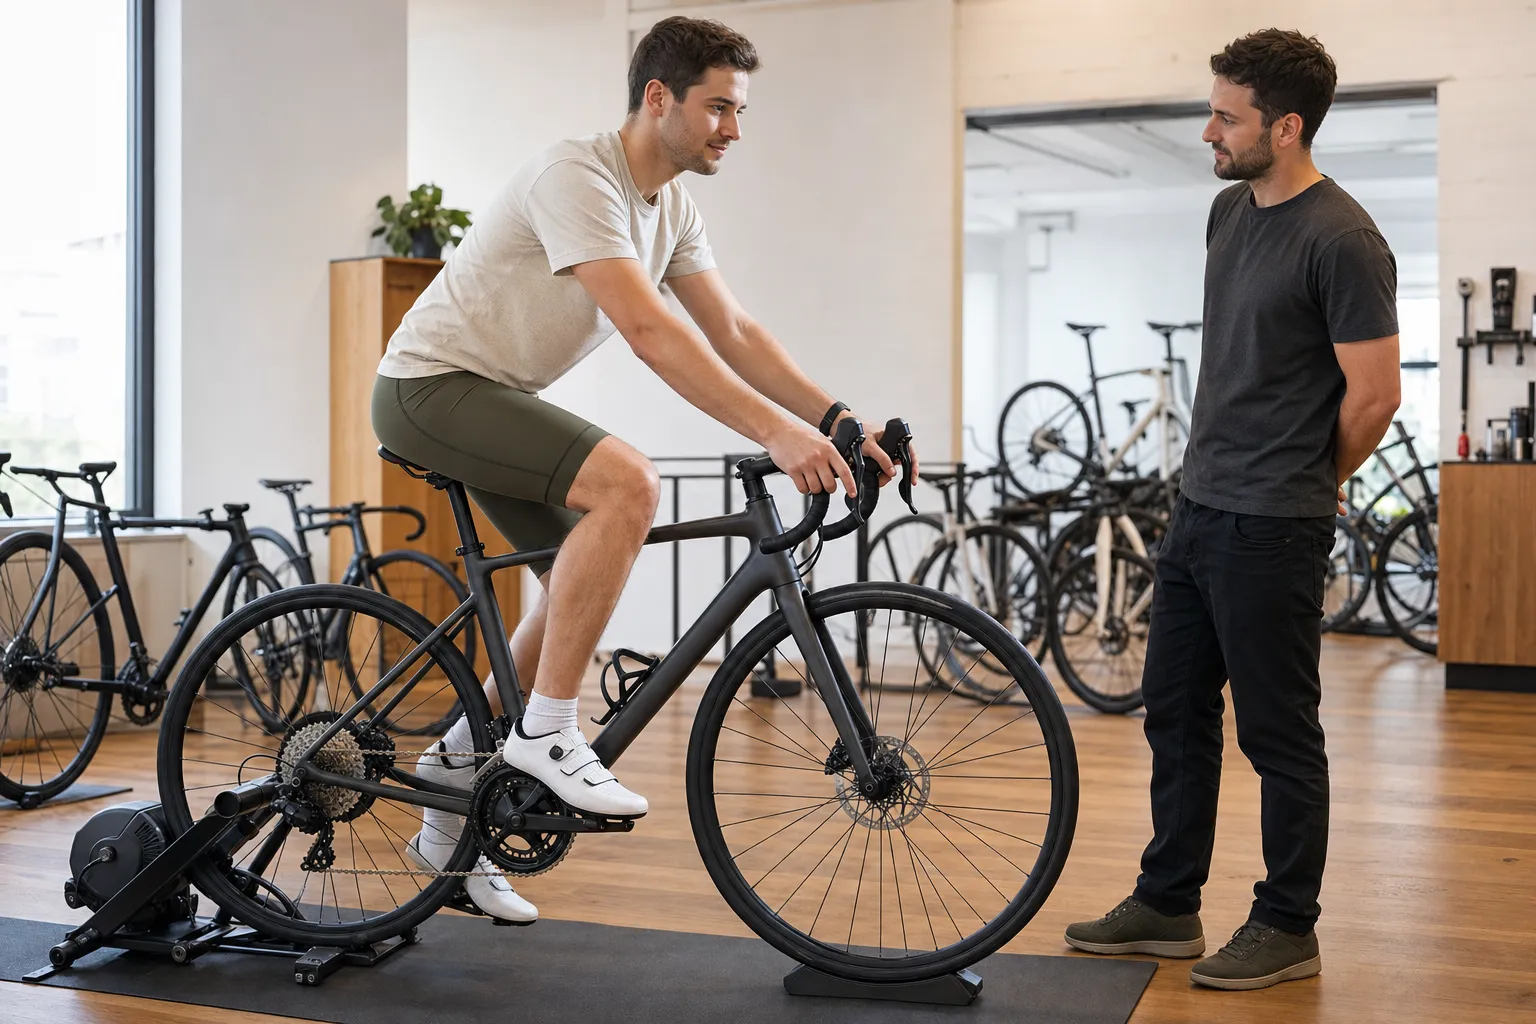
Check the contact points and controls
Your hands, feet, and pelvis connect you to the bike. Small adjustments to the saddle and controls are normal, but the basic frame size still needs to be appropriate.
On a correctly supported bike, look for these starting signals:
- You can reach both brake levers from the hoods without locking your elbows or dragging your shoulders forward.
- Your hands feel secure on the controls and your wrists are not forced into an awkward angle.
- Your knee remains slightly bent at the bottom of a normal pedal stroke rather than your hips rocking to reach the pedal.
- You can turn the handlebar without your knees, hands, or controls colliding.
Interactive checkpoint
Does this bike feel right?
Use a compatible trainer or ask a shop fitter to hold the bike securely while you check.
These observations do not replace a professional bike fit. Persistent pain, numbness, or a position that prevents confident control deserves help from a qualified fitter or relevant health professional rather than repeated guesswork.
Compare the specifications that change your ride
You do not need to memorise a component catalogue. Focus on the details that affect control, comfort, route choice, and maintenance.
Choose gears for your hills and current ability
Easier gearing gives you more options when a road rises or fatigue arrives. Ask the shop to compare the bike’s smallest climbing gear with the alternatives you are considering; do not judge the front chainrings or rear cassette in isolation.
Tell the shop honestly about local gradients and your experience. A harder top gear is rarely the feature that limits a beginner, while a missing easy gear can turn every climb into a struggle.
Leave useful tyre clearance
The frame and fork determine the maximum tyre size, but the real usable clearance also depends on the wheels, tyres, mudguards, and the bicycle manufacturer’s limits. More room gives you options for comfort and rougher surfaces later.
Ask what tyre width is fitted, what the manufacturer permits, and whether fitting mudguards reduces the available space. Do not assume two tyres with the same printed size will measure identically on different rims.
Compare brakes by condition and control
Well-maintained rim brakes and disc brakes can both be appropriate. Disc brakes can offer practical advantages in wet conditions and allow wider tyre designs, but they also introduce their own service requirements. Rim brakes are visually simple and can be easier to inspect, while performance depends on the rim, pads, setup, and weather.
Whichever type you choose, confirm that you can reach both levers, apply them progressively, and stop confidently during the test ride.
Treat the groupset as a system, not a status symbol
The groupset usually includes the gear and brake controls plus drivetrain parts such as the derailleurs, crankset, cassette, and chain. Entry-level components from an established system can shift reliably when they are compatible, adjusted, and maintained.
Ask three practical questions:
- Are replacement wear parts readily available where you live?
- Can your usual workshop service the braking and shifting system?
- Does the bike provide the gear range and control reach you need?
A higher component tier does not correct the wrong size, unsuitable gears, or neglected maintenance.
Check the small features you will miss later
Look for bottle-cage mounts, mudguard fittings, luggage options, replaceable derailleur hangers, and enough clearance around the tyres. If you expect to travel with the bike, ask how the wheels are removed and what tools or adapters are required.
Build a complete-bike budget
Set one number for the bicycle and another for everything required to use it. The essential road cycling gear guide explains how to separate genuine needs from upgrades. Depending on your riding and local rules, the second list may include:
- a properly fitted helmet;
- front and rear lights;
- a floor pump with a suitable gauge;
- a portable pump, spare tube, tyre levers, and a compact tool;
- pedals, because some road bikes are sold without them;
- bottles and cages;
- a lock, mudguards, or luggage;
- an initial service or fit appointment.
Keep a contingency for adjustments and early wear. Spending the entire budget on the frame can leave you with a bike you cannot yet use comfortably or repair at the roadside.
If you are considering a second-hand bike, take the used road bike viewing checklist to the viewing before negotiating. It turns frame condition, ownership, fit, drivetrain wear, brakes, wheels, and immediate replacement costs into a quick yes/no inspection instead of a hopeful guess.
Take a test ride that answers real questions
A useful test ride is not a speed test. Ask the shop to adjust the saddle and explain the controls first, then use a safe area and work through a short sequence:
- Start and stop several times without rushing.
- Reach each brake lever from your normal hand position.
- Shift through the usable gears while pedalling lightly.
- Ride a gentle turn in each direction and look where you want to go.
- Ride over an ordinary imperfect surface if the route safely allows it.
- Notice pressure, stretching, hand comfort, and whether the bike holds a calm line.
Compare no more than a few serious candidates and write down what you noticed immediately. “Fast” is less useful than “I could reach both brakes, steer naturally, and felt no pressure to hold an extreme position.”
Avoid the most expensive beginner mistakes
- Buying for a future identity: choose for the rides you are likely to do, not the racer you may become.
- Assuming a size label transfers between brands: compare geometry and ride the actual bike.
- Spending the accessory budget: price the complete setup before committing.
- Choosing fewer easy gears for appearance: buy options for your real terrain.
- Ignoring control access: being able to operate both brakes matters more than a clean showroom silhouette.
- Treating discomfort as proof of seriousness: unfamiliar can improve; pain and loss of control are not goals.
Your next step
Write a one-paragraph description of your likely rides and a complete-bike budget. Take both to a reputable shop, test two or three correctly sized options, and choose the bike that makes ordinary riding feel controlled and inviting.