Flat pedals vs SPD vs SPD-SL: Which pedal system should you start with?
Compare flat pedals, 2-bolt SPD, and 3-bolt SPD-SL road pedals: walkability, ease of clipping out, foot stability, shoe compatibility, and beginner progression.
 Field guide / flat-pedals-vs-spd-vs-spd-sl
Before you buy
Check the starter kit first
Print the one-page buying brief for helmet, lights, water, phone, and repair compatibility before comparing upgrades.
Choosing the right pedal system on a road bike comes down to one practical tradeoff: how much off-bike walking and stopping ease do you need versus locked-in foot stability? Flat pedals let you wear any regular shoe with zero fall anxiety. Two-bolt SPD systems provide walkable rubber soles and double-sided clipping. Three-bolt SPD-SL systems offer maximum sole stiffness and a wide road platform at the cost of slippery, awkward walking.
The short answer: start on flat pedals if you are still building road confidence, braking habits, and traffic awareness. When you want clipless foot security without awkward duck-walking at café stops, choose 2-bolt SPD. Move to 3-bolt SPD-SL only if you want a wide, race-stiff road platform for continuous, non-stop riding.
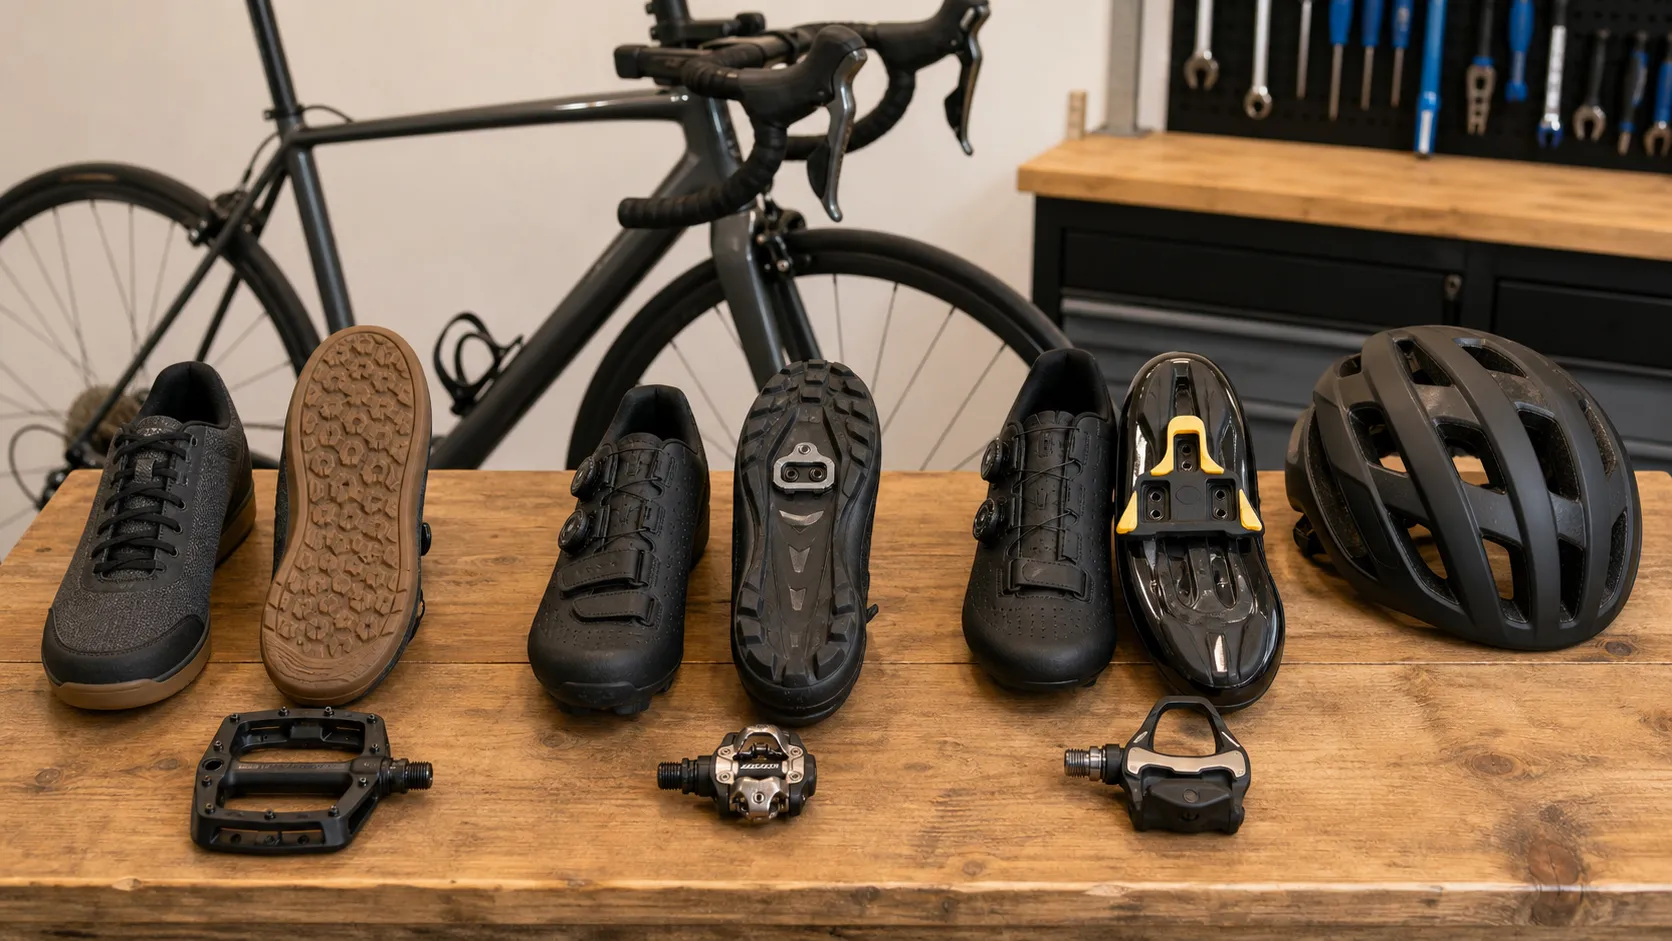
The three pedal systems compared
Before exploring each option in depth, look at how the three systems compare across everyday riding factors:
| Feature | Flat Platform Pedals | 2-Bolt SPD (Mountain / Touring) | 3-Bolt SPD-SL (Road Specific) |
|---|---|---|---|
| Cleat Type | None (regular sole) | Small recessed steel cleat | Large exposed plastic cleat |
| Shoe Sole | Flexible or semi-stiff rubber | Stiff sole with recessed rubber tread | Ultra-stiff, smooth flat sole (carbon/nylon) |
| Walkability | 100% normal walking | Highly walkable (walks like a hiking shoe) | Poor (awkward “duck waddle”, slippery on tiles) |
| Pedal Entry | Step on either side instantly | Dual-sided (or multi-sided) click-in | Single-sided (pedal hangs nose-up, flip to engage) |
| Float & Release | Infinite (foot is free) | 4° to 6° float; easy twist release (or multi-directional) | 0°, 2°, or 6° float depending on cleat color; twist release |
| Power Platform | Large surface, but shoe can flex | Small metal contact area | Wide plastic-to-pedal contact patch |
| Fall Risk at Stops | Zero | Low (quick release, forgiving unclipping) | Moderate (requires deliberate early release) |
| Best For | New riders, city riding, commuting, bike handling | Mixed road/gravel, café stops, commuters, touring | Non-stop club rides, sportives, racing, maximum stiffness |
1. Flat pedals: the zero-pressure starting point
Flat pedals (often called platform pedals) are the pedals that come standard on most commuter bikes. You step on them in regular trainers or flat-soled shoes, pedal forward, and take your feet off whenever you need to stop.
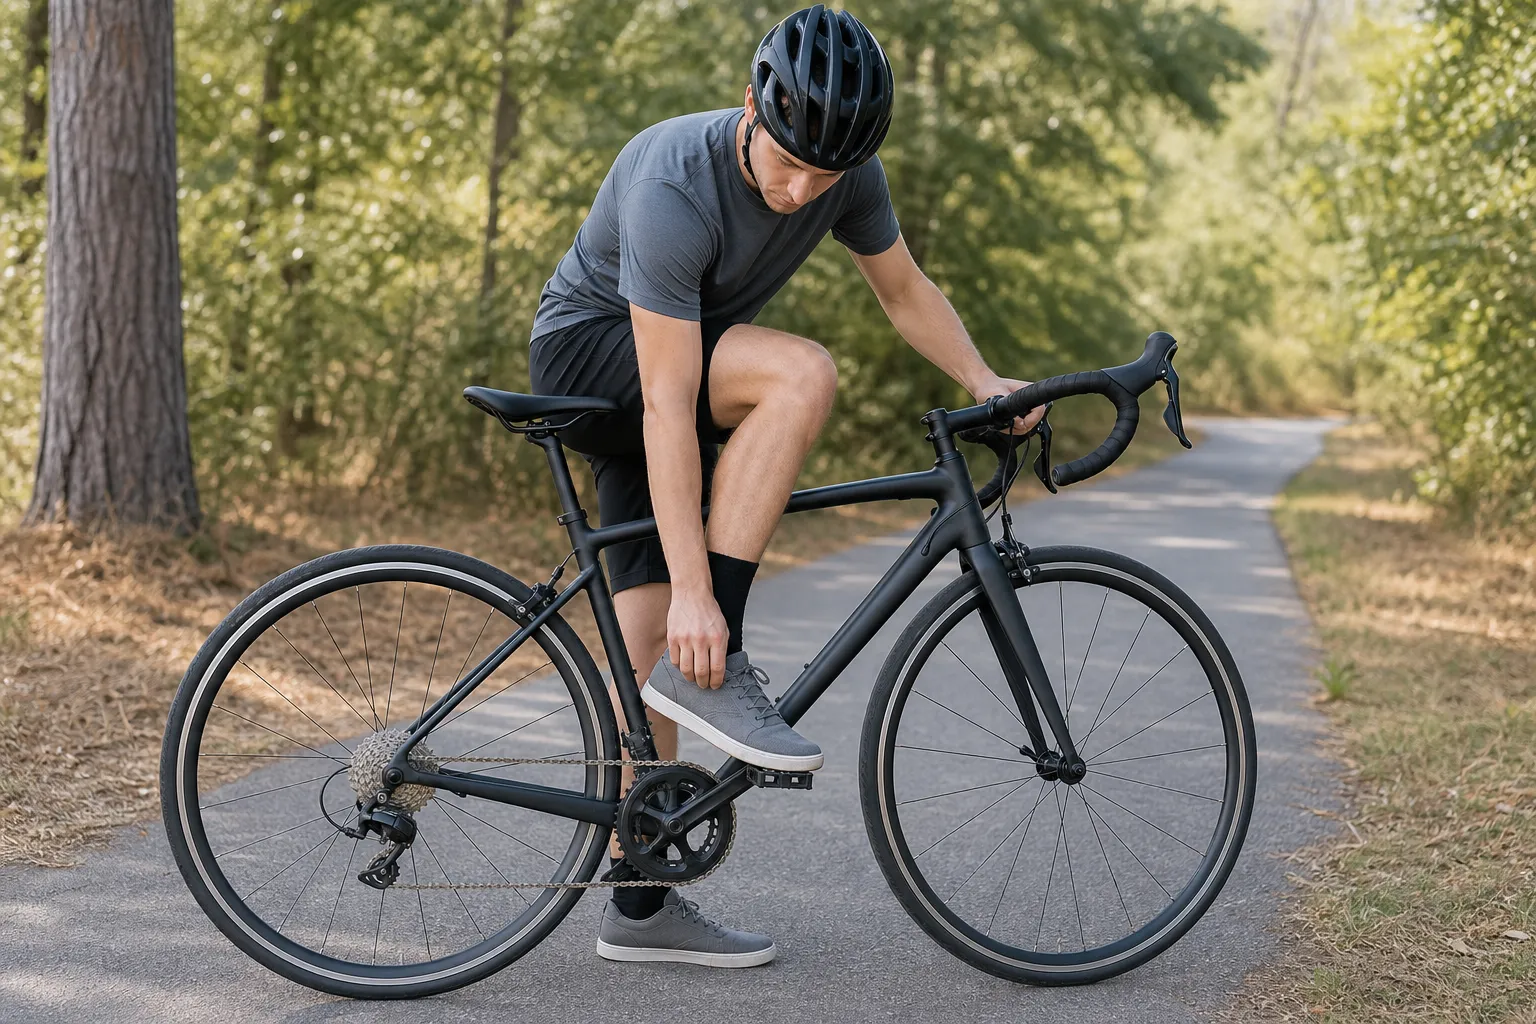
Why flats are a great road setup
- Zero mental tax at junctions: When approaching a complex roundabout, a steep climb where you might stall, or a sudden red light, you can plant a foot instantly without thinking about release angles.
- Wear any footwear: You can ride in running shoes, skate shoes, or dedicated flat cycling shoes (such as Five Ten or Shimano GR5).
- Easy walking: You can hop off your bike to check a map, browse a shop, push up an intimidating hill, or grab coffee without slipping on smooth floors.
- Encourages good pedaling technique: Flats force you to maintain balanced foot pressure on the pedal stroke rather than relying on a mechanical link to keep your feet planted.
The tradeoffs of flat pedals
- Feet can shift on rough terrain: Over potholes, railway tracks, or sudden road bumps, your feet can bounce out of position.
- Inconsistent foot placement: You might place your foot slightly too far forward or twisted on some pedal strokes, which can cause minor knee fatigue over rides longer than 50 kilometres.
- Wetted grip limits: Wet soles on cheap plastic pedals can become slick. Upgrading to wide alloy or composite flat pedals with small grip pins solves this issue completely.
As detailed in you do not need clipless pedals to be a real cyclist, riding flats on a road bike is completely valid. It keeps your attention focused on road cycling safety and road positioning and how to use road bike gears.
2. 2-bolt SPD: the walkable, dual-sided sweet spot
SPD stands for Shimano Pedaling Dynamics. Originally developed for mountain biking where riders frequently dismount in mud, 2-bolt SPD systems have become the most popular clipless choice for gravel riders, touring cyclists, commuters, and sensible road beginners.
How 2-bolt SPD works
Two small bolts secure a compact steel cleat into two parallel slots in the sole of an SPD shoe. Crucially, the cleat sits recessed inside deep rubber tread blocks on either side.
       [ Cycling Shoe Sole ]
       |===|             |===|   <-- Raised rubber tread lugs
           \ [Steel Cleat] /     <-- Recessed inside tread
When you walk, the rubber tread contacts the ground, keeping the metal cleat suspended above pavement or tile floors.
Why beginners love 2-bolt SPD
- True walkability: You can walk into a bakery, climb flight of stairs, or push your bike over gravel without sliding around or damaging your cleats.
- Dual-sided pedal entry: Most SPD pedals (like the classic Shimano PD-M520 or PD-ED500) have binding mechanisms on both sides of the pedal. You do not need to look down or flip the pedal with your toe; you simply step down and click in.
- Multi-release cleat options: Shimano offers two cleats:
- SM-SH51 (Black): Standard single-release (twists outward to exit).
- SM-SH56 (Silver / Gold): Multi-release cleat that releases by twisting outward, tilting upward, or pulling diagonally. This is an exceptional beginner safety feature for panic stops.
- Durable steel construction: The cleats last for years and resist grit, gravel, and mud.
The tradeoffs of 2-bolt SPD
- Smaller contact patch: Because the cleat and pedal mechanism are compact, the direct contact zone between pedal and shoe is smaller than on a dedicated road pedal.
- Potential “hotspots” on long rides: If you pair SPD pedals with a very flexible commuter shoe, you may feel concentrated pressure under the ball of your foot on rides over 60–80 km. Choosing an SPD shoe with a stiff composite sole eliminates this issue.
3. 3-bolt SPD-SL: the road racing standard
SPD-SL (Shimano Pedaling Dynamics - Semi-Light) is Shimano’s dedicated road-specific clipless system. Similar competing 3-bolt systems include Look Keo and Time Xpresso. This is the setup used in the Tour de France and by traditional road cycling clubs.
How 3-bolt SPD-SL works
Three triangularly spaced bolts mount a large, exposed plastic cleat directly onto a smooth, ultra-stiff road shoe sole. The cleat is not recessed; it sticks out prominently from the bottom of the shoe.
Why road riders choose 3-bolt SPD-SL
- Maximum platform stability: The broad cleat distributes your pedaling force across a large area under the ball of the foot, giving a solid, locked-in platform that prevents foot fatigue and hotspots on high-mileage days.
- Stiff, lightweight soles: Dedicated road shoes feature rigid composite or carbon fibre soles with zero tread, maximizing direct power transfer and reducing shoe weight.
- Precise angular float: SPD-SL cleats come color-coded by how much rotational float (side-to-side heel play) they allow before releasing:
- Yellow cleats: 6° float (standard beginner choice; gentle on knees).
- Blue cleats: 2° float (for riders with dialled-in cleat alignment).
- Red cleats: 0° float (completely fixed; used by track sprinters and racers).
The tradeoffs of 3-bolt SPD-SL
- Awkward, slippery walking: Walking on exposed plastic cleats forces an uncomfortable heel-heavy “duck walk”. Walking on wet café tiles, polished concrete, or wooden decking requires extreme caution.
- Single-sided pedal entry: Because road pedals have a binding on only one side, the pedal naturally hangs nose-up by gravity. You have to flick the tip of the pedal forward with your toe before pressing down to engage.
- Cleat wear from pavement contact: Every step you take on tarmac grinds down the plastic engagement tabs. If you use SPD-SL, carrying rubber cleat covers in your jersey pocket is recommended for café stops.
Shoe compatibility: 2-bolt vs 3-bolt soles
One of the most expensive mistakes beginner road cyclists make is buying cycling shoes without checking the bolt pattern on the sole.
       2-Bolt Pattern (SPD)              3-Bolt Pattern (SPD-SL / Look)
      =======================           ================================
            [ o   o ]                                 [   o   ]
            [ o   o ]                                [ o     o ]
(Two parallel tracks) (Triangular layout)- 2-Bolt shoes (MTB / Touring / Gravel): Feature two threaded slots inside a rubber tread channel. Fits SPD, Crankbrothers, and Time ATAC cleats.
- 3-Bolt shoes (Road): Feature three threaded holes arranged in a triangle on a smooth, treadless sole. Fits SPD-SL, Look Keo, and Time road cleats.
- Dual-drilled shoes: Some entry-level road shoes have both 2-bolt and 3-bolt drillings. However, mounting a 2-bolt SPD cleat to a smooth road sole leaves the metal cleat exposed, creating the worst of both worlds: slippery walking and a tiny contact patch.
Rule of thumb: If you want walkable 2-bolt SPD pedals, buy 2-bolt touring/gravel shoes with rubber tread. If you want 3-bolt SPD-SL road pedals, buy 3-bolt road shoes.
Beginner progression roadmap: how to choose your path
You do not need to leap directly from sneakers to high-end road racing shoes. Here is a sensible, stress-free progression used by experienced riding instructors:
[ Phase 1: Flat Pedals ]
  │  Focus: Shifting, emergency braking, road positioning, balance.
  ▼
[ Phase 2: 2-Bolt SPD (Optional) ]
  │  Focus: Walkable soles, multi-release cleats (SH56), loose spring tension.
  ▼
[ Phase 3: 3-Bolt SPD-SL (Optional) ]
     Focus: Fast non-stop group rides, maximum sole stiffness, zero-walk routes.
Stage 1: Build bike-handling competence on flats (Weeks 1–6)
When you first buy a road bike, your brain is busy processing multiple new skills at once:
- Shifting across front and rear derailleurs (how to use road bike gears).
- Modulation between front and rear brakes (your front brake is not the enemy).
- Navigating roundabouts, blind junctions, and potholes.
Stay on flat pedals during this phase. There is zero shame in riding flats, and removing the fear of tipping over lets you learn road craft far faster.
Stage 2: Move to 2-bolt SPD when you want foot security
If you notice your feet bouncing off the pedals over rough roads, or you want your feet to return to the exact same ergonomic position every pedal stroke, 2-bolt SPD is the most forgiving entry into clipless riding.
- Pair an SPD pedal (like Shimano PD-M520 or the dual-sided flat/SPD Shimano PD-EH500) with walkable gravel or touring shoes.
- Install SM-SH56 multi-release cleats and dial the pedal spring adjustment screws fully counter-clockwise to their loosest tension.
- Practice stationary unclipping following clipless pedals without the fear.
Stage 3: Upgrade to 3-bolt SPD-SL only if your riding demands it
Consider 3-bolt SPD-SL if:
- You ride uninterrupted 2–4 hour road loops with almost no walking or dismounting.
- You experience foot flex fatigue over long distances and want ultra-stiff carbon road soles.
- You join fast-paced club group rides where the wide road platform and secure locked-in feel give you extra sprinting confidence.
If you love stopping at coffee shops, commuting into work, or walking around scenic viewpoints, staying on 2-bolt SPD or flat pedals permanently is completely reasonable.
Step-by-step: setting up your first clipless pedals safely
If you decide to try either 2-bolt or 3-bolt clipless pedals, follow this safety checklist before rolling onto public roads:
┌─────────────────────────────────────────────────────────────┐
│             CLIPLESS SETUP & SAFETY CHECKLIST               │
├─────────────────────────────────────────────────────────────┤
│ [ ] Grease pedal threads before installing on crank arms    │
│ [ ] Remember: Right pedal turns clockwise (standard)        │
│ [ ] Remember: Left pedal turns counter-clockwise (reverse)  │
│ [ ] Adjust spring release tension to the MINIMUM setting    │
│ [ ] Match left and right pedal tension indicator marks      │
│ [ ] Torque cleat bolts securely (approx. 5–6 Nm)            │
│ [ ] Perform 20 stationary unclip repetitions against a wall │
│ [ ] Practice rolling stops in an empty car park or park     │
└─────────────────────────────────────────────────────────────┘- Grease the threads: Apply a dab of bicycle grease or anti-seize paste to the pedal threads. Pedals installed dry will seize inside aluminum crank arms over time.
- Mind the reverse thread: The right-side pedal (drivetrain side) tightens clockwise. The left-side pedal has a left-hand reverse thread and tightens counter-clockwise. Both pedals tighten toward the front of the bike and loosen toward the rear.
- Loosen release tension completely: Look for the small 3mm hex adjustment screw on the pedal binding. Turn it toward the minus (
-) sign until it reaches its minimum limit stop. This ensures that even a gentle heel twist will release your shoe immediately. - Equalise left and right tension: Ensure both sides of both pedals have identical release force so your muscle memory works the same way on either foot.
- Pre-ride bike check: Run through the five-minute pre-ride bike check before every outing.
Common mistakes beginners make
| Mistake | Why it happens | Better practice |
|---|---|---|
| Buying 3-bolt shoes for 2-bolt pedals | Assuming all cycling shoes fit all pedals | Check sole drilling before buying shoes |
| Riding with factory-tight spring tension | Pedals ship with medium or high tension from the box | Always loosen tension screws to the minimum before your first ride |
| Unclipping at the last second | Waiting until the bike stops moving before twisting the heel | Unclip 10–15 metres before the junction while rolling slowly |
| Buying 0° fixed float cleats | Thinking zero float gives “more pro power” | Start with high float (Shimano Yellow or SPD SH56) to protect knee joints |
| Walking on road cleats without covers | Walking across gravel, tarmac, or concrete | Use rubber cleat covers or stick to 2-bolt walkable shoes |
| Using clipless pedals to fix knee pain | Misaligned cleats can aggravate joint strain | Check saddle height and cleat angle using beginner road bike fit and comfort |
Your next step
Assess your current riding goals before spending money on new pedals or shoes:
- If you are in your first month of road riding: Stick with flat pedals. Focus on cadence, shifting, and confidence in traffic.
- If you want foot security with zero café stress: Order a set of 2-bolt SPD pedals (or dual-sided flat/SPD combo pedals) and walkable 2-bolt touring shoes with SH56 multi-release cleats.
- If you are training for continuous road sportives: Choose 3-bolt SPD-SL pedals, yellow 6° float cleats, and road shoes.
When you are ready to make the switch to clipless, read our step-by-step practice routine in clipless pedals without the fear to learn how to unclip safely without ever taking a tumble.
Sources and further reading
- Shimano SPD Pedals User Manual (UM-L800B)
- Shimano SPD-SL Road Pedals User Manual (UM-45F0A)
- Shimano SM-SH56 Multi-Release SPD Cleat Specification
- Mornieux et al.: Effects of pedal type and pull-up action during cycling (PubMed)
- Straw & Kram: Effects of shoe type and shoe-pedal interface on the metabolic cost of cycling
- SIKLIST Guide: Clipless pedals without the fear
- SIKLIST Guide: You do not need clipless pedals to be a real cyclist