Clipless pedals without the fear
Decide whether clipless pedals are worth learning, choose a beginner-friendly setup, practise release safely, and know when to stop for help.
 Field guide / clipless-pedals-without-the-fear
Before you buy
Check the starter kit first
Print the one-page buying brief for helmet, lights, water, phone, and repair compatibility before comparing upgrades.
Clipless pedals are worth trying when they solve a real problem: your feet move around, you want more foot security, or you like the consistent feel of cycling shoes. They are not required for your first road bike, and they are not a guaranteed speed upgrade.
The short answer: start with flat pedals if they help you ride calmly. Move to clipless only when you can practise in a quiet place, you understand your pedal’s release motion, and the shoe, cleat, and pedal are confirmed compatible.
Why beginners worry about clipless pedals
Recent beginner threads use the same words again and again: scared of falling, unsure whether to start on flats, confused by SPD versus SPD-SL, and worried about not unclipping before a stop. One new road-bike buyer asked whether to choose clipless pedals or flats because falling and not getting comfortable felt like the real risk, not the equipment choice.
That is the useful starting point. The first clipless decision is not “Which pedal is fastest?” It is “Will this setup make my next month of riding calmer, or will it take attention away from traffic, braking, shifting, and route choice?”
If flats are helping you learn, keep them. The companion post you do not need clipless pedals to be a real cyclist covers the status-pressure side of this question. This guide covers the practical path if you are curious, ready, or already holding a box of pedals and shoes.
What clipless pedals do, and what they do not do
Clipless pedals use a cleat fixed to the sole of a cycling shoe. The cleat clips into a matching pedal, so your foot stays in a repeatable position and is less likely to slide off the pedal on rough roads, out-of-saddle efforts, or wet soles.
The name is confusing because the shoe clips in. “Clipless” separated these systems from older toe clips and straps, not from the act of clipping in.
The real beginner benefits are:
- consistent foot placement;
- better foot security over bumps;
- a stiffer, more supportive shoe for some riders;
- a connected feel when climbing, accelerating, or riding out of the saddle;
- easier repeatability once cleat position is comfortable.
The benefits are not magic. A study by Mornieux and colleagues found no significant difference in net mechanical efficiency between simple pedals and clipless pedals during the tested submaximal cycling condition, while deliberately pulling up reduced net efficiency in that study (Mornieux et al. PDF). In beginner language: clipless pedals may feel better and solve a foot-security problem, but they do not automatically make every rider faster.
Choose the system before you choose the shoe
The cleat, shoe, and pedal must match. This is where many beginners get surprised.
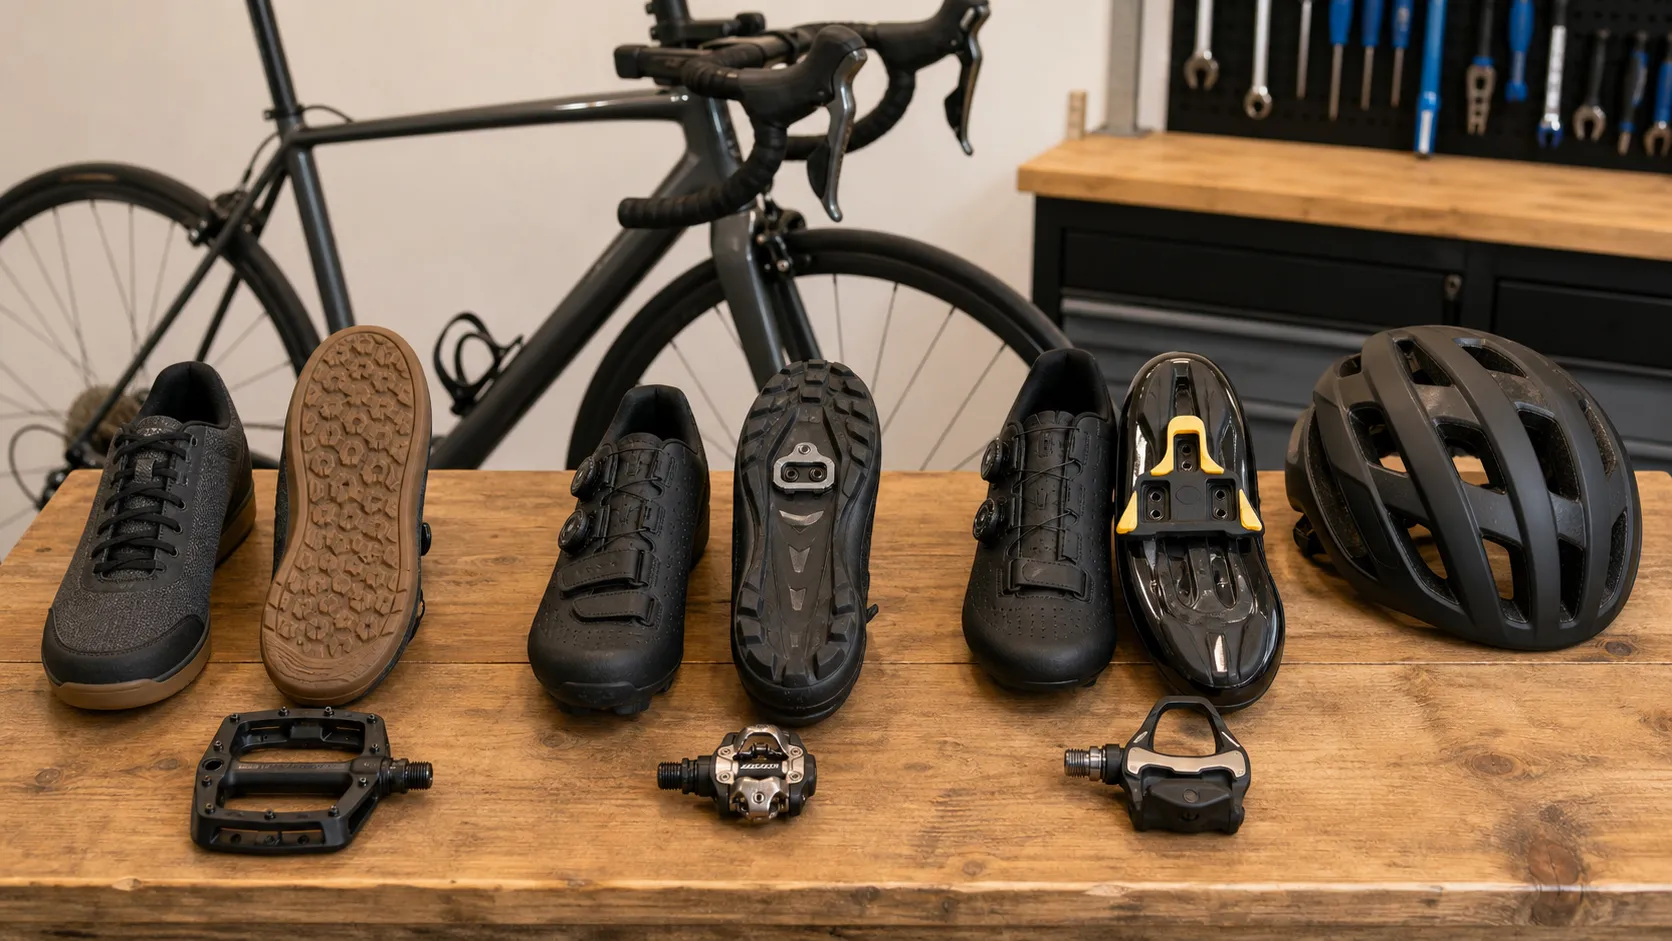
| Setup | What it usually feels like | Beginner tradeoff |
|---|---|---|
| Flat pedals and normal shoes | Simple, easy to walk in, easy to put a foot down | Less foot security and less repeatable placement |
| Two-bolt clipless shoes and pedals | Usually easier to walk in because the cleat is recessed | Smaller pedal platform, but very practical for mixed riding |
| Three-bolt road shoes and pedals | Road-specific feel with a larger cleat and broad support | Awkward walking and often single-sided pedal entry |
| Dual-sided road systems or easy-release options | Can reduce entry or release anxiety depending on the system | More product-specific setup details to learn |
Do not buy shoes first unless you know which pedal system they need to fit. Shimano’s SPD manual says SPD pedals should be used with SPD-compatible shoes and Shimano’s specified cleats, and its SPD-SL manual says SPD-SL pedals should be used with SPD-SL shoes and Shimano cleats (Shimano SPD user manual, Shimano SPD-SL user manual). Other brands have their own compatibility rules, so read the manual or ask a shop before mixing parts.
For a nervous beginner, a two-bolt walkable setup can be a friendly first clipless step, especially if your rides include traffic lights, cafe stops, short walks, gravel paths, or errands. A three-bolt road setup can still be perfectly sensible if most rides are continuous road rides and you want the road-shoe feel from the start.
Beginner-friendly does not mean loose and careless
Many clipless pedals let you adjust release tension or cleat holding force. Lower tension can make release easier, but too little holding force can allow accidental release. Too much can make it hard to get out when you need to stop.
Shimano’s SPD-SL light-action manual tells riders to adjust spring tension before riding, explains that low tension can cause accidental release, and warns that high tension can make cleats difficult to release. It also says the left and right pedals should be adjusted equally and not past the indicator limits (Shimano SPD-SL user manual).
That gives you a clean beginner boundary:
- use the maker’s manual for your exact pedal;
- start with a release force you can repeat confidently;
- keep left and right pedals consistent unless the manual says otherwise;
- do not turn adjustment screws past their limits;
- get shop help if you cannot tell whether the mechanism is adjusted properly.
An “easy” setup should still feel secure when pedalling normally. If a foot pops out when you do not intend it to, stop and inspect the setup before riding in traffic.
Check cleats before the first ride
Cleats are small, but they decide whether your shoe releases predictably. Do not treat them as decorative shoe plates.
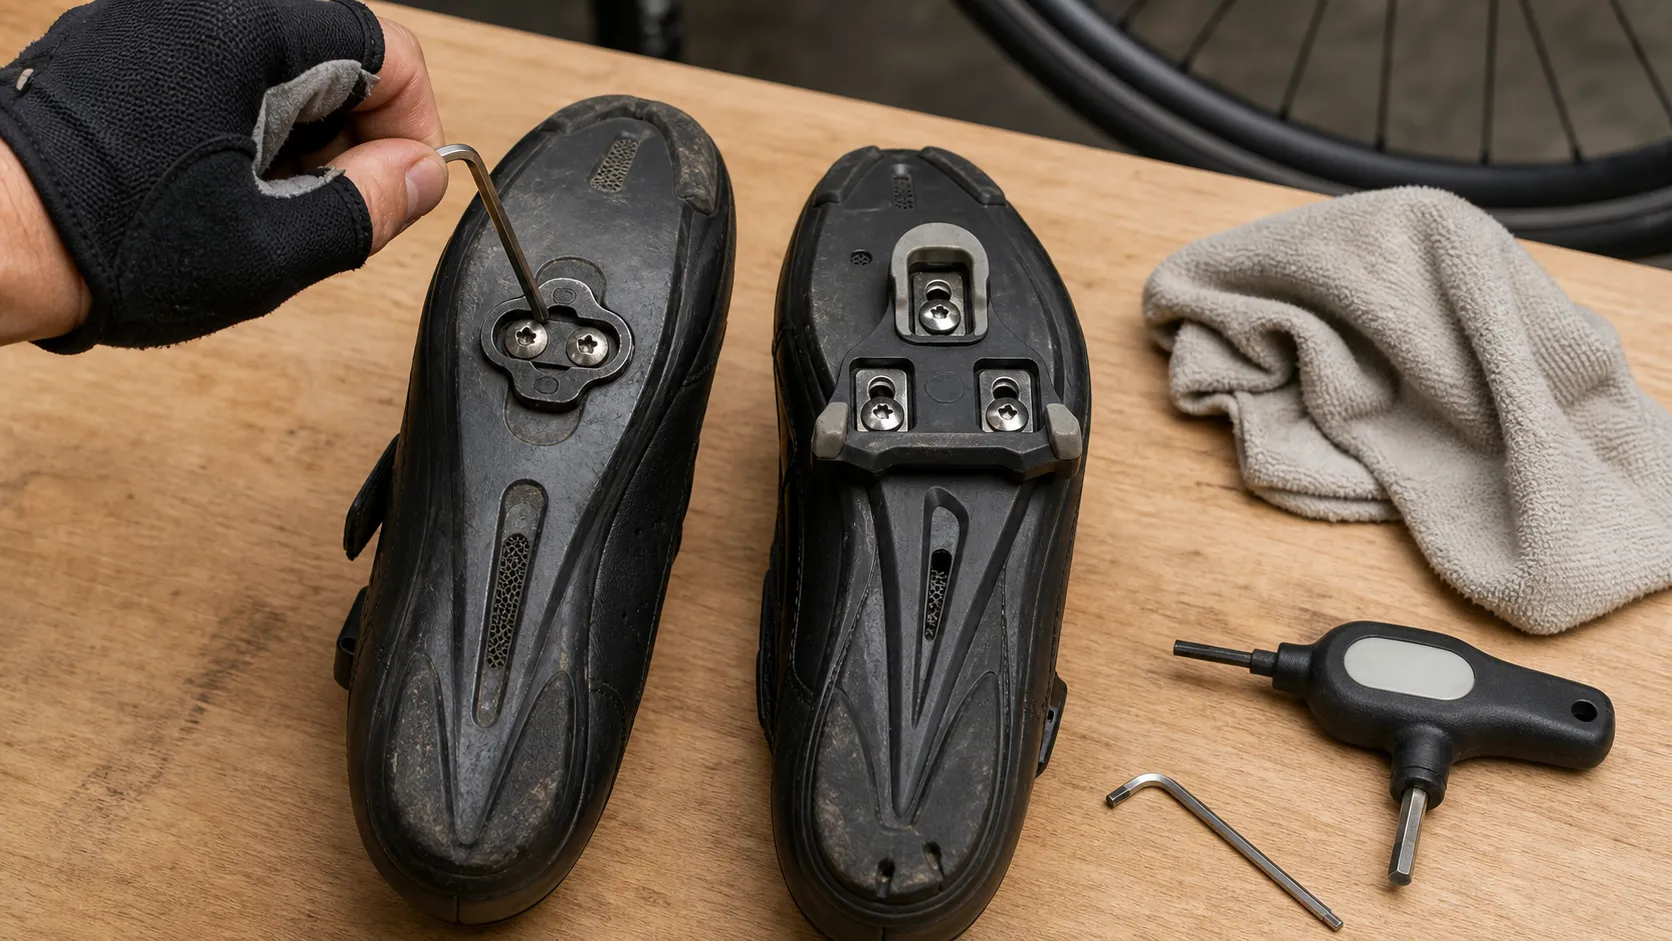
Before riding, check:
- the cleat matches the pedal system;
- the cleat bolts are present, clean, and secure;
- the cleat sits flat against the shoe sole;
- the left and right cleats are positioned similarly unless a fitter intentionally changed them;
- dirt, stones, or café-floor grit are not blocking the mechanism;
- the cleat is not worn enough to make release much harder or much easier than when new.
Shimano’s SPD and SPD-SL manuals both tell riders to keep cleats and bindings clear of dirt and debris and to check cleats periodically for wear. The SPD-SL manual says cleats should be replaced when release becomes difficult or much easier than when new (Shimano SPD-SL user manual).
If you have knee, foot, ankle, or hip pain, do not keep moving cleats around randomly hoping one position solves it. Cleat position changes how your leg tracks through the pedal stroke. Use beginner road bike fit and comfort to decide whether the next step is a simple comfort observation, a mechanic, a bike fitter, or medical help.
Practise release before you ride anywhere
The safe practice routine is boring on purpose. Shimano’s SPD-SL instructions tell riders to apply the brakes, place one foot on the ground, and practise engaging and releasing each shoe until it feels natural before riding. The same manual says to ride on level ground first until release feels familiar (Shimano SPD-SL user manual).
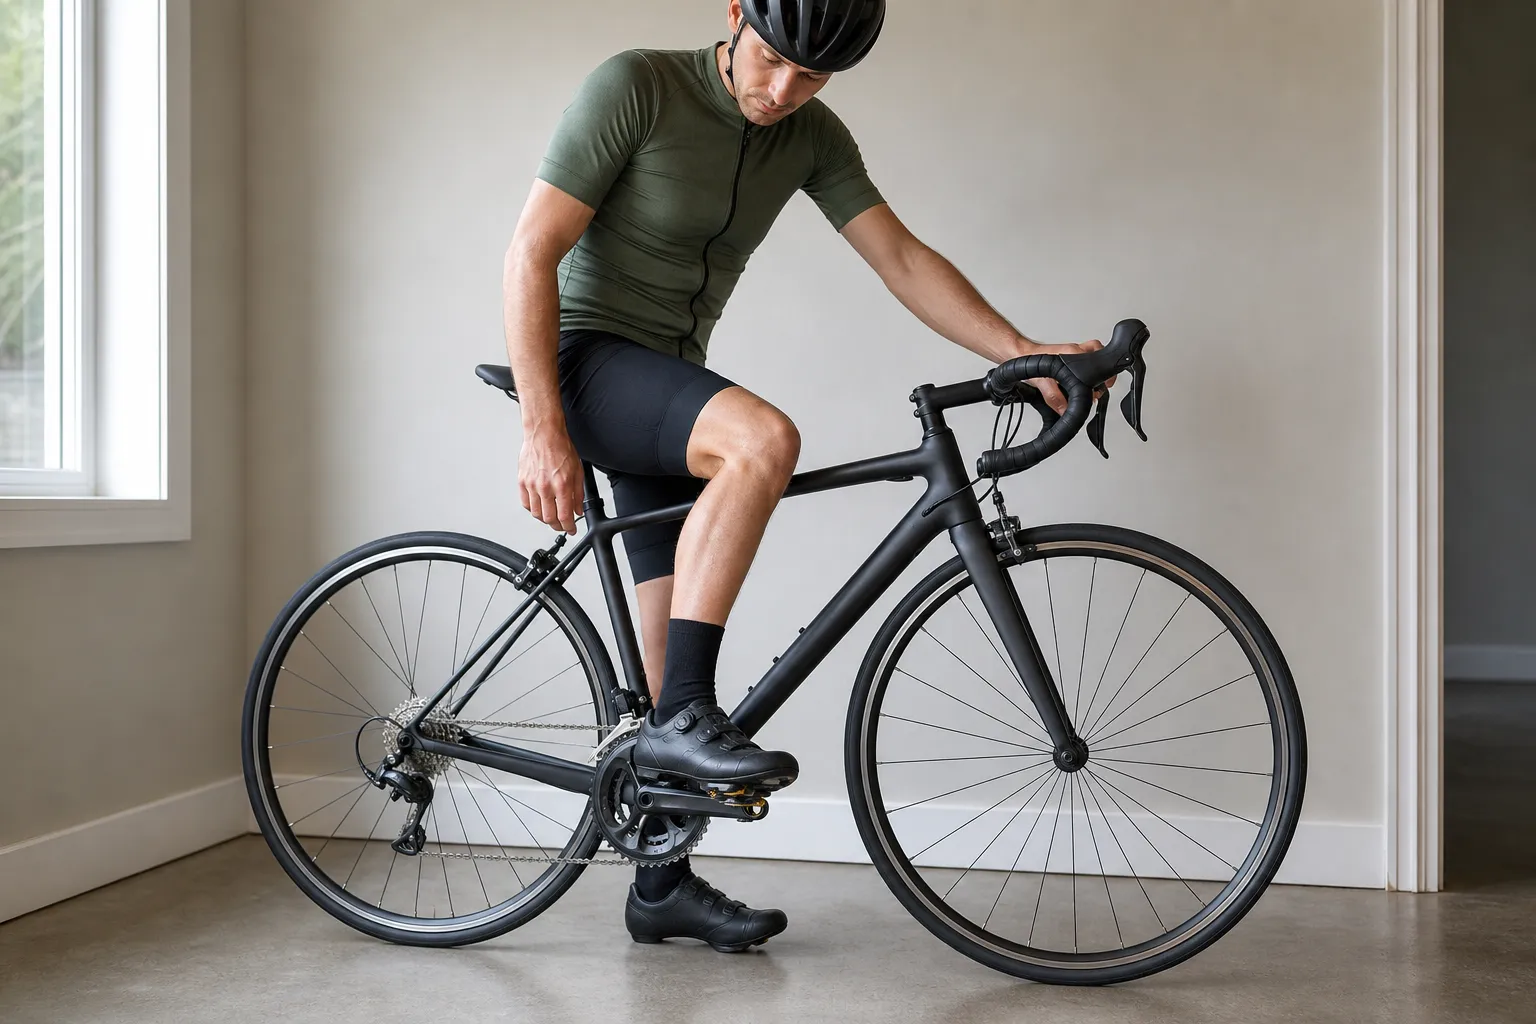
Use this first-session order:
- Put on a helmet and choose a flat, quiet, traffic-free space.
- Stand over the bike beside a wall, fence, doorway, or solid post.
- Apply the brakes.
- Keep one foot on the ground.
- Clip the other shoe in and release it several times.
- Repeat on the other side.
- Roll slowly in a clear practice area.
- Clip in, pedal gently, unclip early, stop, and put the same foot down.
- Repeat until it feels dull rather than dramatic.
Practise both feet even if you expect to put down the same foot every time. In real riding, camber, traffic, a tight turn, or a surprise stop can make the other side useful.
The stopping habit that matters most
Release before you need the foot.
Do not wait until the bike is almost stopped, tilted, and asking your brain to solve balance and release at the same time. When you see a junction, U-turn, queue, steep ramp, blind bend, narrow gate, pedestrian crossing, or uncertain moment, unclip one foot early and keep it ready.
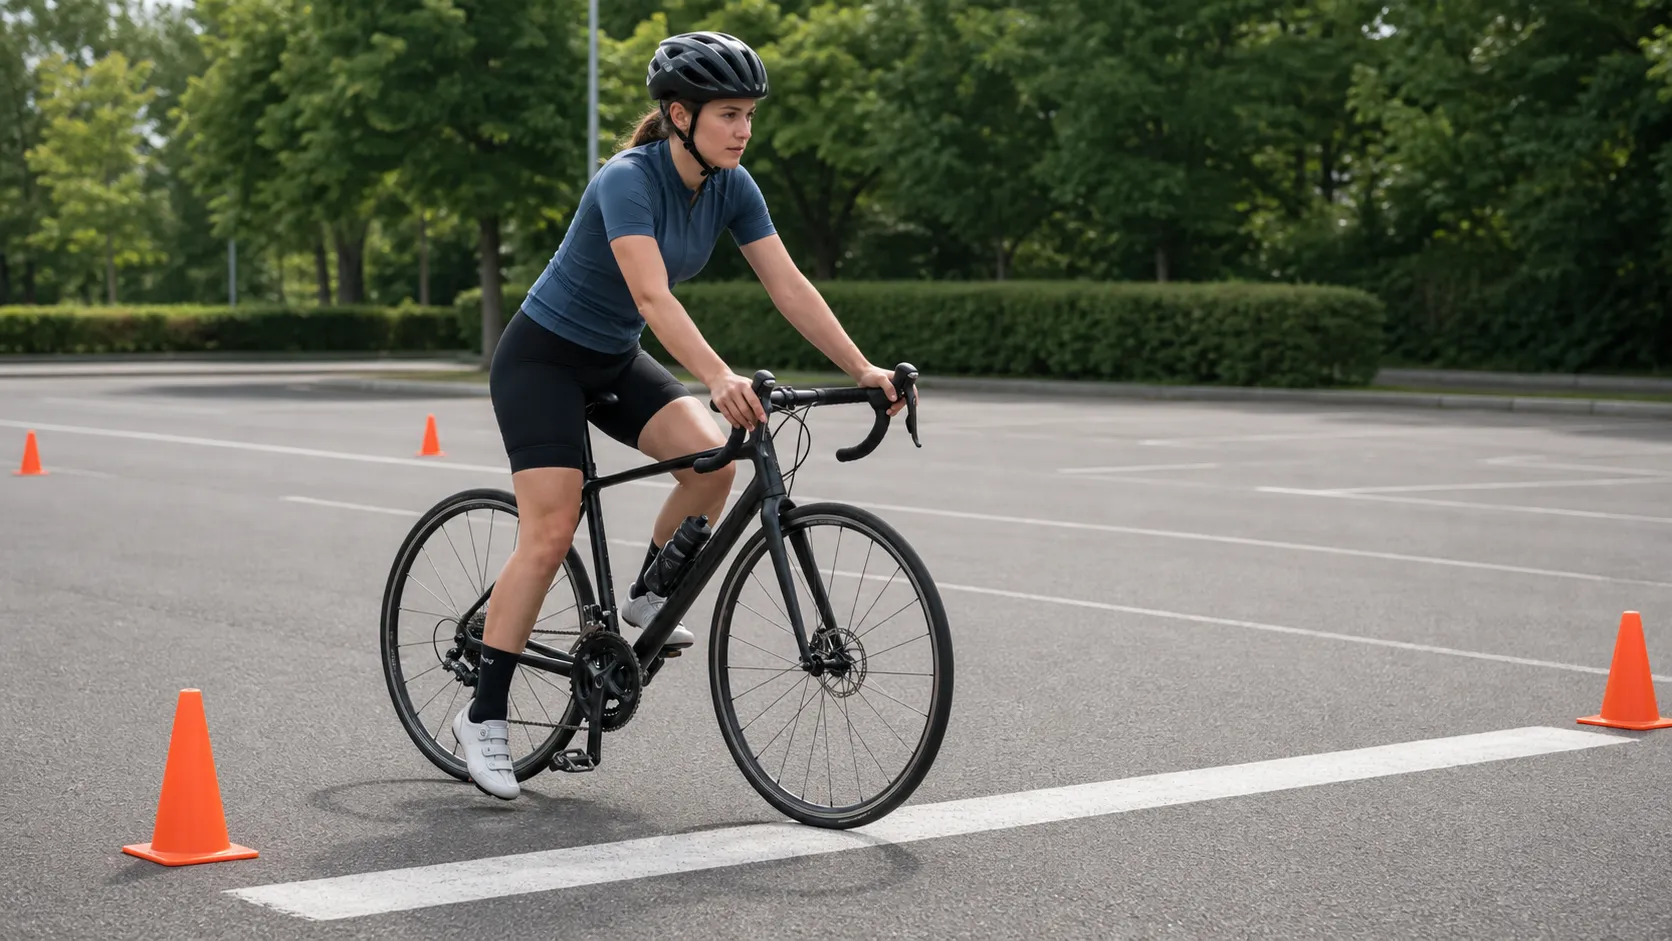
This habit matters more than pretending you will never wobble. It also pairs with the road-safety habits in road cycling safety and road positioning: be predictable, decide early, and leave yourself space.
Your first road ride on clipless pedals
Make the first real ride too easy on purpose. Choose a familiar short route with light traffic, few stops, no steep ramps, and a place to turn back. This is not the day to combine new shoes with a new route, group ride, hill session, or busy urban commute.
Before leaving:
- confirm both pedals release consistently;
- check cleats and bolts;
- check your brakes, tyres, chain, wheels, lights, and essentials with the five-minute pre-ride bike check;
- decide which foot you will usually unclip first;
- choose a route where stopping is low-stress.
During the ride:
- clip in only after the bike is stable;
- unclip early before every stop;
- stay seated for the first few starts and climbs;
- walk awkward sections instead of forcing a nervous restart;
- turn back if release feels uncertain.
If you tip over at low speed, do not turn the story into proof that clipless pedals are wrong for you or proof that you must keep going. Check yourself, your helmet, the bike, the pedals, and the cleats. Replace a helmet that took an impact according to helmet-maker guidance. If anything hurts, release feels worse, or the bike may be damaged, stop the ride.
Common mistakes
| Mistake | Why it causes trouble | Better beginner habit |
|---|---|---|
| Buying shoes before choosing the pedal system | The cleat and bolt pattern may not match | Choose pedal system, cleat, and shoe together |
| Setting release tension by guesswork | Too loose can release accidentally; too tight can trap your foot | Follow the manual or ask a shop to show you |
| Practising only indoors, then riding in traffic | Stationary release is not the same as slow stops | Add empty-car-park starts and stops before roads |
| Waiting until the last second to unclip | Balance and release happen at the same stressful moment | Unclip early before the stop |
| Ignoring cleat wear or dirt | Release can become inconsistent | Inspect, clean, and replace cleats when needed |
| Using clipless to fix pain | Cleat position can create or hide fit problems | Stop and get fit or medical help for persistent pain |
When flats are still the better answer
Flat pedals remain the better answer if you are learning traffic skills, riding many short errands, walking a lot during rides, carrying children, riding in stop-start city conditions, recovering confidence after a fall, or simply enjoying the bike as it is.
That is not quitting. It is choosing the equipment that fits the ride in front of you. You can come back to clipless pedals later, or never. Plenty of useful riding happens either way.
Your next step
Before buying anything, decide which problem you want clipless pedals to solve. If the answer is “I feel pressured,” stay on flats for now. If the answer is foot security, repeatable foot placement, or curiosity, visit a shop or read your exact pedal manual, choose a compatible shoe-cleat-pedal system, then practise one quiet session before your first road ride.
For the bigger beginner equipment picture, read essential road cycling gear: what you need and what can wait. If you are still building ordinary bike-control confidence first, use braking and cornering with confidence before adding clipless release timing.
Sources and further reading
- Shimano SPD-SL pedals light-action user manual
- Shimano SPD pedals user manual
- Shimano SM-SH56 SPD multi-release cleat
- Shimano: how to install SPD two-hole cleats
- Mornieux et al.: Effects of pedal type and pull-up action during cycling
- r/cycling reader context: the fear of clipless pedals as a beginner
- r/cycling reader context: new to clipless, SPD or SPD-SL for road