Road cycling safety and road positioning
Learn where to ride on the road as a beginner cyclist: visible lane position, parked cars, junctions, bike lanes, signals, lights, and when to stop.
 Field guide / road-cycling-safety-and-road-positioning
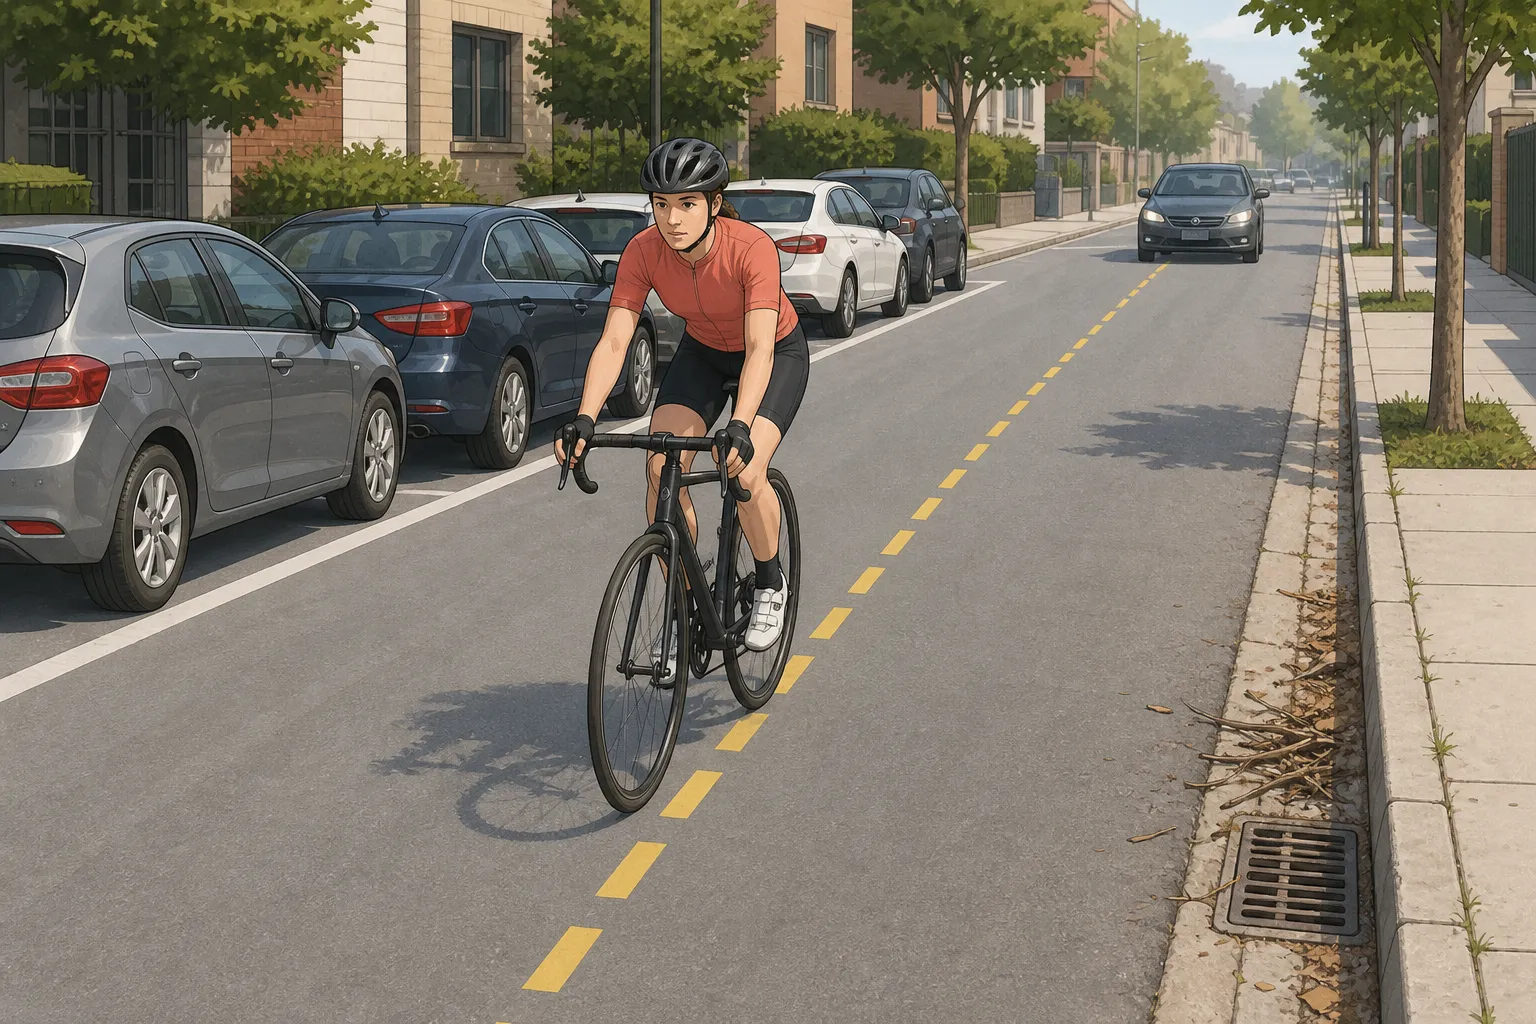
Road cycling safety starts with a boring goal: be legal, visible, predictable, and honest about the road in front of you. Good road position is not always the edge, and it is not always the middle. It is the place that gives you room to ride straight, avoid hazards, communicate early, and be seen where other road users are already looking.
The short answer: ride with traffic where that is the rule, obey signals and signs, scan early, signal before changing position, and hold a steady line. Use bike lanes and quieter routes when they are useful, but do not hug the gutter, door zone, debris, or a narrow lane just to seem polite. If a road asks for more attention than you have, choose a calmer route or stop.
Why this guide exists
Recent beginner questions in cycling communities are rarely about one neat rule. Riders ask whether they should stay close to the white line, whether taking more space is rude, whether a bike lane is always safer, how to handle cars waiting behind them, and what to do when the road edge is full of drains, glass, parked cars, or broken pavement.
That wording matters. The beginner problem is not only “what does the law say?” It is “where can I ride without swerving, hiding, annoying everyone, or putting myself somewhere drivers do not expect?”
This guide gives you a practical decision framework. It does not replace local law, a cycling course, or good route choice. It also does not promise that correct riding makes every road safe. Some roads are badly designed for cycling, and the safest decision may be to avoid them while you build skill.
Safety begins before lane position
Your road position will not save a bike that cannot stop, a route that is far beyond your skill, or a rider whose attention is on a screen. NHTSA bicycle safety guidance puts the foundation plainly: use a bike that fits and works, wear protective and visible equipment, ride with traffic, obey road signs and markings, avoid distraction, and choose routes with less traffic and slower speeds when riding on the road.
Before you worry about the perfect line in the lane, do these first:
- Check tyres, wheels, brakes, chain, lights, and one slow roll with the five-minute pre-ride bike check.
- Choose a route that leaves attention for steering, braking, looking, and signalling with how to plan your first road cycling route.
- Practise looking behind while holding a straight line somewhere quiet.
- Know your local rules for bike lanes, sidewalk riding, lights, reflectors, turns, and passing.
- Decide before the ride what would make you stop, turn around, or walk a section.
If those basics are not in place, make the ride easier. Safety is not only what you do in traffic. It is also refusing to make traffic your first teacher.
The beginner road-position rule
Use this as your starting point:
Ride as far right, or left in left-side-driving countries, as is legal, practical, visible, and safe - not as far as physically possible.
That last part matters. In many places, cyclists are expected to keep to the outside side of the road when moving slower than traffic, but common exceptions include hazards, parked cars, narrow lanes, turn positioning, bike-lane problems, one-way streets, and situations where sharing a lane side by side would be unsafe. The exact wording varies, so check your local driver handbook or transport authority.
NHTSA’s adult bicycle safety guide tells riders to ride with traffic and as far right as is practicable and safe, ride straight instead of swerving, and ride far enough from the curb to avoid parked-car surprises. The League of American Bicyclists teaches the same practical idea: allow room to maneuver around hazards, ride outside the door zone, and use the middle of the lane when a narrow lane cannot be shared safely.
So the beginner question is not “edge or middle?” It is:
- Can drivers and other riders see me where they are already looking?
- Do I have room to avoid drains, potholes, glass, leaves, car doors, and wobbles?
- Am I riding a straight line, or weaving in and out?
- Does this lane actually have enough width for a safe same-lane pass?
- Am I positioned early for the turn or junction I need?
- Would a calmer route remove this decision altogether?
Use the outside third when it is genuinely usable
On many calm roads, the easiest position is somewhere in the outside third of the lane: not glued to the curb, not drifting unpredictably, and not blocking a clearly wide lane without reason. This can leave drivers space to pass when the road is wide enough and conditions are calm.
Use this position when:
- the lane is wide enough for safe passing under local rules;
- the surface near the edge is clean and predictable;
- there are no parked-car doors opening into your path;
- there is no junction, pinch point, island, or turn coming up;
- traffic speed and behavior feel manageable.
Do not turn the outside third into gutter riding. The gutter is where broken glass, wet leaves, drain grates, sand, potholes, and awkward cambers collect. NHTSA specifically tells riders to look ahead for hazards such as potholes, grates, train tracks, pebbles, and wet leaves. If avoiding those hazards means moving out, scan first, signal if needed, and move smoothly.
Take more space when the lane is not safely shareable
“Taking the lane” means riding nearer the middle of the travel lane so a driver behind is discouraged from squeezing past in the same lane. It is not a personality statement. It is a safety tool for specific situations.
The League’s explanation of why bicyclists may ride in the middle of the road describes taking the lane as sometimes the safest position. NHTSA’s adult guide says that if a lane is narrow, it may be safer to take the lane instead of trying to share it with a vehicle.
Consider a more central position when:
- the lane is too narrow for a safe same-lane pass;
- parked cars, doors, or drivers pulling out reduce the usable width;
- a curb, drain, pothole, rough shoulder, gravel, or debris narrows your safe path;
- you are approaching a junction, traffic island, roundabout, bridge, pinch point, or construction zone;
- a bike lane ends, becomes blocked, or places you in a turning conflict;
- you are preparing for a legal turn or lane change;
- descending speed, crosswind, or surface problems mean you need more room.
Move into that position early, not at the last second. Look ahead, look behind, signal if useful and safe, then move on one smooth line. When the narrow or hazardous section ends and it is safe to return to a more outside position, do that deliberately too.
Do not ride in the door zone
Parked cars are not fixed scenery. Doors open, drivers pull out, passengers step into the road, and sight lines disappear between vehicles. A beginner who rides close to parked cars often has only two bad options when a door opens: hit it or swerve left without time to check.
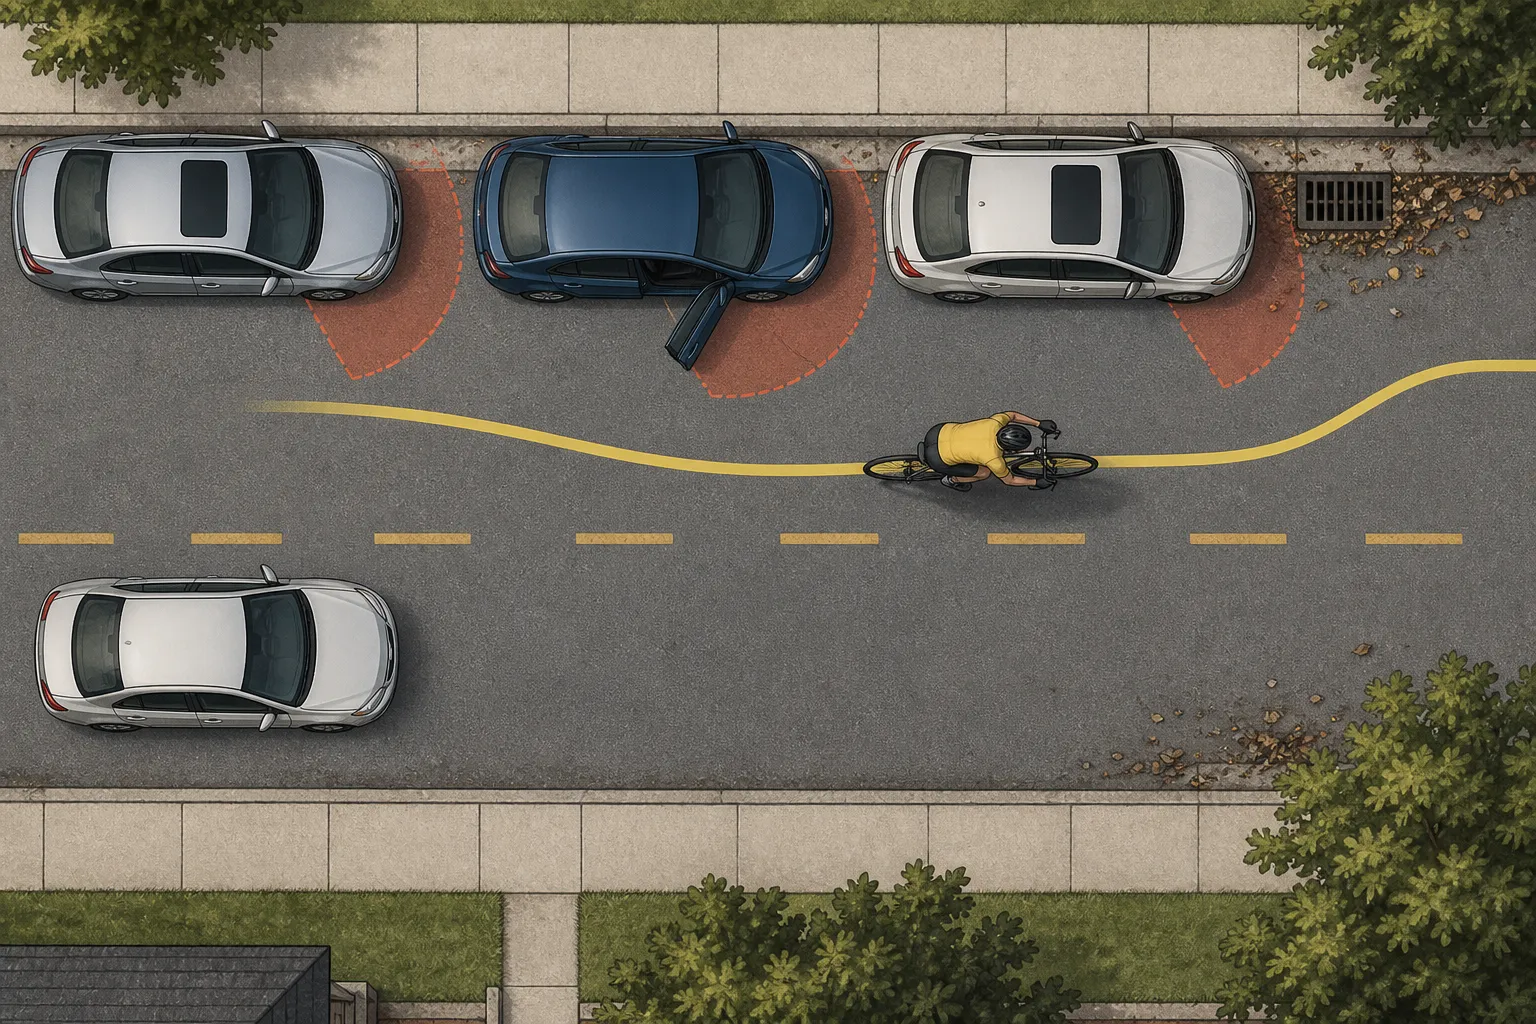
The League’s Ride Better Tips tell riders to ride in a straight line rather than in and out of parked cars, and to stay outside the door zone even if that means riding outside a bike lane. That is useful because a narrow painted bike lane next to parked cars can still place your handlebars or body where a door can reach.
Use this practical approach:
- Look far enough ahead to see whether parked cars form a row.
- Choose one steady line for the whole row instead of diving toward the curb between cars.
- Watch for brake lights, people inside vehicles, front wheels turning, and taxis or rideshare stops.
- Leave more room if the lane is narrow, traffic is fast, or the parked vehicles are large.
- If you cannot pass the row legally and safely, wait, reroute, or dismount rather than threading a gap you do not trust.
Bike lanes are useful, not magic
A good bike lane can reduce traffic stress, make your position obvious, and separate you from faster vehicles. Use it when it is legal, open, and actually serving your route.
But do not switch off your judgment inside a bike lane. Watch for:
- parked-car doors opening into the lane;
- drivers crossing the lane to turn, park, enter driveways, or leave side streets;
- pedestrians stepping from between cars;
- delivery vehicles, bins, construction signs, gravel, glass, or standing water;
- a bike lane that ends just before a stressful junction.
NHTSA notes that sidewalk riding can surprise drivers at driveways and intersections, and that riders should check local law if using sidewalks. The same visibility principle applies to any place where drivers do not expect fast-moving traffic. If a path, sidewalk, or bike lane puts you where turning drivers will not look, slow down and treat each crossing as its own decision.
Position early at junctions
Intersections are where visibility and intention matter most. The League’s lane-positioning guidance says cyclists reduce risk by being visible and positioning themselves clearly, generally in the right-most lane that goes where they are going.
For a beginner, use this sequence before junctions:
- Look ahead for lane arrows, turn-only lanes, parked cars, bus stops, crossings, and traffic speed.
- Look behind before changing your line.
- Signal early enough to be understood.
- Move into the lane or lane position that legally serves your destination.
- Put both hands back on the bars when you need full control.
- Wait if the gap is not obvious.
If your lane becomes a turn-only lane and you are going straight, do not discover that at the stop line. Scan earlier and change position before the junction if it is legal and safe. If you cannot make the move calmly, stop somewhere safe, dismount, and use a pedestrian crossing if local rules allow it.
Be visible without relying on being seen
Visibility is more than bright clothing. It is position, lights, movement, and timing. You want to be seen where other road users are already looking, but you should still ride as if someone may miss you.
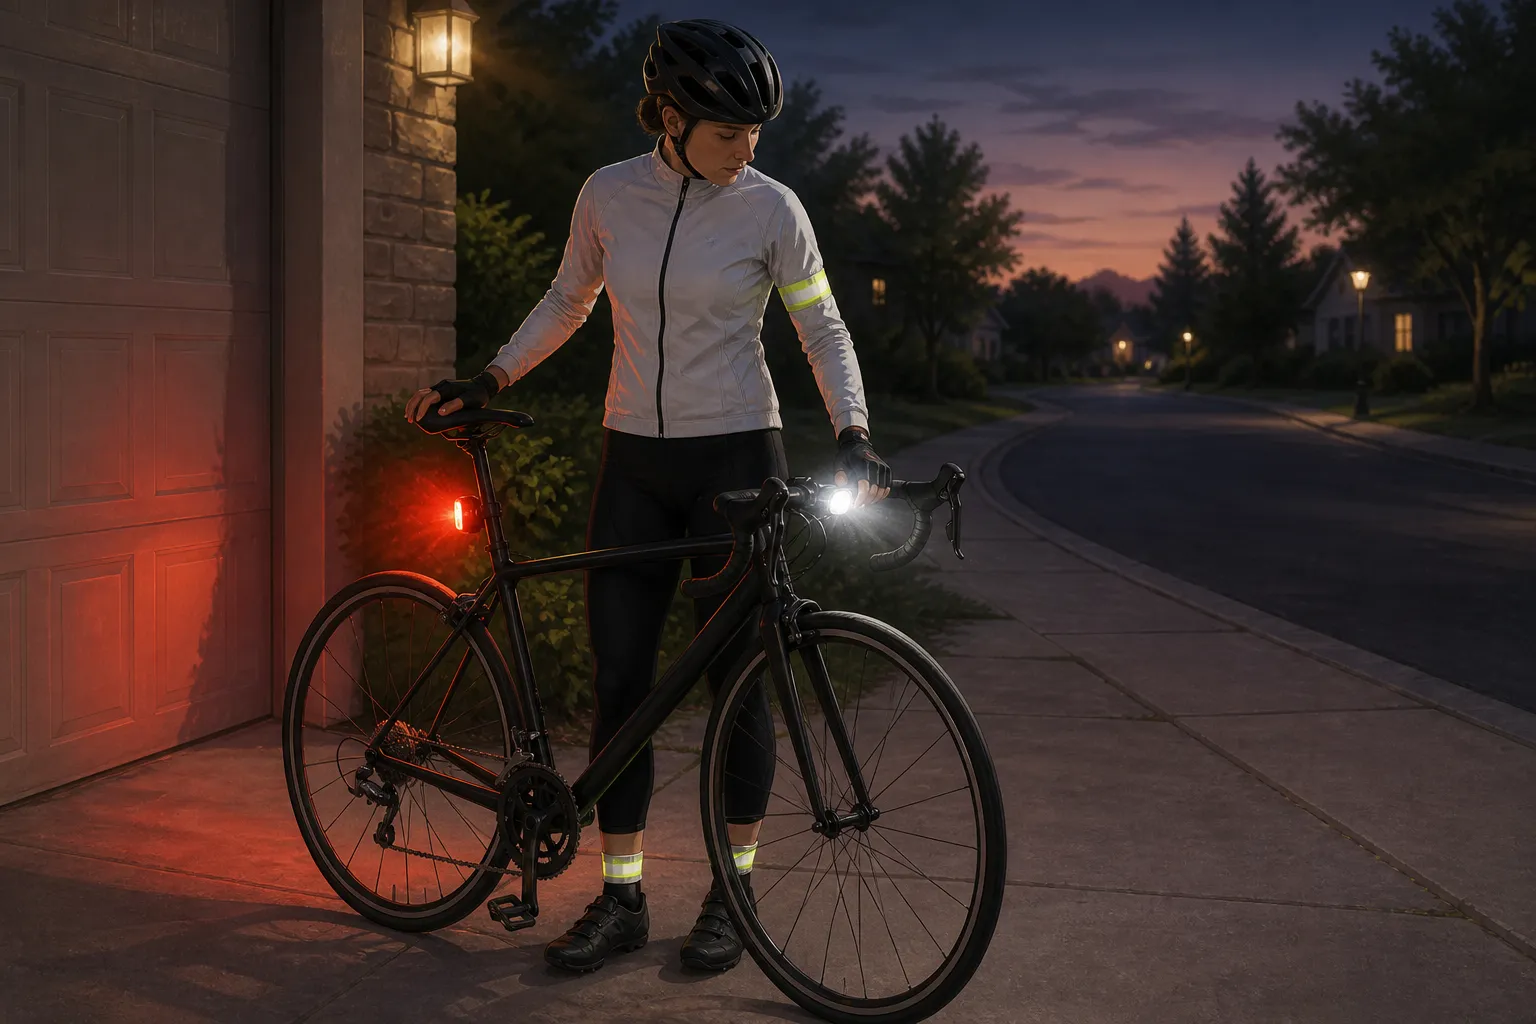
NHTSA recommends protective and visible equipment, including bright clothing in daytime and a white front light, red rear light, and reflectors at night or when visibility is poor. Laws vary on exact light and reflector requirements, but the beginner habit is simple: check the lights before the ride, aim them responsibly, and do not wait for full darkness to become visible.
Good visibility habits include:
- use lights in dawn, dusk, rain, shade, fog, and low sun;
- keep bags and clothing from blocking reflectors or rear lights;
- avoid dark, unpredictable weaving beside parked cars;
- make shoulder checks obvious before moving;
- signal early, then return your hand to the bar for control;
- do not stare at navigation or training screens in traffic.
Use this scenario guide
| Situation | Beginner position | Why |
|---|---|---|
| Clean, quiet, wide lane | Outside third, away from the curb | Leaves room to maneuver while allowing safer passing where lawful |
| Narrow lane with traffic behind | More central lane position | Discourages a squeeze pass where the lane cannot be shared safely |
| Parked cars | Outside the door zone on one steady line | Avoids doors, pull-outs, and repeated swerving |
| Rough shoulder or gutter debris | Move out after scanning | Keeps tyres and steering away from predictable hazards |
| Bike lane beside parked cars | Use only the part outside the door zone, if possible | Paint does not stop doors opening |
| Bike lane blocked ahead | Check behind early, signal, merge smoothly if safe | Last-second swerves surprise everyone |
| Junction where you go straight | Position in the lane that goes straight | Prevents being trapped in a turn-only path |
| Turning across traffic | Plan much earlier than feels necessary | Rushed lane changes create bad choices |
| Fast road that already feels hostile | Choose another route or stop | Good route choice is safety, not avoidance of cycling |
The table is a starting point, not a legal code. Your local rules, road side, traffic speed, lane width, bike-lane design, and personal skill can change the correct answer.
Practise the skill away from pressure
NHTSA recommends building riding skill in a safe environment away from traffic before depending on it in traffic. Treat road positioning as a skill, not just a rule you read once.
Use a quiet street, empty car park, or calm path connection and practise:
- Riding a straight line while looking ahead.
- Looking behind without drifting.
- Briefly signalling while keeping control.
- Moving one metre left or right only after the look.
- Returning both hands to the bars before braking or turning.
- Stopping, restarting, and choosing a new line before a parked-car row or drain.
If any step makes you wobble, stay in the practice setting. Add traffic, speed, hills, rain, darkness, group rides, and clipless pedals only after the basic movement feels boring.
Common beginner mistakes
| Mistake | Why it causes trouble | Better habit |
|---|---|---|
| Hugging the curb to be polite | It can hide you and remove escape room | Leave practical space from the edge |
| Weaving around each parked car | It looks unpredictable from behind | Hold one steady line past the row |
| Taking the lane everywhere | It can create unnecessary conflict where sharing is safe | Use more space for clear reasons |
| Staying in a bad bike lane | Bike lanes can contain doors, debris, and turn conflicts | Treat the lane as useful only when it is actually usable |
| Signalling while wobbling | Communication is not worth losing control | Signal briefly, then regain both hands |
| Changing position late | Drivers and riders get less time to react | Scan and move earlier |
| Looking at a screen in traffic | Attention leaves the road | Stop somewhere safe before checking navigation |
| Letting a honk rush you | Panic creates worse decisions | Hold a predictable line until a safe option appears |
When stopping is the right road skill
Some traffic moments should not be solved while moving. Stop somewhere safe if:
- a lane change needs more confidence than you have;
- traffic is too fast or aggressive for the route;
- you are lost and want to check a map;
- weather, darkness, or glare suddenly changes visibility;
- close passes are making you tense or wobbly;
- you hear a new bike noise or braking feels wrong;
- fatigue makes shoulder checks, signalling, or steering sloppy.
Stopping does not mean the ride failed. It means you kept the decision small enough to make well.
Your next step
Before your next ride, pick one quiet road feature - a parked-car row, a simple junction, or a short bike-lane merge - and practise only the look, signal, move, and reset sequence. Keep the route easy enough that the skill gets your attention.
If the route itself is the stressful part, use how to plan your first road cycling route. If your bike checks are not automatic yet, start with the five-minute pre-ride bike check. For the narrower habit underneath this guide, read predictability beats bravery in traffic.
Sources and further reading
- NHTSA: bicycle safety
- NHTSA: seven smart routes to bicycle safety for adults
- League of American Bicyclists: Ride Better Tips
- League of American Bicyclists: lane positioning and intersections
- League of American Bicyclists: why are bicyclists in the middle of the road?
- Federal Highway Administration: Bikeway Selection Guide
- r/cycling reader context: new rider traffic fear
- r/cycling reader context: taking space and local laws
- r/cycling reader context: radar, awareness, and lane position