Cross-chaining explained: Which gear combinations actually damage your bike?
Understand cross-chaining on a road bike: big-big vs small-small combinations, chain rub, accelerated drivetrain wear, and what to shift instead.
 Field guide / cross-chaining-explained
Before you buy
Check the starter kit first
Print the one-page buying brief for helmet, lights, water, phone, and repair compatibility before comparing upgrades.
Cross-chaining occurs when your bicycle chain runs at a severe diagonal angle between the front chainrings and rear cassette cogs. While an accidental cross-chain will not snap your bike in half or destroy your frame within seconds, persistent riding in extreme diagonal gears causes substantial drivetrain friction, scrapes against derailleur cages, wastes valuable rider watts, and prematurely wears out expensive chains, cassettes, and chainrings.
The short answer: Cross-chaining happens when you pair your biggest front chainring with your largest rear climbing cog (Big-Big) or your smallest front chainring with your smallest rear sprinting cog (Small-Small). Instead of riding in extreme diagonals where the chain grinds against derailleur plates and loses 3–6 watts to lateral friction, shift your front chainring and compensate with two rear clicks. This delivers an identical pedalling ratio with a straight, quiet, and long-lasting chainline.
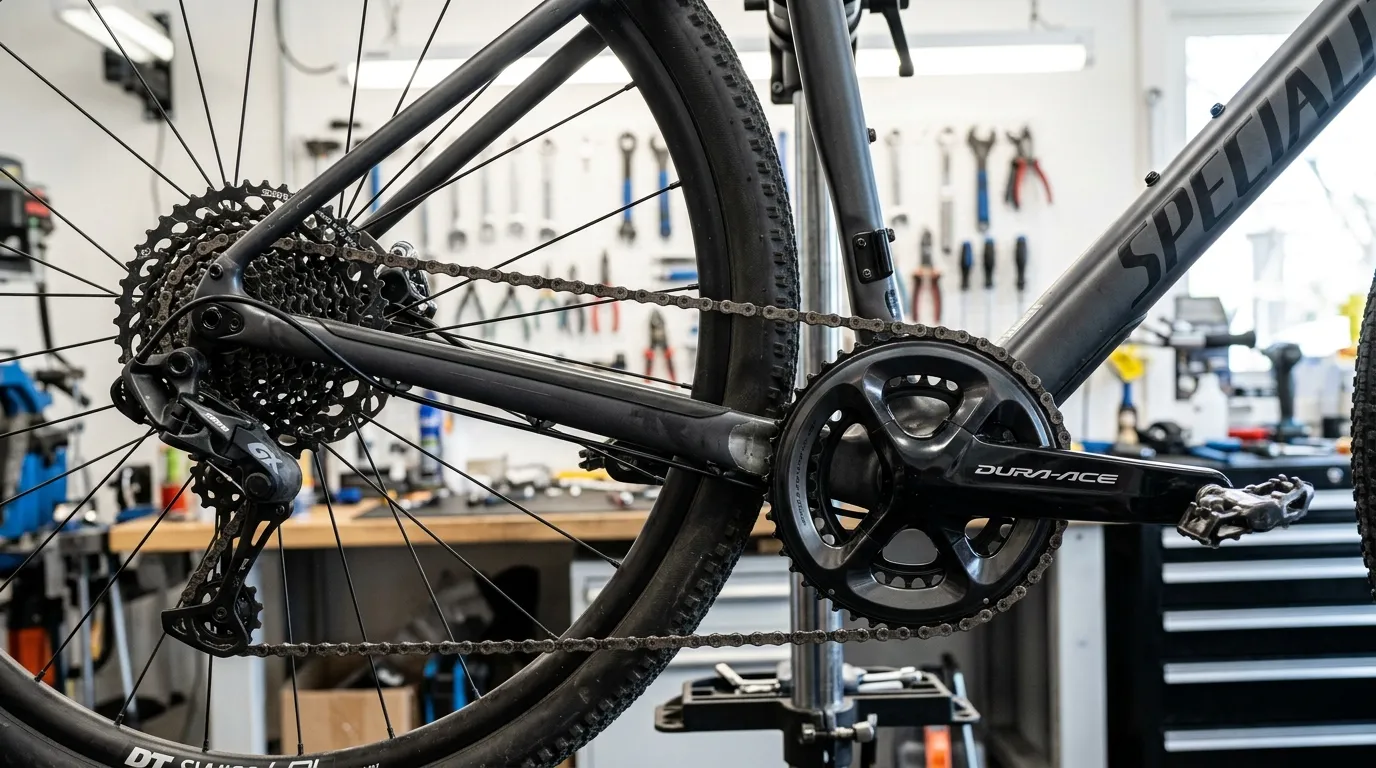
1. What is cross-chaining? The two extreme combinations
On a modern 2x (double chainring) road bicycle, your drivetrain has two chainrings at the pedals (crankset) and between 9 to 12 sprockets on the rear wheel hub (cassette).
A bicycle chain is designed to bend smoothly in one direction: flexing vertically as it wraps around round gears. It is not engineered to bend sideways at sharp lateral angles. Cross-chaining forces the chain into extreme diagonal trajectories.
TOP-DOWN VIEW OF A 2X DRIVETRAIN:

[Front Chainrings]                               [Rear Cassette]
  (Left = Inner)                                 (Left = Large / Climbing)
  (Right = Outer)                                (Right = Small / Fast)

  [ Small Ring ] -------- STRAIGHT (Ideal) ------> [ Inner Cogs ]
  [ Big Ring   ] -------- STRAIGHT (Ideal) ------> [ Outer Cogs ]

  [ Small Ring ] \xxxxxxx SEVERE DIAGONAL xxxxxxx> [ Smallest Cog ] (Small-Small)
  [ Big Ring   ] /xxxxxxx SEVERE DIAGONAL xxxxxxx> [ Largest Cog  ] (Big-Big)
Extreme Combo 1: Big-to-Big (Large Front Ring + Largest Rear Cog)
- What happens mechanically: The chain must wrap around the two largest diameters in the system simultaneously. This stretches the rear derailleur cage forward almost completely flat (horizontal), putting extreme tension on the internal derailleur pivot spring and guide pulleys.
- Why riders end up here: You are cruising fast on the big chainring, encounter a sudden short rise or climb, and keep clicking the rear shifter for easier gears without dropping into the small chainring.
- What it sounds and feels like: A harsh, low-frequency mechanical rumble or buzzing sound, high pedalling drag, and stiff, reluctant shifting response.
Extreme Combo 2: Small-to-Small (Small Front Ring + Smallest Rear Cog)
- What happens mechanically: The chain wraps around the two smallest diameters in the system. The rear derailleur cage retracts all the way backward and upward, leaving the chain slack with minimal spring tension.
- Why riders end up here: You climb over a hill crest in your small chainring and accelerate downhill or on a flat road, clicking into harder rear gears while forgetting to shift the front ring up.
- What it sounds and feels like: Metallic rattling, chain slap against your chainstay over small bumps, and rhythmic scraping where the sagging chain rubs against the inside face of the outer chainring or the front derailleur cage.
2. Does cross-chaining actually damage your bike? Myth vs reality
Cycling folklore often suggests that cross-chaining will instantly snap your chain or shear teeth off your cassette. Let’s separate the myths from the real mechanical consequences.
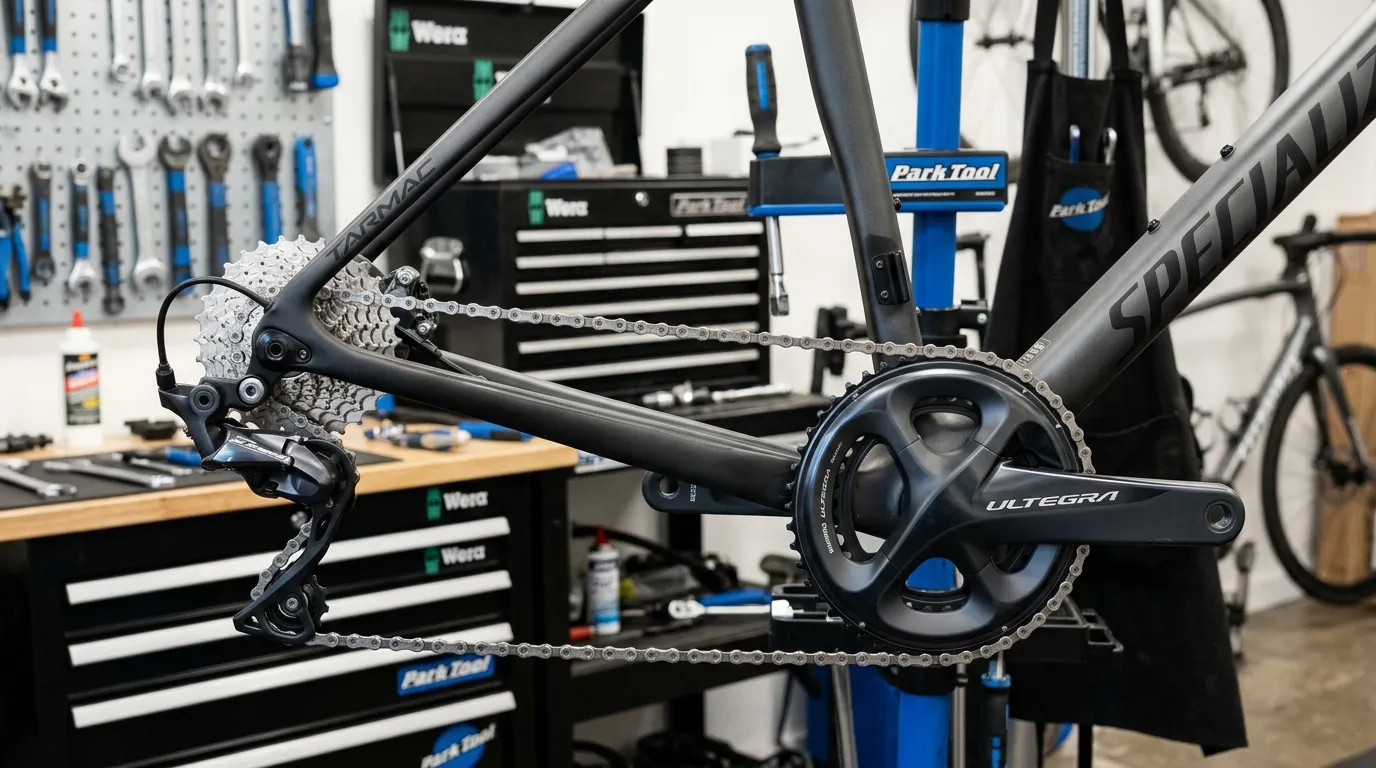
The Myth: “Your bike will instantly break”
If you find yourself in Big-Big for 30 seconds while powering over the top of a short roller, your drivetrain will not spontaneously explode. Modern bicycle chains are manufactured with flexible outer plates and chamfered edges designed to accommodate brief angular misalignment.
The Reality: Four real problems caused by persistent cross-chaining
-
Accelerated Pin and Roller Wear (“Chain Stretch”): When the chain enters a cog at an angle, the lateral force pushes the inner link plates against the pins unevenly. Instead of wearing evenly across the cylindrical bushing surface, the pins develop asymmetrical grooves. This causes the chain to elongate prematurely, requiring replacement after 1,500 km instead of 4,000+ km.
-
Cassette and Chainring Tooth Deformation (“Shark-finning”): Sprocket teeth are designed to receive force straight onto their curved valleys. At diagonal angles, the hardened steel or titanium chain plates grind against the aluminium or steel flanks of the teeth. Over time, the teeth wear into hooked, pointed shapes resembling shark fins, leading to permanent chain skipping under load.
-
Frictional Watt Losses (3 to 6 Watts of Wasted Energy): Independent laboratory tests (including data from Friction Facts and CeramicSpeed) demonstrate that severe cross-chaining increases drivetrain friction by 3 to 6 watts compared to a straight chainline. That is free speed thrown away simply due to chain articulation friction.
-
Derailleur Spring Strain and Dropped Chains: In the Big-Big combo, the rear derailleur’s tension spring is stretched to its mechanical limit. In the Small-Small combo, the slack chain has so little tension that any rough road bump or sudden back-pedal can derail the chain off the front chainring entirely.
3. Visual 2x gear selection guide (Good vs Avoid)
To keep your drivetrain running quietly and smoothly, use this reference table for standard 11-speed and 12-speed 2x road setups:
| Front Chainring | Rear Cassette Cogs (1 = Largest / Easiest, 11/12 = Smallest / Hardest) | Status | What Is Happening |
|---|---|---|---|
| Small Ring (Inner) | Cogs 1–4 (Largest, climbing sprockets) | 🟢 Optimal | Straight chainline, high efficiency, ideal for climbing. |
| Small Ring (Inner) | Cogs 5–8 (Middle sprockets) | 🟢 Good | Slight angle, smooth running, perfect for moderate gradients. |
| Small Ring (Inner) | Cogs 9–10 (Small sprockets) | 🟡 Marginal | Acceptable briefly, but prepare to shift up to the big ring. |
| Small Ring (Inner) | Cogs 11–12 (Smallest sprockets) | 🔴 AVOID (Small-Small) | Severe diagonal, chain slack, rubs front derailleur cage or big ring. |
| Big Ring (Outer) | Cogs 1–2 (Largest sprockets) | 🔴 AVOID (Big-Big) | Severe diagonal, max derailleur tension, harsh grinding noise. |
| Big Ring (Outer) | Cogs 3–4 (Large climbing sprockets) | 🟡 Marginal | Use only for brief crests; otherwise shift down to the small ring. |
| Big Ring (Outer) | Cogs 5–8 (Middle sprockets) | 🟢 Good | Slight angle, ideal for flat cruising and rolling terrain. |
| Big Ring (Outer) | Cogs 9–12 (Smallest, sprinting sprockets) | 🟢 Optimal | Straight chainline, maximum power transfer for descending and sprints. |
4. Gear overlap: Get the same ratio with a straight chainline
Many beginners assume that a “2x11-speed” bike has 22 completely unique, distinct gear options. In reality, because the gear ratios of the big and small chainrings overlap significantly, a 2x11 system delivers roughly 14 to 16 distinct gear ratios.
This overlap is your greatest mechanical advantage: whenever you are tempted to cross-chain, an almost identical gear ratio exists on the other chainring with a straight chainline.
Gear ratio comparison table (50/34T Compact Crankset with 11-32T Cassette):
| Cross-Chained Combination | Ratio | Chainline Quality | Better Straight-Chain Alternative | Ratio | Chainline Quality |
|---|---|---|---|---|---|
| 50T Front × 32T Rear (Big-Big) | 1.56 | 🔴 Extreme angle, high tension | 34T Front × 22T Rear | 1.55 | 🟢 Straight & quiet |
| 50T Front × 28T Rear (Near Big-Big) | 1.79 | 🟡 Heavy angle, noisy | 34T Front × 19T Rear | 1.79 | 🟢 Perfectly centered |
| 34T Front × 11T Rear (Small-Small) | 3.09 | 🔴 Slack chain, cage rub | 50T Front × 16T Rear | 3.13 | 🟢 Perfectly centered |
| 34T Front × 12T Rear (Near Small-Small) | 2.83 | 🟡 Loose tension, angled | 50T Front × 18T Rear | 2.78 | 🟢 Straight & smooth |
As shown above, pedalling 50×32 yields a gear ratio of 1.56, while pedalling 34×22 yields 1.55. Your legs will not feel any difference in resistance—yet shifting to the 34T ring straightens the chain, eliminates noise, and spares your drivetrain from unnecessary wear.
To learn more about basic shifting controls and gear setups, read our complete guide on how to use road bike gears.
5. Front derailleur “Trim” vs true cross-chaining
Beginners often confuse normal chain angle with mechanical malfunction when they hear a slight rubbing sound. Understanding trim solves this mystery.
HOW SHIMANO MECHANICAL TRIM WORKS:

[ Small Ring Low ]  <-- (Trim click) -->  [ Small Ring High / Trim ]
       |                                           |
(For largest climbing cogs)               (For middle cassette cogs)

[ Big Ring Low / Trim ]  <-- (Trim click) -->  [ Big Ring High ]
       |                                           |
(For middle cassette cogs)                (For smallest sprint cogs)
What is a trim click?
On mechanical drop-bar shifters (such as Shimano Tiagra, 105, Ultegra, or mechanical Sora), the left front-derailleur shifter has intermediate micro-clicks known as trim positions:
- When you are in the Small Ring: As you shift across the cassette into smaller middle cogs, the chain angles slightly toward the right and may begin lightly ticking against the outer plate of the front derailleur. Lightly clicking the front shifter lever once moves the derailleur cage 1–2 mm outward without shifting to the big ring, instantly silencing the chain.
- When you are in the Big Ring: As you shift into larger middle cogs, a light inward tap on the release lever tucks the cage 1–2 mm inward, silencing rub against the inner derailleur plate.
Electronic shifting auto-trim
If your bike features electronic shifting (Shimano Di2 or SRAM AXS):
- Shimano Di2: Automatically shifts its front derailleur cage in tiny increments as you move up and down the rear cassette to eliminate chain rub. It also prevents you from shifting into extreme Small-Small combinations via software gear lockouts.
- SRAM AXS & Yaw Derailleurs: SRAM front derailleurs rotate slightly on a specialized angular arc (Yaw technology) to eliminate the need for manual trim clicks entirely.
Key takeaway: Trim is designed to silence mild chain angle in the middle gears. If you are in your two largest or two smallest rear cogs, trim is merely a temporary band-aid—the proper solution is shifting the front chainring.
6. The 2-click compensation shift (How to shift out of cross-chaining)
When you realise you are approaching a cross-chained gear, how do you change chainrings without suddenly ruining your pedalling cadence? Use the classic compensation shift.
Because shifting the front chainring creates a massive jump in gear ratio (roughly a 30–35% change in pedalling resistance), you should simultaneously shift the rear cassette in the opposite direction.
Scenario A: Dropping from Big Ring to Small Ring (Preparing for a hill)
1. Click your left lever to drop the chain to the Small front ring.
2. Immediately click your right lever 2 times into harder (smaller) rear cogs.
3. Result: Your cadence remains identical, the chain straightens, and you have plenty of easier climbing gears in reserve.
Scenario B: Shifting from Small Ring to Big Ring (Accelerating onto a flat/descent)
1. Click your left lever to lift the chain to the Big front ring.
2. Immediately click your right lever 2 times into easier (larger) rear cogs.
3. Result: You avoid hitting a heavy “pedal wall” and accelerate seamlessly onto faster terrain.
Remember the soft-pedal rule
Always ease off 30–40% of your pedal pressure for half a second while shifting chainrings. Front derailleurs do not have guide pulleys; they physically push the high-tension upper span of the chain sideways. Soft-pedalling ensures immediate, quiet gear engagement without dropped chains.
For more detailed climbing and shifting strategies, see our guide on shifting before the hill, not during the struggle.
7. Drivetrain health checklist
Maintaining a healthy chainline is one of several daily habits that keep your road bike running like new. Follow this simple checklist:
- Scan your gear position by feel and sound: Learn to recognize the quiet purr of a straight chainline versus the raspy growl of an extreme diagonal.
- Anticipate climbs early: Shift down to the small chainring 20 metres before the slope begins rather than grinding into Big-Big halfway up.
- Clean and lubricate regularly: A clean chain tolerates slight angular deflection far better than a dry, gritty chain. Follow our step-by-step tutorial on how to clean and lubricate a road bike chain.
- Perform a quick pre-ride inspection: Check gear shifting, brakes, and tyre condition before every single ride with the five-minute pre-ride bike check.
- Set correct tyre pressures: Proper rolling resistance complements smooth gear selection. Calculate your ideal pressure with tyre pressure for beginner road cyclists.
- Check chain elongation periodically: Use an inexpensive chain wear indicator tool every 1,000–1,500 km. Replacing a worn chain at 0.5% elongation saves your expensive cassette and chainrings from premature replacement.
- Review your ride readiness: If you are preparing for your first major outing, run through our first ride checklist.
Your next step
On your next ride, spend 10 minutes on a quiet flat road practicing front-to-rear compensation shifts. Shift from the small ring to the big ring while simultaneously clicking two rear cogs easier, then reverse the sequence.
Once this muscle memory becomes second nature, you will naturally avoid cross-chaining, save your drivetrain from wear, and enjoy a whisper-quiet, efficient ride on any terrain.
If you are still familiarising yourself with the specific components mentioned in this guide, check out road bike anatomy for beginners.
Sources and further reading
- Shimano Inc. (2024). Front and Rear Derailleur Dealer Manuals & Trim Operation Guidelines. Shimano Technical Information Services.
- SRAM LLC. (2023). Road Drivetrain Compatibility, Yaw Front Derailleur Setup & Chainline Engineering.
- CeramicSpeed / Friction Facts. (2021). Drivetrain Efficiency and Friction Losses Across Extreme Chain Angles.
- Park Tool Co. (2024). Calvin’s Tech Corner: Understanding Chainline, Cross-Chaining, and Gear Ratios.
- Sutherland’s Handbook for Bicycle Mechanics (8th Edition). Drivetrain Geometry and Sprocket Wear Dynamics.