When should you replace road bike tyres?
Replace a road bike tyre for visible casing, unsafe cuts or bulges, exhausted wear indicators, or recurring age-related failure—not an arbitrary mileage number.
 Field guide / when-to-replace-road-bike-tyres
Before you buy
Check the starter kit first
Print the one-page buying brief for helmet, lights, water, phone, and repair compatibility before comparing upgrades.
Replace a road bike tyre when its structure or remaining rubber can no longer provide a reliable casing: exposed fabric, a growing sidewall cut, a bulge, a damaged bead, a missing wear indicator, or repeated punctures from a tread worn thin. Do not wait for a universal kilometre or mile limit—there is not one.
The short answer: condition beats distance. Inspect the whole tyre inflated and deflated, follow its maker’s wear indicators, and replace immediately when the casing is compromised.
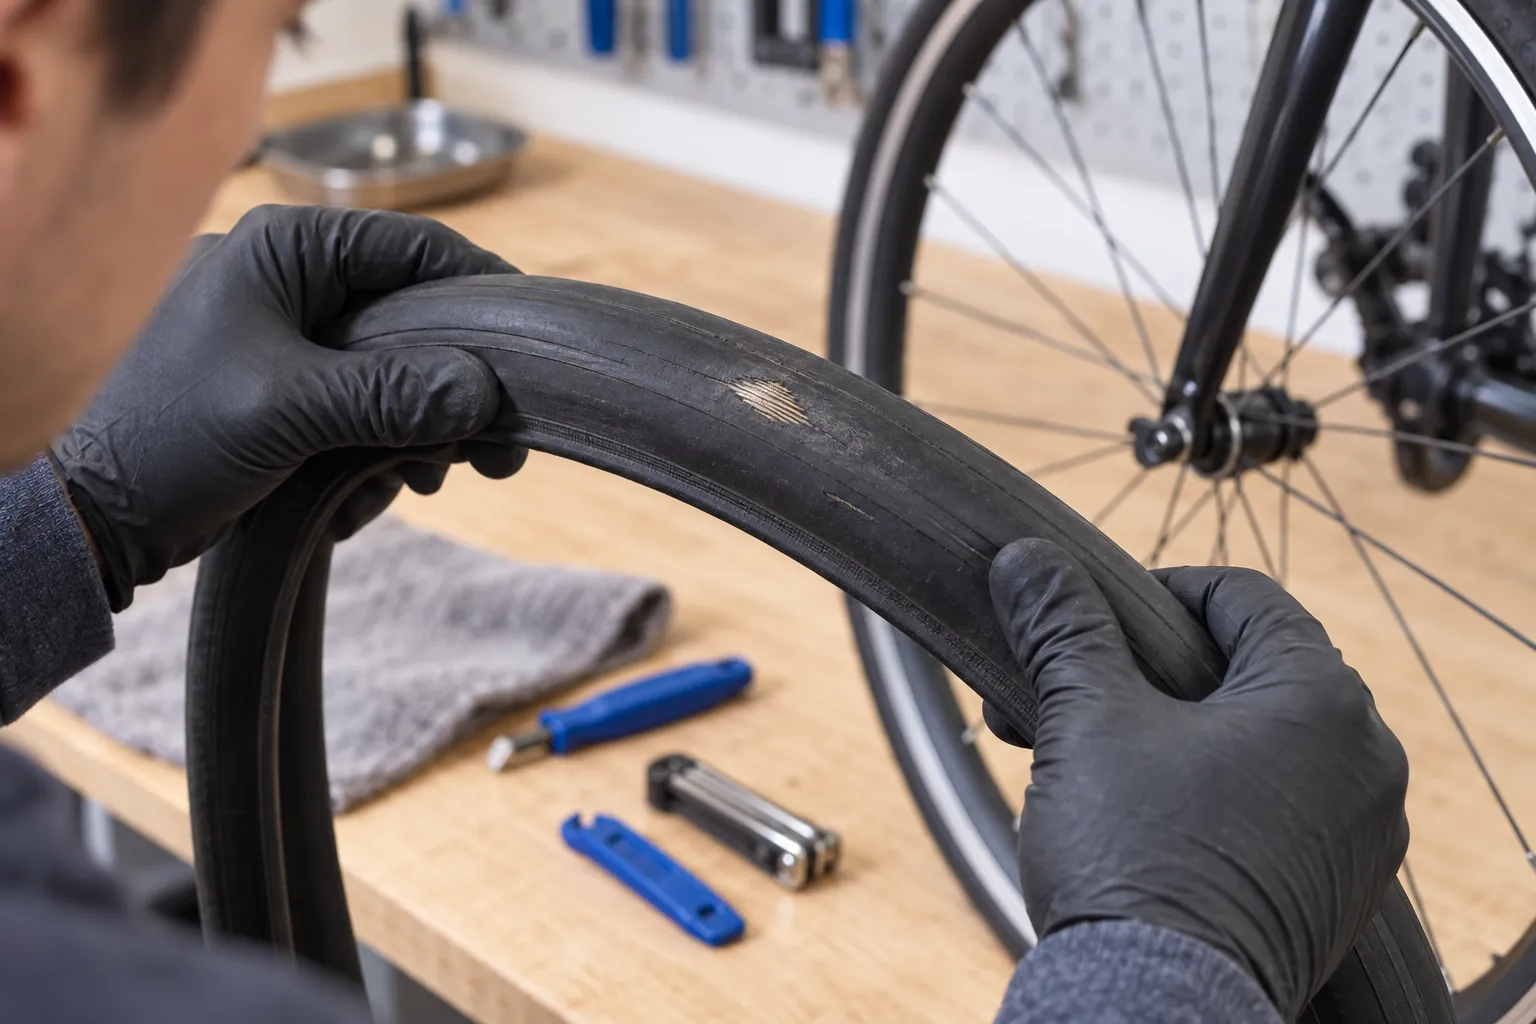
The five replacement signals
A recent rider asking how to know when to change a tyre captured the core problem: distance alone does not account for road surface, load, pressure, rubber compound, braking, storage, or which wheel carries the tyre.
Use these physical signals instead.
1. The wear indicator has disappeared
Some road tyres have small dimples or holes moulded into the centre tread. The sidewall may show a mark pointing to them. When the indicator is no longer visible, replace the tyre according to that manufacturer’s instructions.
Not every tyre has an indicator, and designs differ. Do not mistake a random puncture or mould mark for one. Check the product page or manual for your exact tyre.
2. Casing threads are visible
Rubber covers a woven structural casing. If tan, white, or grey fabric shows through the centre or sidewall, the protective rubber has been worn or cut away. Replace the tyre before riding again.
3. A cut exposes or deforms the casing
Many shallow tread nicks are cosmetic. A cut becomes a replacement concern when it reaches the casing, opens while inflated, creates a local bulge, lets the tube show, or continues growing.
A temporary tyre boot can help you travel carefully to safety after a small casing cut, but it is not a permanent repair for a road tyre used at normal pressure. Read what to do after a puncture with no spare before you need that bailout.
4. The bead is damaged or will not seat consistently
The bead locks the tyre to the rim. Replace a tyre with a cut, kinked, stretched, or exposed bead, or one that repeatedly lifts away from the rim. Do not keep inflating to see whether it fixes itself.
5. Failures are becoming a pattern
A single puncture does not prove the tyre is worn out. Several closely spaced tread punctures can mean the remaining rubber is too thin for your roads—but first rule out one embedded shard, failing rim tape, or an installation pinch. Use our guide to punctures in the same spot to diagnose the pattern.
What normal wear looks like
The rear tyre usually wears faster because it carries more drive load and often more rider weight. Its centre gradually changes from rounded to flatter or squared-off. That shape is a prompt for a close inspection, not automatically an emergency.
Look for:
- Remaining wear indicators, if fitted.
- Plenty of rubber above the casing.
- No local thin patch, bulge, or exposed fabric.
- No cracking that opens when the tyre is flexed.
- A bead that sits evenly around the rim.
Schwalbe’s bicycle-tyre technical information notes that tread wear depends heavily on tyre type, compound, pressure, load, braking, temperature, and riding surface. That variability is why a promised lifespan such as “replace every 3,000 km” can be misleading.
Cuts, cracks, and flat spots: keep or replace?
| What you find | Practical decision |
|---|---|
| Tiny surface nick with no visible casing and no bulge | Remove embedded debris, monitor it, and recheck after inflation. |
| Centre tread looks flatter but wear indicators remain | Continue monitoring more often; mileage alone does not decide. |
| Fabric casing visible anywhere | Replace before riding. |
| Sidewall cut opens or tube is visible | Deflate and replace. |
| Local bubble or bulge | Deflate and replace immediately. |
| Fine surface ageing marks that do not open | Inspect carefully and monitor; storage history and casing condition matter. |
| Deep cracking, stiffness, or cracks that open when flexed | Replace. |
| Repeated flats in different tread locations | Check pressure and debris, then replace if thin tread is the common cause. |
A ten-minute tyre inspection
- Clean the tread. Wipe away dirt so cuts and wear indicators are visible.
- Rotate slowly. Inspect the centre and both shoulders over the full circumference.
- Check the sidewalls. Look on both sides for abrasion, cuts, cracking, and bulges.
- Find the wear indicators. Use the maker’s documentation to identify them.
- Check the bead line while inflated. The moulded line near the rim should remain even all the way around.
- Deflate before flexing. If a cut is uncertain, remove the tyre and gently flex that area under a bright light. Never manipulate an inflated damaged tyre close to your face.
- Inspect the inside. Look for casing damage and embedded debris. Use a cotton ball rather than sweeping quickly with bare fingers; fine wire can cut skin.
Finish by setting an appropriate pressure. The sidewall maximum is a limit, not a recommendation; use tyre pressure for beginner road cyclists as your baseline.
Should you replace both tyres together?
Not automatically. Bicycle tyres often wear at different rates, so a sound front tyre does not need to be discarded because the rear is finished.
If replacing only one, prioritise predictable grip and sound casing condition on the front wheel, because a front-tyre failure is harder to control. Do not move a damaged or questionable tyre forward. If you consider moving an existing front tyre to the rear, do it only when it is fully sound, compatible in size, and permitted by its directional markings and manufacturer guidance.
Replace both when both are aged, cracked, damaged, or at their wear limits. Match the tyre size and confirm your rim and frame clearance; fitting wider tyres to an older road bike covers the checks.
Common mistakes
- Waiting for a bald automotive-style tread. Many slick road tyres begin with little tread pattern; inspect rubber thickness, casing, and maker indicators instead.
- Using puncture count without diagnosis. One hidden wire can puncture multiple new tubes while the tyre still has plenty of life.
- Ignoring the sidewalls. Centre tread is only one part of the structure.
- Trusting age alone. Calendar age matters, but storage, UV, heat, chemicals, and casing condition matter more than a birthday by itself.
- Patching a structural bulge. A boot cannot restore separated or broken casing cords.
Your next step
Clean both tyres, find any manufacturer wear indicators, and photograph each tyre’s current condition. Replace anything with exposed casing, an opening cut, a bulge, bead damage, or unreliable seating. Then add this check to the five-minute pre-ride bike check.