Why your road bike tyre gets punctures in the exact same spot
Find the hidden cause of repeated road bike punctures in the same position: tyre casing debris, spoke hole rim tape failure, pinch flats, and the valve-logo clock method.
 Field guide / repeated-punctures-in-same-spot
Before you buy
Check the starter kit first
Print the one-page buying brief for helmet, lights, water, phone, and repair compatibility before comparing upgrades.
Getting a flat tyre is an annoyance; getting another flat tyre five minutes later in the exact same spot is a diagnostic signal. When a puncture happens repeatedly in the same position along your wheel, it is virtually never random bad luck. The inner tube is merely the victim—the true culprit is still lurking inside your tyre tread, hiding in the rim bed, or being introduced during installation.
The short answer: repeated punctures in the same spot are caused by three things: an invisible micro-wire or glass shard embedded in the tyre casing, displaced or degraded rim tape exposing a sharp spoke hole, or an installation pinch. To fix it permanently, align the tyre logo with your valve stem, map the punctured tube’s hole directly back to that clock position on the wheel, and sweep the inside tyre casing with a cotton ball.
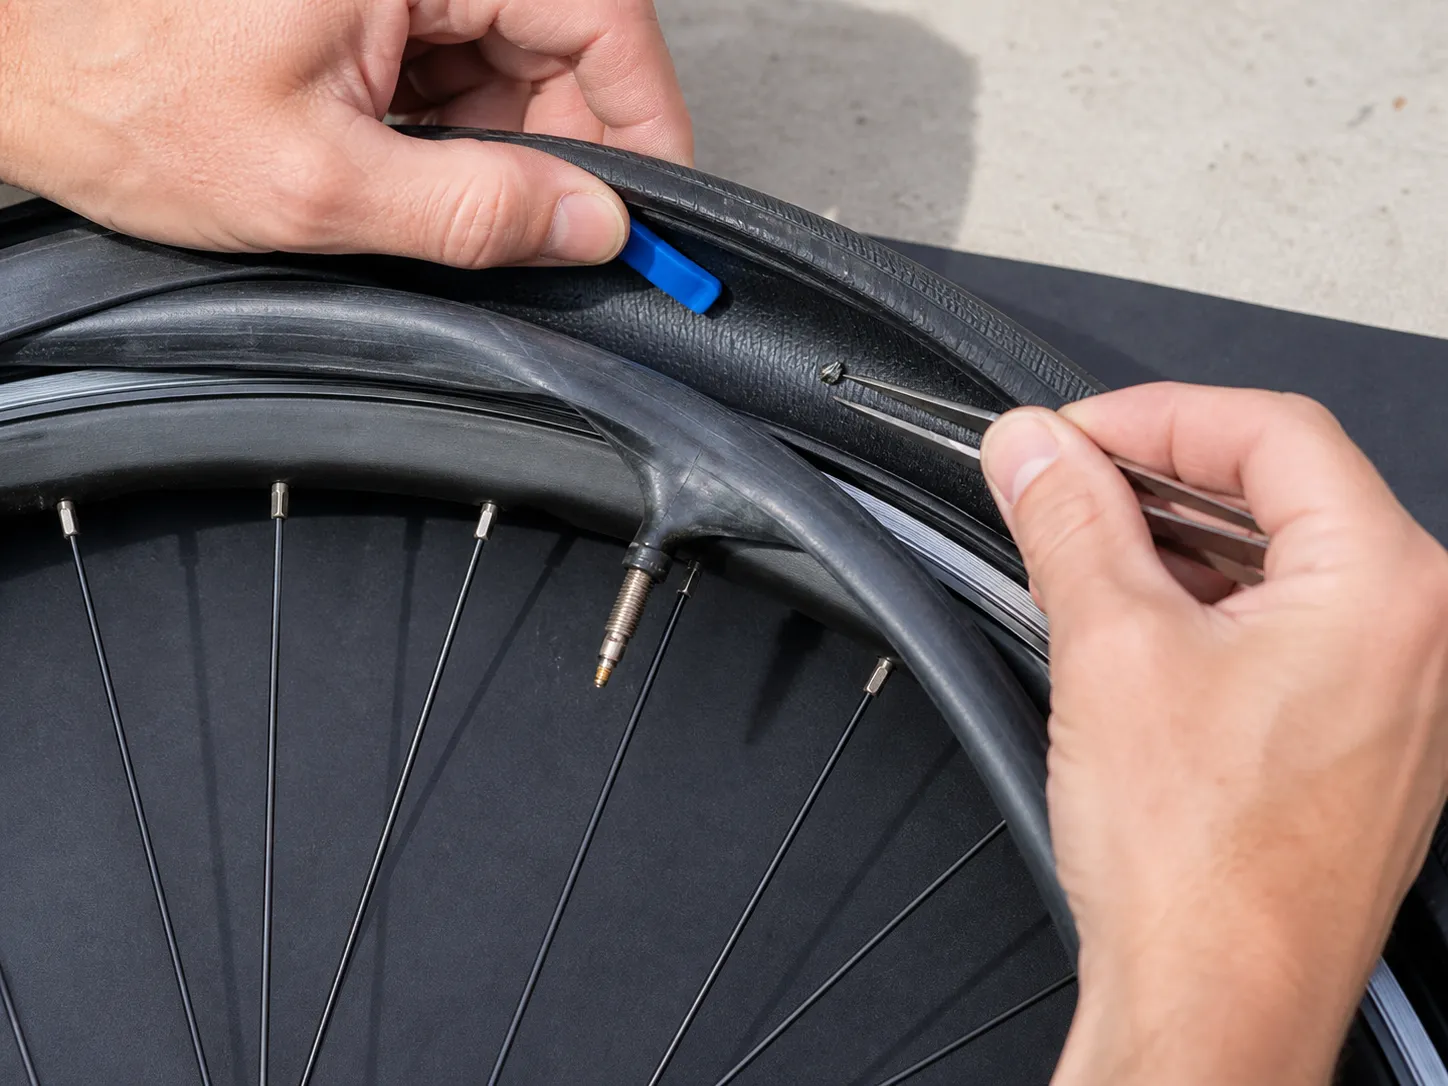
The crime scene: reading the punctured tube
Before throwing away a flat tube or blindly installing a fresh one, treat the damaged tube like physical evidence. Pumping air into the punctured tube off the bike tells you exactly where the problem originated and what kind of hazard caused it.
Fill the tube with enough air to expand slightly, hold it near your cheek or ear to listen for escaping air, or submerge it in a bowl or sink of water to spot the stream of bubbles. Once you locate the hole, examine its position on the tube’s circumference:
| Puncture Location on Tube | Hole Appearance | Probable Culprit | Correct Solution |
|---|---|---|---|
| Outer circumference (tread side) | Single pinhole, slit, or tiny puncture | Thorn, fine glass sliver, or automotive steel wire embedded in tyre | Flex tread outside; sweep inside casing with cotton ball; extract debris with tweezers. |
| Inner circumference (rim side) | Round blowout, cratered split, or oval puncture | Spoke hole exposed by slipped or torn rim tape, or rough spoke nipple | Re-centre, patch, or replace rim tape with high-pressure adhesive tape. |
| Side wall / flank | Two parallel vertical slits (“snakebite”) | Pinch flat from under-inflation hitting a pothole, or tube trapped under bead | Inflate to correct baseline pressure; ensure tube is not pinched under tyre bead. |
| Base of valve stem | Tear at the rubber-to-metal joint | Valve inserted crooked, aggressive pump wiggling, or tyre slippage from low pressure | Align valve perpendicular to rim; use pump with flexible hose; maintain proper pressure. |
If you have already had to use your roadside spare and are unsure how to manage the swap smoothly, review how to fix a puncture on a road bike and rehearse the mechanical sequence in practise one puncture repair at home.
The 3 hidden root causes of recurring punctures
When a puncture recurs in the exact same physical location, it almost always boils down to one of these three root causes.
1. The invisible needle: micro-debris embedded in the tyre casing
The most common cause of identical repeat punctures is a foreign object trapped inside the tyre carcass.
Road shoulders collect steel belt wires shed from disintegrating automotive radial tyres. These steel filaments are as thin as sewing needles and barely 2 to 4 millimetres long. When they pierce a road tyre, they can break off flush with the outer rubber.
When you take the wheel off and examine it without weight on the bike, the rubber closes over the wire, making it completely invisible from the outside. But as soon as you reinstall a tube, inflate to 70–90 psi, and sit your body weight on the saddle, the tyre compresses against the tarmac. The hidden steel wire flexes inward, piercing the new tube in the identical spot within your first hundred metres.
       ROAD TYRE CASING (Cross-Section)
       ================================
         [ Outer Rubber Tread ]
            \                /
             \   [WIRE]     /   <-- Wire sits flush or hidden inside casing
       --------------------------------
         [ Inner Fabric Plies ]
                  |
                  v  Under rider weight and road pressure,
                     the wire tip pushes inward:
       ================================
         [ INNER TUBE RUBBER ]  <-- REPEATED PUNCTURE HERE!
       ================================
Fine flint shards and dried hawthorn tips behave the exact same way. If you do not extract the tip from the casing, no number of new tubes will solve the problem.
2. The inside job: damaged rim tape and exposed spoke holes
If the puncture hole is on the inside of the inner tube (the surface resting against the metal rim bed rather than against the tyre tread), the tyre is innocent. The fault lies in your rim bed.
Modern double-wall road wheels have spoke access holes drilled through the inner rim bed. Under 60 to 100 psi of pressure, an inner tube tries to expand into every microscopic crevice. Rim tape (or a rim strip) acts as a high-pressure barrier bridging those holes.
If the rim tape is:
- Too narrow: It can slide to one side, exposing the razor-sharp edge of a spoke hole.
- Cheap rubber: Thin, stretchy rubber bands deteriorate, stretch under pressure, and allow the tube to balloon into the spoke hole until it pops with a loud “bang”.
- Cracked or brittle: Hard plastic rim strips can split around the valve hole or spoke eyelets, creating knife-like plastic burrs.
When rim tape fails over a single spoke hole, every replacement tube will blow out directly over that specific hole within minutes of reaching full riding pressure.
3. The installation trap: repeated pinch flats and tyre lever nicks
A pinch flat—often called a “snakebite” because it leaves two distinct parallel slit marks on the tube—happens when the inner tube is violently compressed between the wheel rim and a hard obstacle like a pothole, cattle grid, or railway track. If you repeatedly ride with low tyre pressure, you will pinch the tube in similar road conditions. Check your baseline pressures with tyre pressure for beginner road cyclists and remember that maximum tyre pressure is not a target.
However, recurring pinch flats can also happen on a workstand without hitting a single bump:
- Trapped tube bead: When wrestling a tight road tyre bead over the rim hook, the inner tube can get pinched between the tyre bead and the rim edge. When you inflate the tyre, the pinched fold bursts. If you always start and finish your tyre mounting at the exact same spot (such as opposite the valve), you may repeatedly pinch the tube in that exact position.
- Aggressive tyre lever use: Using tyre levers to force the final section of tyre onto the rim frequently bites the tube against the rim edge.
The Valve-Logo Clock Alignment method
The secret to diagnosing mysterious repeat punctures is maintaining orientation. When you pull a tube and tyre apart without tracking how they sat together, you lose the map of the crime scene.
Professional mechanics use the Valve-Logo Alignment rule: always mount your tyre so the manufacturer’s brand logo is centered directly over the Presta valve stem.
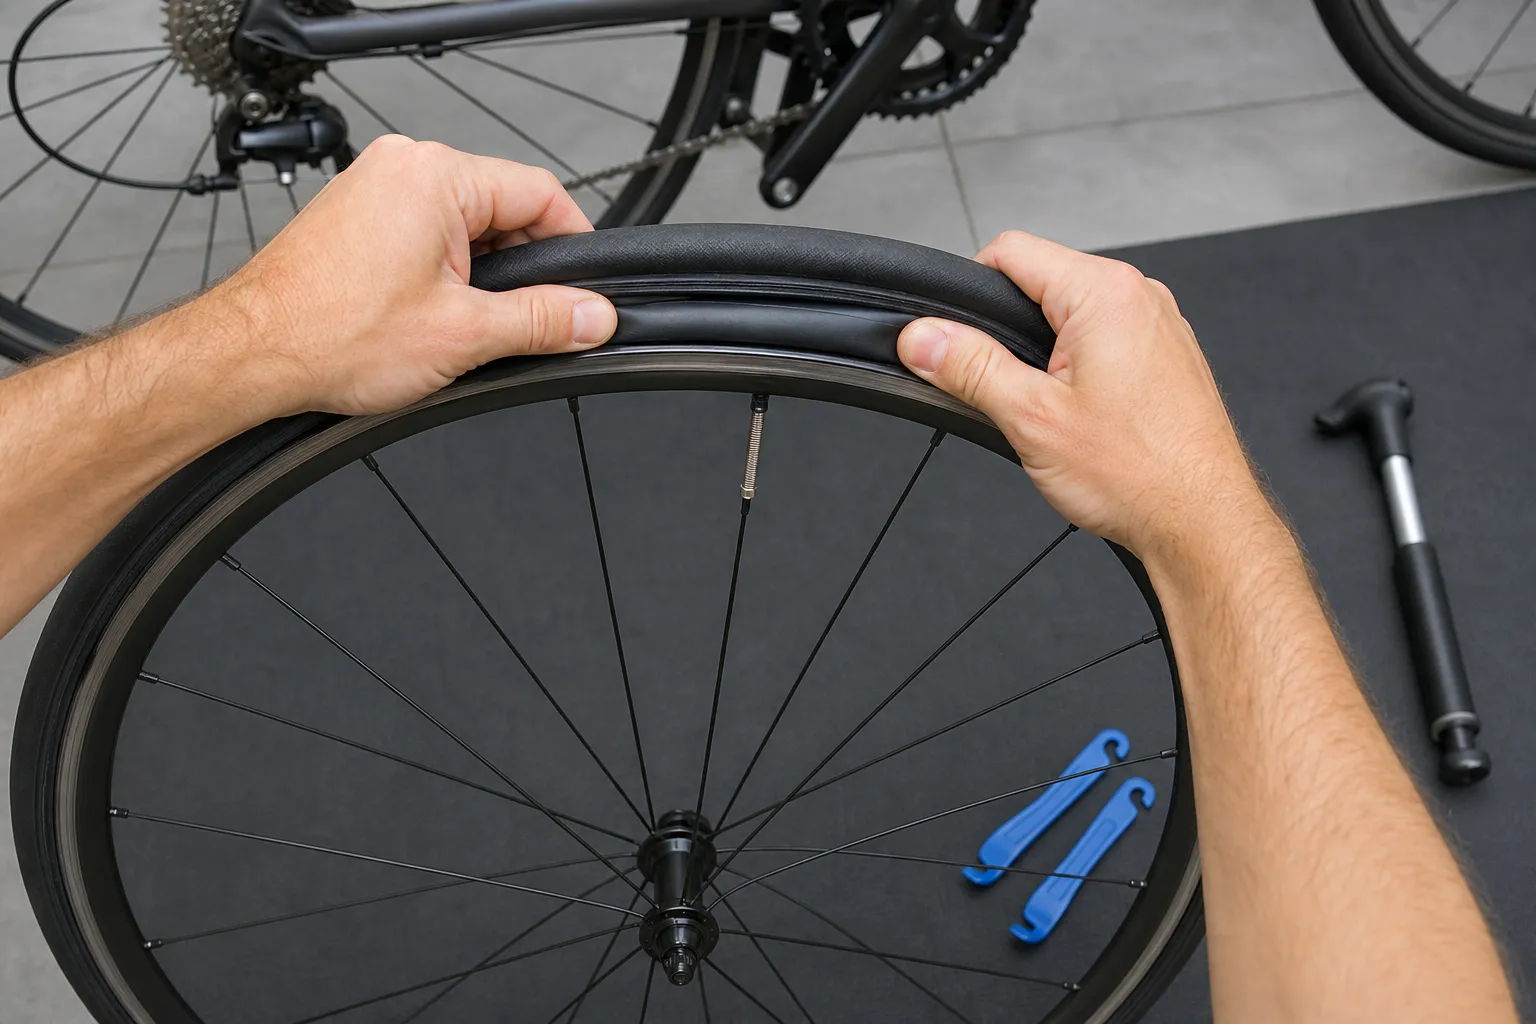
How to use the clock method to pinpoint debris
- Keep the orientation when removing the tube: Before pulling the valve out of the rim, note which side of the bike the tube’s valve was facing (drive side vs non-drive side).
- Find the leak: Inflate the tube and locate the puncture hole.
- Overlay the tube on the wheel: Place the valve stem of the punctured tube back at the rim’s valve hole (or hold it against the wheel in the exact position it sat inside the tyre).
- Follow the clock position: Look at where the puncture hole sits on the tube. If the leak is 25 centimetres clockwise from the valve (roughly at the “2 o’clock” position), look directly at the 2 o’clock position on your tyre and rim.
- Inspect both sides: Look at the tyre tread at 2 o’clock for outer cuts, check the inner casing at 2 o’clock for wires, and check the rim tape at 2 o’clock for exposed spoke holes.
By narrowing your search from the entire 2.1-metre circumference of a road wheel down to a 5-centimetre target zone, you find micro-debris in seconds instead of guessing.
The Cotton Ball Sweep: find shards without slicing fingers
[!WARNING] Never drag bare fingertips quickly along the inside of a tyre casing. Automotive radial tyre steel wires and razor-sharp bottle glass splinters can slice deep into skin before your reflexes can react.
Visual inspection alone often fails because rubber naturally contracts around thin debris. Running a bare hand inside is hazardous. The safest and most effective workshop technique is the Cotton Ball Sweep:
                       COTTON BALL SWEEP
                       =================

     [ Inside of Tyre Casing ]
     ---------------------------------------------
            \                 /
             \      [!]      /  <-- Tiny wire tip (invisible to eye)
     ---------------------------------------------
              O  <-- Drag a dry cotton ball lightly
             /|\     along the inner casing fabric.
              |

     ==> Cotton fibers snag instantly on microscopic points,
         leaving visible white strands exactly where the shard hides.
How to perform the sweep:
- Wipe away loose grit: Use a dry, clean rag to gently clear loose dust from the inside tyre casing.
- Drag the cotton ball: Take a regular cosmetic cotton ball or a clean, fibrous cotton pad. Lightly drag it along the inside casing around the entire circumference in one direction, then reverse and drag in the opposite direction (some angled thorns only snag in one direction).
- Look for snagged white fibers: The instant the cotton catches on a wire tip or glass shard, it pulls away strands of white cotton, flagging the hazard like a neon sign.
- Flex the tyre from the outside: Once flagged, bend the tyre inside out at that exact spot and pinch the rubber. This opens the cut in the tread.
- Extract the culprit: Use fine tweezers, a needle, or small needle-nose pliers to pry the shard or wire out from the outside or inside. Ensure the entire fragment is removed, not just broken off.
If you don’t have a cotton ball on the roadside, a piece of soft paper tissue or a clean microfiber cloth can work as a substitute snagging tool.
How to inspect and fix the rim bed
If your tube inspection showed holes on the inner (rim-facing) circumference, shift your focus entirely to the rim.
       DOUBLE-WALL RIM BED (Cross-Section)
       ===================================
       [Rim Hook]                     [Rim Hook]
          |                              |
          |   [ RIM TAPE / STRIP ]       |  <-- Must cover edge-to-edge
          |==============================|
          |      ( Spoke Hole )          |  <-- Sharp drilled alloy edge
          |          |    |              |
          +----------+    +--------------+
1. Spoke hole inspection
- Check tape alignment: The rim tape must sit perfectly centered in the channel. If it has slipped sideways, exposing even a 0.5 mm sliver of a spoke hole, the tube will blow out against that edge.
- Check for dimpling: Press your thumb along the tape over each spoke hole. If the tape has deep, sagging depressions into the holes, the tape material has fatigued and lost its structural strength. Replace it immediately.
- Look for spoke intrusion: Ensure no spoke nipple or spoke end is protruding up through the double wall into the rim bed.
2. Valve hole deburring
- Examine the metal hole where the Presta valve enters the rim. Rims with sharp metal burrs from manufacturing can slice the rubber base of the valve stem.
- Smooth any sharp edges with a small round file or fine-grit sandpaper, or install a purpose-made adhesive valve reinforcement patch.
3. Upgrading your rim tape
- Replace cheap stretchy rubber bands with reinforced adhesive tubeless tape (such as Stan’s, Muc-Off, or Schwalbe) or heavy-duty cloth rim tape (like Velox).
- Ensure the tape width exactly matches the internal rim width. Tape that is 2 mm too narrow will wander; tape that is too wide will creep up the rim sidewall and prevent the tyre bead from seating correctly.
Installation checklist: avoiding the repeat flat
Once you have identified and removed the root cause, follow this mounting routine to avoid introducing an installation flat:
- Add a breath of air to the tube: Never install a completely flat, floppy tube. Inflate it just enough so it holds a round, soft doughnut shape without stretching. This prevents it from twisting or dropping under the tyre bead.
- Push the valve into the tyre first: After inserting the valve through the rim hole and putting the tube inside, push the valve stem upward into the tyre cavity before seating the bead. This ensures the thick reinforced rubber base of the valve does not get pinched under the bead.
- Seat the tyre by hand: Mount the second bead starting opposite the valve and working symmetrically toward the valve stem. Push the bead into the central sunken channel of the rim to create slack.
- Avoid tyre levers for installation: Try to roll the final stubborn section of bead over the rim using the heels of your palms. If you must use a tyre lever, use plastic levers with shallow hooks and take tiny, careful bites.
- The 360-degree bead check: Before inflating, push the tyre bead inward with your fingers all the way around both sides of the wheel. Confirm that you see only bare rim tape and metal—no inner tube rubber should be visible beneath the bead wire.
- Inflate incrementally: Pump to 20 psi, stop, spin the wheel, and verify that the tyre’s witness line is uniform all the way around the rim. Only then inflate to your target operating pressure.
Diagnostic troubleshooting summary
| Symptom | What It Means | What To Do |
|---|---|---|
| Flat happens 100 m into every ride | Sharp wire embedded in tyre tread, flexing under load | Perform the Cotton Ball Sweep at the mapped clock position; extract with tweezers. |
| Loud gunshot “pop” while pumping to pressure | Tube herniated into an uncovered spoke hole or trapped under bead | Inspect rim tape for gaps or tears; check bead seating before inflating past 30 psi. |
| Slow leak (goes flat overnight) in same spot | Microscopic thorn tip or ultra-fine glass shard penetrating intermittently | Bend tyre tread inside-out in bright light; squeeze rubber to reveal micro-cracks. |
| Valve stem torn at base | Valve inserted at an angle, or riding on flat tyre causing tyre creep | Install valve perpendicular to rim; never ride a flat tyre even for short distances. |
| Two small vertical slits on tube side | Pinch flat from under-inflation or tyre lever pinch | Increase tyre pressure slightly; seat tyre beads using palm technique rather than levers. |
Your next step
Before your next ride, pull off the wheel that suffered the repeat puncture and perform a dedicated 10-minute audit:
- Locate the puncture hole on the old tube and use the Valve-Logo Clock Alignment method to isolate the suspect zone.
- Run a Cotton Ball Sweep over that 10-centimetre tyre section in both directions and remove any embedded wire or glass.
- Inspect the rim bed over that same section to confirm the rim tape completely covers all spoke drillings without sagging.
- Finish your pre-ride preparation with the five-minute pre-ride bike check and verify tyre pressures before rolling out.
Taking ten minutes to find the true root cause ends the frustration of repeat flats and restores total confidence in your road bike.
Sources and further reading
- Park Tool: Inner Tube & Tyre Repair Diagnosis
- Continental Bicycle Tyres: Mounting and Care Instructions
- Schwalbe: Flatless Technology and Puncture Causes
- REI Co-op: How to Fix a Flat Bike Tire
- SIKLIST: How to fix a puncture on a road bike
- SIKLIST: Practise one puncture repair at home
- SIKLIST: Tyre pressure for beginner road cyclists