Can you keep road cycling outdoors through winter?
Use surface, visibility, control, route, and bailout checks to decide when a winter road ride is reasonable and when to change the plan.
 Field guide / road-cycling-through-winter
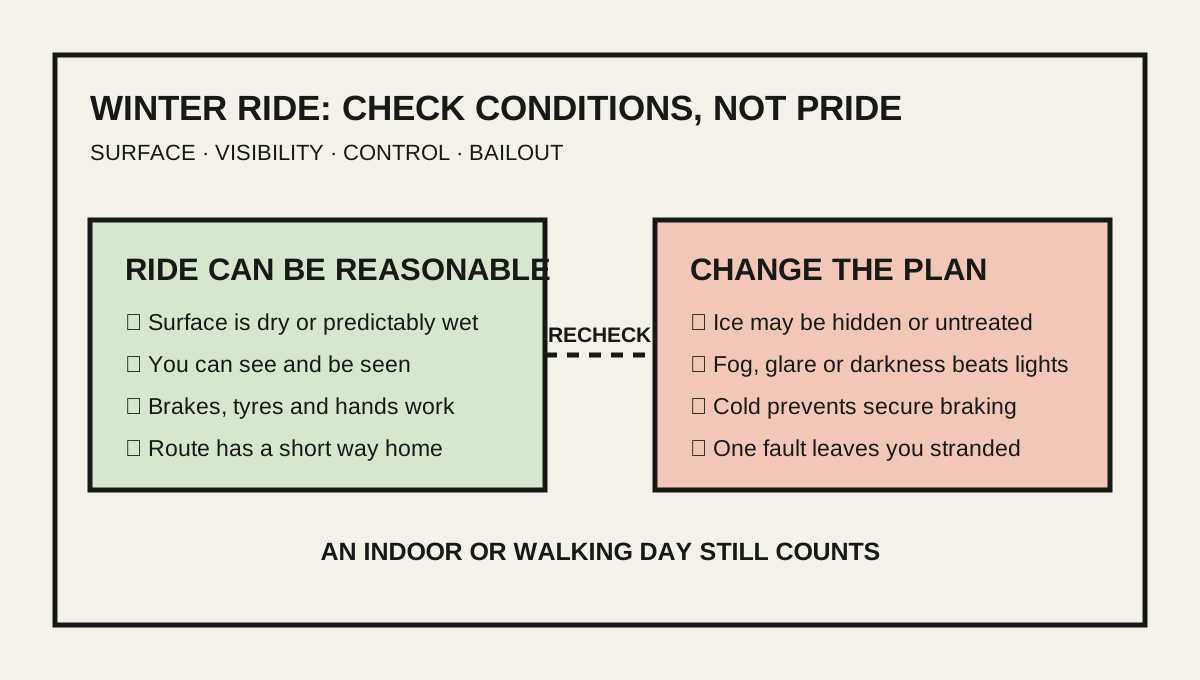
Yes, many road cyclists can ride outdoors through part or all of winter. The useful question is not “How cold is too cold?” It is whether today’s surface, visibility, controls, route, clothing, and bailout plan leave enough margin for a predictable ride.
The short answer: dry cold can be manageable with suitable layers, working lights, reliable brakes, and a short route. Possible ice, freezing rain, dense fog, hands too cold to brake securely, or a route with no easy exit should change the plan. There is no prize for discovering the limit after leaving home.
Winter does not create one universal cutoff
A highly discussed r/cycling question asked whether winter riding is inherently miserable or whether layering is enough. The answers varied because “winter” can mean a dry 5°C afternoon, a dark commute in freezing rain, or an untreated road after thaw and refreeze. Those are different decisions.
Your workable limit depends on:
- whether water can freeze on the route;
- daylight, fog, precipitation, glare, and street lighting;
- wind chill and whether your hands retain full braking and shifting control;
- tyre type, width, condition, and appropriate pressure;
- traffic speed and the availability of separated or quieter alternatives;
- ride length and how quickly you can reach warmth if something fails;
- your experience with wet, dirty, and low-grip surfaces.
Do not borrow another rider’s temperature threshold. A number without the conditions around it is not a safety rule.
Make a four-part go or no-go check
1. Surface: what could be under the tyre?
Look beyond the air temperature. Check the overnight low, recent rain or snow, forecast precipitation, and whether your route is treated. Bridges, shaded corners, low points, metal covers, painted markings, wet leaves, and quiet paths can remain slippery after more exposed roads look clear.
The Met Office’s winter cycling guidance advises avoiding untreated routes when it is icy and acknowledges that extreme conditions can justify not riding. If ice is plausible but you cannot identify where it will be, a different route or indoor session is the controlled choice.
Studded tyres can add grip on ice when fitted and used as their maker directs. They do not make every manoeuvre safe, shorten every stop, or improve a following driver’s grip. Wider ordinary tyres are not a substitute for studs on actual ice.
2. Visibility: can you see and be recognised early?
Winter darkness arrives earlier, while rain, road spray, fog, and low sun can reduce contrast even in daytime. Use a white front light and red rear light that meet your local rules. Choose a steady front beam when you need to see an unlit road, aim it so it does not dazzle others, and carry enough battery for delays.
NHTSA notes that active lighting improves detection, while local laws vary. The UK Highway Code, for example, requires specified lights and reflectors at night. Check the rules where you ride rather than copying another country’s setup.
Visibility is not solved by buying the brightest lamp. If fog reflects the beam back at you, glare hides the surface, or traffic cannot reasonably detect you in time, shorten or delay the ride.
3. Control: can you operate the bicycle normally?
Cold hands must still be able to reach and squeeze both brake levers, change gear, and steer without a death grip. Clothing must not obscure lights or become caught in the drivetrain. Shoes must let you release from the pedals and put a foot down securely.
Before leaving, test:
- Both brakes with gloved hands from your normal hand position.
- Shifting without removing your grip from the controls.
- A shoulder check while holding a straight line.
- Whether your glasses remain clear enough to read the surface.
- Whether layers permit normal breathing and movement.
If thick gloves make the levers hard to reach, change the glove or bike setup before the ride. Our cold-hands guide treats brake access as the constraint, not a reason to tolerate numb fingers.
4. Consequence: what happens after one small problem?
A puncture that is merely annoying in summer can become a cold exposure problem during a long roadside repair. Plan a route with short loops, populated roads, train or bus options where bicycles are allowed, and an easy turn toward home.
Carry the normal road-bike saddle-bag kit, a charged phone, identification, and one additional warm layer for an unplanned stop. Tell someone the route when remoteness or weather increases the consequence of delay.
Change how you ride, not only what you wear
Begin with a shorter ride than your summer default. Brake earlier and progressively, keep the bicycle more upright through uncertain corners, and avoid abrupt steering or hard acceleration on paint, metal, leaves, or grit.
Leave more following distance. A driver behind may also need longer to stop, and road spray can obscure both of you. Choose predictable lines around puddles and debris instead of last-second swerves.
If conditions worsen, shorten the loop before your hands, attention, or body temperature deteriorate. Turning home while everything still works is good route management.
Our rain-riding guide covers braking and cornering technique in more detail. Ice is a different surface; do not treat rain skills as proof that an icy route is rideable.
Prepare the bicycle for winter wear
Winter roads can add water, grit, and salt to the bike. Before the season:
- inspect tyres for cuts, wear, and embedded debris;
- confirm both brakes work strongly and release fully;
- fit full-length mudguards where clearance and local group rules permit;
- make both lights easy to remove and recharge;
- lubricate the chain with a product suited to the conditions;
- check exposed fasteners and frame areas for developing corrosion;
- keep a simple cleaning routine ready for salty or gritty rides.
Do not fit a wider tyre, mudguard, or accessory without checking frame, fork, brake, and toe clearance. The five-minute pre-ride check becomes more important, not less, when the bike is consistently dirty.
After a salty ride, follow the bike maker’s cleaning instructions, rinse contamination without forcing water into bearings, dry the bicycle, and lubricate the chain as needed. See road-bike care after rain for the basic sequence.
Build three versions of the day
Decide before dressing:
| Conditions | Useful plan |
|---|---|
| Dry, visible, controllable | Short outdoor loop with an easy return |
| Wet but above freezing, good visibility | Flatter route, lower speed, earlier braking |
| Ice possible or visibility poor | Delay, choose a treated alternative, or ride indoors |
| Severe wind, freezing rain, or no safe route | Non-riding day or indoor substitute |
An indoor ride, walk, or strength session is not a failure of commitment. It is the backup that keeps one hazardous day from deciding the whole winter. Use the minimum winter training week to preserve consistency without forcing outdoor mileage.
Your next step
Choose one 30–45 minute winter loop close to home. Mark shaded sections, bridges, untreated paths, busy junctions, and bailout points. Before every winter ride, check surface, visibility, control, and consequence. If one category fails, change the route or the session before leaving.
Sources and further reading
- Met Office: how to cycle in winter
- NHTSA: active bicycle lighting and detection
- UK Highway Code: rules for cyclists, including lighting and visibility
- r/cycling discussion: is winter riding that bad? — used as an editorial demand signal; personal temperature limits were not treated as safety evidence.