How to tell if your road bike chain is worn (without expensive tools)
Measure road bike chain stretch at home using a standard 12-inch ruler or the front chainring lift test to save your cassette and chainrings from premature wear.
 Field guide / how-to-check-road-bike-chain-wear
You do not need a specialized workshop tool or an expensive digital gauge to find out if your road bike chain is worn out. A standard 12-inch ruler or a 10-second pull on the front chainring will tell you exactly when your chain has reached the end of its working life—well before it damages your cassette and chainrings.
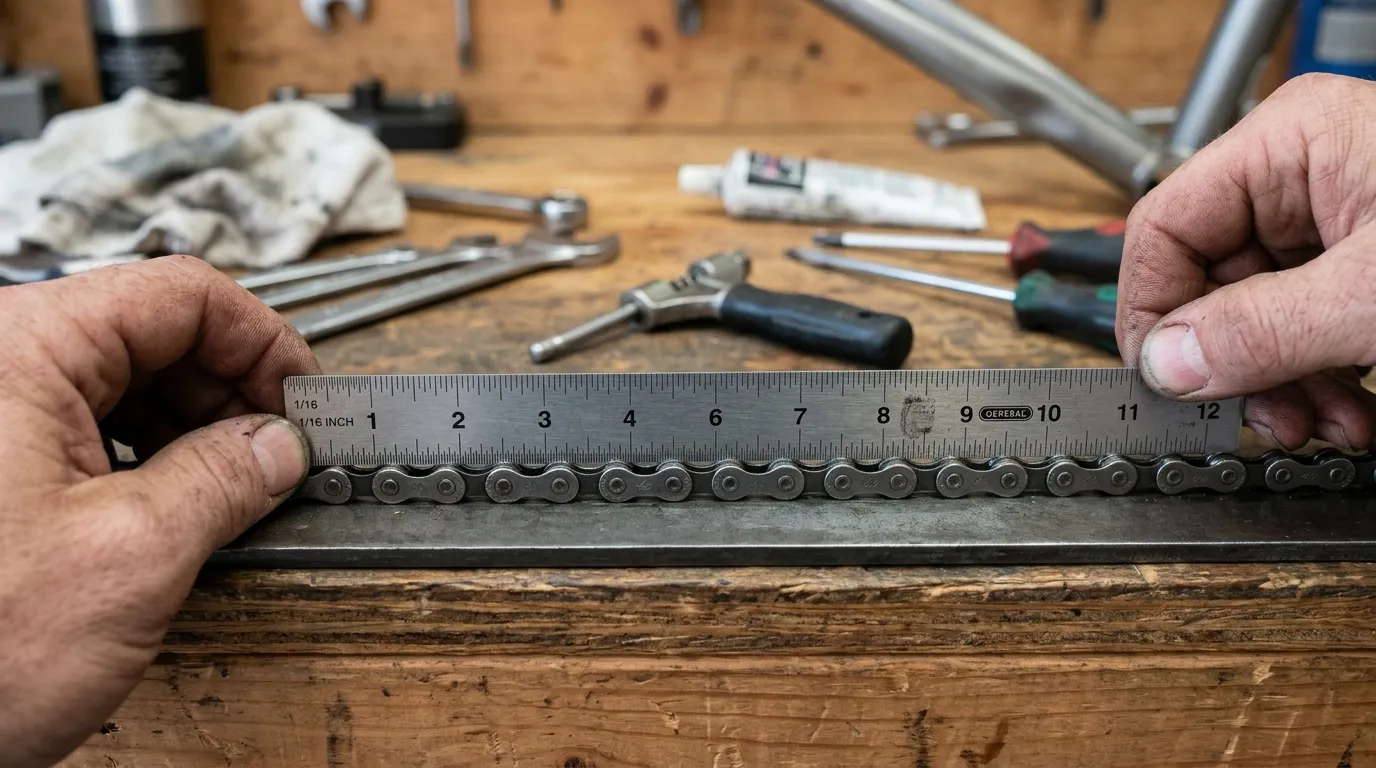
The short answer: measure 12 complete links (24 half-links) on the taut upper run of your chain using a standard ruler. A new chain measures exactly 12 inches from pin center to pin center. If the 12th pin center sits at 12 1/16 inches (0.5% wear), replace the chain if you ride an 11- or 12-speed drivetrain. If it reaches 12 1/8 inches (0.75% to 1.0% wear), replace it on 8-, 9-, or 10-speed bikes. Replacing a $25–$40 chain on time lets your $100–$200 cassette survive through three to four chains instead of wearing out together.
What chain “stretch” actually is (and isn’t)
Cyclists talk about “chain stretch,” which makes many beginners imagine that pedal power physically stretches the steel side plates like elastic bands. In reality, steel side plates do not lengthen under normal riding loads.
What actually happens is internal wear. A bicycle chain is composed of interlocking outer plates, inner plates, pins, and rollers. As you ride, road grit, dust, and metal particles enter the microscopic spaces between the link pins and the internal bushings or inner plate sleeves. Every pedal stroke creates high-pressure friction that slowly grinds away tiny fractions of a millimetre from each pin and sleeve.
Because every link wears down by a fraction of a hair’s width, the cumulative distance between each pin center increases across the entire length of the chain. This expanded pin-to-pin spacing is what mechanics call chain elongation—or “chain stretch.”
A standard, brand-new bicycle chain has a pitch of exactly 0.5 inches (12.7 mm) per half-link (from one pin center to the next). Twelve complete links—meaning 12 inner links and 12 outer links paired together—measure precisely 12.0 inches (304.8 mm) when new. Measuring how far past the 12-inch mark that 12th pin has migrated tells you the exact percentage of wear on your drivetrain.
Drivetrain economics: why a $30 chain saves a $150 cassette
Your bicycle drivetrain is an interconnected wear system. The teeth on your rear cassette cogs and front chainrings are machined to mesh perfectly with a chain whose pins are spaced exactly 0.5 inches apart.
When your chain is fresh:
- The chain rollers drop fully into the curved valleys (troughs) between each gear tooth.
- Pedaling force is distributed evenly across multiple teeth simultaneously.
- Shifting is crisp, silent, and instantaneous.
When the chain elongates past 0.5% to 0.75%:
- The elongated chain pitch no longer matches the spacing of the gear teeth.
- Instead of nesting deep in the valleys, the chain rollers ride higher up on the sloping face of the gear teeth.
- Under heavy pedaling load, the misaligned rollers grind away the metal of the sprocket teeth, carving them into hooked, asymmetrical shapes commonly referred to as “shark fins.”
New Cassette Cog Profile:          Worn "Shark-Fin" Cog Profile:
      /\      /\                        /|      /|
     /  \    /  \                      / |     / |
    /____\  /____\                    /__|    /__|
(Even load distribution)      (Chain slips off steep ramps)
If you monitor your chain and replace it as soon as it reaches 0.5% wear (for modern 11-, 12-, or 13-speed systems) or 0.75% wear (for 8-, 9-, or 10-speed systems), the gear teeth on your cassette remain unworn. A brand-new chain will immediately drop into the existing cassette with zero skipping.
Under this preventive schedule, one cassette typically lasts through 3 to 4 chain replacements, and chainrings can last for tens of thousands of kilometres.
Conversely, if you ride a worn chain past 1.0% elongation, the chain and cassette wear together into a matched set. The moment you finally install a new chain, its shorter, correct pitch will not seat on the carved-out cog teeth. The first time you stand up on a steep hill or sprint, the chain will violently slip over the tops of the teeth under load. At that point, you are forced to buy both a new chain and a new cassette (and potentially new chainrings), turning a routine $30 service into a $150 to $300 overhaul.
Method 1: The 12-inch ruler test (step-by-step)
The 12-inch ruler test is universally recognized by master mechanics and engineering standards (such as ISO and DIN bicycle chain tolerances) as one of the most accurate ways to measure true pin-to-pin pitch wear.
What you need:
- A rigid 12-inch (or 30 cm) metal or stiff plastic ruler with clear 1/16-inch (or 1 mm) increments.
- A clean rag to wipe grime off the pins you are inspecting.
- A stable bike resting on the floor, in a workstand, or against a wall.
Step 1: Shift and tension the chain
Shift your bike into the large front chainring and a middle or small rear cog. This positions the chain on the outermost sprockets, giving you a long, unobstructed straight run of chain across the top span between the chainring and the cassette.
Gently apply forward pressure to the pedal with your hand or foot to pull the top run of chain taut. You do not need extreme force—just enough tension so there is zero sag in the chain links.
Step 2: Align the zero mark
Wipe the top run of the chain clean with your rag so the link pins are clearly visible. Place the ruler flat against the outer side plates of the taut upper chain span.
Align the 0" (zero-inch) mark of your ruler precisely over the exact center of one chain link pin.
Step 3: Count and inspect the 12th link pin
Keeping the zero mark pinned in place, look along the ruler to the 12" (twelve-inch) mark.
Because each link (one inner pair + one outer pair) is 1.0 inch long when new, exactly 12 full links should span to the 12-inch mark. Look closely at where the center of that 12th pin sits relative to the 12-inch line on your ruler.
Reading your ruler results:
| Ruler Measurement | Elongation (%) | Condition & Recommended Action |
|---|---|---|
| Exactly 12“ (304.8 mm) | 0.0% | Brand new: Chain is fresh with no measurable wear. |
| 12“ to 12 1/16“ (< 306.3 mm) | < 0.5% | Good condition: Chain is healthy. Keep riding and maintain regular lubrication. |
| 12 1/16“ (~306.3 mm) | 0.5% | Replace now for 11/12/13-speed: Modern narrow chains must be swapped here. Cassette is completely unharmed. |
| 12 1/16“ to 12 1/8“ (~306.3–307.1 mm) | 0.75% | Replace now for 8/9/10-speed: Wider chains should be swapped now. 11/12-speed chains are overdue. |
| 12 1/8“ or past (≥ 307.8 mm) | ≥ 1.0% | Severe wear: The chain has worn into cassette cogs. Installing a new chain will likely slip; be prepared to replace cassette too. |
Metric conversion tip: If using a metric ruler, measure across 24 half-links (12 full links). A new chain is 304.8 mm. At 306.3 mm (+1.5 mm), the chain has reached 0.5% wear. At 307.1 mm (+2.3 mm), it has reached 0.75% wear. At 307.8 mm (+3.0 mm), it has reached 1.0% wear.
Method 2: The front chainring lift test (the 10-second check)
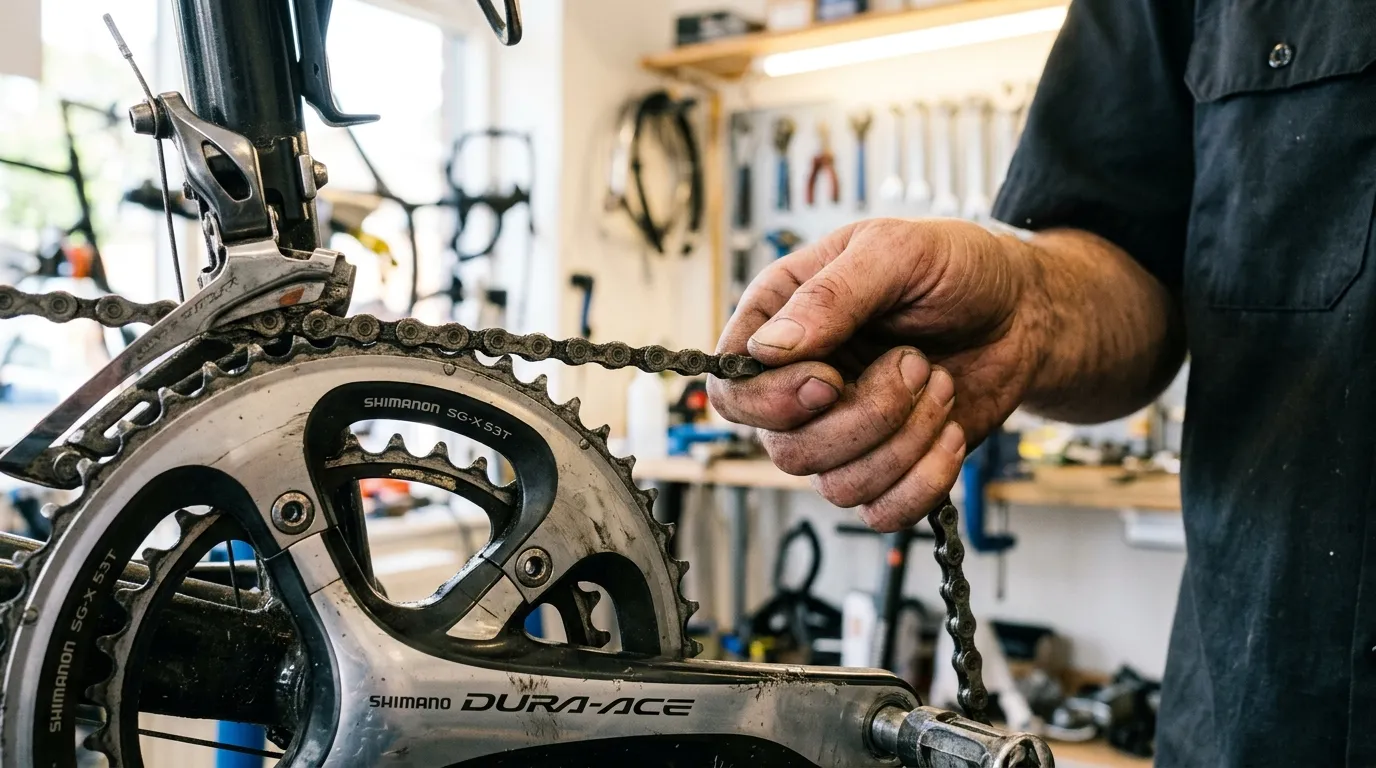
If you are away from home, out on a ride, or inspecting a used road bike without a ruler in your pocket, the chainring lift test provides a quick, zero-tool visual confirmation of chain condition.
How to do the lift test:
- Shift the bike into the large front chainring and a small rear sprocket.
- Ensure the bike is stationary and hands are clear of any moving parts.
- Pinch a single chain link at the 3 o’clock position on the front chainring—the point furthest forward toward the front wheel where the chain wraps around the teeth.
- Pull the chain firmly straight forward, away from the chainring teeth.
Interpreting what you see:
- Tight and minimal movement (healthy chain): On a new or low-mileage chain, you will barely be able to lift the chain at all. The rollers stay nestled snugly at the root of the chainring teeth with no visible gap.
- Moderate lift (partial wear): You can lift the chain slightly, revealing the top tip of one or two teeth. The chain is entering its mid-life wear phase; verify it with a ruler soon.
- Large gap showing daylight (severe wear): If you can lift the chain enough to see daylight under the rollers or expose half of a chainring tooth’s height, the chain is heavily elongated. Stop riding aggressively and measure with a ruler immediately.
While the lift test does not give you an exact 0.5% or 0.75% decimal readout, it is a foolproof way to catch a dangerously worn drivetrain before your next long weekend ride.
Ruler test vs dedicated chain checker tools
You may have seen chain checker tools at your local bike shop (such as the Park Tool CC-3.2, CC-4, Shimano TL-CN42, or Pedro’s Chain Checker) and wondered if a $15–$30 tool is mandatory.
Here is the technical difference between how tools and rulers work:
1. Two-prong drop-in gauges (e.g., Park Tool CC-3.2)
These simple metal gauges insert one hooked prong into a link and drop a second prong into a link further down the chain.
- Advantage: Fast, takes 3 seconds.
- Limitation: Because the two prongs push against the chain rollers in opposite directions, the gauge measures roller internal clearance (slop) on both ends in addition to true pin-to-pin pitch stretch. This can cause the tool to indicate 0.5% or 0.75% wear slightly earlier than actual pin wear warrants, prompting you to discard a chain that still had a few hundred kilometres left.
2. Three-prong / isolating gauges (e.g., Park Tool CC-4, Shimano TL-CN42)
These advanced gauges use three contact points or a tensioning arm to isolate roller wear from pin wear, pushing all rollers in the same direction.
- Advantage: Highly precise, accurate on modern 11-, 12-, and 13-speed chains.
- Limitation: Costs $20–$35 and is dedicated to one single job.
3. The 12-inch ruler
A metal ruler measures strictly across the outer pin centers over a 12-inch span, completely bypassing the rollers.
- Advantage: Zero extra cost, physically cannot give a false reading from roller slop, measures true ISO chain pitch.
- Limitation: Requires careful line-of-sight alignment and steady hands to read 1/16-inch increments accurately.
For everyday beginner maintenance, a good ruler or a quality isolating chain checker will both serve you excellently. The key is measuring consistently rather than waiting for shifting problems to appear.
Warning signs: symptoms your chain is already past due
Do not wait for your drivetrain to show severe physical symptoms before checking chain wear. However, if your bike exhibits any of the following behaviours, check your chain immediately:
- Skipping under hard pedal pressure: You shift into gear, everything feels quiet while spinning easily on flat ground, but the moment you stand up on a 7% climb or accelerate from a stop light, the chain loudly “clunks” and slips forward half a rotation. This is the classic symptom of an elongated chain slipping over hooked cassette teeth.
- Sluggish, hesitant shifting: Even after adjusting cable tension or derailleur alignment, shifting between smaller rear cogs feels vague, slow, or hangs up between gears.
- Chain suck: When shifting down from the big chainring to the small chainring, the bottom run of the chain clings to the big chainring teeth and gets pulled upward into the chainstay, jamming the drivetrain.
- Gritty, excessive drivetrain noise: A worn chain with loose internal tolerances rattles and chatters against the derailleur pulleys and cog gates even when freshly lubricated.
If you are experiencing gear shifting confusion or want to ensure your shifting habits are not straining your drivetrain, review our companion guide on how to use road bike gears.
How to prolong chain life between measurements
Chain wear is not solely a function of distance; it depends heavily on contamination and riding environment. A road bike chain ridden in dry, clean conditions and cleaned regularly can last 4,000 to 6,000 km (2,500 to 3,700 miles), whereas a chain ridden through wet grit without cleaning can wear out in under 1,500 km (900 miles).
Follow these three habits to maximize chain lifespan:
- Clean before lubricating: Never drip fresh oil on top of a black, gritty chain. Wet oil binds to road sand, creating a liquid grinding paste that accelerates pin wear. Follow the complete sequence in how to clean and lubricate a road bike chain.
- Avoid over-lubricating: After applying lubricant to each roller, allow it to penetrate, then thoroughly wipe the outside plates dry. Lubricant is only useful on the inside surfaces of the rollers and pins; oil on the outside plates simply attracts grit. See more chain lubricant is not better.
- Avoid extreme cross-chaining: Riding in the big chainring and biggest rear cog (or small chainring and smallest rear cog) bends the chain at an aggressive lateral angle. This side-loading increases friction on the inner plate edges and accelerates wear.
- Make chain inspection part of your routine: Integrate a quick look at your drivetrain during the five-minute pre-ride bike check before every ride, and do a formal ruler measurement once a month or every 500 km.
Common beginner mistakes
| Mistake | Why it causes problems | Better habit |
|---|---|---|
| Waiting for the chain to skip before replacing it | By the time a chain skips under load, it has already ruined the cassette cogs | Measure wear regularly with a ruler or tool and replace at 0.5%–0.75% |
| Measuring chain wear on a slack chain | A sagging chain sags between pins, giving a falsely short length reading | Tension the upper chain span with gentle forward pedal pressure |
| Measuring only 2 or 3 links | Pitch wear is microscopic per link; measuring a short span makes 0.5% wear impossible to see with the naked eye | Always measure across a full 12-inch (12 complete links / 24 pins) span |
| Installing a new chain on a shark-finned cassette | The new chain will violently slip over the worn cog teeth under pedaling torque | If chain wear exceeded 1.0%, replace both chain and cassette together |
| Using household oil or WD-40 | Solvents wash away internal factory grease and thin oils break down under pedal pressure | Always use dedicated bicycle chain lubricant |
| Measuring while the bike is moving or on power | Moving drivetrains can trap fingers, clothing, or rulers in gears | Perform all measurements with the bike stationary and stable |
When to stop and visit a local bike shop mechanic
Checking chain wear is an easy home skill, but some drivetrain conditions warrant professional mechanic tools and support:
- The chain broke or shed a link while riding: A broken chain may indicate twisted plates, damaged quick links, or rear derailleur hanger misalignment that needs checking with an alignment gauge.
- You installed a new chain and it slips on your favorite gear: This confirms your cassette is worn past the point of accepting a new chain. A bike shop can replace the cassette using a chain whip and lockring socket.
- You are unsure of chain sizing or quick-link installation: New chains come in stock lengths (typically 114 to 126 links) and must be trimmed to the exact link count for your bike’s rear derailleur cage and gear capacity. If you do not have a chain breaker tool or master link pliers, your local shop can size and install it in minutes.
- Front chainrings have bent or missing teeth: If excessive chain wear has damaged the front chainrings, replacing chainrings requires matching bolt circle diameter (BCD) and torque specifications.
If any drivetrain terminology feels unfamiliar, refer to our complete breakdown in road bike anatomy for beginners.
Your next step
Take five minutes today to grab a 12-inch ruler, wipe the upper run of your road bike chain, and measure the distance across 12 full links.
If your 12th pin sits squarely on the 12-inch mark or just slightly past it, you are in great shape—give the chain a clean and fresh lube following how to clean and lubricate a road bike chain. If your ruler shows 12 1/16 inches (0.5%) on an 11- or 12-speed bike or 12 1/8 inches (0.75%) on an 8- to 10-speed bike, order a replacement chain today and save your cassette from an early grave.
Sources and further reading
- Park Tool: When to Replace a Bicycle Chain (Chain Wear)
- Shimano: Technical Service Instructions & Chain Wear Limits
- SRAM: Road Drivetrain Manual & Flattop Chain Specifications
- Sheldon Brown: Bicycle Chain Maintenance, Pitch, and Measuring Wear
- KMC Chain: Chain Wear and Replacement Guide
- Cycling UK: Drivetrain Maintenance and Checking Chain Stretch