Can you install a longer seatpost on your bike?
A longer seatpost can add safe saddle-height range only when its diameter, insertion depth, frame fit, offset, rail clamp, and load rating all match.
 Field guide / can-you-install-longer-bike-seatpost
You can replace a short seatpost with a longer one, but matching the printed diameter is only the first check. The new post must also fit deeply enough into the frame, reach the required saddle height without crossing its insertion mark, use the right saddle clamp and offset, and be approved for the bike, rider load, and intended riding.
The short answer: a 27.2 × 350 mm post may replace a 27.2 × 300 mm post when the frame accepts its extra internal length and every other interface matches. The extra 50 mm does not mean you may expose the post 50 mm beyond its marked limit. It gives you more total material with which to satisfy both saddle height and safe insertion.
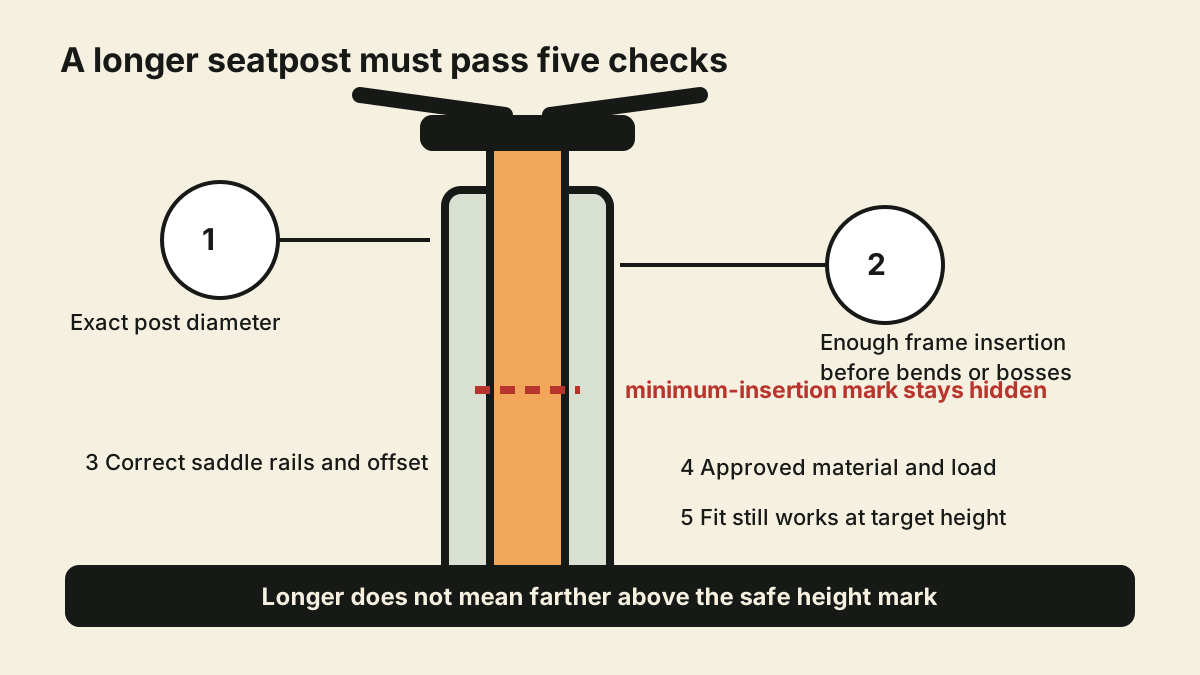
Why “same diameter, longer post” is not the whole answer
A current r/bikefit question asked whether a 350 mm post could replace a 300 mm post when a rider needed a little more saddle height. That is a sensible use case, but a post is a structural component inside a frame—not simply a longer tube.
Two posts marked 27.2 mm can still differ in:
- usable length above the minimum-insertion mark;
- wall shape, material, and load or use rating;
- straight or setback design;
- saddle-rail size and clamp orientation;
- lower-end shape and clearance for internal obstructions;
- proprietary features, batteries, suspension, or cable routing; and
- the preparation and torque required at the frame clamp.
Confirm all of those before ordering.
Work out whether length is actually the problem
Measure the current setup before moving anything:
- Mark the present saddle height from the bottom-bracket centre to a repeatable point on the saddle.
- Measure how much post is exposed from the top of the seat tube to the saddle clamp reference.
- Find the post’s minimum-insertion or maximum-height line.
- Find any deeper minimum-insertion rule in the bicycle or frame manual.
- Measure how much higher the saddle genuinely needs to go.
If the current post reaches its marked limit before the target height, added post length may solve the problem. If the post still has safe range but the saddle feels low, the issue may instead be an incorrect measurement, saddle shape, crank length, footwear, or fit assumption.
Do not raise a saddle through pain or numbness based on a formula alone. Use the staged bike-fit test and return to a known position if control or symptoms worsen.
Check the five compatibility points
1. Exact diameter and shape
Use the frame maker’s specification, the original post marking, or a qualified measurement. Do not force a larger post into the frame or rely on extra clamp torque to retain a smaller one. A shim is acceptable only when the frame, post, and shim makers approve that exact arrangement.
Round numbers are not interchangeable. A 27.0 mm, 27.2 mm, 30.9 mm, and 31.6 mm post each needs its corresponding frame interface. Aero and proprietary posts require the exact shape and hardware.
2. Frame insertion depth
A longer post must physically enter the frame far enough. Bottle-cage bosses, welds, tube bends, suspension pivots, internal batteries, cable guides, or a narrowing seat tube can stop it.
Measure the unobstructed depth carefully; do not drop a metal object into a carbon frame or push a post against hidden hardware. If the new post bottoms out before the saddle reaches its target, it is not compatible merely because the clamp can tighten.
The frame can also require more insertion than the line printed on the post. Follow whichever requirement is deeper. Our guide to the seatpost minimum-insertion mark explains how the post and frame limits work together.
3. Saddle clamp and offset
Confirm the clamp supports the saddle’s rail material and dimensions. Common metal rails and oversized oval carbon rails do not use every clamp interchangeably. Keep the rails inside their marked clamping zone.
Match the old post’s setback unless a fit decision calls for a deliberate change. Setback moves the saddle clamp behind the post centreline; it changes effective saddle position and cannot be treated as a cosmetic detail. Do not install a setback post backwards as a shortcut—use the setback-post compatibility guide.
4. Material, use, and load approval
Material alone is not a capacity statement. A heavier aluminium post may still be wrong for the bike or total system load, while a documented carbon post may be suitable. Check the post maker’s rider or system limit, the bicycle limit, and the approved use category.
Use the lower applicable limit. Include the rider, bicycle, luggage, bottles, and carried equipment when the manufacturer defines a total-system limit.
5. Assembly method
The frame and post manuals determine whether the interface needs grease, carbon assembly compound, a dry surface, a particular collar orientation, and a specific torque. These are not interchangeable choices.
Clean and inspect the seat tube and clamp before installation. A burr, ovalised collar, crack, crushed post, or persistent slip needs diagnosis—not more torque. Use the slipping-seatpost guide when the old post moved in service.
When a longer post is the wrong fix
A longer post does not correct:
- a frame whose reach, standover, or handling is unsuitable;
- a saddle already beyond its rail limit;
- recurring post or frame damage;
- a seat tube that cannot accept the needed insertion;
- knee or hip symptoms without a fit assessment; or
- a bicycle whose verified load limit is too low.
If a large amount of extra post is required, reassess the complete frame size using how to tell if a road bike is too big or too small. A slightly smaller frame can sometimes fit well with an approved post, but no single height chart proves that the complete bike is right.
Install and test without losing the baseline
Record the old saddle height, angle, and fore-aft position before removal. Transfer the saddle using the clamp maker’s sequence, keep the rails within their limits, insert the post past every required mark, and tighten with the specified preparation and torque.
After installation:
- mark the post at the collar with removable tape;
- verify that the saddle does not twist or sink under controlled pressure;
- confirm full steering and safe mounting and dismounting;
- ride a short, quiet test route first; and
- recheck the position and fastener as the manuals require.
Do not make saddle height, tilt, fore-aft, cleat, and handlebar changes at the same time. Change one fit setting at a time so the result remains understandable.
Your next step
Write down the current post’s diameter, total length, offset, rail clamp, minimum-insertion distance, and exposed length. Then measure the frame’s usable internal depth and find its own insertion rule. Buy only when the proposed post satisfies all six numbers and still places the saddle at a tested height.
Sources and further reading
- Trek bicycle owner manual: saddle and seatpost insertion safety
- Trek fitting guidance: saddle position and rail-clamp compatibility
- r/bikefit reader context: replacing a 300 mm post with a 350 mm post — used as an editorial question signal; replies were not treated as compatibility evidence.