Why do pro cyclists' road bikes look too small?
Understand why sloping top tubes, exposed seatposts, low cockpits, and rider proportions make pro road bikes look small—and why you should not copy the look.
 Field guide / why-pro-road-bikes-look-too-small
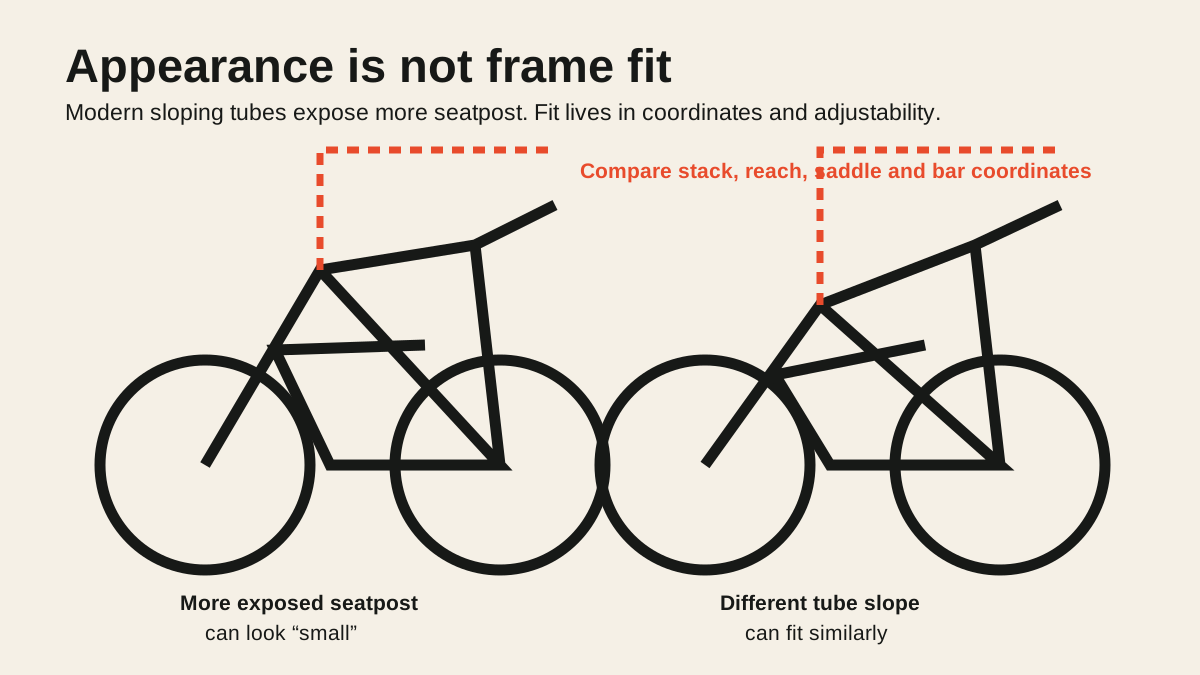
Professional road bikes often look too small because modern frames have sloping top tubes, long exposed seatposts, and low front ends. The rider’s actual position is created by frame stack and reach, saddle height and setback, stem and handlebar dimensions, spacers, and body proportions—not by how much daylight appears above the top tube.
The short answer: a pro bike may be a smaller nominal size, but appearance is a poor sizing method. Elite riders use measured positions that match their bodies, race demands, mobility, and team equipment. Choose the frame that reaches your sustainable coordinates within the maker’s limits, not the frame that produces a professional silhouette.
Why this question keeps appearing
A current r/cycling discussion asks why professional cyclists appear to tower over bikes that look undersized. The question often starts with standover clearance: the visual gap between the rider and top tube.
Standover can matter when mounting, stopping, or riding off-road, but it does not define the pedalling position. On a modern road frame, the top tube may slope steeply downward even when the head tube, bottom bracket, saddle, and handlebar are in appropriate places.
That is why a rider can show lots of seatpost and still be on the correct size.
Nominal frame size is not a universal measurement
A label such as 52, 54, medium, or large is a model-specific name. One brand may derive a number from a virtual seat tube; another may use a historical convention. Two “54 cm” bicycles can have different stack, reach, head-tube length, seat angle, wheelbase, and cockpit.
For useful comparison, start with:
- stack: vertical distance from the bottom bracket to the top of the head tube;
- reach: horizontal distance from the bottom bracket to the top of the head tube;
- seat-tube angle and available saddle setback;
- head-tube angle, fork offset, trail, and wheelbase;
- maximum and minimum seatpost insertion;
- permitted steerer spacers and stem configuration;
- supplied handlebar reach, stem length, and hood position.
The guide to comparing road-bike geometry charts shows how to keep those measurements in the same reference system.
Sloping top tubes exaggerate the “small bike” look
Traditional road frames commonly used a nearly horizontal top tube. Modern compact frames often slope from the head tube toward the seat tube. The slope:
- lowers the visible top tube;
- exposes more seatpost for the same saddle height;
- makes the front triangle look smaller;
- weakens the relationship between standover gap and riding fit.
Photographs add more distortion. Camera angle, wide lenses, a rider standing on the pedals, and small race numbers can all make proportions look unusual.
Do not compare a side-on geometry drawing with a race photograph taken from below and expect reliable sizing evidence.
Pros need a specific handlebar position
Elite road riders spend long periods at high speed, where aerodynamic drag matters. Their position and equipment are chosen around racing, power production, control, team inventory, and regulations.
A lower-stack frame can make a low handlebar position possible without a steeply rising stem. A smaller nominal size may also leave room to use a longer stem or a particular integrated cockpit while reaching the rider’s target bars. But those choices are not universal and do not prove that “smaller is faster.”
A very long stem cannot erase every mismatch. Sizing down also changes wheelbase, front-centre, toe overlap, weight distribution, steering feel, seatpost exposure, and available bar height. Integrated cockpits can make later correction expensive or impossible.
UCI technical rules govern race equipment and rider positions, but compliance is not a fit recommendation for recreational cyclists. Pros are supported by fitters, mechanics, medical staff, and frequent equipment access that ordinary buyers do not share.
A professional position is not automatically uncomfortable
It is tempting to say professionals simply tolerate bad fit. That is too crude. Their positions are trained, monitored, and selected for a race workload. They also produce high power, change hand positions, stand frequently, and may use different setups for different events.
What is sustainable for a trained rider racing four hours is not automatically suitable for someone riding two relaxed hours on weekends. The reverse is also true: an upright position is not universally comfortable if it places the wrong load elsewhere.
Choose for the rider you are and the riding you actually do. The guide should a road-bike fit look aggressive? separates appearance from function.
Why sizing down can backfire
An undersized frame may require:
- excessive seatpost extension or insufficient insertion;
- a stem longer than the bike handles well with;
- more saddle setback than the rails or post permit;
- more spacers or rise than the steerer system allows;
- an integrated cockpit replacement;
- toe overlap or unwanted weight distribution;
- compromised front-wheel clearance or handling.
The common advice “a small bike can always be made bigger” is incomplete. Components have structural and fit limits. A bike is adjustable only inside those limits.
Likewise, a larger frame cannot always be shortened enough. Minimum saddle height, cockpit reach, standover, and steering clearance can become hard stops.
Compare complete positions, not bare frames
If you already have a bicycle that fits, record:
- saddle height from bottom-bracket centre;
- saddle setback relative to the bottom bracket;
- saddle-to-handlebar drop;
- horizontal saddle-to-hood or bar reach;
- crank length;
- stem length and angle;
- handlebar reach and width;
- spacer arrangement.
Then model each candidate size with the actual cockpit and seatpost options. The fit-report shortlist guide explains how to turn coordinates into a buying filter.
If this is your first road bike, test both candidate sizes under real pedalling. Can you reach the brakes from the hoods and drops? Can the shop place the bars high enough without exceeding spacer limits? Is the saddle position centred within its adjustment rather than pinned at an extreme? Does low-speed steering feel controlled?
A better beginner sizing rule
Choose the size that:
- accommodates your saddle height and setback safely;
- reaches a sustainable handlebar position with ordinary components;
- preserves documented steerer, stem, and seatpost limits;
- handles predictably for your intended riding;
- leaves a reasonable path for small fit changes;
- is supported by an actual test or credible fit coordinates.
When between sizes, do not rely on “always size down.” Compare the complete builds with the two-size decision guide.
Your next step
Ignore the size label and top-tube gap for one comparison. Put the candidate geometry charts beside a bike that fits, then compare stack, reach, saddle range, and the complete cockpit. If the desired position requires extreme parts or exceeds a manufacturer limit, eliminate that size no matter how professional it looks. Before paying, run the choice through the beginner road-bike buying checklist.
Sources and further reading
- UCI: current cycling regulations and technical equipment rules
- r/cycling reader context: why pro road bikes can look too small — used as a current question signal; speculative explanations in replies were not treated as verified team fit decisions.