How to use a bike-fit report to shortlist a new road bike
Turn fit coordinates into a practical new-bike shortlist by comparing frame stack, reach, cockpit limits, and component assumptions before you order.
 Field guide / use-bike-fit-report-to-shortlist-new-bike
A bike-fit report can eliminate unsuitable road bikes before you test them, but only if it describes your contact points and its assumptions. Do not search for a frame whose stack and reach exactly equal your handlebar coordinates: frame geometry ends at the head tube, while stems, spacers, handlebars, and hoods finish the cockpit.
The short answer: ask your fitter for target saddle and hand-position coordinates, define acceptable adjustment ranges, then compare complete builds—not frame size labels. Shortlist bikes that achieve the target with ordinary components and room to adjust in both directions.
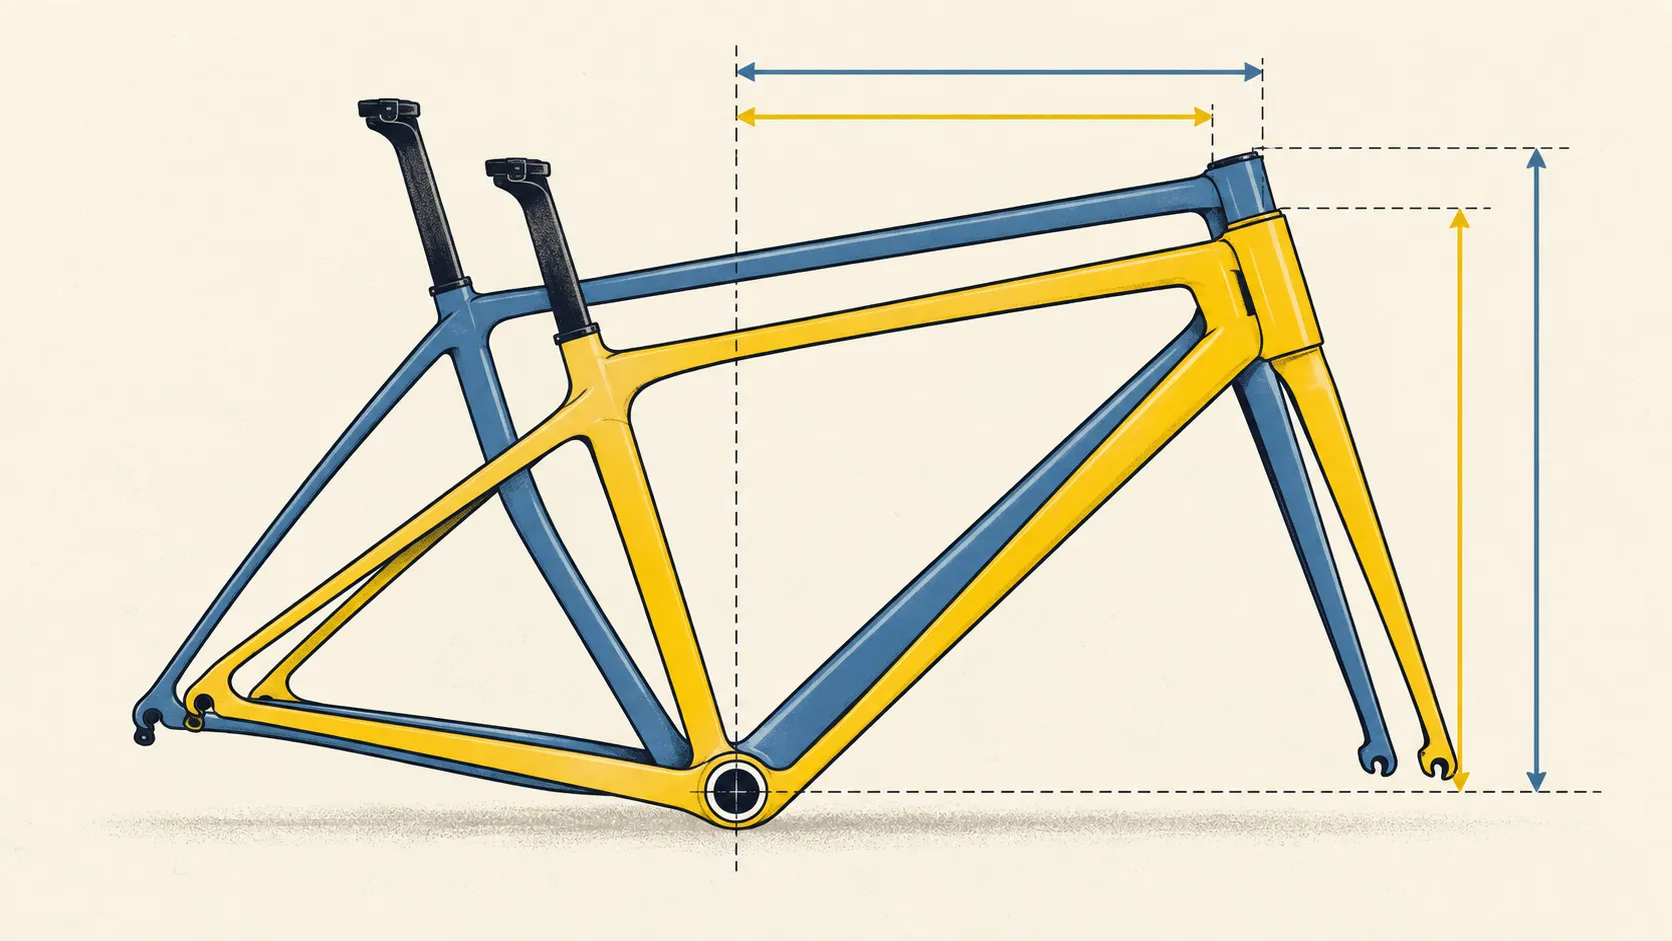
Start by asking what the report measures
A recent r/cycling question asked how to turn fit results into a list of suitable bikes. The rider’s concern was sensible: comparing hundreds of models by size label is slow and misleading.
A useful fit report should identify its reference points and ideally include:
- saddle height, setback, and angle;
- saddle model or the point used for measurement;
- handlebar or hood X/Y position relative to the bottom bracket;
- crank length, pedal system, and cleat assumptions;
- bar width, reach, drop, and hood placement;
- acceptable ranges rather than false single-millimetre precision;
- the rider’s intended use and position.
If the report only says “56 cm frame, 100 mm stem,” ask the fitter for clarification. Those component numbers do not transfer cleanly between bikes.
Understand frame stack and reach
Stack is the vertical distance from the bottom-bracket centre to the top of the head tube. Reach is the horizontal distance between those points. Unlike a nominal size such as 54 or medium, the definitions let you compare differently shaped frames.
They do not describe the entire fit. A taller headset cover, spacer stack, stem angle and length, handlebar reach, and hood position all alter the hands. Saddle position also depends on seat-tube angle, seatpost setback, saddle rails, and saddle shape.
That is why a frame with slightly different stack and reach may reproduce your fit easily, while a seemingly identical frame may not because of an integrated cockpit or proprietary seatpost.
Build a comparison sheet
For each candidate and likely size, record:
- Frame stack and reach.
- Headset-cover height and manufacturer-approved spacer limit.
- Stem length, angle, and whether it is replaceable.
- Handlebar reach, width, and flare.
- Seat-tube angle, seatpost setback, and saddle-adjustment range.
- Crank length supplied in that size.
- Standover, toe-clearance concerns, and tyre clearance.
- Cost and availability of any parts needed to reach the target.
Use the manufacturer’s exact geometry chart for the model year. Do not assume two generations or trim levels use the same fork, cockpit, or geometry.
Reject bikes that need an extreme workaround
The best starting point reaches your fit with normal parts near the middle of their adjustment range. Be cautious if a candidate requires:
- the maximum allowed spacer stack before the first ride;
- a stem far shorter or longer than the platform normally uses;
- the saddle clamped at the end of its rail markings;
- a zero-setback or extreme-setback post merely to compensate for frame choice;
- an expensive proprietary cockpit swap;
- cutting a steerer before the fit has been validated;
- a crank-length change that the budget or drivetrain cannot support.
One unusual number is not automatically unsafe. A cluster of compensations is evidence that another frame or size may be the cleaner choice.
Compare complete contact points, not just frames
Once the list is down to three or four bikes, calculate or have the shop/fitter model the finished saddle and hand positions. The comparison should include the real bar and hood dimensions.
If you are transferring a comfortable position, use the contact-point copying guide. If the new bike serves a different purpose—such as moving from endurance riding to racing—agree with the fitter which coordinates are targets and which may change.
Test the assumptions before purchase
A geometry spreadsheet cannot show how the steering feels, whether your knees clear the bars out of the saddle, or whether the shop can actually source the required cockpit. Before paying:
- ask the fitter to review the final build sheet;
- test ride the correct size or closest available setup;
- confirm every proprietary part and spacer limit with the manufacturer;
- get the shop to price required swaps in writing;
- keep the steerer uncut until the position has been validated where possible.
If you are between adjacent sizes, use the two-size decision guide rather than defaulting automatically to the smaller one.
Your next step
Send your fitter a table of three candidate bikes, their geometry links, sizes, supplied cockpits, and your intended use. Ask which can achieve the agreed coordinates without extreme parts—and what fit range remains for future adjustment.