Should a road-bike fit look aggressive?
A road-bike position does not need to imitate a racer. Judge fit by control, comfort, symptoms, and riding goals, then change one measured variable at a time.
 Field guide / should-road-bike-fit-look-aggressive
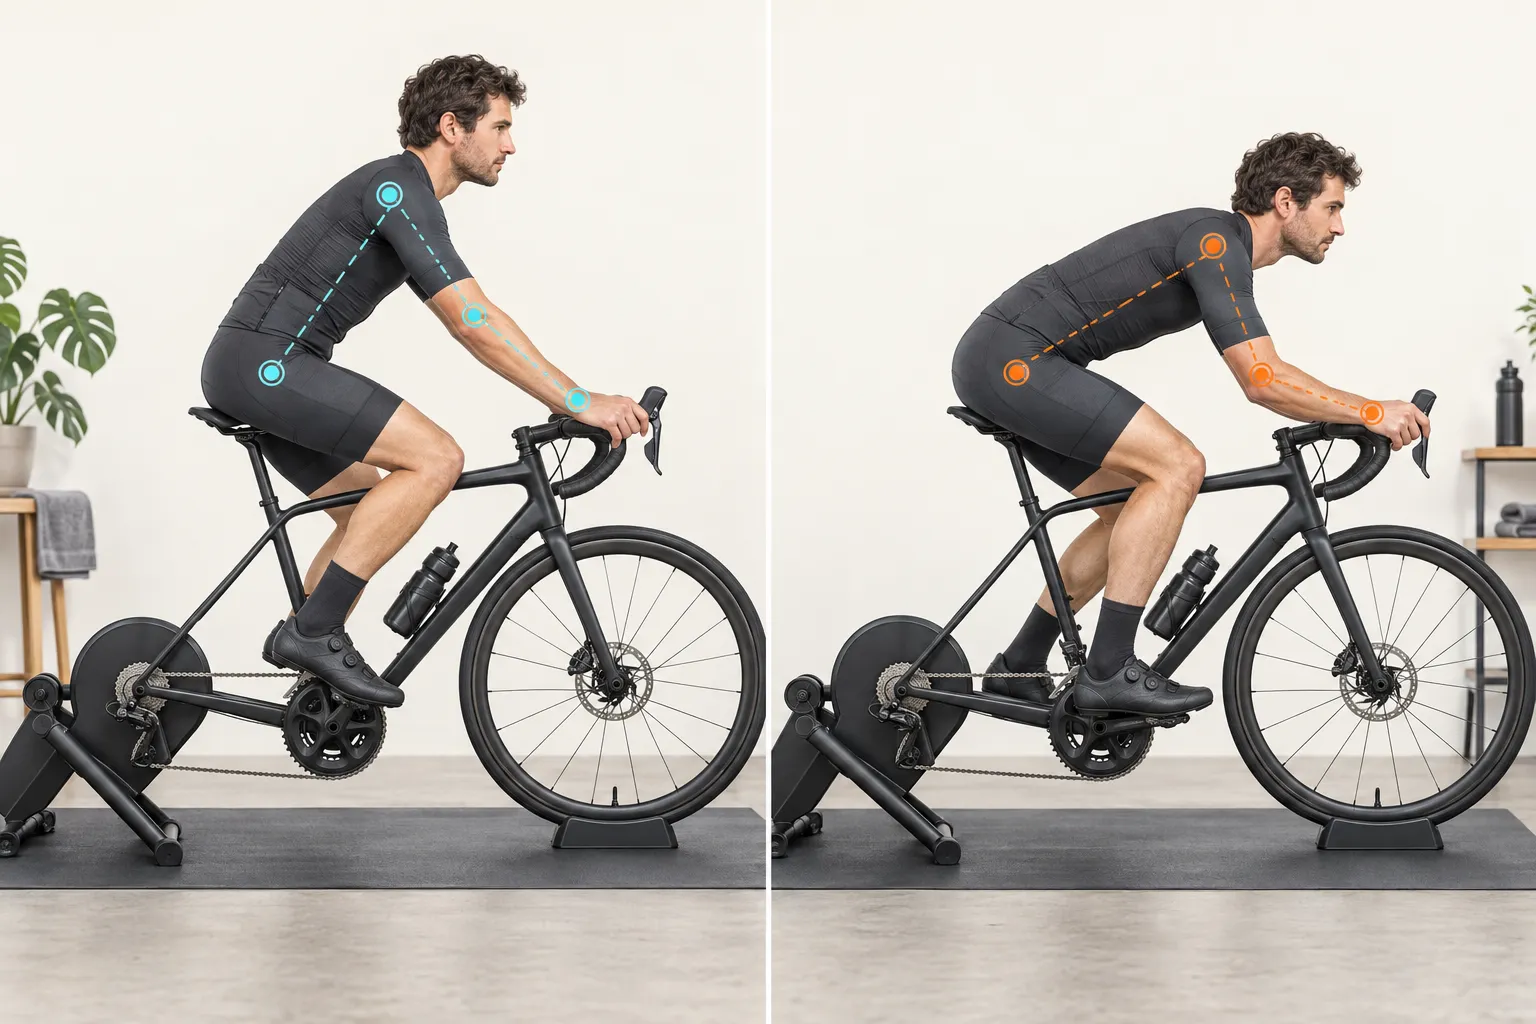
A road-bike fit does not need to look low, stretched, or professional to be valid. If you can control the bike, reach and operate the brakes, use the intended hand positions, and complete your normal rides without recurring symptoms, do not lower the front end simply because a side-view video looks upright.
The short answer: fit the bike to your body, mobility, riding duration, terrain, and goals. A lower position can reduce frontal area for some riders, but it is useful only when it remains sustainable and controllable. Appearance is not a fit outcome.
Why internet fit checks create pressure to look faster
Current r/bikefit discussions include a rider who says the setup is comfortable and asks whether anything should change, and another who reports acceptable comfort beyond three hours while asking for visual approval of saddle position. Replies often disagree because a short, angled video cannot show medical history, joint range, actual riding load, goals, or how the bike behaves outdoors.
Use online discussion to learn which observations to collect, not to crowdsource a diagnosis from one frame of video. Read what an online bike-fit video can and cannot tell you before acting on comments.
Define what “working” means
A fit is not proven by a pro-looking back angle. Check whether it supports the task:
- you can brake firmly from your normal hand position;
- you can steer, look behind, signal, and absorb bumps without feeling trapped;
- your hands can use the tops, hoods, and drops where appropriate;
- your pelvis stays reasonably stable rather than rocking to reach the pedals;
- you are not repeatedly sliding toward the saddle nose;
- no recurring numbness, focal pressure, or joint pain develops;
- the position remains usable near the end of your intended ride;
- you can eat, drink, and check traffic without losing control.
Comfort matters, but it is not a medical guarantee. A retrospective study of recreational and competitive road cyclists found that many reported comfort and pain at the same time, and body-position measures did not reliably separate riders with and without pain. Treat a lack of symptoms as useful evidence, not proof that every joint and tissue is risk-free.
Understand the front-end tradeoff
Lowering the handlebar can rotate the torso down and reduce frontal area if the rider can maintain the posture. It can also increase demands on hip motion, trunk and neck tolerance, and the ability to see ahead. A shorter or higher position may improve control and sustainable comfort but can increase aerodynamic drag at speed.
There is no prize for choosing the lowest setting. Recreational riders, endurance riders, racers, and time-trial riders solve different problems. Even within one category, mobility, proportions, injury history, and event duration change the answer.
British Cycling’s DIY fit guidance gives different handlebar-drop starting points for racing, performance, and recreational road positions, then tells riders to fine-tune for comfort and control. The useful lesson is that category and measurement are starting inputs—not a mandatory silhouette.
Do not use the saddle to fix handlebar reach
Moving the saddle forward can make the bar feel closer, but it also changes the rider’s relationship with the pedals and the way load is supported. Set a reasonable saddle height and fore-aft position first. Then address cockpit reach with the appropriate combination of frame size, stem, handlebar reach, hood position, and bar height.
Likewise, pointing the saddle sharply down to escape pressure can make the rider slide forward and support more weight through the hands. Use why you keep sliding forward on the saddle to separate saddle shape, tilt, height, and reach.
If you cannot obtain a usable reach without an extreme saddle position, unusually short stem, or unsafe spacer arrangement, revisit whether the road bike is too big or too small.
Record a baseline before touching anything
Measure the current setup while the bike is level:
- saddle height from a repeatable frame reference;
- saddle setback and tilt using the maker’s reference surface;
- spacer order and total height;
- stem length and angle;
- handlebar rotation and hood position;
- reach and drop from saddle to the hand contact point;
- cleat position if using clipless shoes.
Photograph both sides and mark components with removable tape where appropriate. Write down the torque requirements before loosening anything. Integrated cockpits, carbon steerers, proprietary seatposts, and internally routed controls may restrict adjustments; use the exact manufacturer instructions.
Change one variable and test it outdoors
A sensible experiment is small enough to reverse and clear enough to interpret.
- Choose one problem, such as excessive hand pressure after 90 minutes.
- Keep saddle, shoes, route, tyre pressure, and normal effort stable.
- Make one permitted adjustment with the correct tools and torque.
- Check steering and brakes before riding.
- Test on a short, familiar route, then on a normal-duration ride if the first check is successful.
- Record symptoms during the ride and the following day.
Do not judge only while sitting still or pedalling gently on a trainer. Outdoors, braking, climbing, wind, vibration, and looking ahead change the demands.
If you are considering a higher bar, read can you raise road-bike handlebars? before rearranging spacers or flipping a stem.
When a lower position is worth testing
Test lower only when it serves a defined goal: sustained faster group riding, racing, reducing frontal area, or gaining a particular handling position. You should still be able to:
- see ahead without excessive neck strain;
- breathe and pedal without feeling folded or blocked;
- keep elbows soft rather than locking the arms;
- use the brakes confidently;
- hold the position for the required part of the ride;
- return to the hoods or tops when the lower position is no longer useful.
Lowering the bars can also expose that the bike’s reach is too long, the saddle is poorly set, or the rider needs more time in the position. Reverse a change that makes control or symptoms worse. Adaptation is not an obligation to endure numbness or pain.
When professional help is the efficient choice
Use a qualified bike fitter when symptoms recur, asymmetry is pronounced, prior injury or disability changes the problem, component choices are expensive, or you cannot separate saddle and cockpit effects. Seek a clinician when symptoms are medical rather than purely positional.
A randomized trial in amateur cyclists found better short-term comfort, fatigue, and pain outcomes from a 3D kinematic bike fit than from qualitative posture advice alone. That does not make every fit method or fitter identical, but it supports using an assessed process when generic cues fail.
If a previous fit made symptoms worse, do not keep the result because it came with a report. Follow what to do when a bike fit makes pain worse.
Your next step
Do not change a symptom-free position for a photograph. Instead, write down the longest ride you want the bike to support and score control, braking access, hand pressure, saddle stability, neck comfort, and joint symptoms near the end of that ride. Change one measured variable only if this review reveals a real problem or a specific performance goal.
Sources and further reading
- British Cycling: DIY road and mountain bike fit
- Randomized trial: 3D bike fitting, pain, fatigue, and comfort
- Study: pain, comfort, and body position in road cyclists
- r/bikefit reader context: comfortable position and visual feedback
- r/bikefit reader context: long-ride comfort and saddle-height concern