How to choose between two road-bike frame sizes
Use fit coordinates, stack, reach, cockpit limits, and a real test ride to choose when a size chart puts you between two road-bike sizes.
 Field guide / choose-between-two-road-bike-frame-sizes
Before you view or pay
Check fit, condition, and starter gear first
Use the buying checklist to choose the right path: used-bike viewing, first-bike fit and type, hidden repair costs, or starter gear.
Being between two labels does not mean both bicycles fit equally well, and “always size down” is not a rule. Compare the riding position each complete bike can actually produce: saddle position, handlebar reach, handlebar height, stem length, spacer allowance, and adjustment limits. Choose the frame that reaches your target without extreme parts or a compromised position.
The short answer: use body height only to make a shortlist. Use stack, reach, fit coordinates, cockpit parts, and a test ride to make the decision.
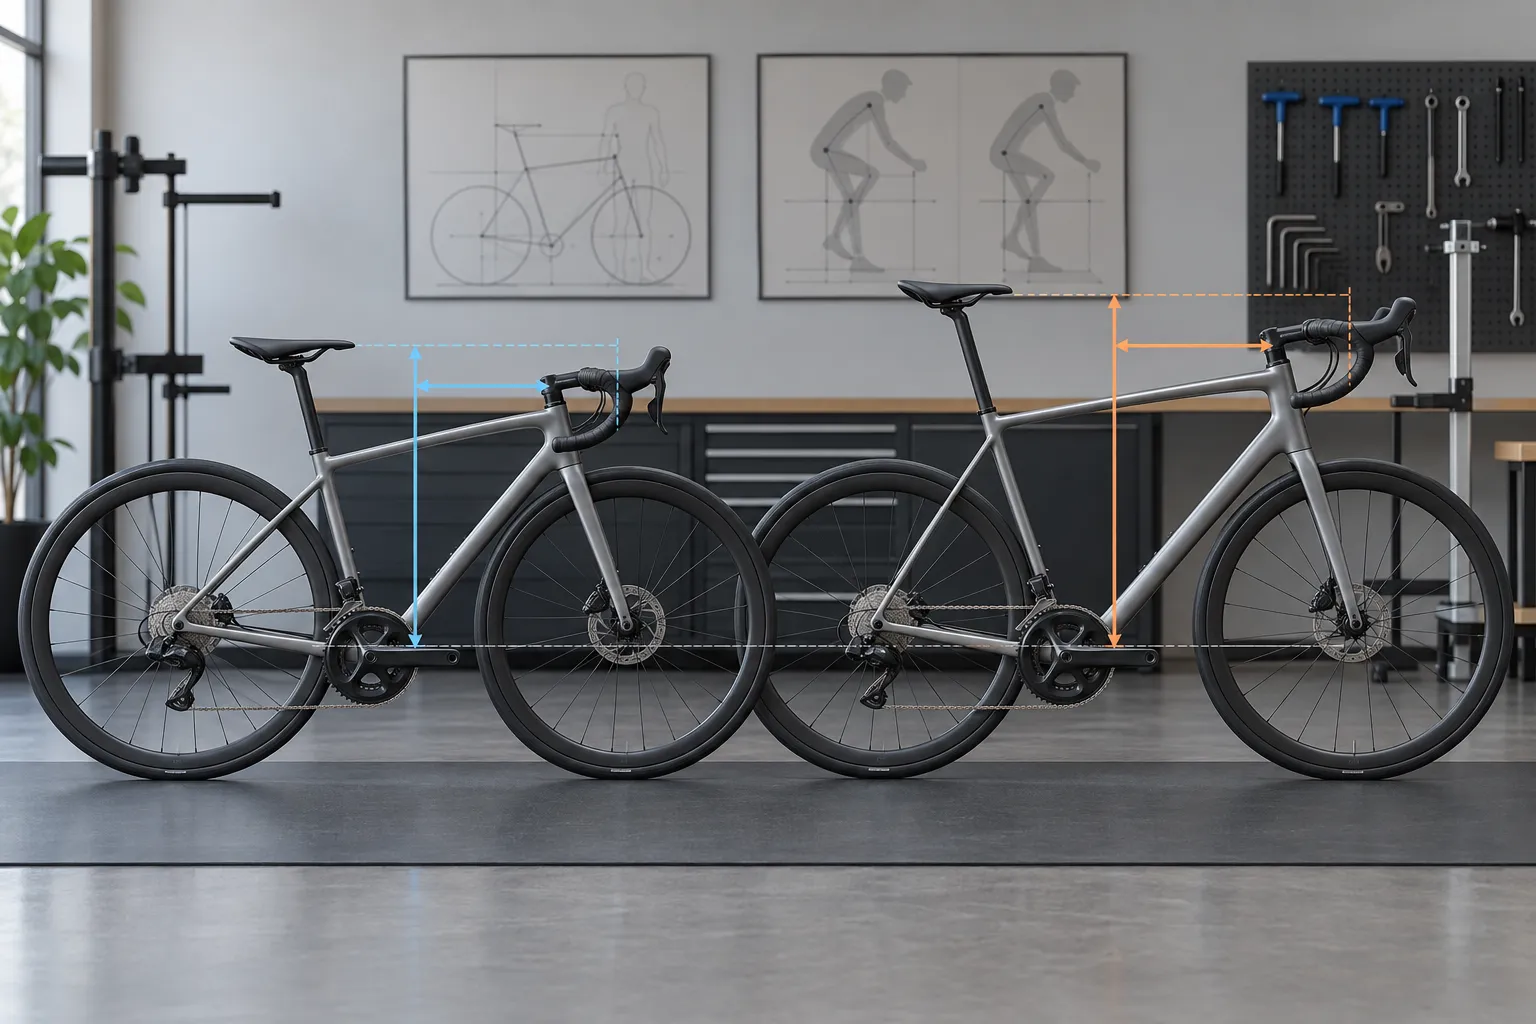
Start with the position, not the size name
A 51 from one brand can overlap a 54 from another. Even two models from the same brand may have different stack and reach because one is an endurance bike and the other is a race bike.
If you had a pre-purchase fit, ask for the coordinates that matter on the candidate bike:
- saddle height from the bottom bracket;
- saddle setback or saddle X coordinate;
- handlebar or hood X coordinate;
- handlebar or hood Y coordinate;
- expected crank length;
- acceptable saddle-to-bar drop;
- acceptable stem length and spacer range.
A fit report that gives only body measurements or “size 54” is not enough to compare real models. Our pre-purchase bike-fit guide explains what to request.
Compare stack and reach correctly
Frame stack is the vertical distance from the bottom bracket to the top of the head tube reference point. Frame reach is the horizontal distance between those points. They describe the frame, not the final hood position.
Final hand position also depends on:
- headset top cover and spacers;
- stem angle and length;
- handlebar reach and rise;
- lever placement;
- proprietary or one-piece cockpit dimensions.
A smaller frame often has less stack as well as less reach. Making it long enough with a longer stem does not automatically make it tall enough. A larger frame may have useful height but leave no way to shorten the reach without poor handling or an unsuitable stem.
Use the geometry-chart comparison guide to keep frame and cockpit measurements separate.
Calculate both complete builds
Ask the shop or fitter to write down two viable configurations—not just two bare-frame charts.
| Check | Smaller frame | Larger frame |
|---|---|---|
| Saddle height within post limits | Yes / no | Yes / no |
| Saddle rails within marks | Yes / no | Yes / no |
| Target hood reach possible | Parts required | Parts required |
| Target bar height possible | Spacers / stem | Spacers / stem |
| Cockpit parts available | Yes / no | Yes / no |
| Toe and tyre clearance acceptable | Yes / no | Yes / no |
| Test-ride control | Notes | Notes |
Reject any build that depends on exceeding maximum spacers, ignoring a cut steerer, using an unavailable integrated cockpit, moving the saddle to fix handlebar reach, or clamping outside marked limits.
When the smaller frame makes sense
The smaller size may be the better platform when it reaches the desired bar height without excessive spacers and the cockpit can be lengthened with normal, available parts. It can also provide more stand-over clearance and a shorter wheelbase.
But smaller is not automatically more adjustable. Watch for:
- too much saddle-to-bar drop;
- a very long stem needed to reach the target;
- excessive seatpost extension;
- toe overlap that affects slow turns;
- limited room above the stem because the steerer was cut;
- a front end that feels nervous to the rider.
When the larger frame makes sense
The larger size may be better when you need its stack and can still achieve the target hand position with a sensible stem and bar. It can feel calmer and may require fewer spacers.
Reject it when the minimum possible reach is still too long, stand-over or mounting is awkward, the seatpost cannot go low enough, or the only solution is an unusually short stem that changes steering more than you accept.
Integrated cockpits change the decision
A conventional stem and handlebar are relatively easy to swap. A one-piece cockpit may offer only a few combinations, cost much more, require brake-hose work, and be unavailable at purchase. Confirm in writing:
- which cockpit size comes on each frame;
- which alternatives are compatible and in stock;
- whether swapping is included;
- the maximum approved spacer stack;
- whether hoses and wires have enough length;
- what happens if the test position is wrong.
This is why a first road bike benefits from an adjustable cockpit.
Test the decision, not just the bicycle
Set both candidates as close as possible to the proposed coordinates. Ride the same route and include starts, slow turns, braking from the hoods, a short climb, and a rough section. Note hand pressure, neck effort, knee clearance, steering confidence, and whether you keep sliding or reaching.
A five-minute spin cannot prove long-distance comfort, but it can expose obvious control and reach problems. Do not let a salesperson raise or lower the saddle casually between tests without recording the change.
If neither size reaches the target cleanly, choose a different model. The model is not entitled to fit you.
Your next step
Ask for a one-page comparison showing the target hood X/Y position and the exact cockpit parts required on both sizes. If the shop cannot produce two safe, permitted builds, remove that model from the shortlist.
Sources and further reading
- r/bikefit demand signal: rider between two frame sizes after a fit — used as an editorial question signal, not an individual fit prescription.