Why does my chain drop when shifting to the small chainring?
Fix the most common road bike chain drop causes: inner limit screw adjustment, cable tension, soft-pedaling shift technique, and chain catcher setup.
 Field guide / why-chain-drops-shifting-small-chainring
Few mechanical hiccups feel quite as jarring as shifting down for a steep climb only to hear a loud clatter and feel your pedals spin freely without resistance. Dropping the chain to the inside of your small chainring—dumping it right onto the bottom bracket shell—is frustrating, leaves oily grime on your fingers, and can scratch your frame if ignored.
The short answer: When your chain drops to the inside when shifting from the big to the small chainring, the most common mechanical culprit is a front derailleur Low (“L”) limit screw that is set too loose, allowing the cage to push the chain too far inward. Other major causes include shifting under heavy pedaling force (torque), a twisted or poorly aligned front derailleur cage, or riding rough surfaces without a chain catcher.
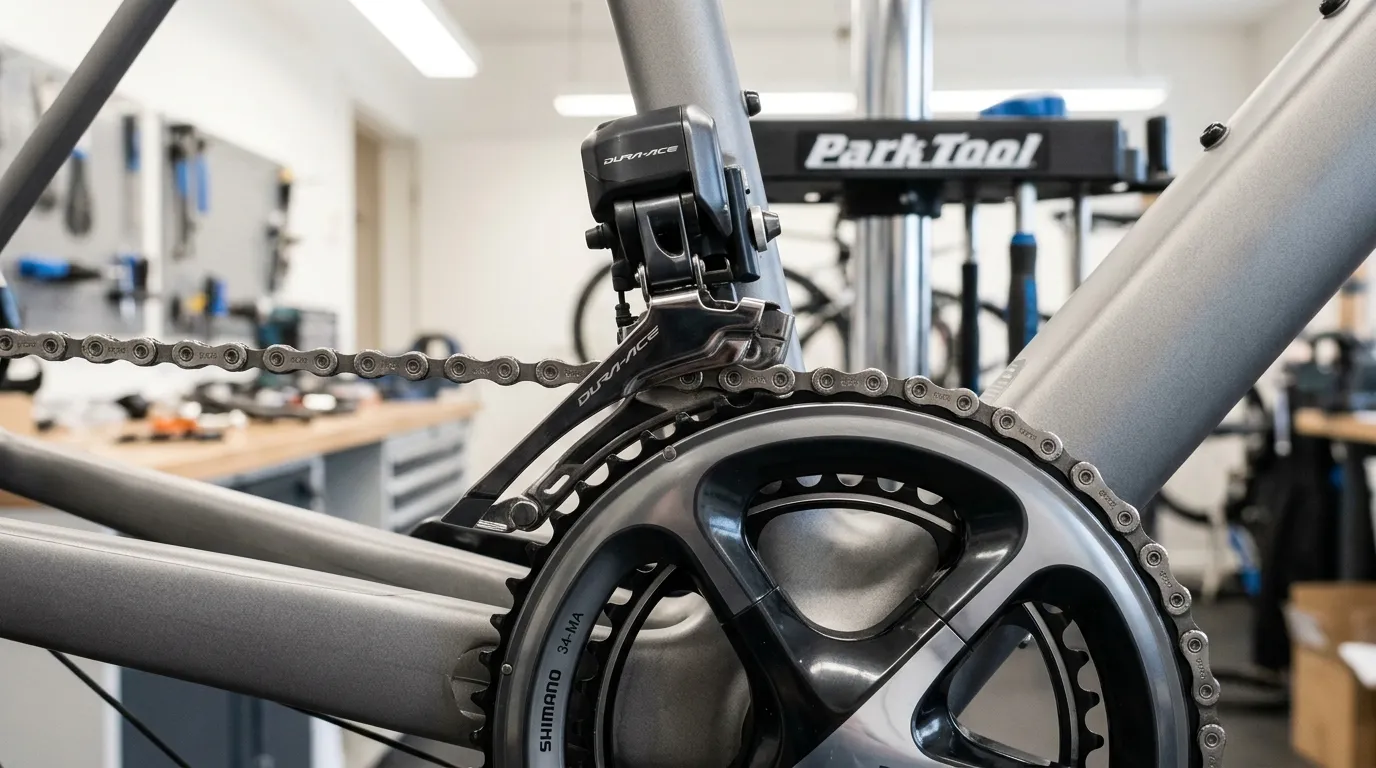
Why front downshifts are vulnerable to chain drops
On a standard road bike with a double chainset (such as a 50/34T compact or 52/36T semi-compact), shifting down means releasing the chain across a substantial jump of 16 teeth.
Unlike the rear derailleur—which shifts one small cog at a time with spring-loaded guide pulleys right next to the cassette—the front derailleur relies on pushing the slack side of the chain sideways so gravity and chainring ramps can catch it.
When you release the cable tension to drop into the inner ring, three forces are at play:
- Lateral momentum: The derailleur cage guides the chain inward towards the bike frame.
- Tension drop: As the chain leaves the larger diameter big ring, sudden slack is fed into the lower run until the rear derailleur takes up the slack.
- Pedal load: If you are pushing down hard on the pedals while shifting, the top run of the chain is under massive tension, resisting lateral movement until it violently snaps across.
If any physical barrier or pedaling habit fails during that half-second transition, the chain overshoots the teeth and falls into the gap between the small ring and your frame.
Quick troubleshooting: why is your chain dropping?
Before picking up tools, match what happens on your ride with the most probable root cause in the breakdown below:
| What happens during the ride | Probable root cause | How to fix it |
|---|---|---|
| Drops inside every time you shift to the small ring, even on flat ground | The front derailleur “L” limit screw is backed out too far. | Tighten (turn clockwise) the “L” limit screw in 1/4-turn increments. |
| Drops inside only when stomping hard on the pedals on steep hills | Shifting under full pedaling load / high torque. | Soft-pedal (ease leg pressure) for half a crank revolution during the shift. |
| Drops inward over bumps, cattle grids, or rough tarmac | Chain bounce and lack of an anti-drop guide. | Keep pedal cadence smooth over rough ground; install a chain catcher. |
| Chain hesitates, grinds, and then suddenly slams off the ring | Excessive cable friction or dirty/sticky front derailleur pivots. | Clean and lubricate pivots; inspect and replace shift inner cable and housing. |
| Chain rubs the derailleur cage in easiest climbing gear, but drops if adjusted | Cage height or angle is misaligned relative to chainrings. | Realign the front derailleur so the cage is parallel to chainrings and 1–3 mm above tallest teeth. |
Step-by-step: how to adjust the “L” (Low) limit screw
The Low limit screw (marked L on the derailleur body) is the physical stop that prevents the front derailleur cage from traveling too far toward the frame. Adjusting it takes only a screwdriver and five minutes.
1. Set your starting gear combination
Put your bike in a work stand or have a partner lift the rear wheel off the ground. Shift the chain into:
- Front: Small chainring (inner ring)
- Rear: Largest cog on the cassette (easiest climbing gear)
This combination creates the most inward chainline and reveals your front derailleur’s true mechanical stopping point.
2. Inspect the cage-to-chain clearance
Look directly down at the front derailleur. Inspect the gap between the inside plate of the derailleur cage and the inner edge of the chain.
- Ideal clearance: There should be a tiny 0.5 mm to 1.0 mm gap (roughly the thickness of a credit card or business card).
- If the gap is wide (2 mm or more): The cage can travel too far inboard, allowing the chain to slip straight past the small ring onto your bottom bracket shell.
- If the chain rubs firmly against the cage: The screw is too tight, which may cause noise or prevent downshifts altogether.
3. Adjust the “L” screw
Locate the L screw on your front derailleur. (On Shimano and SRAM mechanical derailleurs, limit screws are typically marked with a small stamped ‘L’ and ‘H’, or indicated in the component manual).
- To move the cage outward (away from the frame): Turn the L screw clockwise (tighten). This restricts inner travel and stops chain drops.
- To move the cage inward (toward the frame): Turn the L screw counter-clockwise (loosen).
Turn the screw in 1/4-turn increments. Watch the inner cage plate move relative to the chain as you turn.
4. Test shifting under rotation
With the bike supported, rotate the pedals by hand at a normal cadence (around 80–90 RPM). Shift back and forth between the big and small chainrings several times:
- The shift down should be smooth and immediate.
- The chain should land cleanly on the small chainring teeth without bouncing over the inside edge.
- Return to your lowest gear (small ring, biggest rear cog) and confirm there is no persistent rubbing noise when pedaling.
Check front derailleur height and cage alignment
If your “L” limit screw is adjusted correctly but the chain still derails intermittently, the front derailleur mount itself may have shifted on the seat tube.
Height check
Shift into the big chainring. The bottom edge of the outer derailleur cage should sit 1 to 3 mm above the tips of the tallest chainring teeth (about the thickness of a 1-pound coin or standard coin).
- If the derailleur is positioned too high, the cage cannot capture the chain reliably during a downshift.
- If it is too low, the cage will scrape against the chainring teeth when shifting into the big ring.
Angle (parallel) check
View the derailleur cage from directly above. The outer cage plate should run completely parallel to the outer chainring. If the tail of the cage is angled inward toward the frame, it acts like a ramp that kicks the chain off the inside of the ring whenever you downshift.
(Note: On modern Shimano toggle-style mechanical front derailleurs like 105 R7000 and Ultegra R8000, align the cage using the alignment indicator marks on the inner plate as specified in Shimano dealer manuals).
Master the soft-pedal downshift technique
Mechanical adjustments ensure your bike is capable of clean shifts, but your shifting technique determines how smoothly the drivetrain behaves under real road conditions.

Why stomping causes drops
When climbing a steep grade in the big ring and suddenly realizing you need the small ring, the instinctive beginner reaction is to push hard on the pedals to maintain speed while clicking the left shifter.
Under maximum rider torque, the chain is pulled taut like a steel cable. When the derailleur pushes against that taut chain, the chain cannot easily bend onto the shift ramps. Once it finally yields, the built-up tension causes it to whip aggressively across the small ring and straight off the inner edge.
The 3-step soft-pedal technique
- Anticipate early: Shift into your small chainring 5 to 10 seconds before the hill steepens, while you still have forward momentum. For a deeper look at timing, read our field guide on shifting before the hill.
- Lighten your pedal stroke: Keep your legs turning at a steady cadence, but drop your muscular force by about 70–80% for half a crank revolution (the “soft pedal”).
- Execute the click: Push the shift lever firmly through its full throw. Wait for the audible confirmation that the chain has engaged the small ring teeth, then smoothly resume full pedaling power.
Chain catchers: cheap, essential frame insurance
Even with a perfectly dialed derailleur and flawless shifting habits, an unexpected pothole or sudden surge on rough tarmac can bounce a slack chain off the inner ring.
A chain catcher (also known as an anti-drop guide) is a lightweight aluminum arm that bolts directly behind your front derailleur mounting bolt. It extends down alongside the inner chainring, sitting roughly 1 mm away from the chain.
Why every road bike benefits from one:
- Prevents frame damage: If a chain drops without a catcher, it can wedge tightly between the inner ring and bottom bracket shell, gouging aluminum or cracking composite carbon resin.
- Instant recovery: If the chain bounces inward, the catcher guides it immediately back onto the small chainring teeth before it has a chance to fall off.
- Universal adoption: Even WorldTour professional teams running top-tier electronic groupsets equip their race bikes with chain catchers for classic cobbled routes and mountainous stages.
If your bike did not come equipped with a chain catcher from the factory, aftermarket bolt-on catchers (from brands like K-Edge, Token, or Rotor) cost little, weigh under 20 grams, and provide complete peace of mind.
What to do if your chain drops mid-ride
If your chain drops while riding out on the road, staying calm and following a safe sequence prevents injury and drivetrain damage:
- Do not force the pedals: As soon as you feel loss of resistance, stop pedaling immediately. Stomping on a dropped chain is what wedges metal into carbon frame paint.
- Try the rolling pickup (safe flat roads only): If you are coasting safely on a flat, empty road with momentum, click your front shifter into the big ring position and gently rotate the pedals forward with zero pressure. The outer cage will often hook the chain and pull it back onto the ring.
- Pull over safely: If the rolling pickup does not work, coast to the verge or pavement, unclip, and dismount safely on the non-traffic side of the road.
- Reseat the chain cleanly: You do not need oily black fingers. Use a clean stick, leaf, or the tip of a tire lever from your saddlebag to lift the lower run of the chain back onto the top teeth of the small chainring. Lift the rear wheel and spin the pedal forward one turn by hand until the chain re-engages fully.
Your next step
A dropped chain is not bad luck—it is a clear signal that your drivetrain needs a quick mechanical check or a small adjustment to your shifting habits.
To keep your entire shifting system crisp, quiet, and reliable:
- Check your “L” limit screw gap on the stand today using the 1/4-turn method outlined above.
- Review your gear habits by exploring our complete visual guide to how to use road bike gears.
- Keep the drivetrain clean and properly lubed—a grime-encrusted chain cannot flex smoothly across chainrings. Follow our step-by-step tutorial on how to clean and lubricate a road bike chain.
- Make safety checks second nature by running through the five-minute pre-ride bike check before every weekend ride.