Is your road-bike tyre installed backwards?
Read the rotation arrow correctly, decide whether a reversed road tyre needs fixing, and remount a tubeless or tubed tyre without creating a new problem.
 Field guide / road-bike-tyre-installed-backwards
Before you buy
Check the starter kit first
Print the one-page buying brief for helmet, lights, water, phone, and repair compatibility before comparing upgrades.
A reversed slick road tyre is usually not an emergency, but the maker’s arrow is still the correct installation target. First confirm that the marking really is a rotation arrow, check that the bead is seated and the tyre holds pressure, then schedule a careful remount rather than turning a small orientation mistake into a damaged tube or contaminated tubeless setup.
The short answer: if the sidewall has a single
ROTATIONarrow, it should point in the direction the wheel travels when the bike moves forward. A plain road slick fitted the other way may show little practical difference, but follow the manufacturer’s instruction. Remount immediately when the tread is directional for grip, front and rear arrows differ, or the maker explicitly requires it.
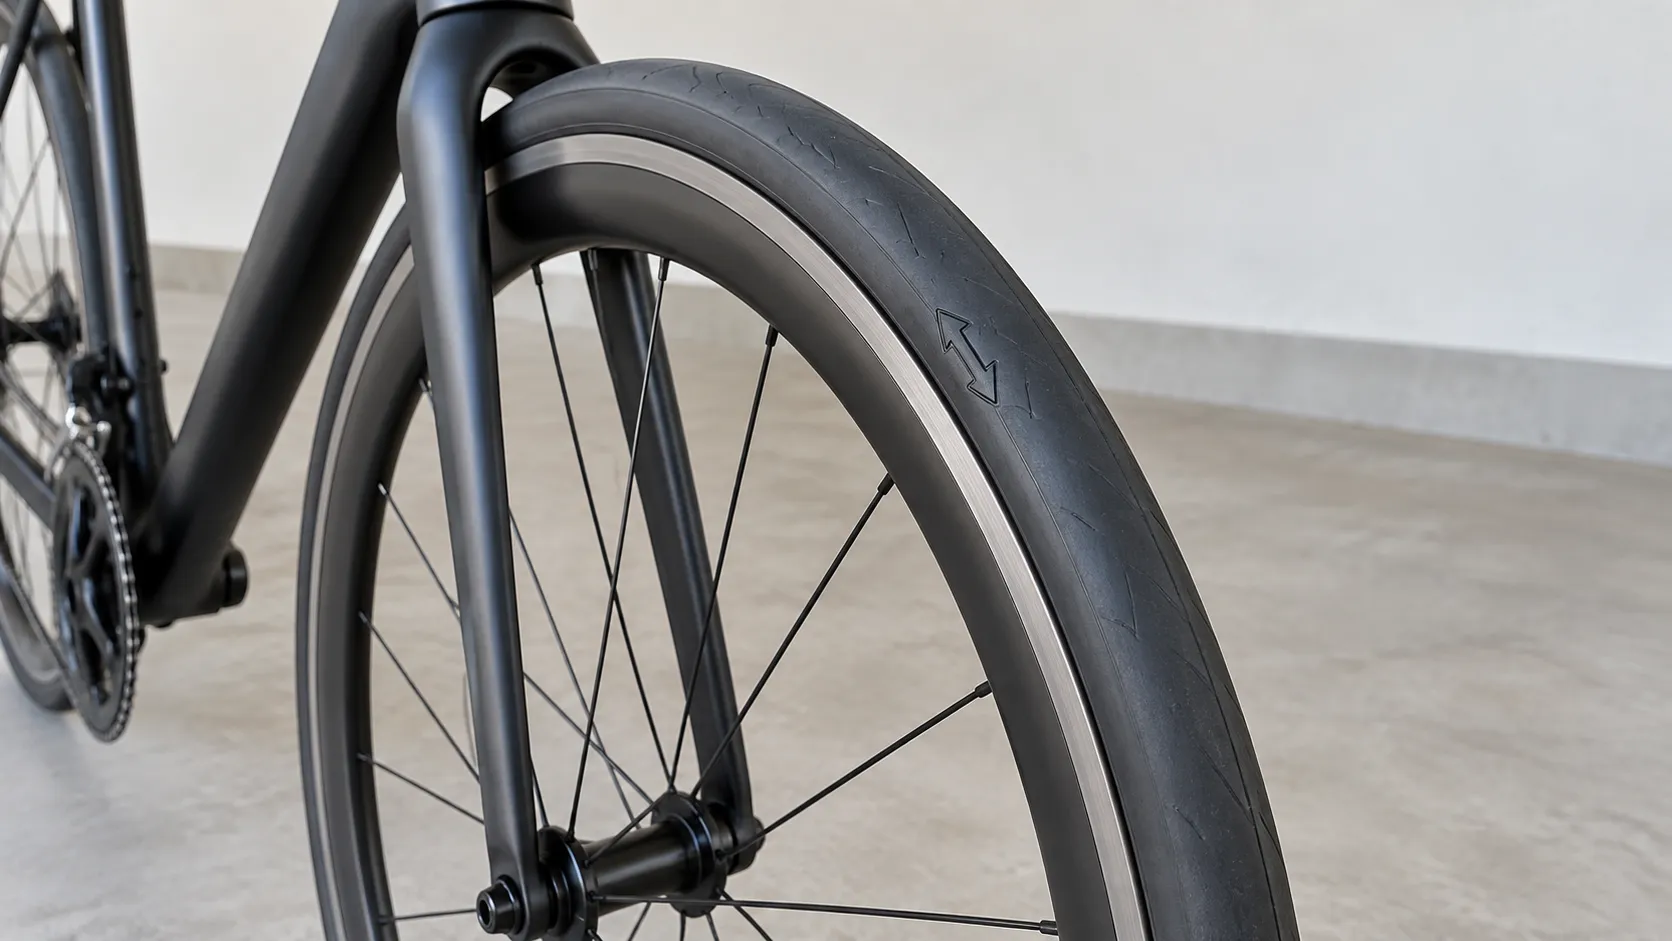
Confirm what the marking means
Spin the wheel slowly and inspect both sidewalls. Look for ROTATION, DRIVE, an arrow, or separate FRONT and REAR markings. Do not assume a decorative tread chevron is the instruction.
- One rotation arrow: install the tyre so the arrow follows forward wheel rotation.
- Front and rear arrows: use the arrow matching the wheel on which the tyre is installed. The recommended directions may be opposite.
- No directional marking: the maker may allow either direction. Check its product page or manual if the tread looks directional.
- Different instructions on each model: the sidewall and that exact tyre maker’s manual outrank a general internet rule.
Schwalbe explains that rotation direction on many road tyres is mainly an aesthetic matter, while it is more important off road because tread must transmit steering, braking, and driving forces. That is useful context, not permission to ignore every arrow: compounds, casings, tread shapes, and manufacturer instructions differ.
Decide whether to fix it now
Stop and correct it before the next ride when
- the tyre maker says direction affects performance or safety;
- the tyre has pronounced directional tread rather than a near-slick road surface;
- a
FRONTorREARarrow has been applied to the wrong wheel direction; - the bead line disappears into the rim in places, indicating uneven seating;
- the tyre loses pressure, bulges, exposes casing, or has installation damage;
- the tube may be pinched or the tubeless bead is not secure.
Direction is only one part of installation. A correctly oriented tyre with a trapped tube or unseated bead is the more urgent fault.
A careful trip home may be reasonable when
The tyre is a near-slick road model, the manufacturer does not attach a safety warning to direction, the bead is even on both sides, pressure is stable, and there is no damage. Ride conservatively and avoid treating Reddit consensus as a product manual. Correct it when you have the time, tools, and workspace to do the job properly.
If you are unsure, send the exact tyre model and a clear photo of its sidewall marking to the manufacturer or a competent shop.
Remount a tubed tyre without pinching the tube
- Shift to make wheel removal easier, release the brake only if your system requires it, and remove the wheel according to the bike manual.
- Deflate the tube completely. Push the tyre beads into the rim’s centre channel to create slack.
- Remove one bead, then remove the tube. Inspect it for pinch marks and check the rim tape, tyre casing, and bead.
- Rotate the tyre so its arrow will follow forward wheel travel. Remember that you are looking at a loose wheel; identify the bike’s left and right sides before installation.
- Fit one bead. Add just enough air for the tube to take shape, place it inside without twists, then install the second bead.
- Before inflation, inspect both sides to confirm no tube is visible beneath the bead.
- Inflate in stages. Watch the moulded bead-reference line and stop if any section lifts, bulges, or fails to seat evenly.
- Reinstall and secure the wheel, reconnect anything released, then perform a stationary brake and wheel-retention check.
If choosing and fitting tubes is still unfamiliar, use our road-bike inner-tube size guide and puncture repair walkthrough.
Remounting tubeless is messier, not mysterious
For tubeless, read the tyre and rim instructions before breaking the bead. Use gloves and protect floors and brake parts from sealant. Keep the valve near the top while unseating the first section so liquid settles away from the opening, then collect reusable sealant only if its maker permits that.
Inspect rim tape and the valve before reseating. Add the specified amount of compatible sealant, seat the beads with an approved pump or inflator, and never exceed the lower pressure limit printed by the tyre or rim maker. Rotate and shake the wheel as directed, confirm the bead line is even, then check pressure again after the installation has settled.
Do not use improvised flammable-gas seating methods. If the bead will not seat with approved equipment, take the wheel to a shop. Our guide to a road-tubeless puncture that will not seal covers a different failure: a puncture after correct installation.
Avoid three common orientation mistakes
Reading the arrow at the bottom
At the contact patch, the tyre surface moves backward relative to the frame. That confuses people looking at the wheel on the floor. Read the arrow at the top of the wheel, where tyre movement matches the bicycle’s forward travel.
Copying the other wheel
Front and rear recommendations can differ. Read each tyre’s sidewall rather than mirroring the first wheel.
Fixing direction but missing the real fault
After every remount, check bead seating, pressure retention, wheel security, brake operation, and free rotation. A reversed arrow rarely explains a tyre that wobbles dramatically; use our wheel-versus-tyre wobble guide to isolate that problem.
Your next step
Find the actual sidewall arrow, stand beside the installed wheel, and trace how the top moves when the bike rolls forward. If it is reversed, read the maker’s instructions and plan one careful remount. If the bead, pressure, or casing is also questionable, do not ride until the complete installation is safe.