How to choose the right inner tube for a road bike
Read tyre size, match the tube's diameter and width range, choose the correct valve type and length, and test your roadside spare before you need it.
 Field guide / how-to-choose-road-bike-inner-tube-size
Before you buy
Check the starter kit first
Print the one-page buying brief for helmet, lights, water, phone, and repair compatibility before comparing upgrades.
Choose a road-bike inner tube by matching three things: the tyre’s bead-seat diameter, its width, and the rim’s valve type. Then choose a valve stem long enough to clear the rim and accept your pump head. The bike’s wheel label or marketing name is not enough.
The short answer: read the full size from the tyre sidewall—preferably an ETRTO marking such as
28-622. Buy a tube whose stated range includes both28mm width and622mm diameter, with the correct Presta or Schrader valve and enough exposed stem for your actual pump.
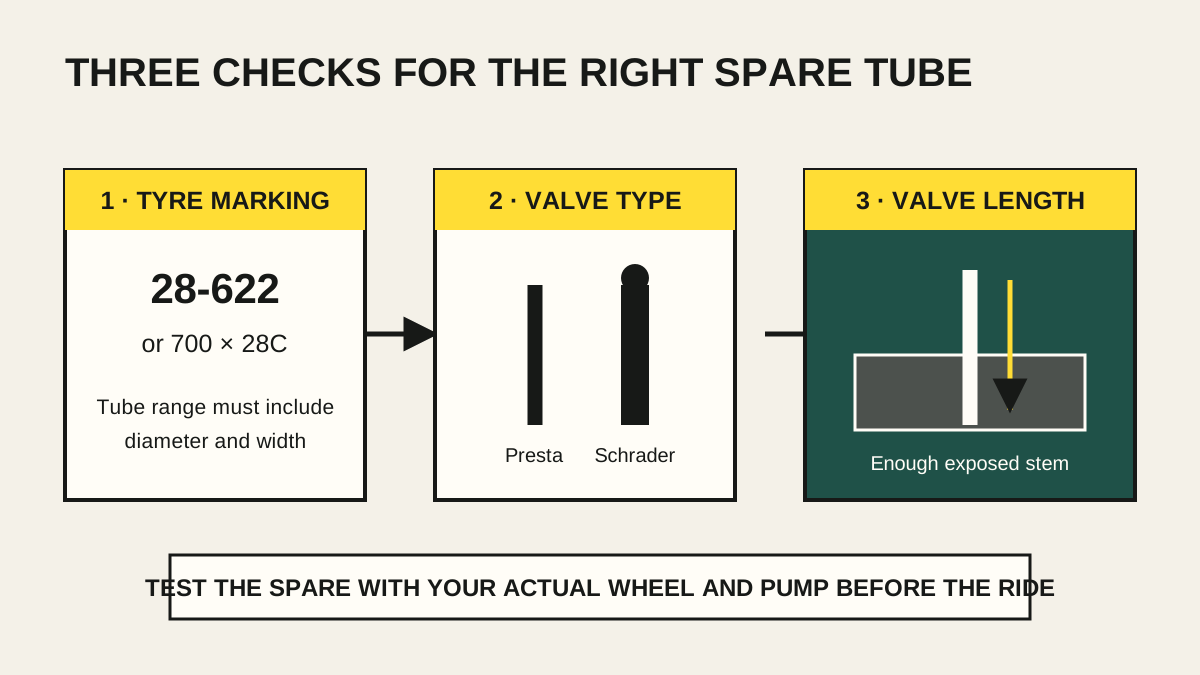
Why a spare can be the wrong spare
Recent Reddit discussions show riders discovering that a valve is too short for a deep rim and asking whether a tube diameter, width, and valve type actually match. These are small packaging details until a puncture happens beside the road.
Common mistakes include:
- reading
700Cbut ignoring tyre width; - treating
700Cand700 mmas an exact physical diameter; - assuming any Presta valve will reach through a deep-section rim;
- buying a Schrader tube for a rim drilled only for Presta;
- carrying a valve extender that does not match the valve core;
- never testing the mini-pump on the chosen valve;
- installing a tube in an incompatible tubeless-only or hookless system.
Use the complete compatibility chain: tyre, tube, rim, valve, pump.
Read the tyre, not the old tube
Find the moulded size on the tyre sidewall. You may see several equivalent naming systems:
| Tyre marking | What it tells you |
|---|---|
28-622 |
ETRTO: approximately 28 mm tyre width and 622 mm bead-seat diameter |
700 × 28C |
French-style road size commonly corresponding to 28-622 |
28 × 1.10 |
An inch-style label that may describe a similar size |
The ETRTO number is the clearest starting point because the second number identifies the rim’s bead-seat diameter. Schwalbe’s official tube finder describes 40-622, for example, as 40 mm wide with a 622 mm inner tyre diameter.
Do not copy the old tube automatically. A previous owner may have installed a broad “close enough” size, the tyre may have changed, or its printed label may be difficult to interpret after stretching.
If the tyre has no readable size, identify the wheel and tyre models before buying. Do not infer fit from rim diameter measured with a household tape.
Match the tube’s stated range
Tube boxes list a diameter plus a width range, such as 700C × 25–32 or an ETRTO range containing 622. Your tyre width must fall within that printed range and the diameter must match.
For a tyre marked 28-622, a tube explicitly covering 25/32-622 would normally include it. A 18/25-622 tube does not include 28 mm simply because both are called 700C.
Wider ranges are convenient for a shared spare, but material and maker restrictions still apply. Some lightweight tubes have narrower approved rim or tyre combinations. Use the tube maker’s fit chart rather than assuming stretch is harmless.
Match the valve hole
Most modern road-bike rims use Presta valves: narrow stems with a small threaded tip that is opened before inflation. Schrader valves are wider and use a central pin, like many car tyres.
- A Schrader valve generally will not pass through a Presta-sized rim hole. Do not drill or force it.
- A Presta valve in a larger Schrader hole may need an approved reducer or grommet to support the valve correctly.
- Dunlop and newer click-style valves exist, so identify the actual system rather than assuming two categories cover every bike.
Look at the valve already installed and the wheel manual. If the rim has been modified, damaged, or drilled, ask a wheel specialist to inspect it.
Choose a valve that your pump can reach
Valve length is measured along the stem, but manufacturers may include different portions in the stated dimension. Schwalbe says its measurement includes the valve foot, not only the visible portion. This is why subtracting rim depth from the package number is only a first estimate.
The usable requirement is simple: enough stem must remain outside the rim for your pump head to seat and seal without levering against the rim. The amount depends on the pump head, valve nut, rim shape, and stem design.
The reliable method is:
- Find the wheel maker’s recommended valve or extender length.
- Measure the rim depth if that specification is not known.
- Choose a listed compatible stem that leaves practical pump access.
- Install or hold the spare at the valve hole and test the exact pump carried on rides.
Longer is usually less troublesome than too short, although an extremely long stem can rattle, look awkward, or place more leverage on the valve. Deep rims may need an extender.
Understand valve extenders before relying on one
There are extenders for fixed valve cores and extenders that relocate a removable core. They are not installed the same way. Zipp’s manual separates the types and ties extender length to rim depth.
Before packing an extender, confirm:
- the tube has a fixed or removable valve core as required;
- the extender is long enough for the wheel;
- the valve can still be opened, closed, and sealed;
- the pump head grips the extended valve;
- the core and extender do not leak after installation;
- the small installation tool is in the repair kit if needed.
A loose extender in the saddle bag is not a repair plan. Assemble and pressure-test the combination at home.
Butyl, TPU, and latex do not change the size rules
Material affects packed size, air retention, heat limits, installation care, repair options, and price. It does not excuse a diameter, width, valve, or rim mismatch.
Some TPU and latex tubes have specific maximum temperatures, rim-brake restrictions, patch systems, inflation limits outside the tyre, or installation procedures. Read the exact instructions. Our tubes versus TPU versus tubeless guide covers the tradeoffs without declaring one universal winner.
Check whether a tube is allowed at all
Some tubeless road setups can accept an emergency tube after removing the tubeless valve and checking the tyre. Others—particularly specific hookless rim and tyre combinations—have restrictions that must be confirmed from both manufacturers.
Before treating a tube as a universal bailout:
- verify that the rim and tyre permit tube use;
- remove any puncturing object from the tyre;
- inspect for a damaged bead, sidewall, rim tape, or rim;
- use the maker’s pressure limit for the exact configuration;
- remember that a large cut or structural damage is not repaired by adding a tube.
If a road-tubeless puncture does not seal, follow the staged options in the tubeless roadside guide.
Test the whole repair kit at home
Install the chosen spare once in controlled conditions. Confirm that you can remove the wheel, operate the axle, unseat and reseat the tyre, inflate with the carried pump, and reinstall the wheel without brake or shifting problems.
Then label the spare with its size and valve length. Keep it protected from abrasion and heat, and inspect it periodically for cracks at folds or the valve base.
Practise using the puncture-repair guide, then add the verified tube, tyre levers if permitted, and pump to the starter gear checklist.
Your next step
Photograph the sidewall size on each tyre and write down the wheel’s rim depth. Compare those facts with the tube box, then attach your ride pump to the valve before packing the spare. A successful home fit test is worth more than “700C road tube” on a label.
Sources and further reading
- Schwalbe: tube finder and explanation of ETRTO sizing
- Schwalbe: tube and valve-length technical guidance
- SRAM/Zipp: wheel care and spare-tube valve guidance
- SRAM/Zipp: valve extender types and rim-depth compatibility
- r/cycling reader context: a spare valve too short for the rim
- r/bikewrench reader context: matching tube size and valve type