Bike lights for being seen vs seeing the road
Choose front and rear bike lights by beam purpose, route darkness, runtime, mounting, and local rules instead of buying by the biggest lumen number.
 Field guide / bike-lights-be-seen-vs-see-road
Before you buy
Check the starter kit first
Print the one-page buying brief for helmet, lights, water, phone, and repair compatibility before comparing upgrades.
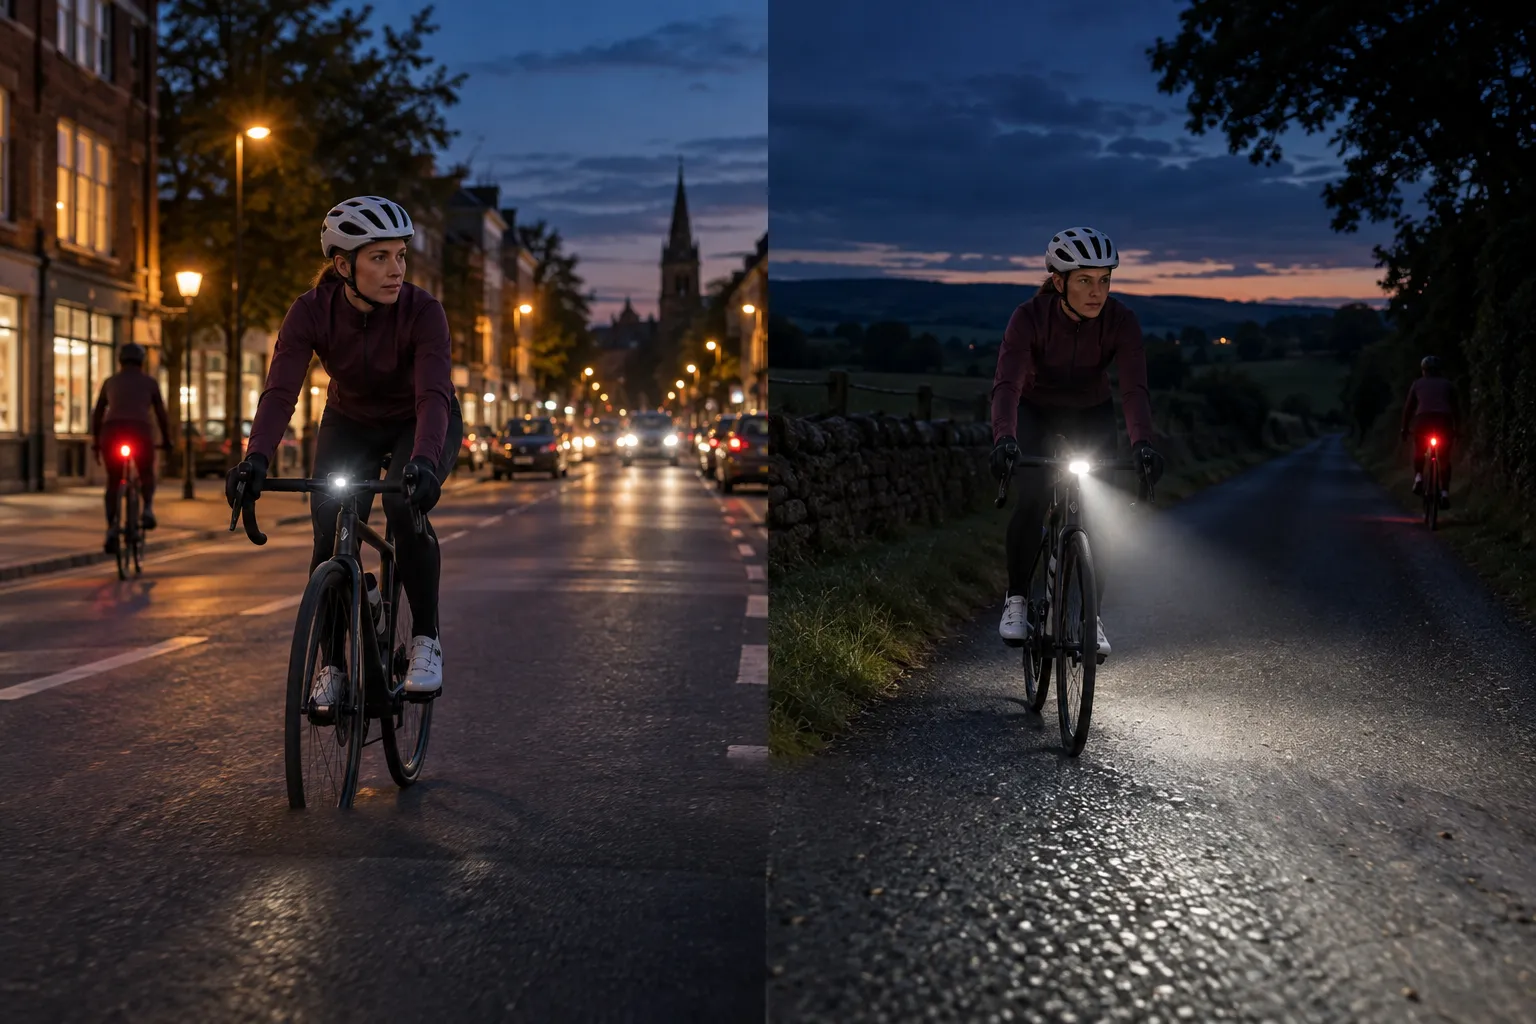
A light for being seen makes the bicycle conspicuous to other people. A light for seeing the road must also reveal surface hazards far enough ahead for your speed. A small commuter light can do the first job on a lit street and still be inadequate on an unlit lane.
The short answer: use a white front light and red rear light that satisfy your local rules. For lit urban riding, prioritise conspicuity, reliable mounts, side visibility, and runtime. For dark roads, add a properly aimed steady headlight with a controlled beam that lets you see through your full stopping distance.
Start with the route, not the lumen number
Ask four questions before comparing products:
- Is the route continuously lit, partly lit, or fully dark?
- How fast will you ride on descents and open sections?
- How long must the light last in the mode you will actually use?
- Will you ride near oncoming traffic, pedestrians, or a group?
A quoted maximum output often applies only to a short boost mode. The more useful specification is runtime at your chosen steady level, plus a beam pattern that puts light on the road rather than everywhere at once.
For a short lit commute, a compact front marker and rear light may be enough to be noticed. For an unlit training ride, you need meaningful illumination ahead, not just a bright point visible from the front.
Choose a light to be seen
A visibility light should be easy to notice without becoming a distraction. Prioritise:
- secure mounting that keeps its angle;
- some visibility from off-axis positions and junctions;
- a mode bright enough for rain, shade, or dusk;
- enough battery margin for delays;
- controls you can use before the ride with gloves;
- a low or group mode that will not dazzle a rider behind you.
Flashing modes can attract attention, but laws and restrictions vary. A flash can also make distance harder to judge and become unpleasant on a dark shared path or in a close group. A steady rear light, or a steady light paired with a restrained pulse where legal, gives other people a continuous reference.
NHTSA advises a white front light, red rear light, and reflectors at night or when visibility is poor. The UK Highway Code requires a lit white front and red rear lamp at night, plus specified reflectors, and recommends a steady front lamp where there is no street lighting. Treat those as examples, not a substitute for checking your local law.
Choose a light to see the road
On a dark road, look for beam shape as well as output. A useful road beam spreads across your lane, reaches far enough ahead, and has a controlled upper edge or careful aim so that the brightest part is not at eye height.
Set the bike on level ground and aim the lamp so its main beam falls on the road ahead. Then test it outside at low speed. Check that:
- potholes and debris become visible before you reach them;
- the beam does not jump upward when the mount vibrates;
- your hands, cables, bag, or computer do not block it;
- switching to a lower mode still leaves a safe get-home option;
- oncoming people are not shielding their eyes.
The faster you ride, the more distance you use while noticing a hazard, deciding, and braking. If the beam ends before the distance in which you can stop, reduce speed or increase useful illumination. Read how to ride safely after dark for route, speed, and positioning choices beyond the lamp itself.
Mounting matters more than it looks
A powerful light aimed badly can make riding less safe. Mount the front lamp firmly near the bike’s centreline and below eye level when possible. Keep it clear of brake and shift cables. After tightening the bracket, try to rotate it by hand; normal bumps should not change its aim.
Mount the rear lamp where it is not hidden by a saddle bag, jacket, mudguard, or seatpost-mounted bottle. Stand 10–20 metres behind the loaded bike and check it at road height, not just while leaning over the saddle.
If you use a helmet light, treat it as a secondary tool. It follows your gaze and can shine directly into other people’s eyes. It also does not replace a legally required cycle-mounted lamp where those rules apply.
Build in battery margin
Cold weather, battery age, high-output modes, and charging habits can reduce real runtime. A practical routine is:
- charge before the ride rather than relying on memory;
- start with at least twice the expected trip time in the chosen mode;
- use a lower mode on well-lit sections;
- carry a small backup on a long or remote night ride;
- inspect charging-port covers and mounts after wet rides;
- replace a light that shuts off unpredictably.
A second small light is useful redundancy, but two poorly aimed lights do not equal one good road beam.
Do daytime lights replace road positioning?
No. A daytime rear light may improve conspicuity in some conditions, but it cannot make a rider visible around a blind corner, through a solid vehicle, or from a position a driver is not checking. Lighting supports—not replaces—predictable riding, observation, and route choice.
Pair your setup with road positioning and safety fundamentals. If you are considering electronics beyond lights, our rear bike radar guide explains what radar can and cannot tell you.
Your next step
Take your fully loaded bike outside tonight and inspect it from the front, rear, and both diagonals. Check beam aim, bag and jacket obstruction, chosen-mode runtime, and one backup plan. If you still need the basics, use the essential road-cycling gear guide before buying the brightest option on the shelf.
Sources and further reading
- NHTSA: bicycle safety and visibility equipment
- NHTSA: overview of active bicycle-lighting laws
- UK Highway Code: rules for cyclists, including lighting
- GOV.UK: pedal-cycle lighting summary
- r/cycling reader context: lights for being seen and seeing
- r/cycling reader context: early rides beginning in darkness