Why a saddle can hurt after you change bikes
Trace new saddle pain after changing bikes through position, reach, saddle angle, riding time, shorts, and saddle shape before buying another saddle.
 Field guide / why-saddle-hurts-after-changing-bikes
A saddle that felt fine on one bike can hurt on another because the saddle is only one part of the position. Frame geometry, handlebar reach and height, crank length, saddle height, setback, tilt, and riding intensity all change where your pelvis rests and how much it moves.
The short answer: do not keep buying saddles until you have compared the two complete positions. Record the old setup if possible, return the new bike to a sensible baseline, change one variable at a time, and treat numbness or persistent pain as a stop signal rather than an adaptation target.
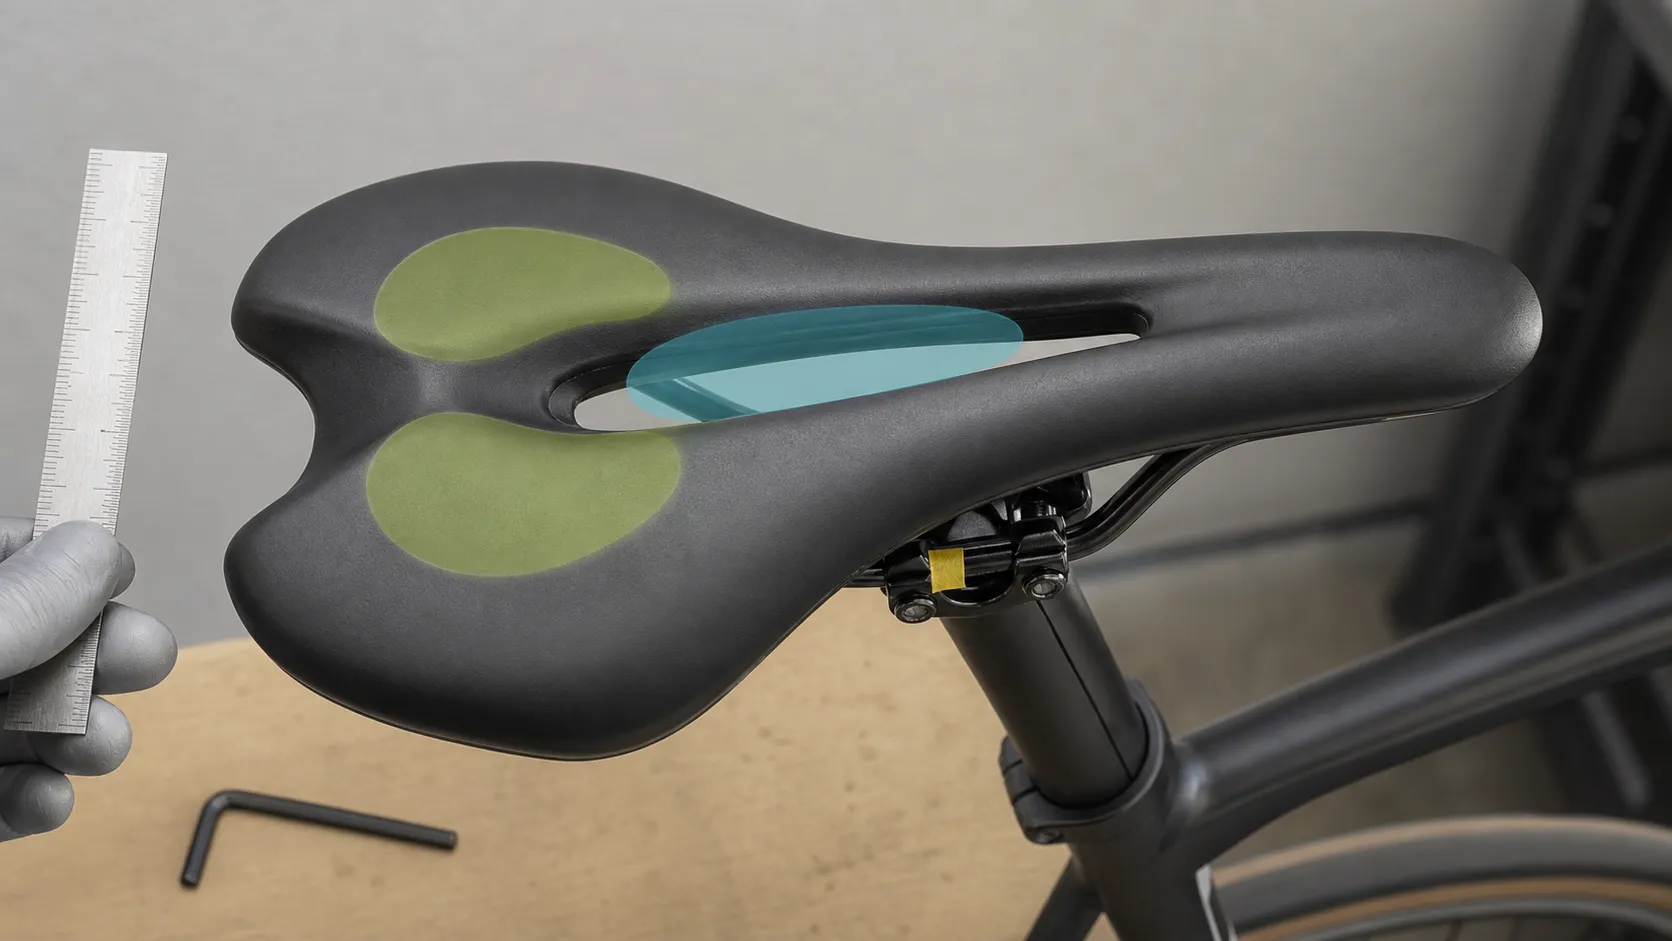
First separate pressure, chafing, and pain
New riders may feel mild, symmetrical tenderness at the sit bones during the first short rides. It should settle between rides and improve as exposure builds gradually.
Different symptoms point to different actions:
- Chafing or broken skin: check shorts, seams, moisture, hygiene, movement on the saddle, and ride duration. Use the saddle-sore guide rather than making repeated fit changes over damaged skin.
- Genital or perineal numbness: stop the ride. Read genital numbness while cycling and get appropriate help if it persists or recurs.
- One sharp pressure point: inspect position and saddle interaction; do not assume more padding fixes it.
- Deep pain lasting for days, swelling, weakness, or off-bike symptoms: seek clinical assessment.
Recent Reddit threads about persistent pain after moving from a previously comfortable bike and different kinds of pain on different saddles show why “which saddle?” is often too narrow a question. They are demand signals, not diagnostic evidence.
Reconstruct the comfortable bike before guessing
If the old bike is available, measure both bikes using the same reference points. Photograph the tape or level in place so you can repeat the measurement.
Compare:
- Saddle model, width, shape, padding, and rail position.
- Saddle height from the bottom-bracket centre to a defined point on top.
- Saddle setback relative to the bottom bracket.
- Saddle angle measured across the same usable surface.
- Crank length.
- Horizontal and vertical distance from saddle to handlebar.
- Hood position and handlebar shape.
- Pedals, cleats, shoes, insoles, and shorts.
Do not copy one number blindly. Different seat-tube angles, saddle shapes, and crank lengths change what the measurement means. The purpose is to find large differences and create a known baseline for a fitter—not to declare two bikes identical with a tape measure.
If the old bike is gone, search for its geometry chart and write down what you remember: upright or stretched, hands light or heavy, preferred saddle area, and the ride duration at which it stayed comfortable.
Check the variables that make a saddle feel different
Saddle height
A saddle that is too high can make the pelvis rock or the rider reach for the bottom of the pedal stroke. That movement can create rubbing and concentrate pressure. Too low can also alter loading and make pedalling feel cramped.
Use the current height as a recorded starting point. Do not chase a formula by moving centimetres at once. Our saddle-height guide explains a conservative setup process.
Saddle tilt
Start close to the manufacturer’s intended neutral position. A nose that points markedly down can make you brace against the bars or slide forward; a nose that points up can increase pressure at the front. Curved saddles need a repeatable measuring surface, not a phone balanced across arbitrary high points.
Tiny adjustments can feel large. Mark the rail position, use the correct clamp method and torque, and recheck after tightening because the saddle may rotate as the clamp seats.
Setback and reach
Moving a saddle forward or backward changes more than the distance to the bars. It changes the relationship between pelvis, pedals, and saddle support. A long or low cockpit may pull you toward the saddle nose even when the saddle itself is suitable.
If you constantly push yourself rearward, slide forward, lock your elbows, or support excessive weight on your hands, inspect the whole fit. Do not use extreme saddle movement solely to correct a frame that is too long.
Riding dose
A new bike often encourages longer or harder rides. Compare time on the saddle, climbing, indoor riding, and consecutive days—not only distance. A 60-minute steady outdoor ride and a 60-minute trainer session can load the contact point differently because indoor riding usually includes fewer natural position changes.
Shorts and position on the pad
The pad in cycling shorts must stay close to the body and sit under the contact area. A stretched, folded, badly positioned, or wrong-size pad can create friction or leave the sit bones beyond its intended support. More thickness is not automatically better.
Why saddle width alone does not settle it
Sit-bone measurements can help narrow a range, but they do not describe riding posture, saddle curvature, pelvic rotation, soft-tissue clearance, or where you actually sit. A wider saddle can interfere with the thighs; a narrower one may fail to support the intended contact area. Brand sizing formulas are not interchangeable.
Saddle shape also interacts with position. A flat saddle, a waved profile, a short nose, and a cut-out guide the pelvis differently. Test programs and return policies are more useful than collecting cheap saddles that cannot be returned.
Research reinforces the interaction rather than providing one magic measurement. In a small controlled study, changing seat position changed discomfort, pressure distribution, muscle activity, and pedal forces. The finding does not identify a universal best position; it explains why swapping only the saddle may miss the cause.
Run a controlled two-week check
Only test if there are no red-flag symptoms and the bike is mechanically safe.
- Record the current setup with measurements and photographs.
- Return obvious extremes—such as a heavily tilted saddle—to a sensible baseline, using the maker’s instructions.
- Choose a short, familiar route and easy effort.
- Record symptom type, location, onset time, and how quickly it settles.
- Change one variable by a small amount.
- Repeat comparable rides with recovery between them.
- Stop the experiment if symptoms worsen or numbness appears.
Do not use pain tolerance as the test. The useful result is a repeatable improvement at the same riding dose.
When to stop adjusting alone
Get fitting help when the bike’s size is uncertain, several contact points hurt, the position requires extreme parts, or no single-variable test produces a clear direction. Bring both bikes or their measurements when possible.
Get healthcare help for persistent pain, numbness, weakness, skin infection, urinary symptoms, or symptoms affecting daily life. A saddle purchase cannot diagnose or treat those problems.
Your next step
Before ordering another saddle, create the eight-item comparison between the old and new bikes. Correct one obvious baseline issue, then make one short test. If the result is unclear, take the comparison to a fitter chosen with our bike-fitter checklist.
Sources and further reading
- Primary research: seat position, discomfort, pressure distribution, and pedal force
- Primary research: saddle design and perineal pressure
- Cycling UK: making a bike fit more comfortably
- r/cycling reader context: pain after changing to a different bike
- r/cycling reader context: different symptoms on different saddles
Reddit discussions were used to identify the recurring troubleshooting question. Individual experiences were not treated as medical or fitting evidence.