Why does the chain keep dropping off a 1× chainring?
Diagnose repeated front chain drops on a one-by drivetrain by checking chain seating, damage, wear, compatibility, chainline, chain length, clutch function, and rear setup.
 Field guide / why-one-by-chain-keeps-dropping
A chain that repeatedly leaves a single front chainring is not fixed by adjusting a front derailleur—there is no front derailleur. First confirm the chain is routed and seated correctly, then inspect the chainring, chain, rear derailleur clutch, chain length, chain gap, chainline, hanger and component compatibility in that order.
The short answer: one isolated drop after mud or a violent bump may be contamination or impact. Repeated drops on ordinary terrain point to a setup, wear, damage or compatibility problem. Do not add a chain guide until you have found why the drivetrain’s built-in retention is failing.
The current problem signal
A current r/bikewrench post about a chain repeatedly leaving a 1× front chainring drew strong attention. The photos initially made some readers think the chain had simply been placed on a guard rather than the teeth, while the rider clarified that the pictured position was the result after turning the cranks.
That exchange illustrates the first diagnostic rule: record the chain before, during and after the fault. A photo of the final position alone may not show how it got there, and forum replies cannot establish the condition or compatibility of unseen parts.
This guide covers a true 1× derailleur drivetrain: one front chainring, a multi-sprocket cassette and a rear derailleur. It does not cover a two-chainring bike dropping during a front shift.
Stop safely when the chain comes off
Ease off the pedals immediately. Forcing the crank can wedge the chain between ring and frame, bend teeth, damage paint or carbon, or pull the rear derailleur.
Brake smoothly, move out of the traffic line and stop on stable ground. Before reseating the chain, check whether it is trapped, twisted, open at the quick link, or routed outside the derailleur cage. If the chain entered the spokes, inspect the derailleur, hanger, spokes and wheel before riding again.
Wear gloves or use a clean barrier, place the chain on the correct ring teeth, turn the crank slowly by hand and watch one complete revolution. If it tries to walk off again, do not test it under leg power.
1. Confirm the chain is seated on the actual teeth
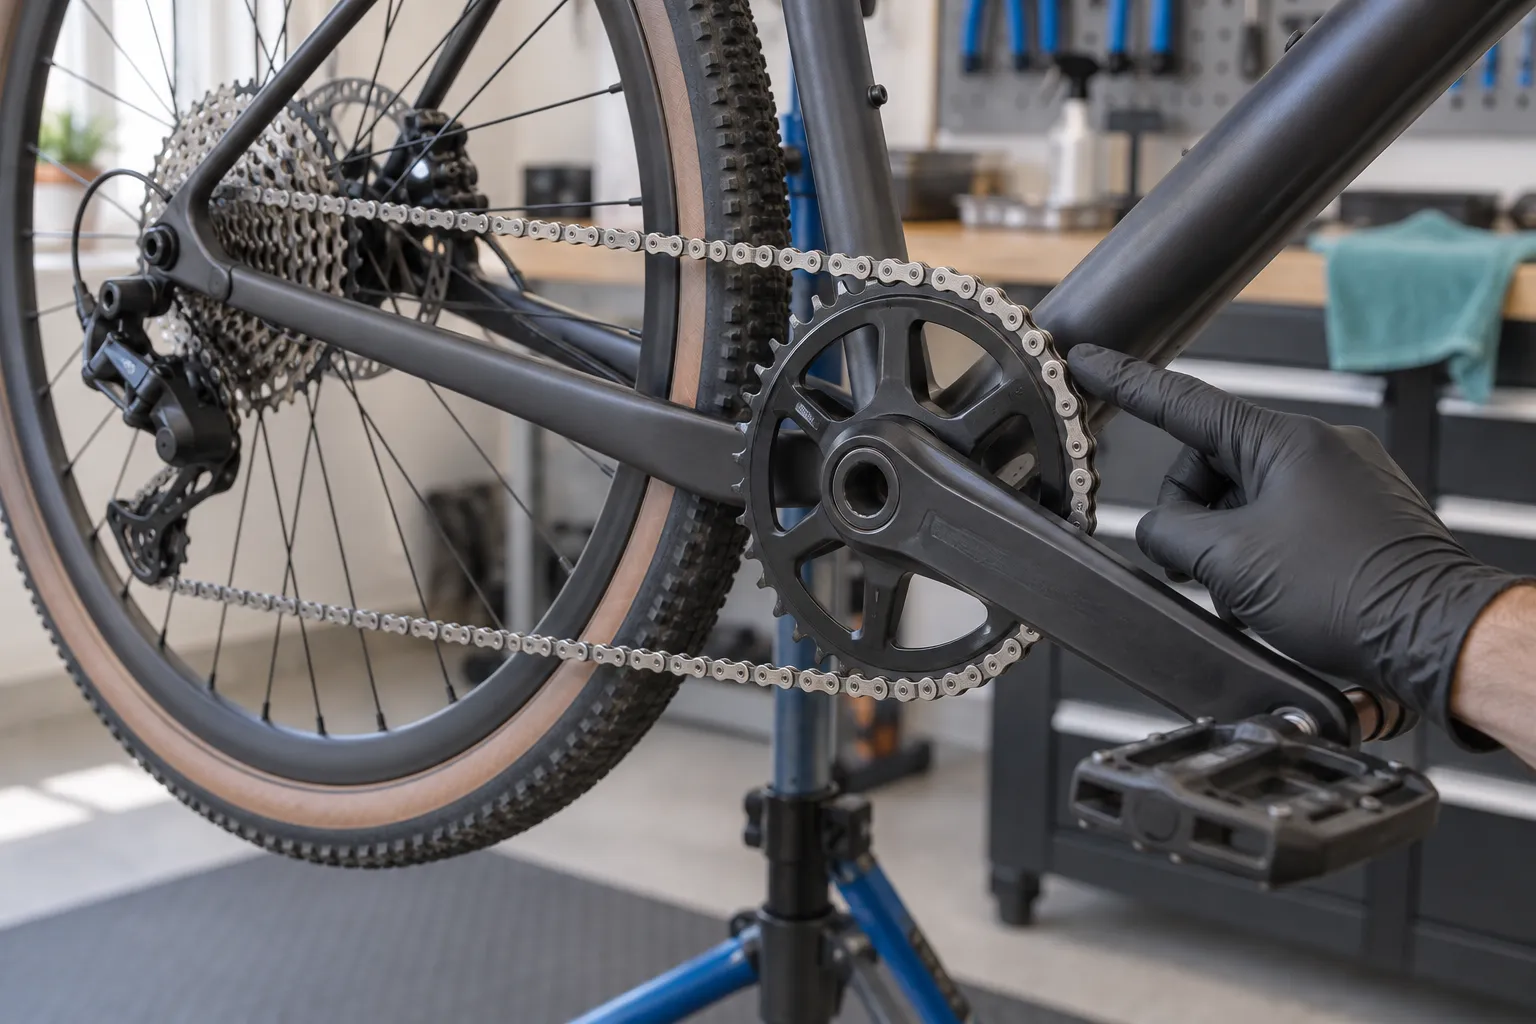
Some cranks have a guard, bash ring, spider or decorative outer structure near the chainring. The chain must engage the toothed ring around the full circumference. Check that each roller settles between teeth and no link rides on top.
Also trace the entire chain path:
- over the cassette sprocket;
- around the upper derailleur pulley;
- between the correct cage plates and guide tab;
- around the lower pulley;
- forward to the lower chainring run.
Incorrect pulley-cage routing can create noise and poor tension while still looking almost plausible from the side.
2. Inspect the chainring for damage and orientation
Rotate the crank slowly while viewing the ring from the side and from above. Look for:
- a bent ring or lateral wobble;
- bent, chipped, hooked or unusually short teeth;
- loose chainring bolts or lockring;
- a ring installed backwards or with the wrong offset;
- mud, a twig, packed wax or debris lifting the chain;
- wear concentrated on one section.
Do not tighten chainring hardware to a generic internet number. Direct-mount lockrings and chainring bolts have model-specific procedures and torque.
Many modern 1× rings use alternating tooth profiles often described as narrow-wide. The wider teeth occupy the chain’s wider spaces and the narrow teeth fit the narrow spaces. That retention works only when the chain and ring profiles are compatible and not excessively worn.
3. Check chain and chainring compatibility
Speed count alone does not guarantee compatibility. Current 12-speed systems can use different roller, plate and tooth profiles. Wolf Tooth’s compatibility chart, for example, separates tooth profiles for several chain families and warns that an incompatible chain can wear the wrong ring quickly.
Check the chain model, chainring model, drivetrain generation and manufacturer chart. Be suspicious if the problem began immediately after replacing the chain, chainring, crank, cassette or rear derailleur.
Also confirm the quick link matches the chain and is fully locked. A stiff, damaged or partly closed link may climb a tooth once per crank or chain revolution.
4. Measure chain wear and inspect ring wear
Use a chain checker suitable for the chain’s design. Do not diagnose wear by pulling the chain away from the ring or comparing it with a random ruler threshold. Our chain-wear guide explains why tools and replacement points differ.
A worn chain on a worn ring may seem to mesh until bumps or torque make it release. A new chain on a heavily worn ring can also run poorly. Look for hooked or asymmetric ring teeth, but compare them with manufacturer images because intentional narrow-wide shapes are not uniform.
If the chain skips under load while remaining on the ring, that may be cassette or chain wear rather than a front drop. Use why a chain skips under load to separate the symptoms.
5. Check rear-derailleur chain control
Gravel and mountain 1× systems commonly use a clutch to resist cage movement and reduce chain slap. SRAM describes its Apex 1× clutch as part of the system’s chain-retention design. Shimano GRX derailleurs may have a stabiliser switch that must be used according to their manual.
Check the exact derailleur instructions:
- Is the clutch or stabiliser in its riding position?
- Does the cage provide normal tension?
- Is the cage bent or damaged?
- Was the clutch disengaged for wheel removal and never re-engaged?
- Does the system require service rather than an external adjustment?
Do not dismantle a clutch without the manufacturer procedure. Stored spring energy, seals and friction parts make this more than a casual experiment.
6. Verify chain length and chain gap
A chain that is far too long may not maintain adequate tension; one that is too short can overload the derailleur in the largest sprocket. Wide-range 1× drivetrains often use a sizing method different from older narrow-range road systems.
Manufacturer instructions decide chain length. Park Tool’s general guide adds specific steps for dedicated 1× systems with large sprockets, but model-specific exceptions still apply.
Then check chain gap—the distance between the upper derailleur pulley and the cassette in the specified gear. SRAM supplies drivetrain-specific gauges and procedures because an incorrect gap affects shifting and chain control. Do not set it by copying a number from a different cassette or derailleur.
If the chain, cassette or chainring size recently changed, recheck both length and gap.
7. Inspect hanger alignment, indexing and limits
A bent rear-derailleur hanger can move the derailleur away from the intended cassette plane. Poor indexing may then make the chain climb, chatter or momentarily run between sprockets, sending disturbances forward.
From behind, look for an obviously angled derailleur, but do not assume a visual check proves alignment. Accurate diagnosis uses a hanger-alignment gauge. Read how to tell if a derailleur hanger is bent before turning adjustment screws.
Rear high and low limit screws prevent the chain leaving the cassette at its ends. They do not retain the chain on the front ring. If the chain can enter the spokes or fall outside the smallest sprocket, stop riding until the rear limit and alignment problem is corrected.
8. Consider chainline and backpedalling
Chainline describes the lateral relationship between the front ring and rear sprockets. A ring with the wrong offset, spacers in the wrong location, an incompatible crank or hub standard, or a wheel not seated correctly can create an extreme angle.
Notice when the drop occurs:
- only in the largest cassette sprocket;
- only in the smallest sprocket;
- while backpedalling in an extreme gear;
- after a crank or bottom-bracket change;
- under bumps rather than torque;
- at the same chainring position each revolution.
Those patterns narrow the cause. Some wide-range drivetrains may not backpedal cleanly in the most angled gears, but a chain that drops during normal forward pedalling still requires correction.
Chainline measurement and correction can involve crank spacers, ring offset and hub standards. That is a good point to involve a mechanic rather than adding washers experimentally.
Should you install a chain guide?
A compatible guide can add retention for rough terrain, racing or a design that specifies one. It should not conceal:
- an incompatible or worn chainring;
- a bent ring or hanger;
- wrong chain length or chain gap;
- failed clutch;
- incorrect chainline;
- loose crank or chainring hardware.
Fix the cause first. Then use a guide approved for the frame, ring size and chainline, installed to its clearance and torque instructions.
A useful diagnosis order
| Pattern | Check first | Then check |
|---|---|---|
| Started after new chain or ring | Exact compatibility and orientation | Wear on the retained old part |
| Happens on rough ground | Clutch/stabiliser and chain tension | Chain length, guide need, damaged teeth |
| Happens in one extreme rear gear | Chainline and wheel seating | Hanger, chain gap, component offset |
| Happens at one crank position | Bent ring, damaged tooth, stiff link | Loose mounting or crank play |
| Chain heads toward spokes | Stop riding; hanger and rear low limit | Wheel seating and derailleur damage |
| Chain remains on ring but jumps under load | Chain/cassette wear | Freehub and indexing |
Change one verified variable at a time and test by hand before a traffic-free low-load ride. Several simultaneous adjustments erase the evidence.
Your next step
Clean the drivetrain and make a 20-second video from the drive side while turning the cranks slowly by hand through the gears. Record the chain, chainring, cassette, clutch position and full derailleur cage. Then identify every component model and follow its compatibility and setup manual—or give that evidence to a mechanic. Do not ride until the chain remains seated and cannot enter the spokes.
Sources and further reading
- SRAM Apex 1× guide: clutch, chain retention and chain-gap setup
- SRAM 1× mechanical road systems manual
- Wolf Tooth: chain compatibility by chainring tooth profile
- Park Tool: chainline concepts
- Park Tool: chain-length sizing, including dedicated 1× systems
- r/bikewrench reader context: repeated front chain drop on a 1× drivetrain