Why does your bike vibrate through the pedals?
Trace a high-frequency pedal vibration by separating wheel speed, cadence, gear choice, chain engagement, pedals, crank, bottom bracket, and rear-wheel faults.
 Field guide / why-bike-vibrates-through-pedals
Before you buy
Check the starter kit first
Print the one-page buying brief for helmet, lights, water, phone, and repair compatibility before comparing upgrades.
A buzz through the pedals is not automatically a bad bottom bracket. The useful clue is what controls its frequency: road speed, crank cadence, a particular gear, pedalling force, or one side of the pedal stroke. Reproduce it gently, change one variable at a time, and stop before replacing parts.
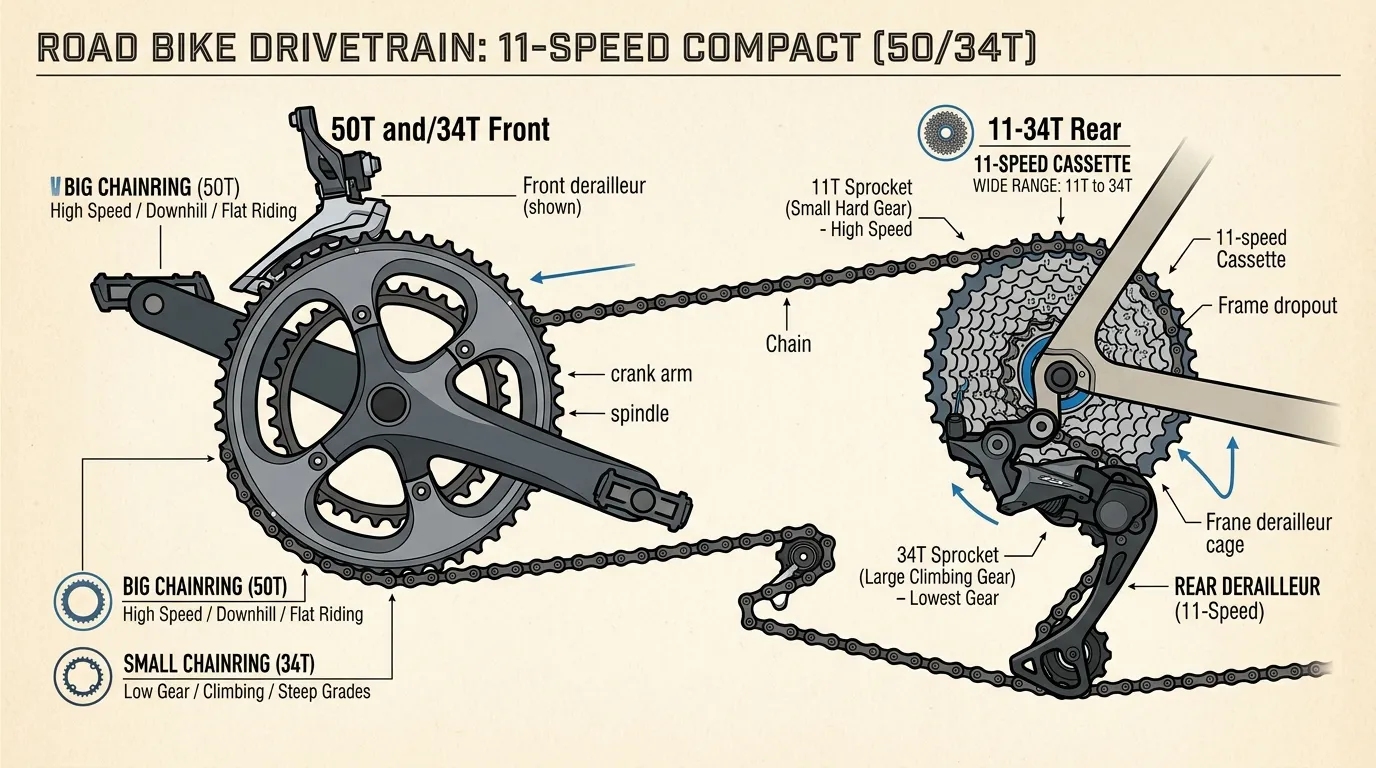
The short answer: first check for loose or dangerous parts. Then note whether the vibration changes when you shift while keeping cadence similar. A gear-specific buzz points toward chain, cassette, derailleur alignment, or chainline; a once-per-revolution pulse points more toward pedal, crank, chainring, or bottom bracket.
Start with the pattern, not the suspected part
A recent r/bikewrench thread described a new build with a high-frequency vibration through the pedals, most noticeable under force in the smaller rear sprockets. Suggestions ranged from swapping pedals to checking chain and cassette compatibility. That spread of answers is useful: “vibration” needs a controlled test before it needs a parts order.
On a quiet, safe road or a securely supported bike, record:
- whether it happens while coasting;
- whether it appears seated, standing, or both;
- the front chainring and rear sprocket;
- whether frequency follows road speed or crank cadence;
- whether it changes with light versus hard pressure;
- whether it is continuous or pulses once per crank revolution;
- whether a sound accompanies the sensation.
Do not stare at the drivetrain while riding. Have a mechanic reproduce the symptom if the test cannot be done safely.
Stop and inspect the high-consequence faults
Before another ride, check by hand for:
- pedal bodies or axles with looseness or rough rotation;
- pedals cross-threaded or loose in the crank;
- crank-arm play, loose fixing hardware, or visible cracks;
- a chainring that wobbles, loose chainring bolts, or damaged teeth;
- stiff, damaged, or partly separated chain links;
- rear-wheel bearing play or an unsecured axle;
- a bent derailleur, incorrect chain route, or contact with spokes;
- a tyre bulge, wheel wobble, or brake rub.
Use the maker’s torque and inspection procedure. Do not tighten every bolt harder “just in case.” If a pedal has loosened in the crank, follow the pedal-thread damage guide rather than reinstalling it blindly.
Use frequency to narrow the source
| What changes the vibration? | More likely area | Next controlled check |
|---|---|---|
| It continues while coasting | Wheel, tyre, hub, freehub, brake, or road surface | Coast on the same surface; inspect wheel and tyre |
| It follows road speed in every gear | Wheel rotation or rear hub/freehub | Check play, truth, tyre seating, and brake clearance |
| It follows crank cadence | Pedal, crank, chainring, bottom bracket | Check left/right phase and once-per-turn movement |
| It appears only on certain rear sprockets | Indexing, cassette, chainline, chain-cassette engagement | Shift one sprocket at the same cadence and load |
| It appears only under high force | Loose joint, flex contact, worn engagement, incompatible parts | Stop forceful tests; inspect and verify compatibility |
| It began immediately after assembly | Routing, orientation, spacing, torque, or component mismatch | Audit every installed part against the manuals |
This table narrows the inspection; it does not diagnose a bearing through your shoes.
Check chain and cassette as a system
Clean enough dirt from the drivetrain to see what the chain is doing. Turn the cranks slowly and inspect for:
- a stiff link that rises at the derailleur pulleys or chainring;
- the chain riding on tooth tips rather than settling;
- side rub against the next sprocket;
- an incorrectly joined quick link;
- a directional chain installed contrary to its instructions;
- indexing that positions the chain between sprockets;
- wrong chain routing around a derailleur guide tab;
- chain, cassette, and chainring families not approved together.
“Eleven speed” alone does not prove full compatibility. Shimano publishes compatibility charts that connect specific chains, cassettes, derailleurs, shifters, and freehubs. Its HYPERGLIDE+ explanation also notes that chain-plate shape and cassette-tooth design are developed together to reduce vibration and improve engagement. Other makers have their own systems; use the documents for the parts actually installed.
If the chain skips rather than merely buzzes, stop load testing and use the chain-skips-under-load diagnosis.
Small sprockets can make normal texture more noticeable
A chain wraps around fewer teeth on a small rear sprocket. That can make engagement feel and sound different from a larger sprocket, especially with a new, dry, dirty, mismatched, or imperfectly indexed drivetrain. A faint uniform texture that appears only in the smallest cogs is different from banging, skipping, binding, or a new worsening vibration.
Do not declare it “normal” until you have verified:
- the component combination is approved;
- the chain is correctly installed and lubricated;
- indexing and derailleur position follow the maker’s procedure;
- cassette spacers and lockring are correct;
- the rear wheel and axle are fully seated;
- nothing is loose or contacting the frame.
The answer is not automatically to move the derailleur closer to the cassette. B-gap or end-adjustment settings are model-specific and affect shifting across the range.
Isolate pedals and crank components carefully
If the pattern follows cadence rather than gear, a mechanic may substitute known-good pedals and inspect the crank system. At home, check pedal rotation and play without opening sealed components. Mark the crank position where the pulse occurs: the same clock position every turn is useful evidence.
Bottom-bracket bearings are only one possibility. A dry pedal bearing, damaged cleat, chainring runout, loose crank interface, or even a shoe contacting the crank can feel similar. Sound and vibration travel efficiently through a bicycle frame.
Our road-bike creak guide uses the same one-variable method when noise is the main symptom.
Your next step
Write a six-line symptom log: coasting or pedalling, gear, cadence, load, crank position, and recent work. Inspect all safety-critical joints, then verify the exact chain, cassette, chainring, and derailleur combination in the maker’s chart. Give that evidence to a mechanic if the source remains unclear.
Sources and further reading
- Shimano current component compatibility information
- Shimano HYPERGLIDE+: chain and cassette engagement
- r/bikewrench demand signal: high-frequency drivetrain vibration through the pedals — used as an editorial question signal, not technical evidence.