When should you replace road-bike disc brake rotors?
Measure disc-rotor thickness against the exact maker's limit and recognize cracks, deformation, severe scoring, and other replacement signs.
 Field guide / when-replace-road-bike-disc-brake-rotors
Replace a road-bike disc rotor when it reaches the exact manufacturer’s minimum thickness or when it is cracked, structurally damaged, severely deformed, or otherwise condemned by its manual. Colour and photographs alone cannot prove remaining thickness.
The short answer: identify the rotor model, find its printed or documented wear limit, and measure the swept braking track at several points with an appropriate micrometer. Do not use a generic 1.5 mm rule: Shimano and SRAM documents, for example, contain different limits for particular rotors and systems.
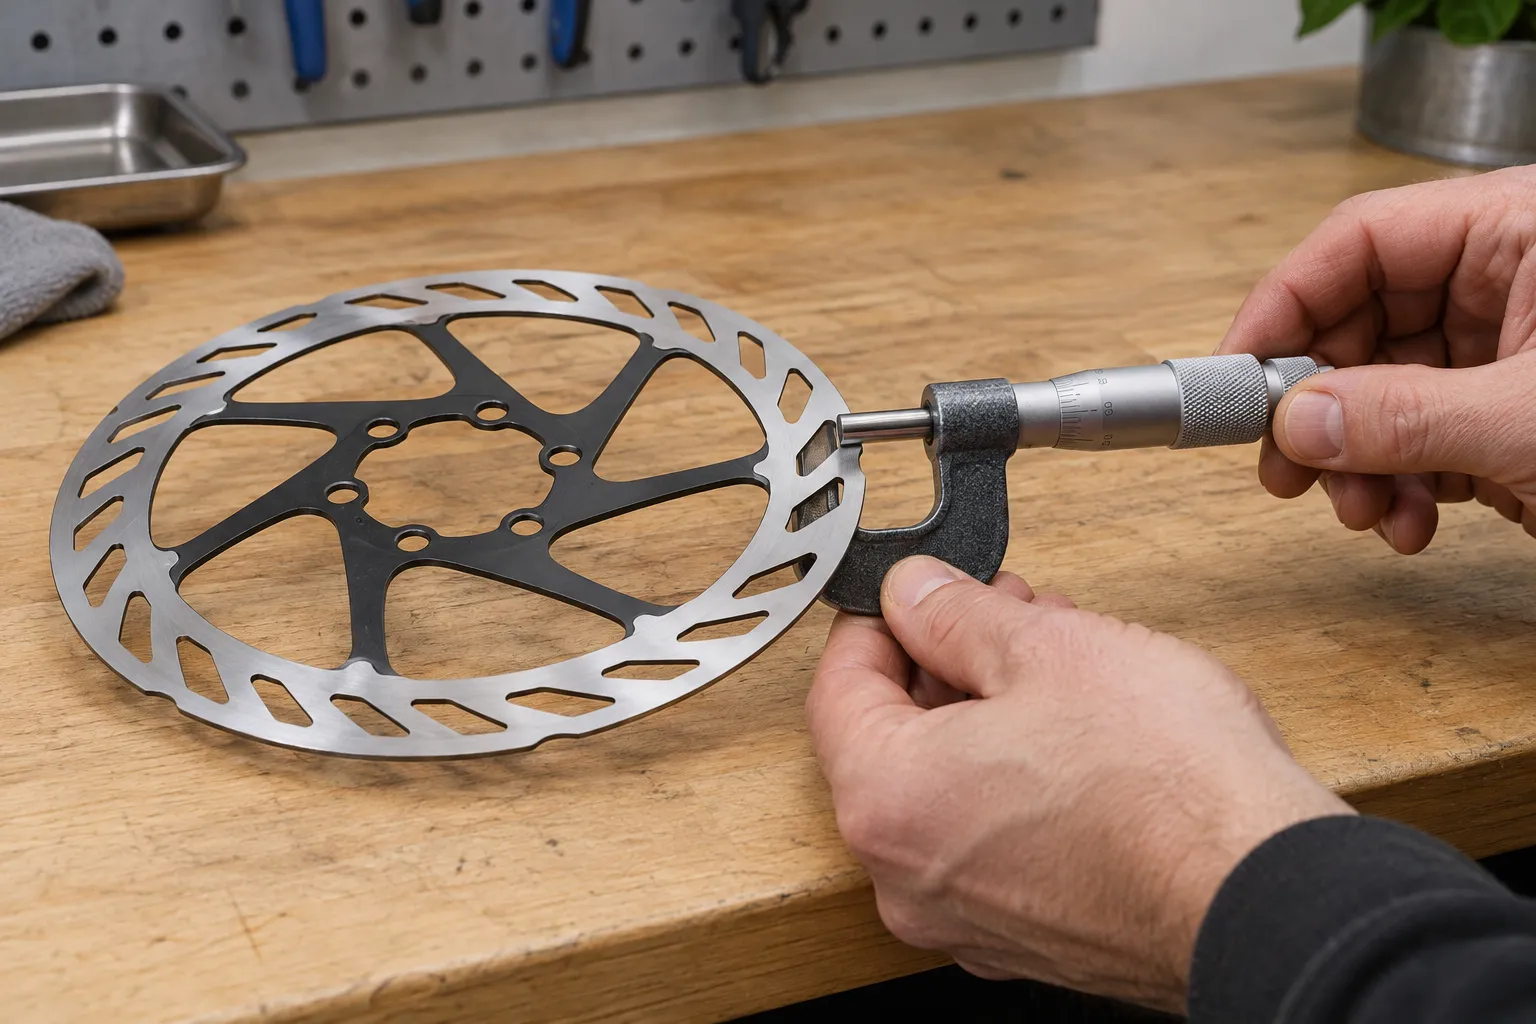
Why appearance is not the wear gauge
Recent repair threads repeatedly ask whether a marked or discoloured rotor “looks finished.” Images can reveal a crack, missing material, or obvious deformation, but normal polish, pad tracks, and colour changes do not measure metal thickness.
Rotor wear is often uneven. An unworn ridge at the outer edge can fool broad caliper jaws into reading more material than remains in the centre of the braking track. A micrometer or rotor-thickness gauge with small measuring faces is better able to reach the worn area.
Appearance still matters for damage; it simply does not replace measurement.
Identify the exact rotor first
Clean only enough to read the model code, size, rotation arrow, and any minimum-thickness marking. Search the current manufacturer manual for that code. Do not assume every rotor from one brand shares a limit.
Examples show why specificity matters:
- one Shimano dealer manual says not to use the covered rotor at 1.5 mm or less and also rejects it if its aluminium surface becomes visible;
- a SRAM brake-pad replacement document specifies replacement below 1.55 mm for the rotors it covers;
- thicker systems and other makers can use different starting and minimum values.
The correct number is the one for your rotor and brake system, not the most repeated number online.
Measure rotor thickness correctly
Let the brakes cool fully. Secure the bike or remove the wheel using the bike maker’s instructions. Keep grease, chain lubricant, penetrant, skin oil, and dirty rags away from the braking surfaces.
Then:
- Zero and check the micrometer according to its instructions.
- Place its faces squarely on the swept braking track between slots, not on a burr or unworn lip.
- Close it with consistent light measuring pressure; do not clamp hard enough to flex the rotor.
- Measure several positions around the rotor and across the part of the track the pads actually contact.
- Record the smallest repeatable reading.
- Compare it with the exact manual’s limit.
If the tool cannot reach the worn track, the readings vary implausibly, or you do not know how to account for a lip or coating, have a shop measure it. Brakes are a poor place to learn by optimistic rounding.
Replace for damage as well as thickness
Do not keep a rotor simply because one measurement is above the limit. Replace it or obtain competent assessment when you find:
- a crack at the braking track, arm, rivet, or carrier;
- missing, flaking, or delaminated material;
- deep grooves or a ridge inconsistent with normal pad contact;
- severe deformation, repeated warping, or brake pulsing;
- an exposed layer that the manufacturer says requires replacement;
- damaged mounting holes, lockring interface, or carrier;
- a model-specific service bulletin or recall affecting the rotor.
A slightly rubbing rotor may be a seating or caliper-alignment problem rather than wear. Use the disc-rub guide before bending anything. A badly bent or structurally damaged rotor should not be “trued” back into service by a beginner.
Separate wear, contamination, and glazing
These conditions need different decisions:
- Wear removes metal and is assessed against a thickness limit.
- Contamination puts oil or another substance on the rotor or pads and can cause noise and poor braking.
- Glazing or heat distress changes friction surfaces and may require the maker’s cleaning, pad, or replacement procedure.
- Misalignment causes rub but may leave thickness unchanged.
Do not sand a rotor until an unknown amount of material disappears, then measure afterward as though the process were free. Follow the maker’s permitted cleaning or resurfacing procedure. Read what to do with contaminated disc brakes if oil exposure is plausible.
Inspect pads and the complete brake
A rotor and its pads work as a system. Check pad thickness using the brake maker’s limit, confirm both pistons move appropriately, inspect the caliper and hose for leakage, and make sure the rotor size and pad compound are compatible.
Metal-on-metal pad wear can quickly score a rotor. A new rotor paired with contaminated or incompatible pads may perform poorly from the first stop. When changing friction material or rotor type, follow the brake maker’s instructions; some systems require replacing pads with the rotor.
Use the disc-brake pad-wear guide rather than judging through the top of the caliper.
Fit replacements by specification
Match diameter, thickness, mount type, brake-caliper compatibility, pad compound, rotation direction, and frame/fork limits. “Same diameter” is not enough.
Use new fasteners or lockrings where required, the stated thread treatment, installation sequence, and torque. Avoid touching the braking track. After fitting, centre the caliper as instructed, verify lever feel and wheel security, then follow the maker’s bedding procedure in a traffic-free area. Bedding in disc brakes is controlled preparation, not an emergency stop test.
Your next step
Photograph the rotor code and wear marking, find the exact manual, and write its minimum beside the bike in your maintenance log. If you own the right micrometer, record several current readings. If not, ask a shop to measure both rotors at the next pad check.
Sources and further reading
- Shimano dealer manual: rotor thickness and damage warnings for the covered brake system
- SRAM brake service document: pad and rotor replacement limits for the covered system
- r/bikewrench reader context: why minimum thickness must be measured rather than guessed from colour
- r/bikewrench reader context: recurring questions about measuring and replacing rotors
Reddit discussions were used to identify the question and common uncertainty, not as brake specifications. No usernames or personal stories are reproduced here.