Why does your disc brake rub after removing the wheel?
Fix road-bike disc-brake rub in the right order: reseat the wheel, inspect the rotor gap, identify constant versus pulsing contact, then align only if needed.
 Field guide / disc-brake-rubs-after-wheel-removal
If a disc brake started rubbing immediately after you removed and reinstalled the wheel, reseat the wheel before adjusting the caliper or bending the rotor. The axle may be secured with the wheel slightly out of position, or a hydraulic piston may have moved if the lever was squeezed while the rotor was absent.
The short answer: wheel seating first, diagnosis second, adjustment third. A once-per-revolution “ting” suggests a rotor that moves sideways; continuous scraping suggests seating, caliper position, pad clearance, or a piston that is not retracting.
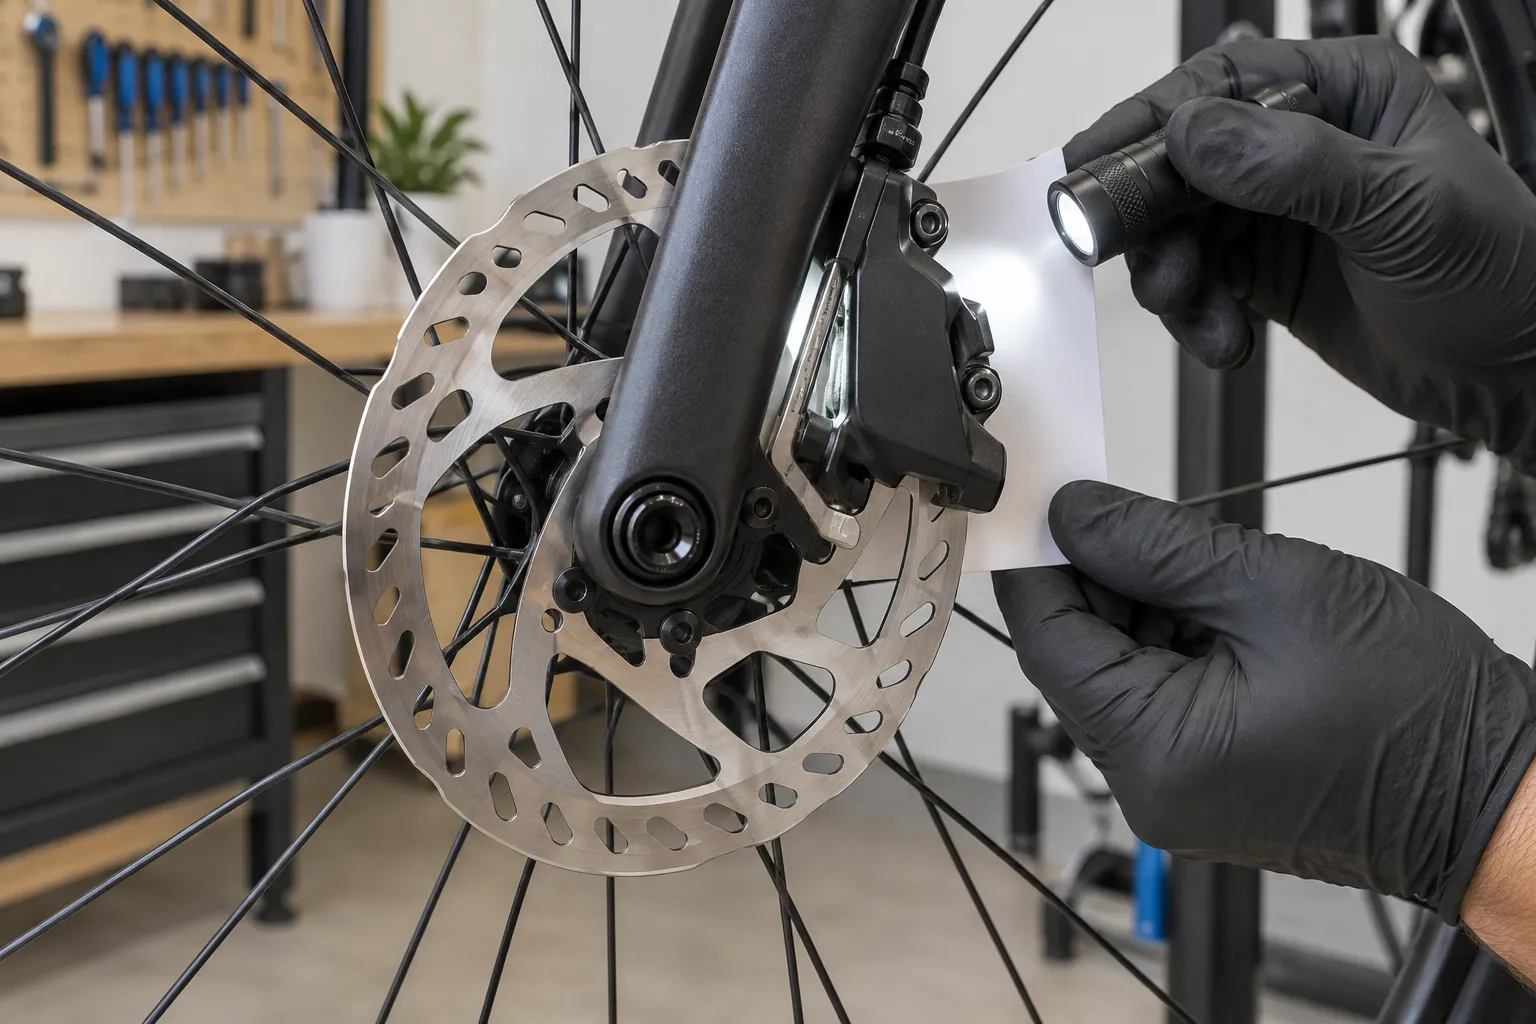
Why wheel removal changes the sound
Disc-brake pad clearance is small. The rotor returns between the pads only when the wheel and axle return to a consistent position.
Recent repair discussions describe front-rotor rub after every quick-release wheel refit and constant rubbing after a tube and tyre change. Those anecdotes do not diagnose another bike, but they expose the recurring beginner question: why touch the caliper when the brake worked before the wheel came out?
Usually, you should not—at least not first.
Step 1: do not squeeze the lever with the wheel out
On hydraulic brakes, squeezing the lever without a rotor or transport spacer between the pads can advance the pistons and close the gap. Park Tool’s disc-pad service instructions warn that the pistons move out if the lever is squeezed while the wheel is removed.
Use the correct clean transport spacer whenever the wheel is out for travel. If the pads have already closed, do not force a screwdriver between them or touch the pad material with contaminated tools. Follow the brake manufacturer’s piston-reset instructions or ask a mechanic.
Step 2: reseat and secure the wheel
Work on stable ground with the bike supported.
For a thru-axle
- Remove the axle and check that the hub end caps are fully seated.
- Guide the rotor between the pads without forcing it sideways.
- Settle the wheel fully into the fork or frame interfaces.
- Install and tighten the axle exactly as the bike or axle maker specifies.
For an open dropout and quick release
- Open the lever and make sure the axle sits fully in both dropouts.
- Put the bike upright on the ground so its weight helps seat the axle consistently.
- Close the quick release with the correct adjustment and lever orientation from the owner’s manual.
A quick-release lever is not a wing nut. If you do not know how tight or where to point it, use the bike manual or a shop demonstration. Never ride a wheel whose retention is uncertain.
Now spin the wheel. If the rub disappeared, stop. Moving the caliper would only introduce a new variable.
Step 3: read the contact pattern
Place a clean white card behind the caliper and shine a flashlight onto it. Look through the gap without putting fingers near the spinning rotor.
Continuous scrape
The rotor stays close to one pad through most of the revolution. Likely causes include:
- The wheel is not seated consistently.
- The caliper is laterally misaligned.
- One hydraulic piston is extended or sticky.
- A mechanical brake’s fixed or moving pad is adjusted too close.
Ting once per wheel revolution
The rotor moves sideways at one point. This suggests local rotor runout, a loose rotor attachment, hub play, or debris between a rotor and its mounting face.
Rub appears only after braking
A piston may not retract evenly, the rotor may change shape with heat, or the caliper may be insecure. Stop and have the system assessed if braking performance or hardware security is in doubt.
Park Tool’s hydraulic alignment guide lists wheel seating, bent rotor, rotor play, bearing play, and sticky pistons as separate causes. Check them before assuming the caliper is simply “off-centre.”
Step 4: check the non-adjustment causes
With the bike stationary:
- Hold the rim and gently check for side-to-side hub play.
- Inspect the rotor attachment for obvious looseness without touching the braking track.
- Confirm the rotor is not contacting the caliper body rather than a pad.
- Look for a pad spring or retaining part out of position.
- Compare the gap as the wheel turns slowly.
Do not spray anything into the caliper. Chain lubricant, penetrating fluid, general-purpose cleaner, and skin oil can contaminate braking surfaces.
Step 5: align the caliper only when needed
Caliper procedures differ between hydraulic, dual-moving-pad mechanical, single-moving-pad mechanical, and hybrid cable/hydraulic systems. Use the manual for the exact brake.
A common hydraulic sequence is:
- Confirm wheel seating and rule out rotor or hub problems.
- Loosen the caliper mounting bolts only enough for the caliper to move.
- Hold the brake lever to centre the caliper over the rotor.
- Snug the mounting bolts evenly.
- Release the lever, spin the wheel, and inspect both gaps.
- Tighten the bolts to the manufacturer’s torque specification and recheck braking.
This centring method is a starting point, not a guarantee. Park Tool also recommends fine visual alignment when lever-centring does not remove the rub. Do not copy a generic torque value when your caliper, adapter, frame, or fastener specifies another one.
Mechanical brakes may require individual pad-clearance and cable adjustments. Follow a dedicated mechanical disc-brake alignment procedure rather than treating them as hydraulic.
Should you straighten the rotor yourself?
Only after wheel seating, rotor attachment, hub play, and caliper alignment have been ruled out—and only if the rotor manufacturer allows truing.
Small corrections require a clean rotor-truing tool and restraint. Repeated bending, sharp kinks, cracks, deep scoring, severe heat discolouration, or a rotor below its marked minimum thickness call for replacement or professional assessment. Never bend a rotor with an adjustable wrench contaminated by oil.
Is a faint rub safe to ignore?
A very light intermittent sound may have little effect on wheel rotation, but sound alone cannot prove the brake is safe. Check that:
- The wheel is secure.
- Braking is strong and predictable.
- The rotor and caliper hardware are secure.
- The rotor is not badly distorted.
- The lever does not pull unusually close to the handlebar.
- There is no heat, smell, or rapid wheel slowdown from constant drag.
If any check fails, do not ride. If all pass but the noise remains, schedule service rather than repeatedly loosening safety-critical bolts.
Common mistakes
- Aligning the caliper before reseating the wheel.
- Squeezing a hydraulic lever with no rotor or spacer installed.
- Touching the rotor with greasy fingers.
- Using a business card as a substitute for the brake maker’s required setup procedure.
- Bending the rotor every time the wheel returns at a slightly different angle.
- Turning a mechanical brake’s cable adjuster without checking pad position.
- Assuming all scraping means the rotor is bent.
Your next step
Remove and reinstall the wheel once using the correct axle procedure, then backlight the caliper and classify the rub as continuous or once per revolution. If seating does not solve it, use the exact brake manual or take that diagnosis to a mechanic. Add wheel security and brake function to the five-minute pre-ride check before the next ride.