How to train for your first 300 km bike ride
Prepare for a first 300 km cycling event through winter with a sustainable weekly plan, progressive long rides, comfort tests, night practice, fuelling, and bailout criteria.
 Field guide / train-for-first-300km-bike-ride
You do not prepare for a first 300 km ride by attempting 300 km in training. Build a repeatable week, extend selected outdoor rides gradually, prove that your position and fuelling work for many hours, and rehearse the event’s darkness, weather, group, navigation, and stop strategy. Consistency matters more than one heroic winter session.
The short answer: use winter to build durable routine and indoor quality, then make spring increasingly event-specific. Your final preparation should show that you can ride long while eating, drinking, navigating, staying comfortable, and making safe decisions—not merely produce one high fitness number.
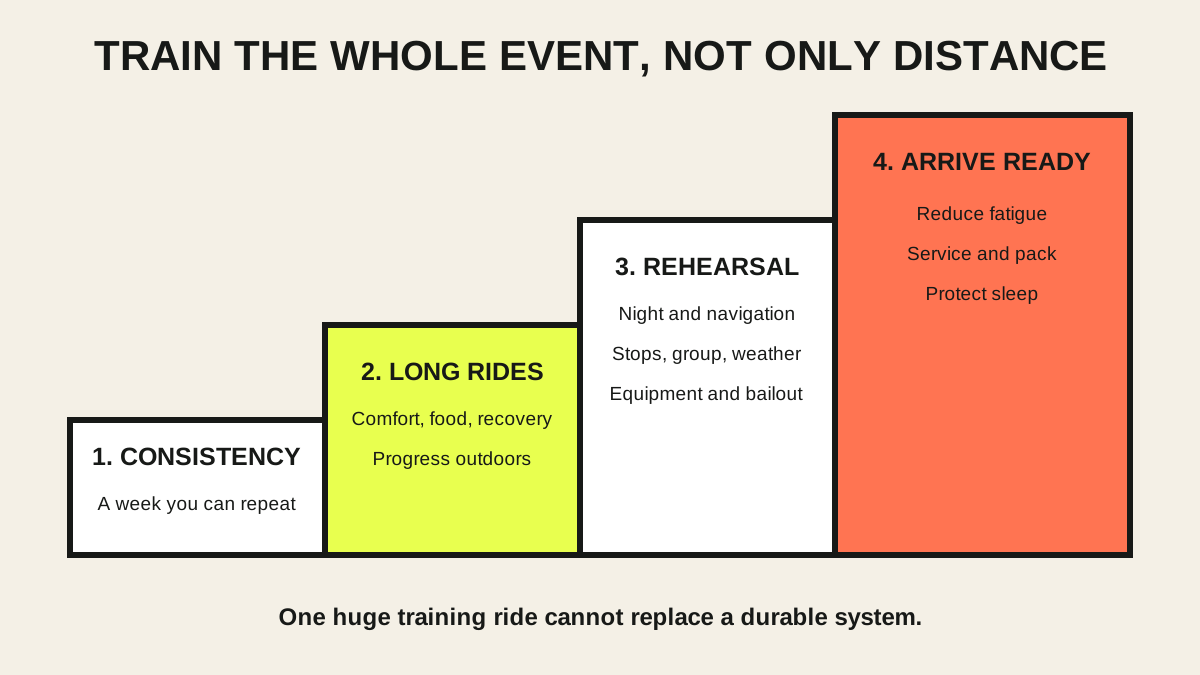
Start with the event, not a generic plan
A current r/cycling discussion asked how a newer rider should train through winter for the 315 km Vätternrundan. That event starts in waves through the night and day and has depot and finish cut-offs. Another 300 km ride may be unsupported, mountainous, hot, or require continuous navigation.
Write down:
- distance and climbing;
- surface and likely wind;
- start time, darkness, and legal light requirements;
- cut-offs and control points;
- food, water, mechanical, and medical support;
- group rules and whether drafting is expected;
- transport home and withdrawal options.
Training for “300 km” without those details can prepare the wrong problem.
Stage 1: build a week you can repeat
For four to eight weeks, stabilise the routine before chasing distance. A practical week may contain one longer easy ride, one or two focused sessions, easy riding, and real recovery. The exact number of days depends on current training, health, work, sleep, and experience.
Use effort you can control without a power meter. Most endurance riding should feel sustainable enough for full-sentence conversation. A focused session can add harder work without turning every day into a test. Increase one demand at a time—duration, frequency, or intensity—then observe sleep, motivation, soreness, and normal daily function.
If your available week is about five hours, use our time-limited ultra-distance guide to decide whether the goal and schedule fit.
Stage 2: extend the long ride outdoors
An indoor trainer is efficient for consistent pedalling, but it cannot fully rehearse road handling, weather, clothing, food stops, darkness, navigation, or equipment access. Keep indoor sessions purposeful and use suitable outdoor days for progressively longer practice.
The official Vätternrundan guidance recommends roughly 1,000 km of preparation and at least a couple of 100–150 km rides in the preceding weeks. Treat those numbers as that event organiser’s recommendation, not a guarantee or a universal formula.
Build toward long rides gradually enough that you can resume normal training after recovery. Avoid doubling distance because one weekend has good weather. Back-to-back moderate days can sometimes teach tired-day routine without the risk and recovery cost of a single maximal ride, but they still add load.
Stage 3: train the non-fitness systems
Comfort
A position that feels fine for two hours may fail at eight. Record when hand, neck, back, foot, or saddle discomfort begins. Change one variable at a time and retest. Persistent pain, numbness, or weakness is not an endurance badge.
Fuelling and hydration
Practise the foods and drinks you plan to use. Build a schedule you can execute when tired, and include real products available at event controls. Do not improvise a high carbohydrate intake on event day or force fluid beyond thirst and conditions.
Use our first 100 km pacing and fuelling guide as the foundation, then extend the practice rather than inventing a separate ultra-only diet.
Night riding
Test front and rear lights at the intended brightness for the actual duration. Carry the required backup, manage charging, and practise judging surfaces without outriding the beam. A night start also changes sleep and clothing decisions.
Stops
Long stops can cool you, stiffen the body, and consume cut-off margin. Practise a simple routine: park securely, refill, eat, use facilities, adjust layers, check the bike, and leave. Do not race through safety checks to save minutes.
Group skills
If the event uses large groups, gain experience in a suitable coached or beginner group first. Riding close to strangers while fatigued is not the place to learn wheel overlap, signals, or predictable line choice.
Stage 4: rehearse, then reduce load
Several weeks before the event, complete one or more rides that combine the important demands: meaningful duration, planned kit, night or low light, navigation, food, stops, and likely weather. The rehearsal should answer questions, not leave you depleted for weeks.
In the final period, reduce training load enough to arrive rested while keeping some familiar riding. Do not use the last week to recover missed months. Our week-before-century guide scales well to the practical tasks even though the event distance is longer.
Use readiness gates instead of one magic distance
You are building a stronger case to start when:
- weekly training has been consistent rather than boom-and-bust;
- long rides no longer create unresolved pain or multi-day exhaustion;
- you can eat and drink without stomach distress;
- lights, clothing, navigation, and repair kit have been tested;
- the bike has passed maintenance checks;
- you know the cut-offs and withdrawal routes;
- you can abandon the time goal without treating it as failure.
Delay, shorten, or withdraw when illness, unsafe weather, equipment faults, persistent symptoms, or inadequate recovery remove those gates. Finishing is optional; returning safely is not.
A simple winter-to-spring outline
| Period | Main job | Evidence to collect |
|---|---|---|
| Early winter | Repeatable schedule and easy volume | Several stable weeks without accumulating fatigue |
| Late winter | Focused indoor work plus outdoor handling | Consistent sessions, tested cooling and fit |
| Early spring | Progressive long rides | Comfort, food, kit, and recovery notes |
| Final build | Event-specific rehearsals | Night, navigation, controls, group and weather practice |
| Final period | Reduce fatigue and prepare logistics | Sound bike, packed kit, sleep and transport plan |
Your next step
Copy the five event facts and four training stages into a one-page plan. Schedule only the next four weeks in detail, with one long-ride opportunity and one fallback for bad weather. Review what you actually completed before extending the plan.