Road-bike tyre too tight to fit? Use the rim's centre channel
Mount a stubborn clincher tyre without brute force by creating slack at the rim centre, protecting the tube, and knowing when tyre-rim compatibility needs checking.
 Field guide / road-bike-tyre-too-tight-to-fit
Before you buy
Check the starter kit first
Print the one-page buying brief for helmet, lights, water, phone, and repair compatibility before comparing upgrades.
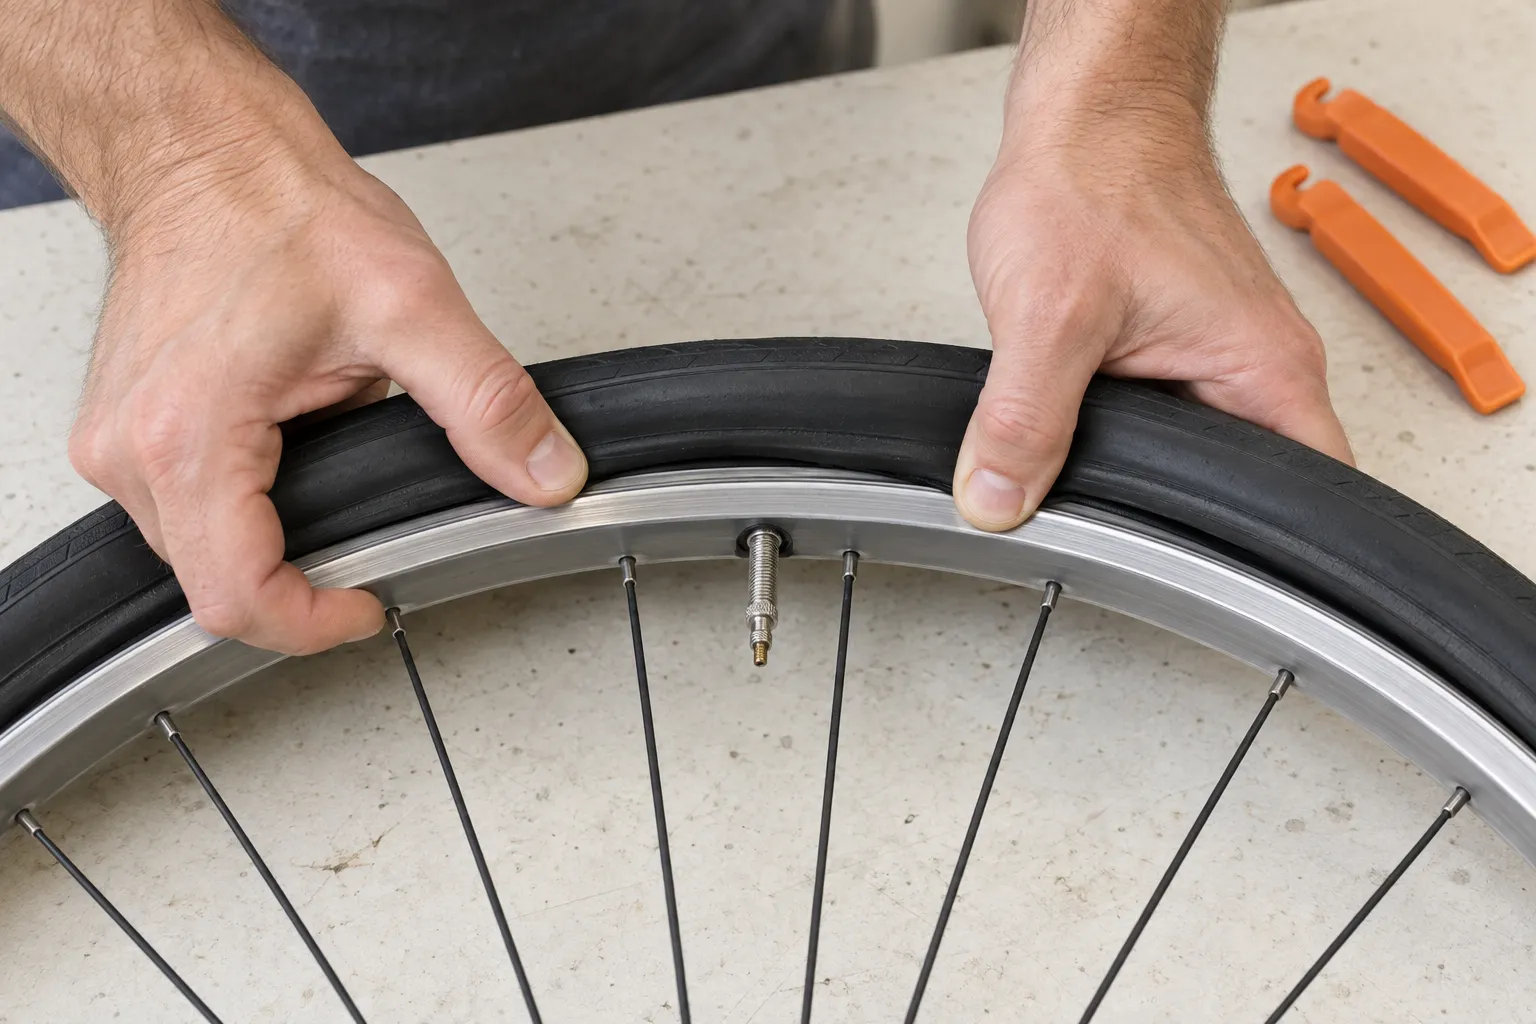
When the final section of a road-bike tyre will not go over the rim, stop pulling at that section. The missing slack is usually trapped elsewhere. Push both beads into the rim’s deeper centre channel all the way around, keep them there, and finish near the valve.
The short answer: fully deflate the tube, unseat the mounted sections into the rim centre, and work that slack toward the last tight section. Roll the bead over with your palms. Use a compatible plastic lever only as a careful last resort, and stop if size, bead, rim, or tubeless compatibility is uncertain.
Why the last section feels impossible
A long-running r/cycling discussion asks whether other riders can really change tight inner tubes easily. The frustration is real: tyre and rim tolerances, bead material, tubeless-ready construction, rim profile, and technique all change mounting effort.
The key geometry is simple. The rim’s bead seats near the sidewalls have a larger effective circumference than its deeper centre channel. If the already-mounted bead remains up on those shoulders, there may be no slack left at the final section. Moving it inward reduces the circumference the bead must span.
Schwalbe notes that allowed tyre and rim dimensional tolerances can make some valid combinations harder to mount than others. Difficulty alone does not prove incompatibility—but brute force does not prove compatibility either.
Verify size before technique
Read the tyre’s full size marking and the rim documentation. Match the bead-seat diameter, not just a marketing label such as “road,” “700C,” or “28 inch.” Confirm:
- tyre and rim bead-seat diameter;
- tyre width permitted by the rim and bicycle;
- hooked or hookless requirements;
- tube, tubeless-ready, or other system compatibility;
- the lower maximum pressure stated by tyre and rim;
- any model-specific approved tyre list.
Do not attempt to stretch a near-looking diameter onto the rim. If markings are missing or contradictory, stop and identify the parts. The clincher, tubeless, and tubular guide helps separate the systems.
Prepare the tube and rim
Inspect the rim tape, rim bed, valve hole, tyre beads, and tyre interior. Remove debris and replace damaged tape by the rim maker’s method. Check the tyre’s rotation arrow before the second bead hides it.
For a tubed clincher:
- Fit the first bead completely.
- Add only enough air for the tube to hold a soft round shape.
- Put the valve through the rim without twisting it.
- Tuck the tube fully inside the tyre.
- Start the second bead opposite the valve.
Too much air makes the tube occupy the centre channel and removes your working space. No air at all can make a floppy tube easier to trap. You want shape, not pressure.
For tubeless, follow the tyre and rim makers’ process. Sealant timing, valve position, approved mounting fluid, inflation equipment, and compatibility are system-specific.
Use the centre-channel method
Work the second bead toward the valve from both directions. When the final section becomes tight:
- Stop at the tight point.
- Starting opposite it, squeeze both tyre sidewalls inward so the beads drop into the rim centre.
- Continue around both sides, holding the bead in the centre as you move.
- Work the accumulated slack toward the remaining section.
- At the valve, push the valve stem inward briefly so the tyre bead can occupy the rim channel beneath it.
- Use the heels of your hands to roll the final bead over the rim edge.
Schwalbe recommends beginning opposite the valve and finishing at the valve for this reason. Do not repeatedly stretch only the final centimetres; reset the entire bead path each time it climbs back onto a shoulder.
Warm, flexible rubber is easier to handle than a tyre stored in a cold garage, but do not apply a heat gun, boiling water, flame, or uncontrolled heat. Bring the tyre to ordinary room temperature.
Use levers cautiously
Many tyres can be fitted by hand, but some compatible combinations need a plastic lever or a purpose-made mounting tool. Check that the rim and tyre makers permit it.
Before levering:
- push the opposite bead back into the centre channel;
- confirm the tube is nowhere under the bead;
- use a smooth, undamaged plastic tool;
- take a small bite of bead, not a large forced section;
- protect tubeless tape and carbon or aluminium rim edges.
Park Tool advises against screwdrivers, knives, and sharp improvised tools because they can damage the tyre or tube. A lever can also pinch a new tube against the rim, creating the flat you were trying to repair.
If a strong plastic lever bends sharply, the rim moves across the bench, or the bead develops visible damage, stop. Recheck the centre channel and compatibility instead of escalating force.
Mounting fluid is not household grease
An approved bicycle tyre-mounting fluid can help a stubborn bead slide into place and later seat evenly. Use only a product and quantity allowed by the tyre and rim makers.
Do not use oil, grease, petroleum lubricant, or an unknown solvent. It can attack rubber, contaminate brakes, leave the bead able to move, or interfere with tubeless sealant. Keep any fluid away from rim-brake tracks, rotors, and pads.
Inspect before full pressure
After the bead goes on, do not jump straight to full pressure.
- Push the valve inward and back to ensure the tube is not trapped beneath the bead.
- Inspect both sides for visible tube.
- Inflate only a little.
- Rotate the wheel and follow the moulded bead line on both sides.
- Deflate and reseat any section that rises, dips, or exposes tube.
- Continue gradually to an appropriate checked pressure below every applicable limit.
- Recheck the bead, valve alignment, and wheel clearance.
A sharp pop can be normal on some tubeless installations, but repeated cracking, a climbing bead, a bulge, or sudden displacement is a stop signal. Keep your face and body out of the trajectory of the sidewall while inflating.
The wheel-or-tyre wobble guide covers a tyre that appears uneven after installation.
Practise the exact wheel before relying on it
A puncture repair is a poor time to discover an unusually tight combination. Fit and remove the tyre once at home with the tools carried on the bike. That rehearsal reveals whether your levers work, your spare tube fits, and your pump can reach a useful pressure.
If the combination remains beyond your hand strength after correct technique, ask a shop to demonstrate it on that wheel. Consider a different compatible tyre only after confirming size, performance needs, and rim approval. “Easier to mount” is a useful requirement for a rider who must repair it roadside.
Use the full roadside puncture guide for wheel removal, cause-finding, tube replacement, and final checks.
Your next step
At home, fully deflate one wheel and practise pushing both beads into the rim’s centre channel without removing the tyre. Notice how much slack appears at the valve. If the marked sizes and compatibility are correct, rehearse a full tube change with your actual roadside tools before the next long ride.