Why your Presta valve will not inflate—and what to check first
Fix a Presta valve that will not take air by checking the valve tip, pump-head fit, dual-head setting, valve core, and tube installation in order.
 Field guide / presta-valve-will-not-inflate
Before you buy
Check the starter kit first
Print the one-page buying brief for helmet, lights, water, phone, and repair compatibility before comparing upgrades.
A Presta valve that will not inflate is usually not a ruined tube. The common causes are a closed valve tip, a pump head that is not pushed on far enough, a dual-valve pump set to the wrong port, or a valve stem being pushed into a completely flat tube.
The short answer: remove the cap, unscrew the small knurled tip, tap it once to confirm air can move, press the Presta side of the pump head fully and squarely onto the valve, then lock the pump head. If air exits the pump’s Schrader port instead, the pump head—not the tube—is the first thing to investigate.
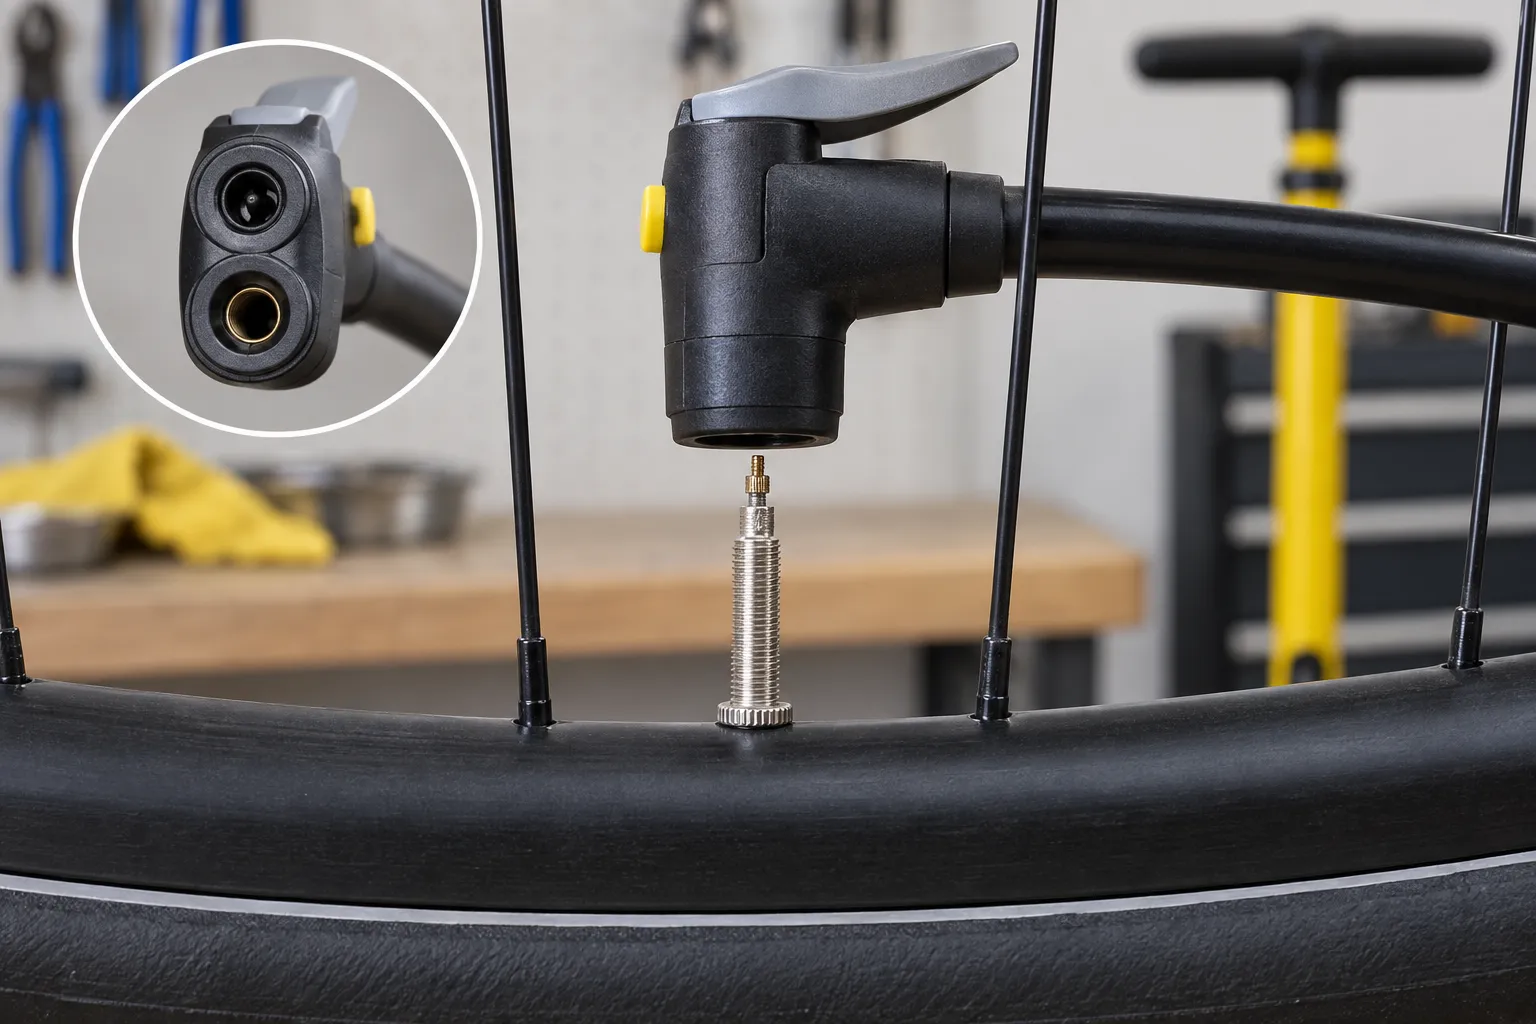
Use this five-step check
- Open the valve. Remove the plastic cap and unscrew the tiny brass or silver nut at the valve tip until it stops. Do not remove that tip.
- Wake up the valve. Press the tip briefly. On an inflated tyre you should hear a short hiss. A new, empty tube may not hiss, but the pin should move.
- Support a flat valve. If the tube is completely empty, push the valve outward from the tyre side while fitting the pump. Loosen or temporarily remove the rim nut if it prevents the pump head from reaching far enough.
- Use the correct opening. On a twin-head pump, the narrower Presta opening and wider Schrader opening are separate. On a reversible internal gasket, the insert must be arranged according to the pump manual.
- Seat, lock, then pump. Push the head on straight before moving its locking lever. If the first stroke meets solid resistance, stop and reseat it instead of forcing the pump.
Pump levers do not all work in the same direction. Some lock when raised; others lock when folded down. The pump’s markings or manual outrank a generic instruction.
If air comes out of the other pump port
That symptom points strongly toward the pump head. A dual head may use an internal shuttle or gasket to close the unused opening. If the head is only partly seated, the shuttle may never move and air escapes from the Schrader side.
Test the pump on a known-working Presta wheel. If it works there, compare how far the new valve enters the chuck. A thick rim nut, short valve, or rubber shoulder at the base of a new tube can prevent full engagement. The recent r/bikewrench question that prompted this guide was resolved by creating more insertion room at the valve rather than by replacing both new tubes.
If the pump fails on every Presta valve but still works on Schrader valves, inspect its rubber seal and reversible insert. Follow the pump maker’s instructions before taking the head apart; small parts can be fitted backwards.
If the valve pin will not move
A valve core can stick after storage. Gently pressing the open tip once is reasonable; striking it or levering it sideways is not. If the valve remains solid, the core may be damaged or blocked.
Tubeless sealant can also clog a removable core. Deflate the tyre fully, remove the core with the correct tool, and clean or replace it. Not every tube has a removable core, so look for small flats on the core and check the tube maker’s specification. Never loosen a core while the tyre is pressurised.
If the stem spins, leans sharply, leaks where it joins the tube, or disappears into the rim even after you support it, replace the tube rather than trying to rescue the valve. Use the inner-tube size guide to match diameter, width, and valve length.
New tubes need only a breath of air
A little air makes an inner tube round enough to install without folds. It does not need riding pressure outside the tyre. Schwalbe’s Aerothan instructions, for example, limit pre-inflation before installation to 0.3 bar / 4.5 psi because an unsupported tube can deform.
Once the tube is inside the tyre:
- keep the valve straight;
- check that no tube is visible beneath either bead;
- inflate gradually;
- inspect the bead line around both sides;
- stay within the lowest tyre and rim pressure limit.
If you were solving a puncture at home, complete the full road-bike puncture repair rather than treating inflation as the only check.
When the pump reading is the problem
An electric pump can report a high pressure immediately when its connector is blocked, poorly seated, or unable to depress the valve path correctly. Disconnect it and verify the valve with a manual pump. A floor pump that moves air normally is a useful diagnostic comparison.
Do not keep cycling an electric pump against a closed connection. Heat and pressure can build in the hose or chuck without putting useful air in the tyre.
Your next step
Practise the connection at home until you can open, seat, lock, inflate, unlock, and remove the pump without bending the valve. Then pack a pump that you have actually tested with your spare tube. Our mini pump, CO2, and electric pump comparison can help you choose the roadside backup.