Mini pump vs CO2 vs electric pump: what should you carry?
Choose a reliable roadside inflator for road cycling by comparing hand pumps, CO2 cartridges, and rechargeable mini pumps—and test it before a puncture.
 Field guide / mini-pump-vs-co2-vs-electric-pump
Before you buy
Check the starter kit first
Print the one-page buying brief for helmet, lights, water, phone, and repair compatibility before comparing upgrades.
For most non-racing road cyclists, a dependable manual mini pump is the safest single inflator to carry because it can make repeated attempts without a cartridge or battery. CO2 is faster but finite. A rechargeable electric mini pump is compact and convenient, but its charge, heat limits, and real tyre capacity need testing.
The short answer: choose a manual pump if you want one simple, repeatable backup. Add CO2 when speed matters and you have practised with the exact inflator. Choose electric only after confirming it can inflate your actual tyre from flat to a safe riding pressure, then set a charging routine. For remote solo rides, carry redundancy rather than trusting one untested gadget.
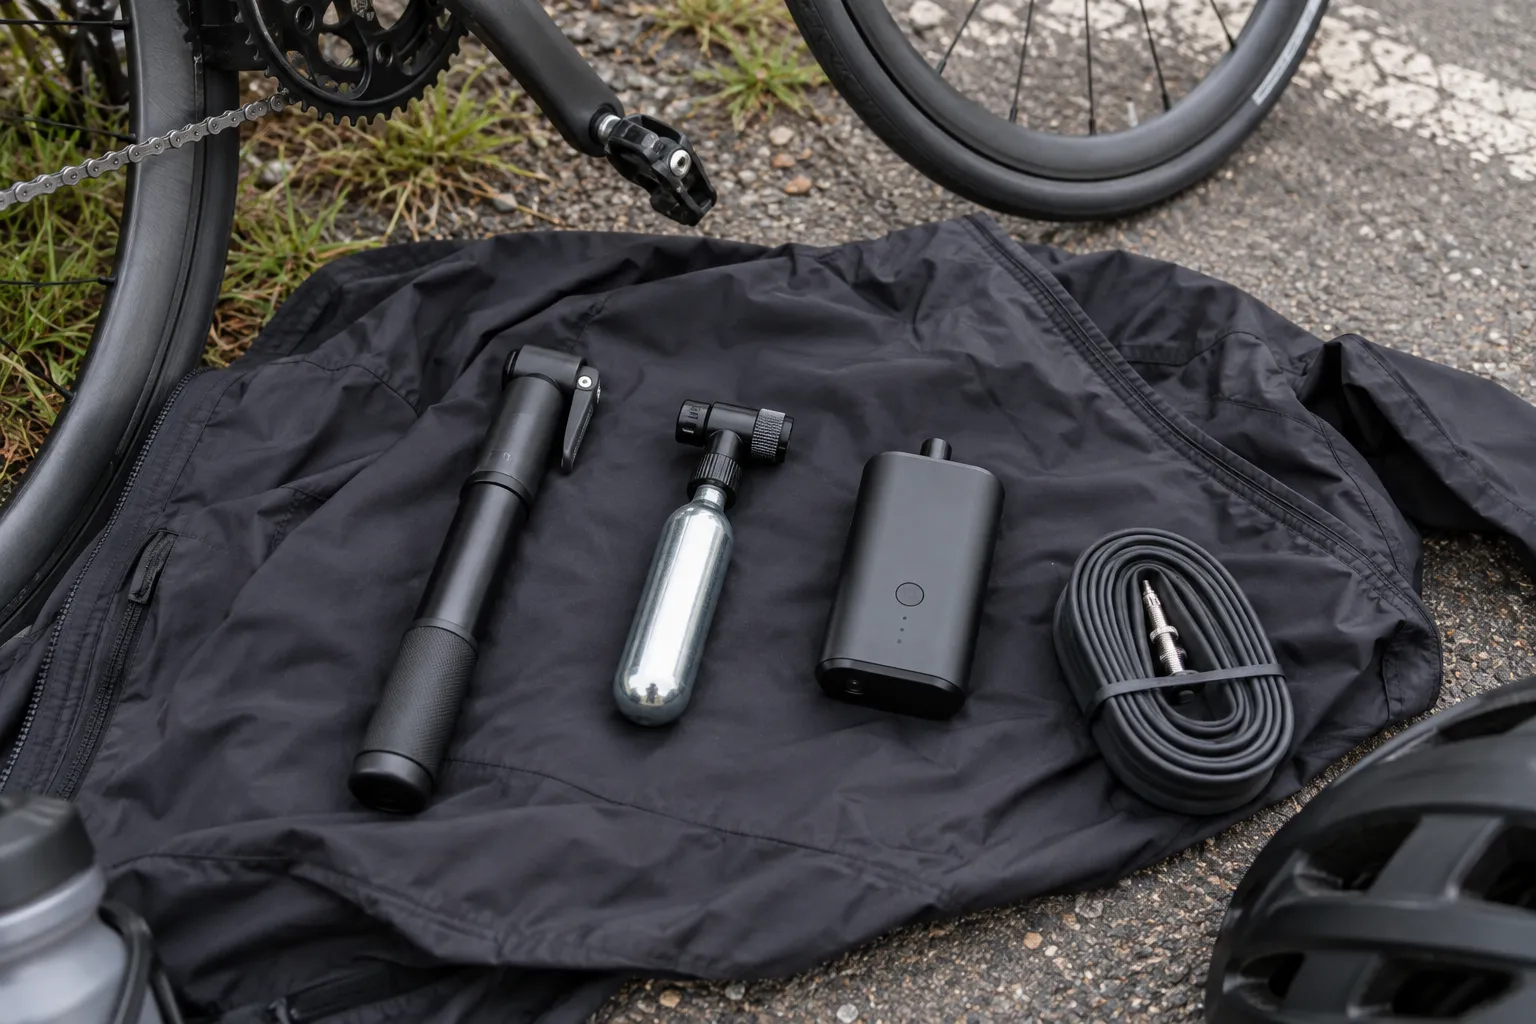
Compare the failure modes, not the marketing
| Option | Main advantage | Main limitation | Best fit |
|---|---|---|---|
| Manual mini pump | Repeatable inflation without consumables or charging | Slower; small models take more strokes and may be awkward at high pressure | Everyday rides and dependable backup |
| CO2 cartridge | Very fast and compact | One finite attempt per cartridge; cold in use; technique matters | Racing, fast group repairs, or a second inflator |
| Electric mini pump | Compact, quick, and sometimes includes a pressure display | Battery, heat, duty-cycle, and capacity limits | Riders who maintain a charging routine and test it |
No option repairs the puncture. You still need the correct tube, patch, or tubeless plug; tyre levers if required; and the skill to find the cause before reinflating. Putting air into a tyre that still contains glass or a pinched tube simply creates a second failure.
A manual mini pump is the conservative default
A hand pump can try again after you reseat a tube, discover another leak, or help another rider. It does not care how long it sat in the saddle bag, although seals, hoses, and valve heads can still age or work loose.
Choose by real requirements:
- Valve: it must fit your Presta or Schrader valve without a fragile improvised adapter.
- Pressure: its stated maximum must exceed the pressure you actually need, with usable margin. A theoretical maximum does not tell you how exhausting the last part will be.
- Connection: a short hose can reduce the sideways force applied to the valve; a direct head can be smaller.
- Size: very short pumps save space but usually demand more strokes.
- Mounting: a bottle-cage bracket keeps the pump out of a crowded pocket, but check it cannot shake loose.
Inflate one tyre from completely flat at home. Count how long it takes and check the final pressure with a gauge. If you cannot reach your safe ride-home pressure in calm conditions, the pump is not an adequate roadside plan.
CO2 buys speed, not certainty
A CO2 cartridge can inflate a road tyre quickly, which matters in a race or when a group is waiting. The cartridge is single-use and the inflator technique varies. A poor connection, opened valve, damaged seal, or accidental discharge can consume the supply in seconds.
Practise with one cartridge before depending on it. Learn how the head controls flow, whether the cartridge must be threaded fully before use, and how to hold insulated parts. Escaping gas makes the cartridge and head extremely cold.
Match cartridge size to the tyre volume and required pressure using the inflator maker’s chart. Do not assume one cartridge will both seat a tubeless bead and provide final pressure. Check whether your sealant maker permits CO2 exposure and whether it gives special instructions. Gas can also escape from a tyre differently from ordinary air, so replace or top up with air according to the product instructions after the ride.
For a beginner, CO2 works better as an optional fast layer beside a manual pump than as the only unpractised plan.
Electric mini pumps need a routine
A tiny rechargeable pump can reduce effort and may stop at a selected pressure. That convenience comes with four checks:
- Capacity: how many of your tyre size can it inflate from flat at your pressure?
- Duty cycle: how long may it run before cooling, and how hot do the body, hose, and valve connector become?
- Battery state: does the charge remain usable after weeks in the saddle bag and in cold weather?
- Gauge accuracy: how close is its reading to a known gauge at your normal pressure?
Run a home test, then repeat after the device has sat unused for your normal interval. Follow the charging, storage, cooling, and water-resistance instructions. Do not place a hot pump immediately against an inner tube, waterproof fabric, or bare skin.
If the pump uses a proprietary charging lead, decide whether it lives with the bike. A powerful inflator at home and a forgotten cable elsewhere is a routine failure, not bad luck.
Build a kit around the consequence of failure
Short rides near transport or home
A tested manual pump, compatible tube, and tyre levers are a sound baseline. A phone and pickup plan provide a final fallback.
Fast group rides or events
CO2 or electric inflation can shorten the stop. Add a very small manual pump when being stranded would be costly. Know whether the event provides mechanical support before reducing redundancy.
Remote solo rides
Carry two independent ways to inflate—for example, a manual pump plus CO2—and enough repair material for more than one puncture. “Independent” matters: two CO2 cartridges still depend on the same inflator head.
Tubeless road setup
Carry plugs plus a tube for failures a plug cannot solve. Confirm the inflator can reach a useful pressure after plugging. Seating an unseated bead at the roadside may require airflow that a small hand or electric pump cannot supply, so do not build the plan around a best-case reseating claim.
Use the starter-gear checklist to budget the complete kit, not just the smallest pump. Then practise with our road-bike puncture walkthrough before the first long ride.
Perform a ten-minute reliability check
- Confirm valve compatibility and enough exposed valve length.
- Deflate a tyre at home.
- Connect the inflator without bending the valve.
- Inflate to a safe, known ride-home pressure.
- Verify with a separate gauge.
- Pack every tool and consumable used in that successful test.
- Add a recurring check for pump condition, cartridge seal, or battery charge.
The best inflator is the one you can operate correctly while tired, wet, and beside a noisy road.
Your next step
Start with a tested manual pump unless speed or accessibility gives you a clear reason to choose differently. If buying CO2 or electric, keep your current pump until the new system has completed a full flat-to-riding-pressure test on your actual wheel.
Sources and further reading
- Park Tool mini-pump specifications: valve compatibility, maximum pressure, mounting, and size
- r/cycling reader context: CO2 versus electric pumps and the value of a manual backup
- r/cycling reader context: current roadside pump choices
- r/cycling reader context: repeated CO2 failures prompting a return to a hand pump