Will a power-meter crankarm fit your road bike?
Check crank family, spindle and bottom bracket, arm length, frame clearance, drivetrain compatibility, and head-unit support before buying a cheap power upgrade.
 Field guide / power-meter-crankarm-compatibility
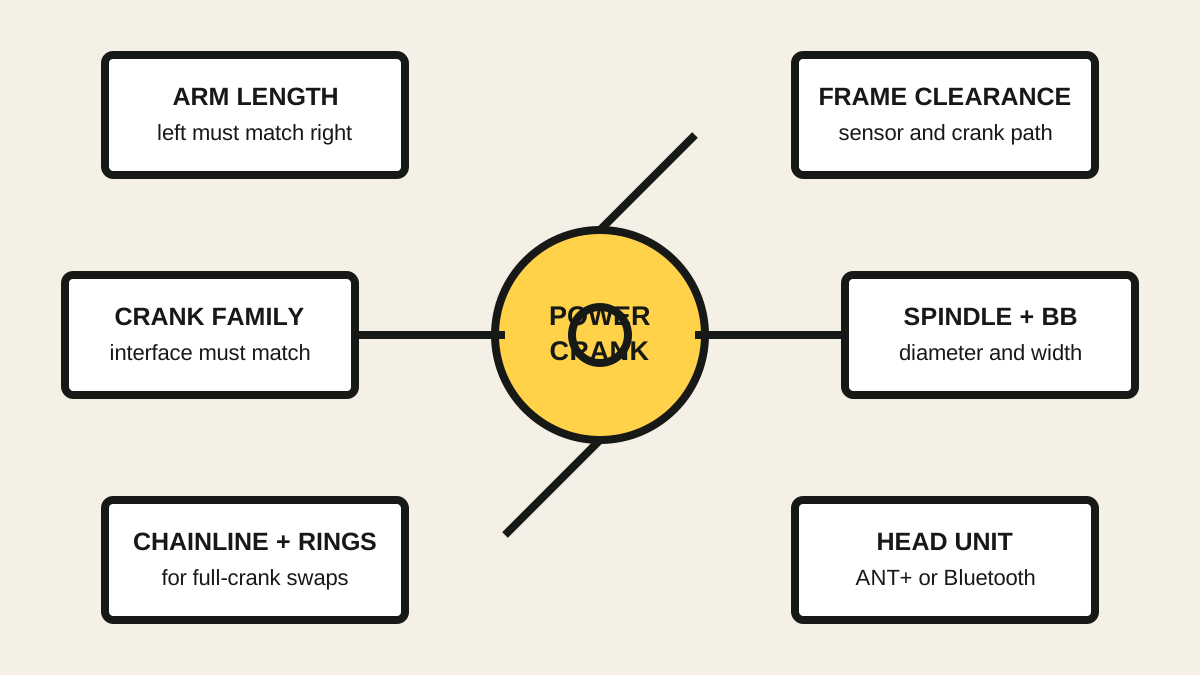
A discounted left-crank or spindle power meter does not fit merely because it is the same length or because the rest of the bike uses the same brand. It must belong to a compatible crank family and match the spindle, bottom bracket, frame clearance, road or wide configuration, and drive-side arm.
The short answer: treat a crank-based power meter as a crank component first and a sensor second. Find your exact existing crank model, then use the power-meter maker’s compatibility tool. If the upgrade replaces the spindle, it may require a matching drive-side arm, bottom bracket, spacers, preload parts, and chainline—not a standalone left-arm swap.
Why a cheap crankarm may not be a cheap upgrade
A current r/cycling question asked whether a SRAM Rival AXS power-meter crankarm could fit a Shimano Claris crank. It is a useful example of a broad trap: online listings often show one non-drive-side arm, but the sensor may be integrated with a proprietary spindle designed for a specific crank family.
SRAM describes its current Rival AXS spindle-based power upgrade as a non-drive-side arm and DUB spindle assembly. Its service page identifies DUB bottom-bracket technology and specific Road and Road Wide variants. That does not make it a universal left arm for unrelated cranks.
Ignore visual similarity. One correct model code is worth more than twenty photos.
Identify what you already have
Record:
- bicycle brand, model, year, and frame size;
- crank brand, complete model code, and generation;
- both crankarm lengths;
- spindle standard and diameter;
- bottom-bracket shell and installed bottom bracket;
- chainring configuration and chainline or “wide” designation;
- any spacers and preload adjuster in their installed order.
Photograph model markings on both arms, the chainrings, and the bottom-bracket area. Do not rely on a bike’s marketing name: manufacturers sometimes substitute components, and used bikes may have been changed.
If you cannot identify the crank, do not order a crankarm from dimensions alone. Ask the crank or bicycle manufacturer with clear photographs and the serial number where appropriate.
Check the crank family and interface
Some power meters replace only a left arm that attaches to an existing spindle. Others include the spindle with the left arm. Others replace a spider, complete crank, chainring, or pedal.
For a left-side product, verify all of these in the manufacturer’s compatibility data:
- exact compatible drive-side crank families;
- axle or spindle interface;
- road, gravel, MTB, standard, or wide version;
- generation and model-year restrictions;
- permitted crankarm lengths;
- required preload adjuster, wave washer, spacers, and fixing hardware.
Do not pair left and right arms of different lengths. Do not assume an older and newer arm from the same named groupset share an interface. A difference hidden inside the bottom bracket is still a difference.
The bottom bracket is a system, not just a hole
If the power upgrade includes a different spindle standard, the installed bottom bracket may not accept it. A bottom-bracket change must also fit the frame’s shell standard and width.
Work through the chain:
- Does the power crank use the same spindle as the current crank?
- If not, does the power-meter maker approve a bottom bracket for that spindle and this frame shell?
- Does the frame maker approve that crank and bottom-bracket configuration?
- Are the correct road or wide spacers documented?
- Can preload and lateral clearance be set exactly as specified?
An adapter is not automatically an approval. It may affect bearing support, chainline, sealing, clearance, or service life. Use an adapter only when every relevant maker documents the combination.
Check frame and chainstay clearance
The strain-gauge pod or enlarged arm can sit closer to the chainstay than the original crank. Measure at the location and crank angle shown in the power-meter instructions. Account for permitted frame flex and any protective film only as the maker directs.
Spin the installed crank slowly through a complete revolution before riding. Stop if the sensor, arm, magnet, cadence hardware, or shoe can strike the frame.
Road Wide and standard road cranksets may use different chainlines and spindle lengths. If a full crank or spindle swap changes the chainline, front-derailleur position and drivetrain compatibility may also change. Do not move the derailleur beyond its mounting or setup limits to rescue an incompatible crank.
Arm length is both compatibility and fit
Match the drive-side crank length unless the complete crankset is being changed as an intentional fit decision. A 170 mm arm on one side and 172.5 mm on the other changes the pedal circle and is not a substitute for the out-of-stock size.
If you are intentionally considering shorter cranks, treat that as a separate fit project. Read whether shorter road-bike cranks make sense and update saddle height deliberately after the complete, matched crankset change.
Drivetrain brand matters less than the exact interface—and sometimes more
A power meter measures torque and cadence; the sensor itself does not care how many rear sprockets you have. But the crank hardware around it can affect:
- chainring and chain compatibility;
- front-derailleur shape and travel;
- chainline;
- bottom-bracket fit;
- crankarm and frame clearance;
- Q-factor, the lateral spacing between pedal attachment points.
Therefore “the bike is eight-speed” does not answer crank compatibility, and “power works with any chainring” does not prove the crank fits the bike. Resolve each interface from the official documents.
Compare power-meter formats before changing the crank
If the crank route requires a new bottom bracket, drive-side arm, chainrings, and labour, compare the complete cost with:
- a compatible left-arm meter made for the current crank;
- a complete compatible crank-based system;
- power-meter pedals that fit the bike’s pedal threads and your chosen shoe-cleat system;
- structured training by heart rate and perceived effort until a future bike change.
Pedal power meters can be easier to move between bikes, but they introduce pedal-system, cleat, shoe, stack, clearance, and installation requirements. They are not universally compatible either. Use the shoe-cleat-pedal compatibility check before changing pedal systems for power.
If you do not yet use structured workouts, read whether you need a power meter for a first event. The right answer may be to keep the existing crank and train consistently.
Electronics come after mechanical fit
Once the hardware is approved, confirm:
- ANT+ and/or Bluetooth protocol support in your head unit or app;
- single-sided versus dual-sided measurement and how total power is estimated;
- battery type, replacement access, and sealing instructions;
- firmware-update method;
- calibration or zero-offset procedure;
- cadence source and any required magnet;
- regional app and warranty support.
Save the serial number and proof of purchase. Install current firmware, pair the sensor, perform the maker’s first-use calibration, and verify plausible cadence and power on an easy test ride.
A practical buying checklist
Do not pay until you have written confirmation for:
- exact crank-family compatibility;
- matching left and right arm length;
- spindle and bottom-bracket fit;
- standard versus wide configuration;
- frame and chainstay clearance;
- required spacers and preload parts;
- chainring and front-derailleur compatibility if changed;
- head-unit protocol;
- installation tools, torque values, and warranty.
Include every extra part and workshop charge in the price. A low listing price can be accurate and still be irrelevant to your bike.
Your next step
Photograph your crank model code and bottom-bracket area, then enter the exact power-meter model into the manufacturer’s compatibility advisor. If it does not explicitly list your crank and bike configuration, send those details to the manufacturer or an authorised dealer before ordering.