How to check cycling shoe, cleat, and pedal compatibility
Match the shoe's bolt pattern to the correct cleat and pedal system, then check walking needs, fit, release mode, and included hardware before buying.
 Field guide / cycling-shoe-cleat-pedal-compatibility
Before you buy
Check the starter kit first
Print the one-page buying brief for helmet, lights, water, phone, and repair compatibility before comparing upgrades.
A cycling shoe and a clipless pedal are not compatible merely because both say “road,” “SPD,” or “clipless.” The shoe must accept the correct cleat mounting pattern, the cleat must be approved for the pedal, and the supplied hardware must suit the shoe.
The short answer: identify the pedal system first, then its approved cleat, then a shoe with the matching two-bolt, three-bolt, or explicitly dual-pattern sole. Check the exact model manuals before paying. Shoe size and cleat compatibility are separate decisions.
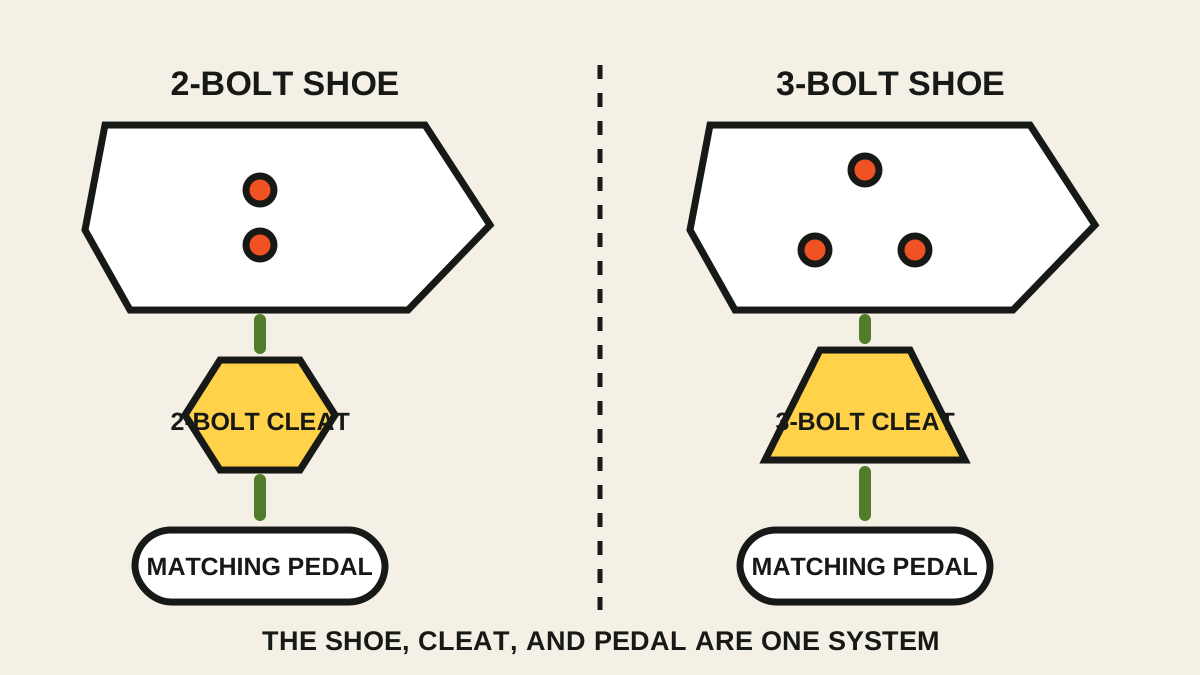
Start with the complete three-part system
A recent beginner question asked whether a pair of shoes would work with a dual-sided pedal. That question recurs because product pages often show the shoe, pedal, and cleat separately.
Write down three exact model numbers:
- Pedal: this determines the engagement mechanism.
- Cleat: this is the physical connector supplied with or specified for the pedal.
- Shoe: its outsole must accept the cleat’s mounting pattern and hardware.
Do not infer compatibility from the shoe category. Some road-style shoes accept only a three-bolt road cleat. Many walkable mountain, gravel, touring, and commuting shoes accept a recessed two-bolt cleat. Some soles provide both patterns, but that must be stated by the shoe maker.
Two bolts and three bolts are different systems
Shimano’s current footwear guidance describes its common patterns clearly:
- SPD: a compact two-bolt cleat, normally recessed into a walkable sole.
- SPD-SL: a larger exposed three-bolt cleat, primarily used with road shoes and pedals.
A two-bolt-only shoe cannot directly take a three-bolt cleat. A three-bolt-only road shoe cannot directly take a two-bolt cleat. An adapter exists for some specific combinations, but adapters affect stack height, walking, hardware, and fit; use only a combination documented by the relevant makers.
Other brands have their own cleat-pedal interfaces. A three-bolt shoe pattern may let several road cleats attach to the sole, but it does not make those cleats interchangeable with one another’s pedals. Match the cleat to the pedal model, not just the number of shoe bolts.
“Dual-sided” can mean two different things
Product descriptions use “dual-sided” ambiguously:
- Clip-in on both faces: either side of the pedal accepts the same cleat.
- Hybrid pedal: one face accepts a cleat and the other is a flat platform for ordinary shoes.
Look at both pedal faces and read the manual. A two-sided clip-in pedal is not automatically usable in normal shoes, while a hybrid pedal may require you to rotate it to the desired face at every start.
If you want one bike for training and ordinary trips, compare that routine honestly. A hybrid pedal can be useful, but a wide quality flat pedal may be simpler while you learn. The flat, SPD, and SPD-SL comparison explains the tradeoffs without treating clipless as a graduation requirement.
Check whether the cleat is included
Many pedals include one compatible cleat set; many shoes include no cleats. Do not assume either. Confirm:
- exact cleat model and release type;
- bolts, washers, and any mounting plate;
- bolt length approved for the shoe;
- whether replacement cleats are locally available;
- whether the pedal requires a proprietary tool or service part.
Cleats that look almost identical may have different release behaviour or float—the permitted rotational movement while clipped in. Never substitute based on colour or appearance alone.
Shoe fit is not solved by a conversion chart
Once compatibility is confirmed, fit the shoe. A website’s EU-to-US conversion is only a starting point because last shape, toe-box width, volume, closure, and sock thickness vary.
Try both shoes later in the day with the socks you ride in. Check that:
- toes are not touching the end while seated and standing;
- the forefoot is secure without numbness or side pressure;
- the heel does not lift excessively;
- closures do not create a hot spot over the top of the foot;
- the cleat slots allow the position you need;
- you can exchange the shoe after an indoor fitting if the retailer permits it.
Do not choose a smaller size merely to make the shoe feel “performance tight.” Numbness, burning, and pressure are not a break-in requirement.
Choose for walking as well as pedalling
An exposed three-bolt road cleat can be awkward and slippery on hard floors. A recessed two-bolt cleat is usually easier for café stops, commuting, stairs, and walking through a station, although the exact outsole still matters.
Ask where the shoe will spend time off the bike. Frequent walking can make a walkable system more practical than a broad road platform. If most riding begins at home and ends at home, a road system may suit you. This is a use decision, not a speed hierarchy.
Install the cleats as safety hardware
Use the shoe, cleat, and pedal manuals together. Shimano’s SPD-SL instructions, for example, specify a compatible three-bolt outsole, the correct washers and bolts, an installation torque, and a staged positioning process. Your system may differ.
A sensible installation sequence is:
- Photograph the shoe sole and record the initial position.
- Apply only the thread preparation named by the maker.
- Install every specified washer and bolt with clean threads.
- Begin with a neutral cleat position rather than copying someone else’s measurements.
- Tighten gradually and evenly to the documented torque.
- Check engagement and release while seated and supported.
- Recheck bolt security after the maker’s stated bedding-in interval.
For first setup, follow the first cleat-position guide and change one variable at a time.
Practise release before the first road ride
Set release tension to the easiest permitted setting on both pedals, if adjustable. Lean against a wall or use a stable support with another person present. Clip and release each foot repeatedly without moving, then practise on grass or an empty traffic-free area.
Release the foot you plan to put down before stopping. Do not wait until the bike has already stopped and begun to lean. If release is rough, unpredictable, or impossible, stop and inspect cleat orientation, bolt security, shoe interference, and pedal condition.
A five-line pre-purchase check
Before ordering, you should be able to complete these sentences:
- My pedal model is ___ and it accepts cleat model ___.
- That cleat uses a ___-bolt shoe pattern.
- My shoe model explicitly supports that pattern.
- The cleat and required hardware are included / added separately.
- I can return or exchange the shoes after an indoor-only fit check.
If any line depends on a forum guess, ask the pedal or shoe manufacturer before buying.
Your next step
Save screenshots of the pedal manual, approved cleat, and shoe outsole specification in one note. Buy only after all three model numbers form a documented chain. If you are still unsure which system fits your riding, start on flat pedals; your first road-bike purchase does not require clipless equipment.