Why is your road-bike cassette loose or wobbling?
Separate a loose sprocket stack from freehub or wheel play, then check the lockring, spacers, seating, and compatibility in a safe order.
 Field guide / loose-road-bike-cassette
Before you buy
Check the starter kit first
Print the one-page buying brief for helmet, lights, water, phone, and repair compatibility before comparing upgrades.
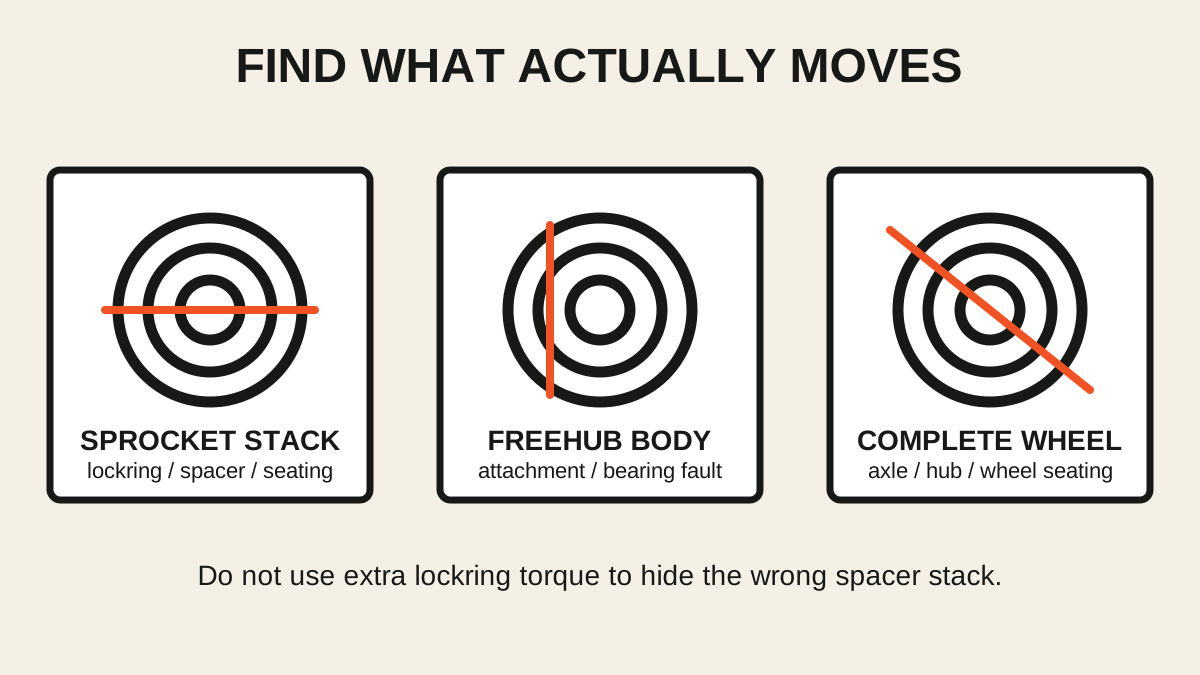
A cassette should not clunk or slide sideways as a loose stack of sprockets. Stop riding and identify whether the movement is in the sprockets, the freehub body beneath them, or the complete wheel. A loose lockring is only one possibility; a missing spacer, mis-seated smallest sprocket, damaged interface, or hub fault can look similar.
The short answer: remove the wheel, hold the axle or freehub as appropriate, and determine which layer moves. Do not simply tighten harder. Verify the exact cassette/freehub combination, spacer order, sprocket seating, lockring thread engagement, and model-specific torque first.
First decide whether it is actually loose
Watch the cassette while turning the cranks in a stand and while coasting the rear wheel. A visual oscillation can be exaggerated by tooth profiles, the camera angle, or normal tolerances. The meaningful checks are physical play, noise, poor engagement, and whether components are correctly assembled.
With the bike stable and the chain relaxed, check without putting fingers near moving spokes or sprockets:
- Does the entire wheel move sideways at the rim? Check wheel seating, axle security, and hub play.
- Do the cassette and freehub move together relative to the hub axle? Suspect the freehub attachment or bearings.
- Do the sprockets clunk or slide relative to the freehub body? Suspect the lockring, sprocket seating, spacer stack, or interface damage.
- Does only one loose individual sprocket move on a system where it should be fixed? Stop and identify the exact cassette construction.
Our hub-play guide covers the wheel-level check. If you are not certain the wheel uses a cassette, start with cassette versus freewheel identification.
Common causes of a loose sprocket stack
The lockring is loose
The lockring clamps the cassette stack. It may have been under-tightened, cross-threaded, installed with poor tool engagement, or loosened because the parts beneath it were not seated.
Do not copy a torque from a forum. Shimano manuals, for example, show ranges such as 30–50 N·m for particular HG cassette procedures; that is evidence that substantial and model-specific tightening is involved, not permission to assign 40 N·m to every cassette. Use the manual for the exact cassette and driver.
A required spacer is missing or wrong
Freehub bodies and cassettes of different generations and speeds use different spacer arrangements. Some combinations need a low spacer behind the cassette, another spacer supplied with the cassette, both, or neither. A thin transport band can also be mistaken for a functional spacer.
Identify the hub/freehub and full cassette model. Rebuild the stack exactly as the exploded diagram shows.
The smallest sprocket is not seated
Most splined systems have one narrow or otherwise keyed position. A sprocket can sit partly on top of a spline instead of sliding fully into place. The lockring may begin to tighten while the stack still feels loose or crooked.
Remove it, inspect for burrs or damage, align every keyed spline, and confirm the smallest sprocket is fully engaged before starting the lockring by hand.
The cassette and driver are incompatible
“Ten speed” or “twelve speed” does not define the mounting interface. HG, Micro Spline, XD, XDR, and brand-specific variants differ, and adapters or spacers have exact uses. A part that can be forced onto a driver is not necessarily compatible.
The freehub or hub is loose
If the sprockets are clamped together but the entire freehub moves, the cassette lockring is not the repair. The freehub fixing, axle parts, end caps, or bearings may be worn, missing, loose, or incorrectly assembled. These parts are wheel-specific; obtain the wheel manual or use a qualified shop.
Inspect before tightening
Remove the wheel using the axle procedure for that bike. Keep disc rotors and braking surfaces clean. Then:
- Photograph the existing order before disassembly.
- Fully engage the correct lockring tool. Similar splines do not guarantee the right tool.
- If removal is required, hold the cassette with a chain whip in the correct direction and protect your hands from sharp sprocket teeth.
- Inspect lockring threads, driver splines, sprocket keys, spacers, and the smallest sprocket.
- Stop for stripped threads, cracks, heavy gouging, metal debris, or an interface you cannot identify.
- Clean mating surfaces as the maker allows; do not grease friction surfaces or improvise thread treatment.
- Reassemble in the documented order and start the lockring by hand to avoid cross-threading.
- Tighten with the specified tool and torque procedure.
If the lockring reaches its torque while the stack remains loose, stop. That strongly suggests an incorrect or incomplete stack, mis-seating, or a component mismatch—not a need for more force.
Check the complete repair
Reinstall and secure the wheel by its manual. Then verify:
- there is no lateral clunk in the sprocket stack;
- the freehub rotates and engages normally;
- the wheel has no abnormal hub play;
- the smallest and largest sprockets clear the frame, spokes, and derailleur;
- shifting works through every gear in a stand;
- the chain does not overshift toward the frame or spokes;
- the brake works and the axle is fully secure.
Take a short, low-load ride in a traffic-free area. Stop immediately for renewed play, grinding, skipping, or chain contact. Use the chain-skipping diagnosis if the cassette is now secure but the drivetrain still jumps.
When the freehub splines are marked
Individual steel sprockets can mark softer freehub splines. Light notching is not the same as a loose stack, while deep damage can make removal difficult or prevent correct seating. Do not file structural parts casually. Ask the wheel maker or a competent mechanic whether the driver is serviceable.
Metal shavings, rapidly increasing play, or a cassette that contacted spokes or frame are reasons for professional inspection before another ride.
Your next step
With the bike stationary, identify which layer moves: sprocket stack, freehub, or complete wheel. Record the cassette and wheel model before buying a tool or spacer. If the stack is loose and the documented parts order is not obvious, carry the wheel and all loose parts to a shop rather than tightening by guesswork.
Sources and further reading
- Shimano road wheel dealer manual: cassette lockring procedure, torque range, and model-specific spacers
- Shimano wheel dealer manual: align the keyed spline and use the specified lockring tools
- r/bikewrench reader context: a current loose cassette caused by a mis-seated smallest sprocket
- r/bikewrench reader context: spacer and transport-band confusion during cassette installation
- r/bikewrench reader context: separating a loose lockring from freehub or bearing faults
Reddit discussions were used to identify failure patterns and reader questions, not as torque or compatibility specifications. No usernames or personal stories are reproduced here.