Cassette or freewheel: how to tell before buying parts
Identify whether your rear wheel uses a cassette or threaded freewheel, then choose compatible tools, replacement cogs, and upgrade options.
 Field guide / cassette-or-freewheel-how-to-tell
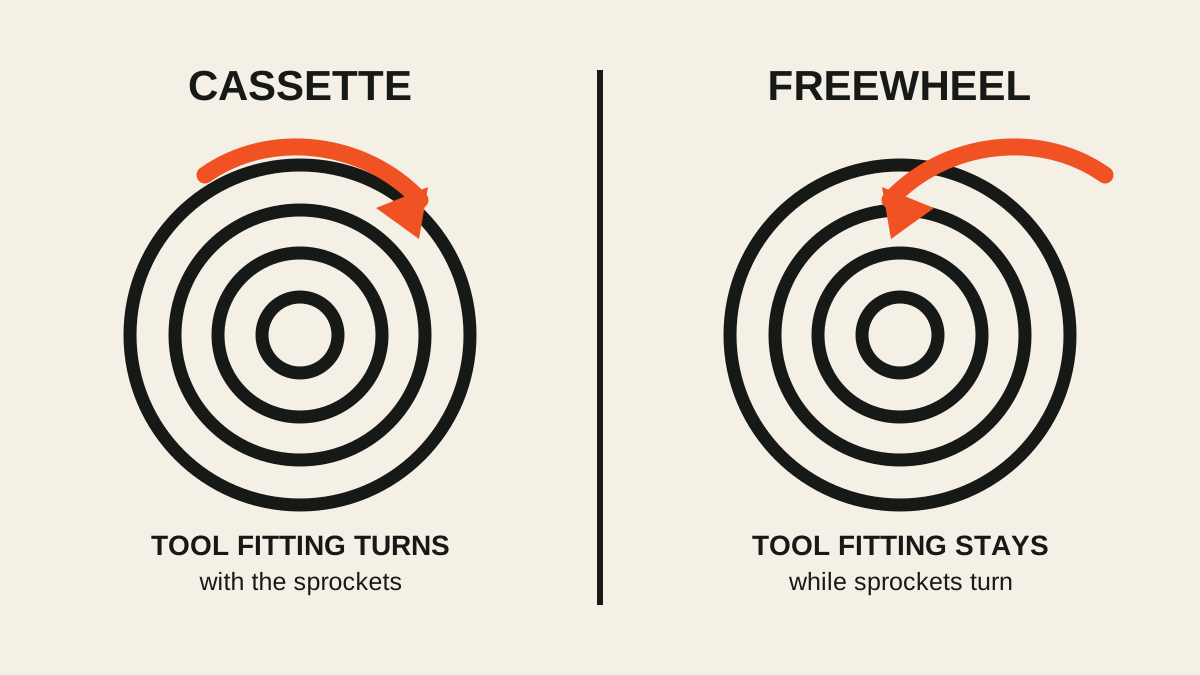
A cassette and a freewheel can look almost identical on the bike, but they attach to the rear hub differently and need different removal tools. The reliable beginner check is to remove the rear wheel, rotate the sprockets backwards, and watch the central tool fitting.
The short answer: if the tool fitting rotates with the sprockets, the wheel normally has a cassette on a freehub. If the sprockets rotate while the tool fitting stays still, it normally has a threaded freewheel. Record the hub and sprocket model before ordering anything.
Why the name changes the whole job
Several current repair questions ask whether the rear cogs are a cassette or freewheel, which remover fits, and whether a seven-speed freewheel can become nine-speed. They are useful demand signals, not compatibility evidence for another wheel.
On a cassette system, the ratcheting mechanism is the freehub body attached to the hub. The sprockets slide over splines and are usually retained by a lockring. Remove the cassette and the freehub remains on the wheel.
On a threaded freewheel system, the sprockets and ratchet form one assembly that threads onto the hub. Remove it and the hub’s large external thread is exposed.
That distinction affects the remover, whether a chain whip is needed, available sprocket ranges, axle design, and the practical upgrade path.
Perform the rotation test
- Shift to the smallest rear sprocket.
- Remove the rear wheel using the bicycle maker’s axle instructions.
- Lay the wheel securely with the sprockets facing you.
- Find the splined or notched tool fitting near the axle.
- Rotate the sprockets backwards, in their normal coasting direction.
- Watch the fitting relative to the axle.
Interpret the result:
- Fitting rotates with the sprockets: normally a cassette and freehub.
- Fitting remains stationary: normally a threaded freewheel.
- You cannot see a fitting or the result is ambiguous: photograph the wheel straight on, record all markings, and ask a shop before buying a tool.
Park Tool’s identification guide documents this test and also warns that similar-looking removers can have different dimensions. Do not decide from the number of sprockets alone. Eight-speed freewheels exist, and old or unusual hubs break many internet shortcuts.
What the tools do differently
A common cassette removal uses:
- the matching lockring tool;
- a chain whip to stop the cassette rotating while the lockring loosens;
- a suitable wrench or torque tool;
- the model’s specified installation torque and spacer arrangement.
A threaded freewheel removal normally uses:
- the exact remover that engages the freewheel body;
- secure engagement, sometimes retained by the axle nut or quick release while force begins;
- a suitable wrench or bench setup.
The freewheel does not normally need a chain whip for removal because pedalling tightens the complete assembly onto the hub. Some old freewheels have obsolete or fragile fittings. Do not improvise with a punch, screwdriver, or almost-fitting remover if preserving the part or wheel matters.
Do not confuse freehub, freewheel, and cassette
Use the terms this way:
| Term | What it is |
|---|---|
| Cassette | The removable stack of sprockets on a freehub body |
| Freehub | The hub-mounted ratcheting body that accepts a cassette |
| Freewheel | Sprockets and ratchet combined in one threaded assembly |
| Hub | The wheel centre containing axle and bearings |
If a seller says “freewheel cassette,” ask for a wheel-off photo and model numbers. The mixed phrase does not identify the part.
Before replacing worn sprockets
Record all of these:
- number of rear sprockets;
- smallest and largest tooth counts;
- brand and complete model code;
- cassette/freewheel result from the rotation test;
- hub model and freehub interface if it is a cassette;
- axle type and rear spacing;
- chain, shifter, and derailleur model;
- any spacer found behind a cassette.
A replacement must fit more than the wheel. Speed count, sprocket spacing, chain, shifter indexing, derailleur capacity, largest supported sprocket, chain length, and freehub interface can all matter. Use the compatible rear-wheel guide if a wheel change is part of the plan.
What if you want more gears?
A cassette hub often offers more upgrade options, but “cassette” does not mean every cassette fits. Freehub interfaces and lengths vary, and some combinations need a specified spacer.
Moving a freewheel bike to a cassette commonly means replacing or rebuilding the rear wheel, then confirming frame spacing, axle, dish, shifter, derailleur, chain, and brake compatibility. A wider threaded freewheel is not a harmless shortcut; it can change spacing and wheel geometry, and old axle layouts may not tolerate it well.
For a modest bike, compare the complete conversion cost with a correct same-type replacement and the bike’s condition. The used-parts guide explains how to avoid buying an unidentified “upgrade” that creates another compatibility problem.
Your next step
Remove the rear wheel, make a ten-second video of the backwards-rotation test, and photograph every hub and sprocket marking. Identify the system and exact tool before loosening anything. If replacement is needed because a new chain skips, use the chain-or-cassette diagnosis before buying both automatically.