Is a rusty bike chain safe to ride? Clean, inspect, or replace it
Tell light surface rust from a stiff or damaged chain, run a safe inspection, and decide when replacement is better than another cleaning attempt.
 Field guide / is-rusty-bike-chain-safe-to-ride
A few orange marks after a wet ride may be removable surface rust. A chain with stiff links, deep pitting, missing material, cracks, or poor engagement is a replacement job. Colour alone cannot decide it: clean the chain enough to inspect, flex every link, and measure wear with a gauge approved for that drivetrain.
The short answer: do not “ride the rust off” before checking the chain. Wipe and clean light contamination, then inspect link movement and wear. Replace the chain if corrosion remains deep, any link is damaged or persistently stiff, or wear exceeds the component maker’s limit.
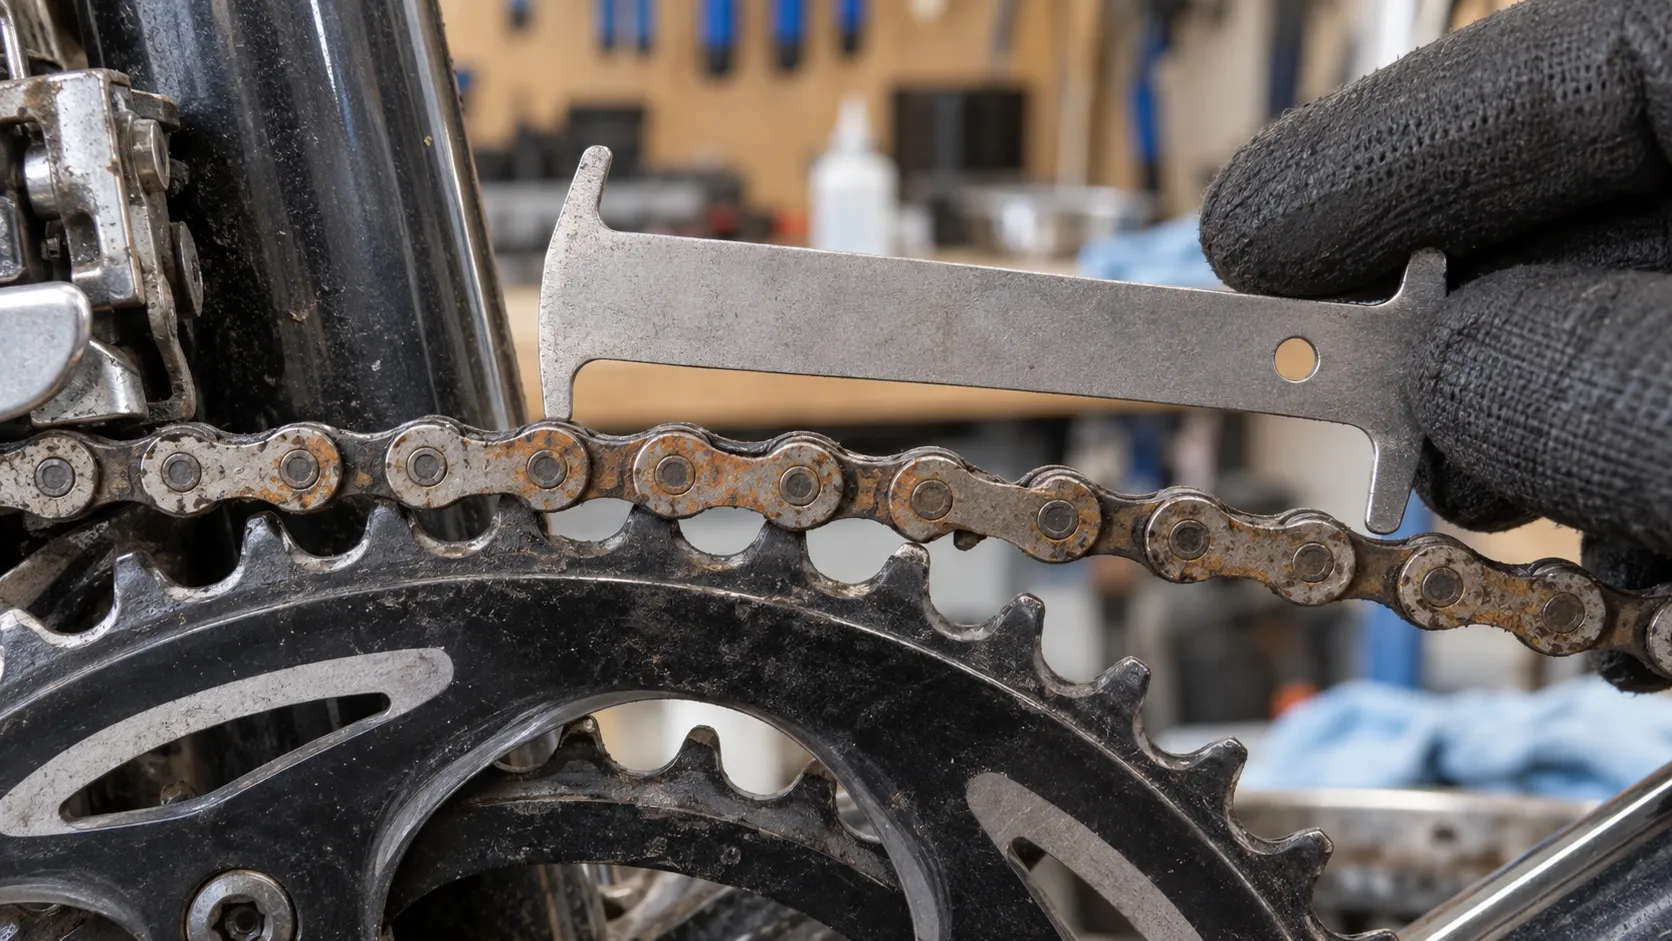
Classify what you see before touching it
Light surface rust
Small orange patches on outer plates can appear after a wet chain is left without enough corrosion protection. If the chain still articulates freely and the marks wipe away during normal cleaning, it may remain serviceable after a full inspection.
Rust around rollers and pins
Corrosion concentrated at the joints matters more because the chain must pivot at every link under load. Look for rollers that do not turn normally, links that remain kinked, squeaking after correct lubrication, or reddish debris returning from inside the joint.
Deep corrosion or missing material
Pitting, flaking metal, swollen plates, cracked plates, loose pins, or a chain frozen into a shape are replacement signs. Cleaning cannot put steel back or prove the remaining part will carry load reliably.
Inspect the chain in six steps
- Do not pedal hard. Put the bike somewhere stable and inspect it before a test ride.
- Protect the brakes. Keep sprays, solvent, oil, and dirty runoff away from disc rotors, pads, rim-brake tracks, and tyres.
- Wipe off loose contamination. Rotate the cranks backward by hand only if the drivetrain moves freely. Use a rag to expose the plates, rollers, and pins.
- Flex every link. Work through the complete chain. Each joint should articulate rather than hold a kink. Inspect both sides for cracks, spreading plates, damaged pins, and impact marks.
- Measure wear correctly. Use a chain gauge compatible with the chain and follow its instructions. Replacement thresholds vary by drivetrain and manufacturer; do not apply one number to every chain.
- Check the rest of the drivetrain. Look at cassette and chainring teeth, derailleur pulleys, cables, bearings, brakes, and tyres—especially if the rust suggests outdoor storage.
SRAM’s current road guidance, for example, specifies a wear threshold for its chain systems and tells users to clean with biodegradable non-acidic cleaner, dry, lubricate with dedicated chain lubricant, and wipe off the excess. Your chain maker’s instructions take priority.
When cleaning is reasonable
Cleaning is a defensible first step when:
- corrosion appears light and recent;
- every link moves freely before and after cleaning;
- plates, pins, and rollers show no pitting or damage;
- the wear gauge remains within the maker’s limit;
- the chain runs quietly and engages correctly during a cautious test.
Use a bicycle-specific, non-acidic cleaner allowed by the component maker. Rinse if instructed, dry the chain thoroughly, apply one suitable lubricant to the rollers, allow it to settle as directed, and wipe the outer plates almost dry.
General-purpose water-displacing products are not automatically a complete chain lubricant. A product that helps clean or displace moisture still needs to be followed by the chain lubricant specified for riding, unless its maker explicitly says otherwise.
When replacement is the better decision
Replace rather than rescue when:
- one or more links remain stiff after correct cleaning and lubrication;
- rust has pitted the load-bearing parts;
- a plate is bent, cracked, spreading, or missing material;
- a pin is loose or visibly displaced;
- the chain exceeds the maker’s wear limit;
- the chain skips, catches, or binds after basic adjustment checks;
- labour and chemicals would approach the cost of a compatible chain;
- you cannot establish what happened to a long-neglected used bike.
A new chain must be the correct speed, type, length, and joining system for the drivetrain. Installation may require a compatible quick link, connecting pin, chain tool, and torque or directional instructions. If that list is unfamiliar, a shop replacement is cheap risk reduction.
A rusty chain on a used bike is a wider clue
One rusty chain does not prove every bearing is ruined. It does justify a closer inspection. Ask where and how the bike was stored, then check cable ends, fasteners, headset, bottom bracket, wheel bearings, brake hardware, frame drain areas, tyres, and the inside of accessible steel parts.
Price the whole first service before calling the bike a bargain. Use the used-bike test-ride guide and used road-bike checklist rather than negotiating from the cost of one chain.
Prevent the next rusty morning
After a wet ride, remove road grit, dry the chain, and restore the correct lubricant before storage. Keep the bike out of persistent damp and do not leave the chain coated in salty water or sweat. Applying more oil without wiping the excess creates a dirt-catching paste; read why more chain lubricant is not better.
Measure wear periodically so replacement happens before a worn chain accelerates wear elsewhere. Our chain-wear inspection guide explains the tools and common measurement mistakes.
Your next step
Do not start with a ride. Wipe one full chain rotation, flex every link, measure wear using the correct tool, and choose clean or replace. If any link remains questionable, replace the chain or put the bike in front of a mechanic before loading it on the road.
Sources and further reading
- SRAM road drivetrain manual: chain wear, cleaning, drying, and lubrication
- r/bikewrench reader context: surface rust versus stiff-link and wear checks
- r/bikewrench reader context: heavily corroded chain on a low-cost used bike
- r/bikewrench reader context: a rusty chain as a clue to used-bike storage