Can you copy your bike fit to a new road bike?
Transfer useful bike-fit coordinates to a new road bike, account for different saddles, cranks, bars, and geometry, then validate the result gradually.
 Field guide / copy-bike-fit-to-new-road-bike
You can copy useful fit coordinates from a comfortable road bike to a new one, but you cannot safely copy only saddle height, exposed seatpost, spacer count, and stem length. The new bike’s geometry and components change where your hands, feet, and pelvis actually sit.
The short answer: transfer the rider’s contact points relative to the bottom bracket, match the same shoes and pedals where possible, and treat the result as a baseline that still needs riding and adjustment.
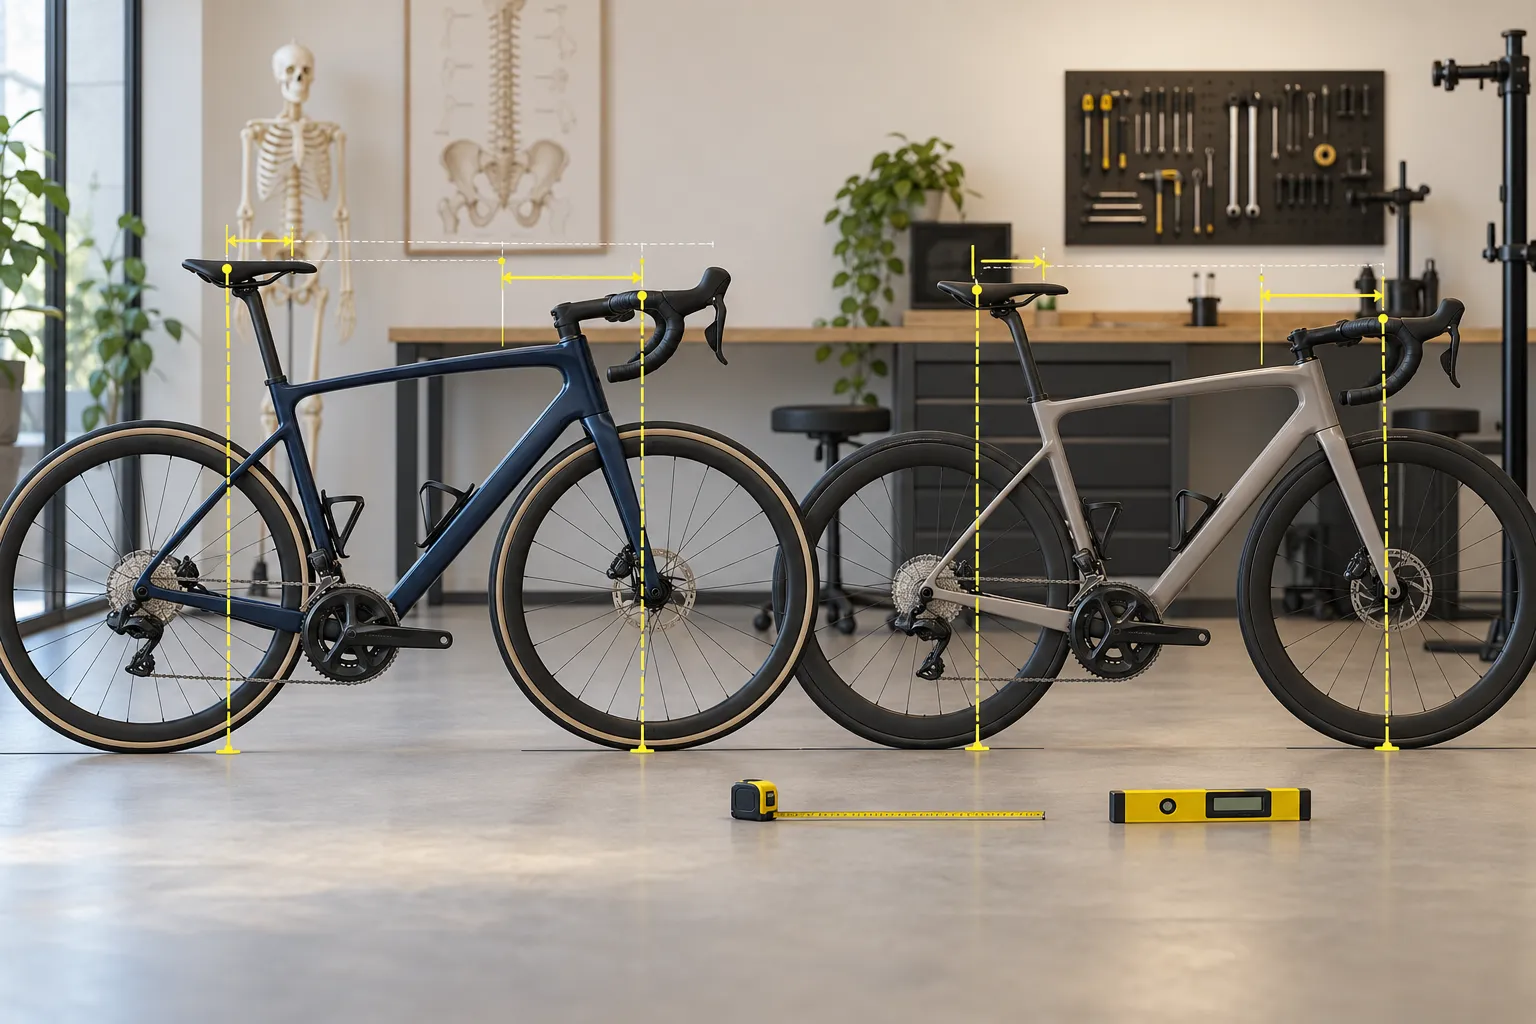
Start with a fit worth copying
A fit report is not automatically a guarantee. Before transferring it, ask:
- Was the old bike comfortable for the duration and intensity you actually ride?
- Did you have numbness, joint pain, or one-sided symptoms?
- Have your mobility, injury status, body mass, shoes, or riding goals changed?
- Was the fit completed before a recent saddle, cleat, crank, bar, or hood change?
- Is the new bicycle intended for the same type of riding?
Do not faithfully reproduce a problem. If the old setup required unusual workarounds or never felt right, use the new bike as a reason to reassess it with a qualified fitter.
Use the bottom bracket as the reference
The bottom-bracket centre is a stable reference for the rider’s relationship to the pedals. Useful transfer measurements include:
- saddle height from bottom-bracket centre to a defined point on the saddle;
- saddle setback: the saddle reference point’s horizontal position behind or ahead of the bottom bracket;
- saddle tilt measured on the same defined surface;
- handlebar or hood horizontal reach from the bottom bracket;
- handlebar or hood vertical height from the bottom bracket;
- handlebar width, reach, and drop;
- brake-hood position and lever reach;
- crank length and pedal system.
A professional fit report may express these as X/Y coordinates. If yours only lists component dimensions, ask the fitter whether it can be updated with contact-point coordinates and the measurement method.
Photograph both bikes from the side on level ground. Record exactly where every measurement starts and ends. “Saddle height 740 mm” is not reproducible if one person measures along the seat tube and another measures directly to a different point on the saddle.
Saddles cannot be matched by the nose alone
Saddles vary in length, shape, padding, rail position, and where the rider actually sits. Aligning two noses can place the pelvis differently.
Use the same saddle model for the cleanest transfer. If the saddle changes, identify a repeatable point based on width or the maker’s fitting method, then expect to validate setback and height. A shorter saddle is not automatically meant to sit with its nose in the same place as a longer one.
If you changed saddle models, follow the saddle-fit reset process before deciding the frame is wrong.
Match the foot interface
Crank length changes the pedal’s top and bottom positions. Shoes, insoles, cleats, and pedals change stack height and where the foot sits over the axle. Copying the same saddle measurement while changing those parts does not reproduce the same leg extension or hip closure.
Record:
- crank length on both bikes;
- pedal model;
- shoe and insole model;
- cleat type, fore-aft position, rotation, and lateral position;
- any shims or wedges prescribed by a fitter.
Do not improvise corrections for leg-length differences from a photograph or a forum comment. Those decisions need a proper assessment.
Bars and hoods hide extra reach
Two stems marked 100 mm do not create the same hand position if frame reach, headset cover, spacer height, stem angle, handlebar reach, bar rotation, or hood placement differs.
Compare the complete path from the bottom bracket to the place your hands rest on the hoods. The new frame must also have enough safe adjustment range: approved steerer spacers, a suitable stem, correct cable or hose length, and manufacturer-permitted bar placement.
Use road-bike geometry charts across brands to check whether the target coordinates are realistic before buying. If the frame needs extreme parts just to approach the old position, it may be the wrong model or size.
Transfer in a controlled order
- Fit the intended cranks, pedals, shoes, and cleats.
- Install the intended saddle and set a conservative height, setback, and tilt.
- Set bar height and reach within the frame and fork’s allowed range.
- Set bar rotation, hood position, and lever reach.
- Record every coordinate before the first ride.
- Test easy for 30–45 minutes somewhere safe.
- Change one variable at a time and log the result.
Do not begin with a long event or hard intervals. A small setup issue is easier to identify before fatigue adds posture changes. Use the one-change bike-fit log for the validation phase.
Know when the copy has failed
Recheck or seek help when:
- the target coordinates require prohibited spacer height or an unsuitable stem;
- weight distribution and steering feel are markedly different;
- you cannot use the hoods and brakes with relaxed control;
- one-sided pain, numbness, or instability appears;
- the saddle must sit outside its rail markings;
- cables or hoses become tight through steering;
- the new bike’s intended position is fundamentally different from the old one.
A race bike, endurance bike, gravel bike, and time-trial bike may need different positions even for the same rider. The goal is not to force every bicycle into one silhouette.
Your next step
Ask for the old fit report, then create a one-page table of bottom-bracket-to-saddle and bottom-bracket-to-hood coordinates, plus every contact component. Check those targets against the new frame before purchasing parts.
Sources and further reading
- Retül: rider-centred bike fitting overview
- r/bikefit demand signal: copying a fit from one road bike to another — used as an editorial question signal, not as individual fit advice.
- r/bikefit demand signal: copying measurements after replacing a bicycle — used as an editorial question signal; personal measurements and comment prescriptions were not reused.