How to center dual-pivot road-bike rim brakes
Seat the wheel, align the brake pads, center the caliper, set cable clearance, and separate a brake adjustment from a wheel problem.
 Field guide / center-dual-pivot-rim-brakes
Center a dual-pivot rim brake only after the wheel is fully seated and the pads are correctly aligned. Then use the caliper’s centering adjustment to make the left and right gaps equal, and use the cable adjustment to set the overall pad clearance. If the gap changes as the wheel spins, diagnose the wheel or rim before chasing the brake.
The short answer: wheel first, pads second, caliper third, cable clearance fourth. Squeeze the brake repeatedly and spin the wheel after every change. Do not “fix” one rubbing spot by shifting the entire caliper if the rim moves side to side.
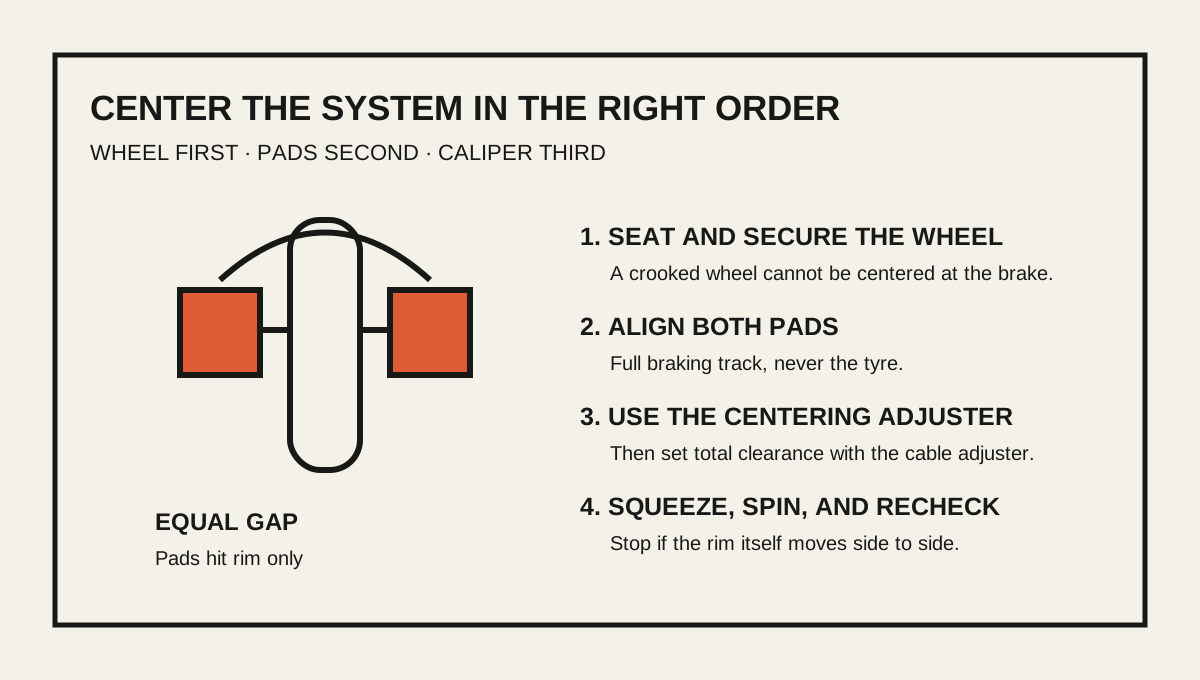
Identify the brake before adjusting it
A current r/bikewrench question asked why one dual-pivot brake pad would not sit evenly from the rim despite following a general adjustment video. The recurring problem is that several different faults all look like “the brake is off-center.”
This guide covers common road-style dual-pivot calipers mounted at one central frame or fork bolt. It does not cover cantilever, V-brake, hydraulic rim brake, direct-mount two-bolt, or disc-brake systems. Find the model marking and the manufacturer’s dealer manual before turning fasteners.
The small screw on one caliper arm is usually a centering or spring-balance adjustment. It is not a pad-position screw, cable-tension screw, or substitute for securing the main mounting bolt.
Step 1: seat and secure the wheel
Open the brake quick release if needed, then reinstall the wheel fully into the fork ends or dropouts. Secure the quick release or thru-axle exactly as its maker specifies. Close the brake quick release before judging clearance.
Check that the tyre is centered between the frame or fork. If the whole wheel sits to one side, solve that issue before moving the brake. Our quick-release wheel guide covers the safe closing check.
Spin the wheel and watch the braking track, not the tyre graphics. Ask:
- Does the rim stay in one lateral plane?
- Does it move toward one pad at only part of the rotation?
- Is the rim seam, dent, or sidewall damaged?
- Is the hub loose when the rim is pushed sideways?
A caliper can be perfectly centered around a rim that is not true. If the rim wanders, wheel inspection comes first.
Step 2: align each brake pad
The pad should contact the rim’s braking track fully and squarely. It must never touch the tyre, hang below the track, or contact only one corner because the holder is rotated.
Follow the brake and pad maker’s procedure. Common checks are:
- The correct pad faces forward in the marked direction.
- Replaceable inserts are fully retained in their holders.
- The pad surface is clean and free of embedded metal.
- The entire pad lands on the braking track when the lever is squeezed.
- Fasteners are tightened to the exact published torque.
Some systems permit a small amount of toe-in; others specify a different setup. Do not invent a universal angle. Replace worn pads before centering around them; use when to replace rim-brake pads for the inspection.
Step 3: center the caliper
Start with the model’s centering adjustment, not the cable anchor. Turn it in a small increment and observe which pad moves closer. If the imbalance worsens, return to the recorded start and turn the other way.
Shimano’s general dual-pivot instructions show using the centering adjustment bolt to make left and right shoe clearances equal. The same manual gives 1.5–2 mm as a setup value for the models it covers; that is not a universal number for every brake, lever, rim, and cable system. Use your exact manual.
If the centering screw reaches its useful limit without centering the brake:
- confirm the wheel is seated and the quick release is closed;
- check that the caliper is mounted straight and the main fixing hardware is secure;
- look for a sticky pivot, bent arm, damaged spring, or cable housing pulling the caliper sideways;
- confirm washers and recessed nuts are in the correct order;
- stop before loosening the main mount unless you have the model procedure and torque.
Some calipers require initial alignment at the central mounting bolt before fine centering. Holding, loosening, or retightening that bolt incorrectly can leave the brake loose or damage a carbon fork crown. If the manual is unclear, use a mechanic.
Step 4: set total pad clearance
Once the gaps are equal, use the intended cable adjustment to set both pads’ overall distance from the rim. A barrel or cable adjustment changes both clearances; it should not be used to hide a left-right centering fault.
Keep enough adjuster thread engaged and preserve any locknut position specified by the maker. If the barrel adjuster cannot achieve correct lever travel, the cable may need to be anchored again—but that is a separate procedure with its own routing and torque.
Do not compensate for a frayed cable, split housing, worn rim, or lever that nearly touches the bar. Those are component faults, not fine adjustment.
Step 5: settle and test the brake
Shimano’s general procedure says to operate the lever about ten times and recheck operation and shoe clearance. Repeated squeezing settles the housing, pads, and pivots after adjustment.
Then:
- Squeeze the lever firmly while stationary.
- Confirm both pads contact the rim together and only on the braking track.
- Release and confirm both pads retract.
- Spin the wheel and listen through a full revolution.
- Push the rim gently side to side to check for hub play.
- Confirm the caliper and wheel attachment remain secure.
- Test braking at walking speed in a traffic-free area before a normal ride.
If one pad rubs only after a hard lever squeeze, a sticky pivot, housing tension, loose mounting, or wheel movement may be returning the caliper off-center.
Match the symptom to the right correction
| What you see | Likely area to inspect first |
|---|---|
| Same pad rubs for the full rotation | Wheel seating, caliper centering, cable housing pull |
| Rub occurs at one rim section | Rim trueness, dent, seam, or hub play |
| Pad touches the tyre | Pad position; stop riding until corrected |
| Lever comes close to the bar | Pad wear, cable clearance, cable/housing, caliper condition |
| Brake stays applied after release | Pivot return, cable friction, damaged spring, housing route |
| Both gaps look good but braking is weak | Pad/rim condition, contamination, cable system, lever compatibility |
Do not make multiple corrections at once. If the wheel was recently removed and the brake was fine beforehand, begin with wheel seating and quick-release position. If the fault followed a crash, transport, or wheel impact, inspect for damage before adjustment.
When to stop adjusting
Use a mechanic when the caliper is bent, pivots are loose or seized, the mounting bolt will not hold, the fork or frame is damaged, the rim braking track is concave or cracked, or the cable is frayed. Also stop when pad clearance cannot remain stable after repeated lever operation.
Our mechanic-or-adjustment guide helps separate a safe routine task from a fault that needs tools, parts, or diagnosis.
Your next step
Find the brake’s exact model number and dealer manual. Reseat the wheel, mark the current centering-screw position, align the pads, and make one small centering change. Squeeze the lever repeatedly and spin the full wheel before deciding whether the brake—or the wheel—is the part that moved.
Sources and further reading
- Shimano general dealer manual: dual-pivot caliper installation and centering
- Shimano manuals search: find the document for the exact brake model
- r/bikewrench discussion: uneven pad clearance on a dual-pivot brake — used as an editorial question signal, not as technical evidence.