How to tighten a quick-release bike wheel safely
Seat and close a traditional quick-release wheel correctly, then check lever resistance, wheel security, brake clearance, and alignment before riding.
 Field guide / how-to-tighten-quick-release-bike-wheel
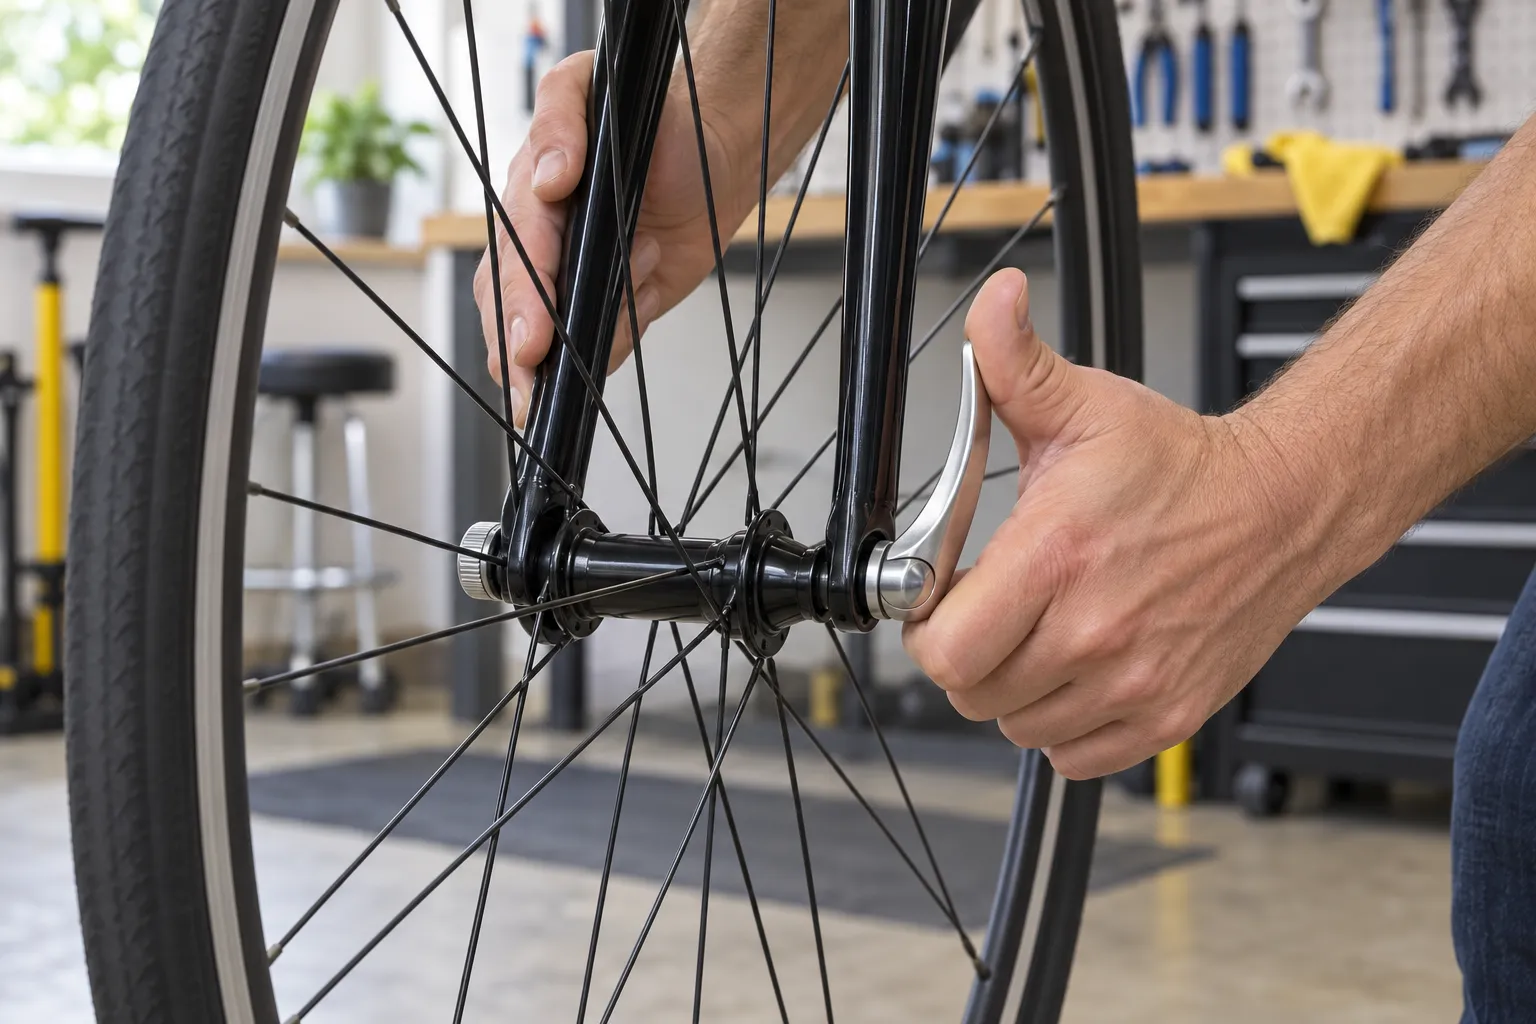
A traditional quick-release lever is a cam, not a wing nut. Set the tension with the nut while the lever is open, then swing the lever fully closed by hand. Spinning the lever around the axle does not create the intended clamping force.
The short answer: seat the axle fully in both dropouts, hold the wheel centred, tighten the adjusting nut until the open lever begins to resist around halfway through its closing arc, then use your palm to close it completely. Reconnect the brake if required and check that the wheel cannot shift before riding.
First confirm what axle you have
This guide is for a slender skewer that passes through a hollow hub axle and has a cam lever at one end and an adjusting nut at the other. It is not for a threaded thru-axle. If your axle is a thick shaft that screws directly into the frame or fork, use the thru-axle tightening guide instead.
Also check your bike or hub manual. Lever shape, retaining tabs, disc-brake clearance, and approved orientation can differ.
Install the wheel in seven steps
- Open the brake if necessary. Many rim brakes have a release that creates tyre clearance. Disc brakes normally stay assembled; never squeeze a hydraulic brake lever with the wheel removed unless a proper pad spacer is installed.
- Move the lever to OPEN. Loosen the adjusting nut enough for both axle ends to enter the dropouts. Do not remove so much tension that the nut falls off.
- Seat the wheel fully. Put the bike upright on its wheels when practical. Make sure both axle ends are at the bottom of their dropout slots and the wheel sits between the frame or fork blades.
- Set initial tension. With the lever open, turn the adjusting nut clockwise until it contacts the dropout. Begin closing the lever.
- Find resistance. Shimano’s quick-release instructions say resistance should become apparent as the lever approaches a position parallel with the hub axle. If there is no resistance, reopen it and tighten the nut slightly. If it cannot close, loosen the nut in small increments.
- Close with your palm. Brace the fork or frame with your fingers and press the lever fully to CLOSE using your palm. Use no hammer, extension, or tool.
- Position the lever safely. It must not touch the fork, frame, disc rotor, spokes, or brake. Follow the manufacturer’s allowed orientation rather than copying the other wheel.
The small conical springs usually point their narrow ends toward the hub. They help centre the skewer during installation; they do not provide the clamping force. A bent skewer or damaged cam needs replacement, not extra hand force.
Check the wheel before you ride
Close or reconnect any rim-brake release, then spin the wheel. It should remain centred without the tyre touching the frame and without new brake rub. Apply the brake firmly several times and spin again.
Next, with the bike stationary:
- confirm the lever is fully in its CLOSE position;
- try to move the rim sideways; there should be no looseness at the dropout;
- lift the wheel slightly and strike the top of the tyre with the heel of your hand; it must remain seated;
- verify the tyre clears the fork, frame, brake, and mudguard;
- squeeze the brake and make sure it stops the wheel normally.
Shimano notes that the tap-and-wiggle check confirms there is no obvious looseness; it does not replace correct lever adjustment. If you are unsure, reopen and install it again.
Why the wheel pulls sideways while closing
Closing the lever cannot properly centre a wheel whose axle is not seated evenly. If the rim moves to one side as you close the lever, reopen it, place the bike on the ground, apply gentle downward pressure to the handlebar or saddle, and make sure both axle ends are fully home before adjusting again.
If the wheel is seated but remains off-centre, do not compensate by leaving the quick release loose. The issue may be wheel dish, hub spacing, dropout damage, or an incompatible wheel. Use the replacement-wheel compatibility checklist or ask a bike shop to inspect it.
Quick release versus security skewer
A hex-key or security skewer may deter casual wheel theft and removes the external cam lever, but it does not fix damaged dropouts, a mismatched hub, or poor wheel seating. It also requires the correct tool and torque guidance every time you repair a puncture.
You do not need to replace an otherwise compatible bicycle solely because it uses a traditional quick release. You do need to learn its mechanism and check it after any wheel removal, transport, public parking, or puncture repair.
Your next step
Remove and reinstall one wheel at home with the manufacturer instructions beside you. Finish with the security, alignment, spin, and brake checks above. Add the lever check to the five-minute pre-ride bike check.