Your first indoor cycling setup: buy cooling and stability before screens
Build a beginner indoor cycling setup in priority order, covering trainer compatibility, fan cooling, floor protection, fit, apps, and what can wait.
 Field guide / beginner-indoor-cycling-setup-priorities
Before you buy
Check the starter kit first
Print the one-page buying brief for helmet, lights, water, phone, and repair compatibility before comparing upgrades.
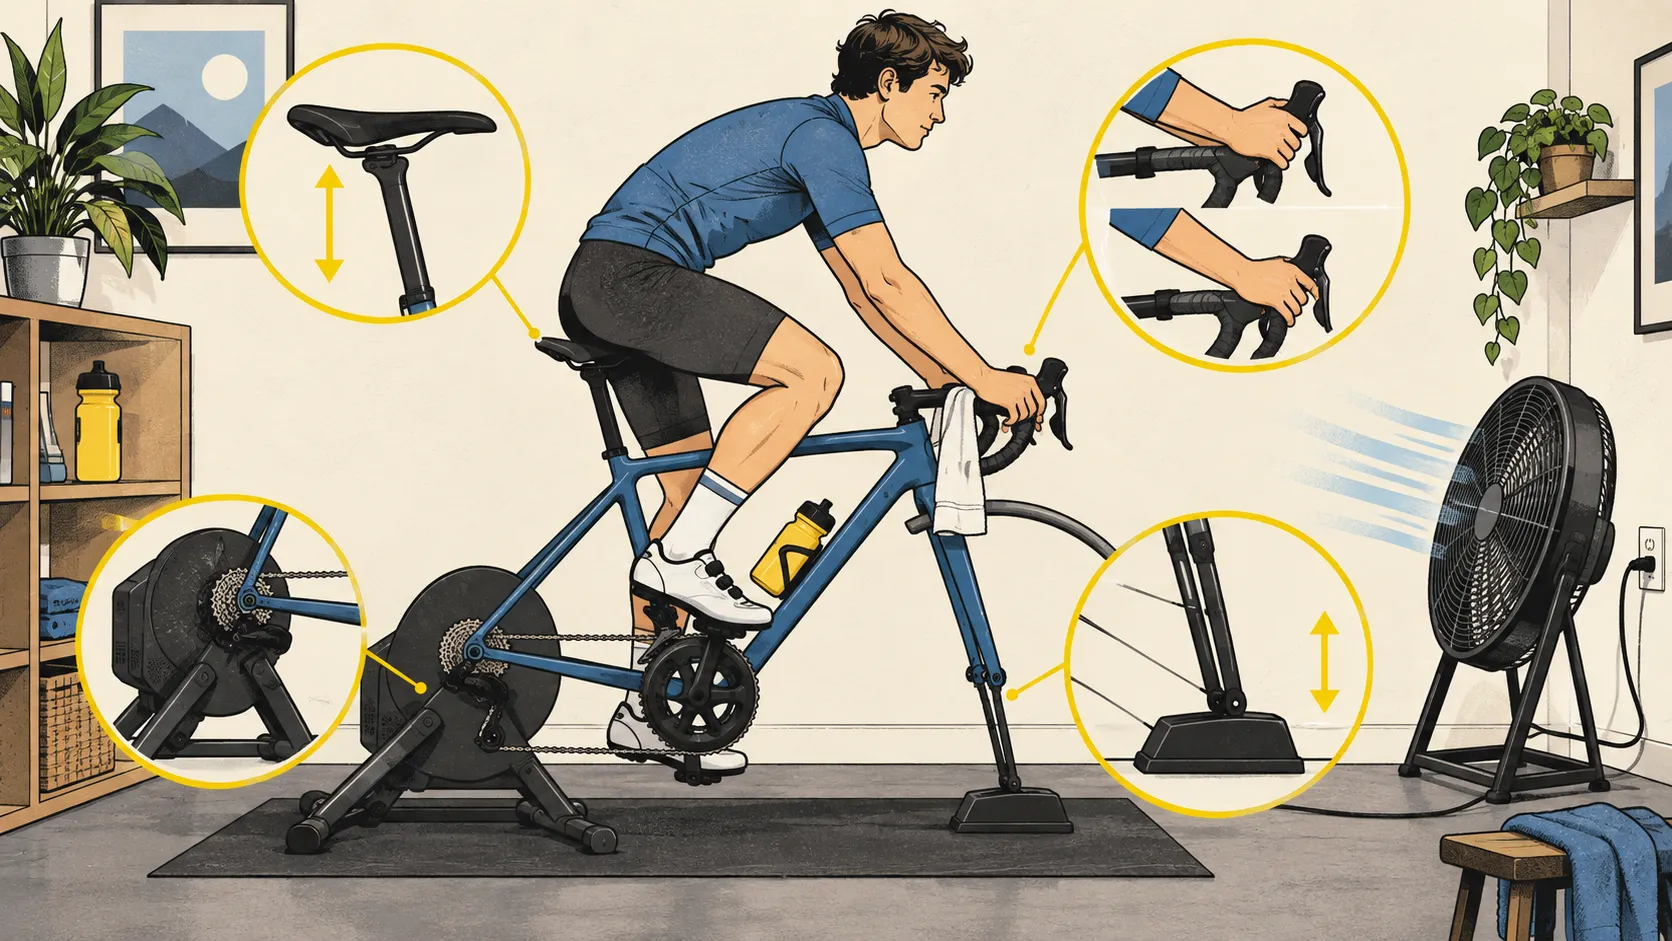
Your first indoor cycling setup needs a compatible, stable trainer and serious airflow before it needs a television, subscription, rocker plate, power meter, or dedicated indoor bike. Cooling is part of making the workout repeatable, not a decorative extra.
The short answer: confirm the trainer fits your bike and axle, secure it exactly as instructed, place it on a stable protected floor, aim a strong fan at your torso, keep water and a towel within reach, then choose the simplest app or workout that makes you ride. Add screens and accessories only after several weeks of use.
Start with the constraint, not the shopping list
A recent beginner thread about what indoor equipment deserves a limited first budget repeatedly returned to the trainer and fan before optional clothing, screens, and sensors. That is a useful demand signal, but product opinions in the thread are not independent testing.
Write down four constraints:
- the exact bicycle, axle type, wheel size, and drivetrain;
- your available floor area and ceiling height;
- the noise you and your neighbours can tolerate; and
- the total budget including adapters, cassette or virtual shifting hardware, mat, fan, and subscription.
A cheap trainer that needs unavailable adapters is not cheap. A premium smart trainer you cannot leave assembled may not get used.
Priority 1: compatibility and safe retention
Before buying, check the trainer manufacturer’s current compatibility list for:
- quick-release versus thru-axle mounting;
- axle diameter, thread pitch, and length;
- wheel diameter for wheel-on trainers;
- cassette speeds and freehub body for direct-drive trainers;
- frame, derailleur, and brake-caliper clearance;
- rider and bicycle weight limits; and
- whether the frame manufacturer permits trainer use.
Do not improvise an axle, spacer, or clamp. Carbon and unusual frame shapes deserve particular attention to the bicycle maker’s instructions. After installation, confirm the bike is centred and stable before climbing on. Recheck retention after the first short ride.
Priority 2: airflow
Outdoor riding creates continuous air movement. Indoors, the bike stays still and the warm, humid boundary around the body is not swept away unless the room or a fan moves air.
A controlled crossover study of 16 recreationally active adults found that fan cooling improved submaximal indoor cycling capacity and changed physiological responses compared with no fan. One small study cannot specify the perfect fan for every room, but it supports the practical point: airflow materially changes indoor exercise.
Choose a stable fan with:
- enough airflow to reach the torso and face from a safe distance;
- controls you can reach before riding or operate remotely;
- a grille and base that cannot contact pedals, wheels, children, or pets; and
- a power cable routed away from sweat and moving parts.
Start the fan before you are overheated. An open window may help room ventilation but does not guarantee useful airflow over the rider.
Priority 3: a stable, sweat-safe space
Use a firm, level surface. A purpose-made mat is convenient, but a durable non-slip floor protector can work if it does not bunch under the trainer. Confirm the trainer’s feet are fully supported.
Keep a towel on the bars or top tube without covering controls or entering moving parts. Wipe the bike after every session, especially around the headset, stem bolts, handlebar, seatpost hardware, and front brake. Use the sweat-protection guide for the weekly inspection routine.
Position the setup so you can dismount without stepping over cables or furniture. Keep children and animals away from the flywheel, roller, drivetrain, and hot resistance unit.
Priority 4: fit and contact points
Copy your workable outdoor saddle height and setback as a starting point. Level the bicycle according to the trainer instructions; a riser block may be required with some wheel-on setups.
Indoor riding often feels less comfortable because the bike moves less and riders change position less frequently. Stand briefly when appropriate, move among safe hand positions, and begin with sessions shorter than your outdoor rides. Do not respond to numbness by adding thicker covers and continuing.
If discomfort appears only indoors, work through why a bike feels less comfortable on a trainer before buying a saddle.
Priority 5: water, towel, and reachable controls
Have water within normal reach, not on a shelf that requires twisting out of the bike. Put the phone, remote, or keyboard where you can stop the session safely before handling it.
For a short easy workout, ordinary water may be sufficient. Longer or harder sessions may need carbohydrate and sodium according to duration, heat, sweat, and individual needs. Do not use an app’s calorie estimate as a fuelling prescription.
Choose the minimum useful training interface
You can train effectively with:
- a basic resistance trainer and a timer;
- a smart trainer in resistance or ERG mode with a simple workout file;
- a free video or written session; or
- a virtual riding subscription if its social and game features help consistency.
A large screen is entertainment, not a training requirement. Test the trainer’s included app and any free trials before committing to a recurring subscription. If you mainly want steady aerobic work, a timer, fan, and music may be enough.
Power from a smart trainer can make structured work repeatable, but it does not remove the need to set a sustainable intensity. Heart rate can be useful context, not a command to ignore heat, fatigue, medication, or symptoms.
What can wait
Delay these until the basic setup has survived several weeks:
- a dedicated trainer bicycle;
- multiple subscriptions;
- a large television or tablet bought only for training;
- a rocker plate;
- premium indoor-specific clothing;
- separate cadence or power sensors when the trainer already reports them;
- a desk crowded with controls; and
- cosmetic upgrades.
A second bike may later make sense when frequent installation prevents riding, several household members share a setup, or outdoor and indoor configurations conflict. Our guide to whether you need a dedicated trainer bike handles that decision.
A practical budget order
When starting from a compatible bicycle, allocate money in this sequence:
- compatible trainer, required axle or cassette parts, and secure installation;
- strong fan;
- stable floor protection and sweat control;
- bottle and safe device support;
- service or replacement of worn drivetrain parts;
- software that you have already tested; and
- convenience extras.
Used trainers can save money, but verify the exact model, included adapters, power supply, freehub, firmware support, unusual noise, connection stability, and proof that resistance changes. Replacement adapters and cassettes can erase the saving.
Run a 20-minute shakedown
For the first session:
- Inspect the bicycle and trainer retention.
- Confirm the fan and cables are safely positioned.
- Ride easily for five minutes and stop to recheck mounting.
- Continue for ten minutes while testing shifting, resistance, and device control.
- Cool down, dismount, and inspect for movement, rubbing, sweat pooling, or unusual noise.
Do not make the first ride a maximal test. Learn how to stop the trainer, leave ERG mode, and dismount before adding intensity.
Your next step
Make a compatibility list for your exact bike, then reserve budget for the fan and required adapters before comparing screens or subscriptions. Print the starter gear buying brief and mark indoor-only items separately so outdoor safety essentials do not disappear into the trainer budget.
Sources and further reading
- Primary research: fan cooling and submaximal indoor cycling capacity
- Wahoo: KICKR SNAP installation and operating instructions
- r/cycling reader context: prioritising an indoor setup on a beginner budget
Reddit was used to identify the purchasing question. Brand recommendations and personal experiences in the thread were not treated as verified performance claims.