Why do bicycle disc-brake pads wear unevenly?
Use the thinnest pad point to make the replacement decision, then check caliper alignment, rotor position, contamination, and hydraulic piston movement.
 Field guide / why-disc-brake-pads-wear-unevenly
Uneven disc-pad wear usually points to caliper misalignment, a rotor that is not centred or true, contamination, or pistons that are not advancing and retracting similarly. Measure the thinnest friction-material point on both pads and use the brake maker’s limit—do not average the pair or swap sides to “even them out.”
The short answer: replace the pad set if either pad reaches its limit or shows contamination, cracking, separation, or abnormal damage. Before installing the new pair, inspect the rotor, centre the caliper, and verify piston movement using the exact brake manual. Otherwise the new pads may repeat the same pattern.
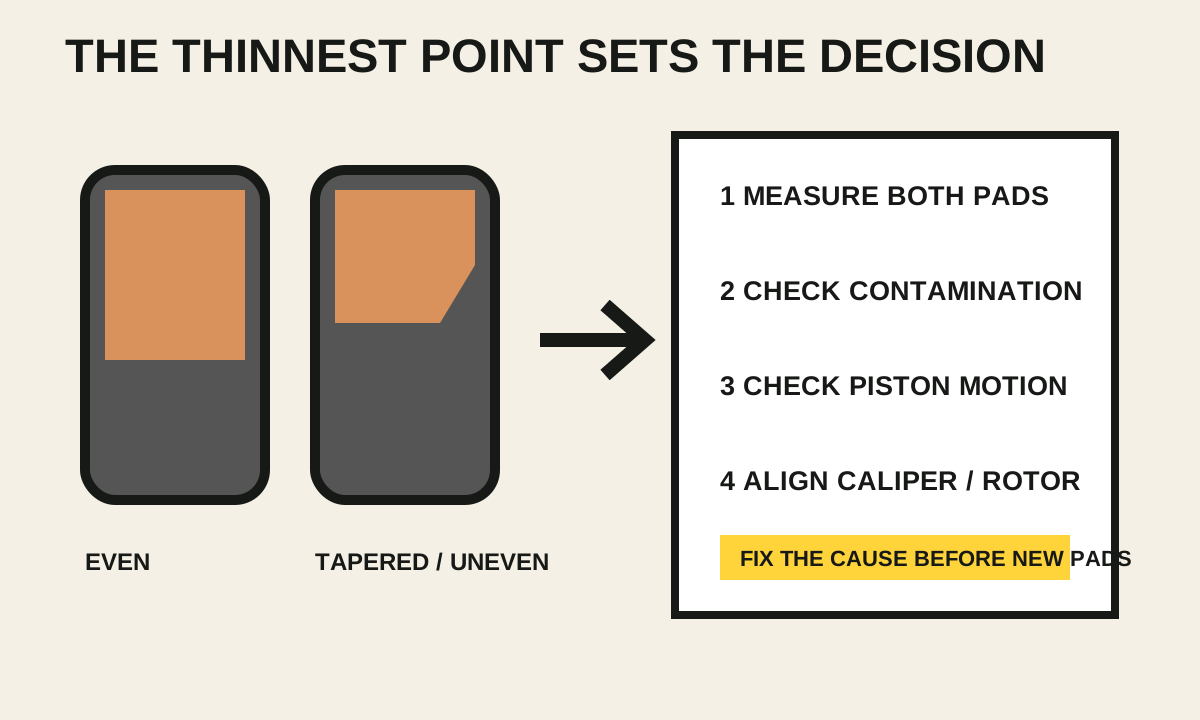
Why two pads can wear differently
A current r/bikewrench post showed two pads with visibly different wear and asked whether they could stay in service. A photograph can prompt the right checks, but it cannot establish remaining thickness, contamination, rotor condition, or piston behaviour.
Hydraulic calipers automatically advance their pistons as pad material wears. Small differences in visible piston movement can be normal, but a caliper sitting off-centre, a sticky piston, or a rotor running closer to one side can keep one pad working harder or rubbing continuously.
Mechanical disc calipers may have one moving pad and one fixed pad by design. Their adjustment and expected wear pattern differ, so identify the brake type and model before applying hydraulic-caliper advice.
Remove and label the pads
Let the brake cool fully. Put the bicycle in a secure stand, remove the wheel by the bike maker’s method, and fit the correct pad spacer only when the service manual calls for it. Do not squeeze the lever with the rotor and spacer absent.
Mark each pad’s original side with a clean method that cannot contaminate the friction material. Photograph:
- pad position and retaining hardware;
- friction faces;
- backing plates and spring;
- rotor from both sides;
- caliper position relative to the rotor.
Avoid touching friction faces with bare, oily fingers. If hydraulic fluid is visible around a piston, hose, banjo, or bleed port, stop and arrange service.
Measure the thinnest usable material
Brush off only loose dry dust using the maker’s safe cleaning method. Measure friction material—not the steel backing plate—at several points. Compare the smallest measurement with the exact manual.
Limits differ by manufacturer and model. A Shimano road hydraulic dealer manual, for example, instructs replacement when pad material reaches 0.5 mm or when oil is present. That 0.5 mm figure is a cited Shimano instruction, not a universal bicycle-pad rule. SRAM and other makers publish their own inspection methods and minimums.
Replace the pair when either pad is at the limit. Also replace as directed for:
- oil or grease contamination;
- friction material lifting from the backing plate;
- cracks, crumbling, glazing that the maker says cannot be remedied, or heat damage;
- a retaining spring touching the rotor;
- incompatible or mixed pad compounds within one caliper.
The broader disc-pad wear guide covers thickness checks. Unevenness adds a cause-finding step before the replacement goes in.
Read the wear shape
One pad is uniformly thinner
The caliper may be laterally off-centre, one piston may be moving poorly, or the rotor may sit to one side because the wheel is not fully seated. Verify wheel seating and axle torque before adjusting the caliper.
A pad is wedge-shaped from top to bottom
The caliper and rotor may not be parallel, mounting faces or adapters may be incorrect, or the pad may not be seated properly on its retaining hardware. Check for burrs, paint, washers, or an incorrect adapter only as the component manual directs.
Only one edge is worn
The pad may overhang the rotor track, the rotor diameter/adapter combination may be wrong, or the caliper may be positioned incorrectly. Do not file the pad to disguise an incorrect setup.
Both pads are thin on a diagonal
A misaligned caliper or rotor can produce a matching taper. Check rotor truth and caliper alignment, but replace a cracked, deformed, or undersize rotor rather than repeatedly bending it.
Check hydraulic piston movement safely
Use only the brake maker’s piston procedure, pad spacer, and cleaning products. Shimano instructs mechanics to clean the pistons and surrounding area and push pistons straight back with a flat tool that will not damage them. SRAM’s road troubleshooting likewise uses model-specific spacers and warns against applying grease or DOT fluid to pistons during its external troubleshooting procedure.
Do not hold one bare piston in while pumping the other far out unless the exact service instruction tells you to. A piston can overextend and leak. Do not use a sharp screwdriver against a ceramic or resin piston.
If one piston remains reluctant after the approved external cleaning and reset procedure, or if fluid appears, the caliper needs qualified service or replacement.
Centre the caliper and inspect the rotor
Reinstall a serviceable rotor and wheel correctly. Check that the rotor is fully secured, within its thickness limit, and not cracked or deformed. A rotor that moves side to side once per revolution can create intermittent rub and uneven loading even with a centred caliper.
Follow the brake maker’s alignment sequence and torque values. Lever-squeeze centring is a starting method on many brakes, not proof of perfect alignment. Look through the caliper under bright light and fine-adjust until the specified clearances are present.
If the rotor rubs after wheel removal, first use the wheel-removal rub guide to rule out poor axle seating.
Install replacement pads as a set
Use the exact compatible pad shape and approved compound. Install the spring, retaining pin or bolt, clip, and torque as specified. Never reuse a distorted retention clip or omit a safety part because the pads feel snug.
After the wheel is installed:
- operate the lever as the manual specifies to bring pads into position;
- verify a firm lever and no leaks;
- spin the wheel and check clearance;
- bed in the new pads and rotor using the maker’s controlled procedure;
- recheck for rub, noise, and a repeat taper.
Do not test fresh brakes for the first time in traffic or on a descent. Our disc-brake bed-in guide gives a safe preparation checklist.
Your next step
Remove and label both pads, measure the thinnest friction material on each, and photograph the wear shape. If either pad is at its model-specific limit, replace the pair. Before fitting them, verify wheel seating, rotor condition, caliper alignment, and piston motion in that order.
Sources and further reading
- Shimano road hydraulic-disc-brake dealer manual: pad replacement and piston procedure
- SRAM hydraulic road disc brake manual: pad spacing, piston troubleshooting, and alignment
- Reddit demand signal: visibly uneven bicycle disc pads — used to identify the question, not to judge the pictured pads remotely.