How to use a torque wrench with an extension or crowfoot adapter
Know when a bicycle-tool adapter changes applied torque, calculate a corrected wrench setting, and avoid overtightening expensive components.
 Field guide / use-torque-wrench-with-extension-adapter
Before you buy
Check the starter kit first
Print the one-page buying brief for helmet, lights, water, phone, and repair compatibility before comparing upgrades.
An adapter changes applied torque only when it changes the effective lever length between the wrench’s drive centre and the fastener centre. A normal socket extension that stays on the drive axis does not lengthen that lever. An inline crowfoot or bottom-bracket tool can, so the torque wrench usually needs a lower setting. A tool positioned at 90 degrees is often treated as no length change, but only when its geometry truly keeps the effective length unchanged.
The short answer: first identify whether the adapter moves the fastener centre away from the square-drive centre. If it does, measure the wrench and adapter and use the tool maker’s correction method. Never click the specified torque into the wrench unchanged just because the adapter physically fits.
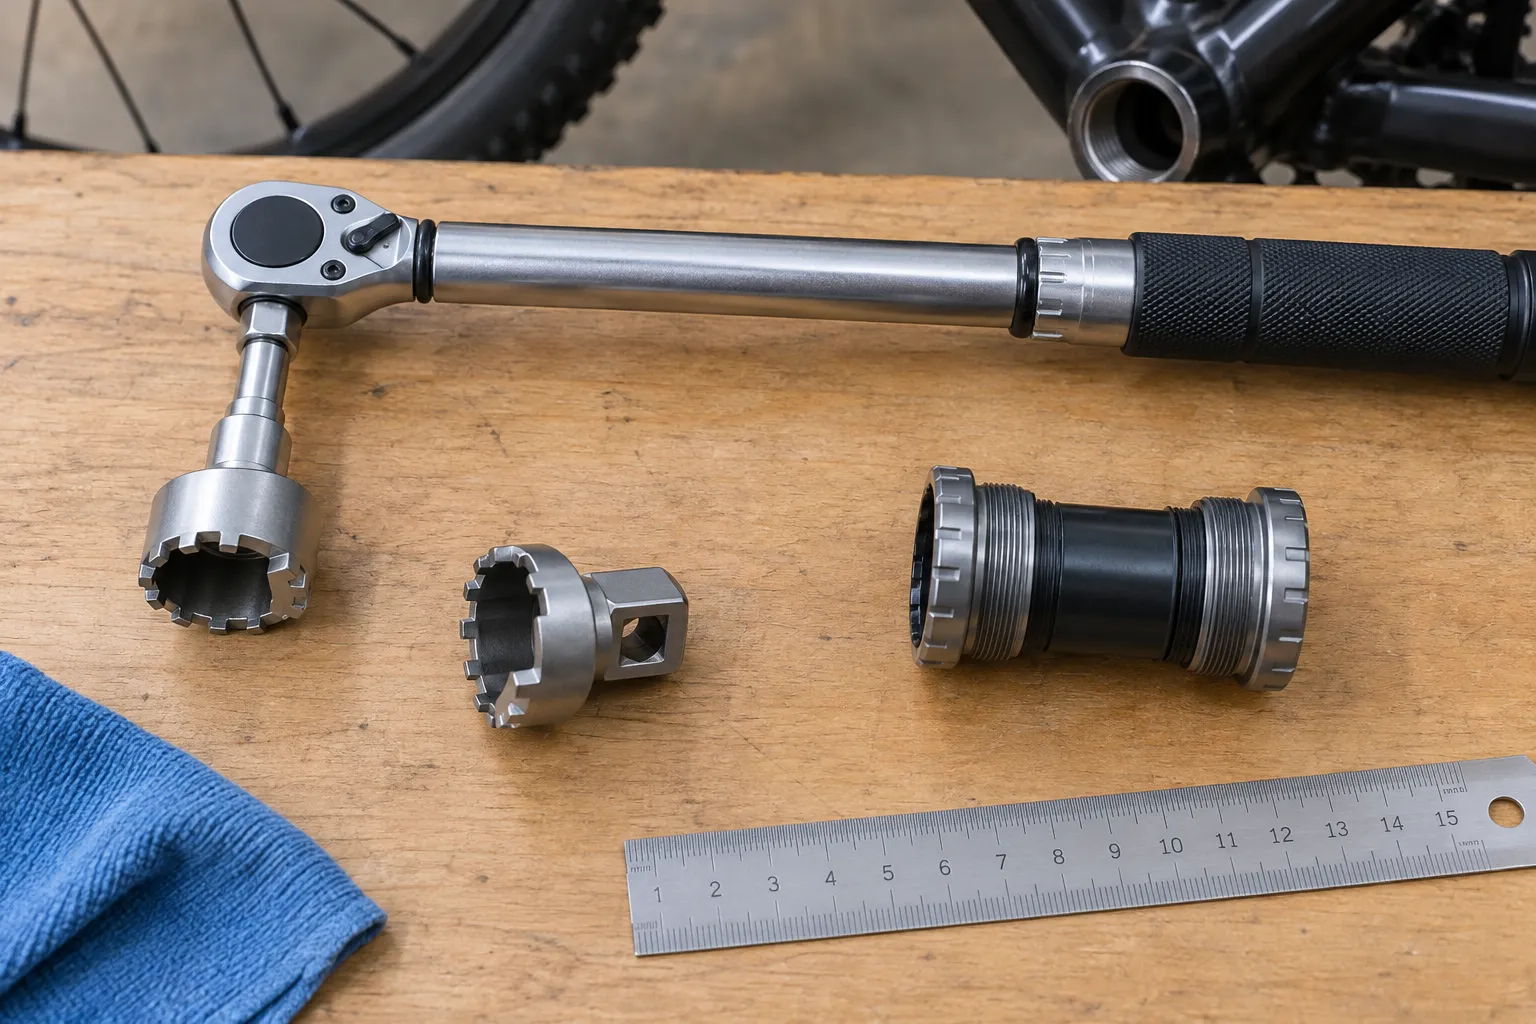
Three tools people call an extension
A socket extension
A conventional square-drive extension moves the socket along the fastener’s rotational axis. It improves reach but does not normally increase the torque-wrench handle length. Use a sound, rigid extension within its rating and keep it aligned; no lever-length formula is normally required.
An inline crowfoot or offset bicycle tool
This moves the fastener centre beyond the torque wrench’s drive centre in the same direction as the handle. The hand force now acts through a longer lever, so the fastener receives more torque than the wrench scale suggests. Correct the setting.
An adapter set at 90 degrees
When the fastener centre sits perpendicular to the wrench handle and the effective lever length remains the same, many tool instructions allow the target torque to be set directly. “About 90 degrees” is not a measurement. If the head, pivot, or force line is unusual, use the adapter maker’s calculator or procedure.
The inline correction formula
For a straight inline extension, a common formula is:
Wrench setting = desired fastener torque × wrench length ÷ (wrench length + adapter length)
Use consistent length units.
For example, suppose:
- desired fastener torque = 40 N·m;
- wrench effective length = 300 mm;
- inline adapter centre-to-centre length = 50 mm.
The setting is:
40 × 300 ÷ 350 = 34.3 N·m
Set only to a value your wrench can represent reliably and within its operating range. If the correction places the setting outside that range, use a different tool arrangement.
This example teaches the relationship; the instructions from your torque-wrench or adapter maker take priority because some wrenches define length from a marked loading point, pivot, or handle centre.
Measure the right points
For the wrench length, measure from the centre of the square drive to the centre of the hand-load position defined by the manufacturer. On many click wrenches, that means the midpoint of the handle grip, not the end cap.
For the adapter length, measure from the centre of the wrench’s square drive to the centre of the fastener or tool spline, along the extension direction.
Do not use:
- the adapter’s overall outside length;
- the edge of a bottom-bracket cup;
- the end of the wrench handle;
- a diagonal measurement between arbitrary corners.
A small geometry error matters more when the adapter is long relative to the wrench.
A safe bicycle workflow
- Find the exact torque specification. Confirm the component model, fastener, units, lubrication state, and whether the value is a range. Use the torque-spec verification guide when sources disagree.
- Choose the correct engagement tool. It must fit fully without rocking or damaging notches, flats, or splines.
- Inspect the threads and interface. Cross-threading, corrosion, old threadlocker, paint, dirt, or the wrong grease can invalidate the job.
- Decide whether effective length changes. Compare the drive centre, fastener centre, and handle direction.
- Calculate and record the setting. Write down target, wrench length, adapter length, corrected setting, and units before pulling.
- Load the handle at its marked grip. Pull smoothly and perpendicular to the handle; do not choke up or add a cheater pipe.
- Stop at the first click. Repeated clicking continues to load the joint.
- Return an adjustable click wrench to its storage setting. Follow its manual; do not wind below the stated minimum.
Mistakes that cause real damage
- adding an inline adapter but setting the wrench to the full component torque;
- using a wrench whose minimum setting is above the corrected value;
- mixing N·m, kgf·cm, in·lbf, and ft·lbf;
- assuming every 90-degree position cancels every geometry change;
- holding the wrench close to the head instead of at the calibrated grip;
- torquing a reverse-threaded component without confirming wrench direction capability;
- using a click wrench as a breaker bar to loosen a seized part;
- trusting a calculation while the tool teeth are only partly engaged.
If a component was substantially overtorqued, simply loosening it and applying the right value does not prove it is undamaged. Inspect the fastener, thread, tool interface, and component according to manufacturer guidance; replace or obtain professional assessment when necessary.
When to avoid the adapter
The cleanest solution is often a bicycle tool with a direct square-drive socket centred over the part. This removes the lever correction and reduces opportunities for side loading. Buy or borrow the direct tool when:
- the adapter geometry is unclear;
- the torque is safety-critical;
- the corrected value falls outside the wrench range;
- access forces an angled pull;
- the part is carbon, thin aluminium, or expensive to replace;
- the job will be repeated often.
Your next step
Lay the wrench and adapter on a bench before touching the bike. Mark the two drive centres, measure the effective lengths, and use the manufacturer’s calculator. If you cannot explain why the adapter does or does not change lever length, do not torque the component yet.
Then check whether your bike torque wrench is trustworthy before relying on its click.
Sources and further reading
- Norbar: torque-wrench extension formula and example
- Norbar torque-wrench extension calculator
- TEKTON guide to crowfoot orientation and correction
- r/bikewrench discussion involving a bottom-bracket tool used as a torque-wrench extension — used as an editorial error signal; the thread’s repair suggestions were not treated as manufacturer instructions.