What to do when a chainring bolt spins or the nut is stripped
Identify two-piece chainring hardware, support both sides with the correct tools, and know when damaged or seized fasteners need replacement or shop removal.
 Field guide / spinning-stripped-chainring-bolt
Before you buy
Check the starter kit first
Print the one-page buying brief for helmet, lights, water, phone, and repair compatibility before comparing upgrades.
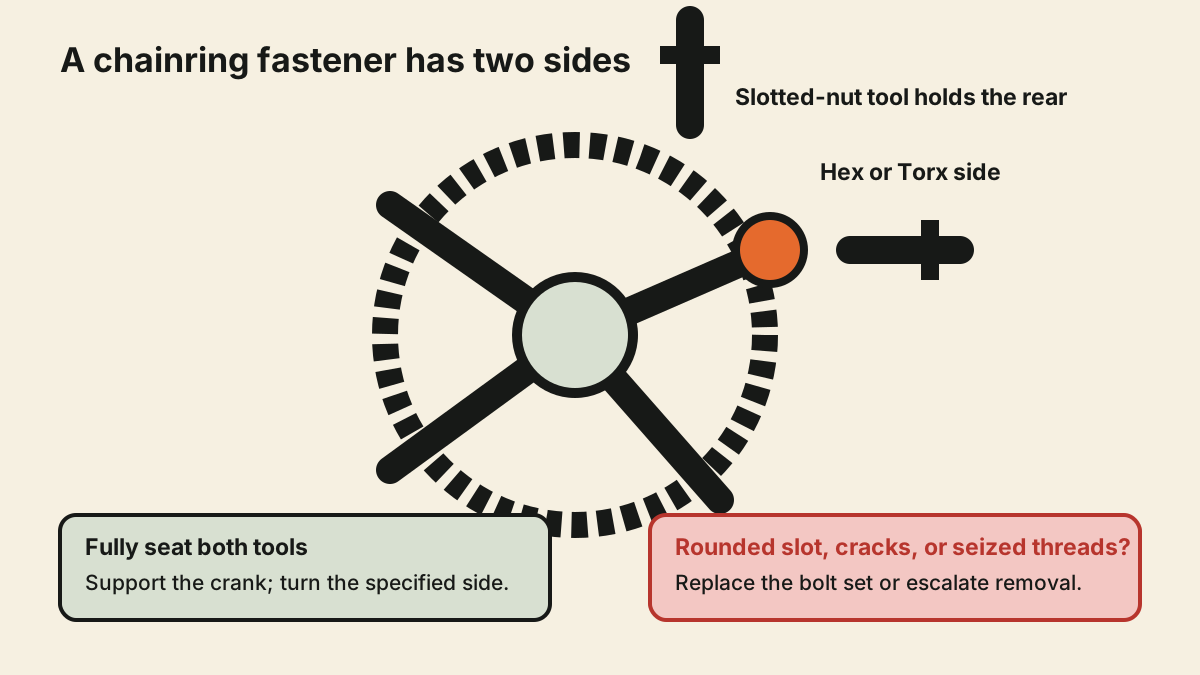
Many traditional chainring fasteners are two-piece: a bolt enters from one side and threads into a slotted nut or sleeve on the other. If the whole set spins, hold the rear nut with the correct chainring-nut tool while turning the bolt with a fully seated bit. If either tool interface is already stripped, stop trying to preserve cheap hardware at the expense of the crank or chainring.
The short answer: clean the fastener, identify its exact design, seat both tools completely, and try controlled force in the documented direction. A rounded slot, damaged socket, seized threads, or cracked chainring changes the job from ordinary removal to extraction. Replace the complete compatible bolt set after destructive removal; do not treat visibly damaged hardware as a keepsake that must return to service.
First identify the fastener you actually have
A current r/bikewrench question described a slotted chainring nut that no longer accepted its holding tool. The rider wanted to preserve the matching bolt. The wider lesson is that appearance is not enough to specify chainring hardware.
Common arrangements include:
- a male bolt and female slotted sleeve nut;
- a bolt threading directly into the crank spider;
- integrated or hidden chainring hardware;
- direct-mount chainrings with a lockring or proprietary fasteners; and
- covers or caps that look like the fastener but are not the driven part.
Find the crank model number and exploded view. Count chainrings, note bolt count and location, and confirm the required tools, thread preparation, tightening sequence, and torque. “Five-bolt road crank” is not a complete specification.
Separate spinning from stripping and seizure
These symptoms need different responses:
- Both sides rotate together: the rear nut is not being held, or the holding tool is slipping.
- The driver turns inside the bolt head: the front socket is rounded or the bit is wrong or not fully seated.
- The nut tool will not hold: the slot is rounded, corroded, the wrong size, or obstructed.
- Neither side moves under appropriate force: threads may be corroded, cross-threaded, locked, deformed, or installed with an incompatible compound.
- The bolt turns without backing out: threads may be stripped.
Clean enough dirt and corrosion away to see the interfaces. Do not probe while the crank can move. Secure the bicycle and keep fingers away from chainring teeth.
Try the normal removal method once, correctly
Park Tool’s CNW-2 instructions show the tool holding the slotted chainring nut while the bolt is installed or removed. The tool is double-ended because common nut slots differ. Choose the end that seats deeply and squarely.
Then:
- Remove the chain when the manual or safe access requires it.
- Seat the correct hex or Torx bit fully in the bolt head.
- Seat the nut wrench squarely in the rear slot.
- Support the crank so force does not topple the bike or load the derailleur.
- Apply steady force in the documented loosening direction.
- Stop immediately if either tool cams out or the metal deforms.
Do not substitute a narrow screwdriver that contacts only one edge unless the component or tool documentation explicitly supports that method. Partial engagement concentrates load and can turn a merely tight nut into an extraction problem.
Do not confuse penetrant with a complete plan
Visible rust may justify a material-compatible penetrating product and dwell time, but protect bearings, paint, tyres, and brake surfaces. Penetrant does not repair a rounded slot or stripped thread.
Heat is especially risky around painted, bonded, carbon, greased, or sealed bicycle assemblies. Do not use an open flame. If controlled heat, a punch, cutting, drilling, or an extractor becomes necessary, the crank should be removed and supported by someone who can protect the chainring, spider, threads, and nearby parts.
The cheapest safe outcome is often to sacrifice the damaged bolt set. Replacement hardware generally costs less than a scarred crank spider or ovalised chainring hole.
When extraction belongs at a workshop
Stop home removal when:
- the nut slot or bolt socket is rounded;
- the bolt is cross-threaded or turns without advancing;
- the fastener is seized in a carbon crank or chainring;
- the chainring or spider is cracked, bent, or heavily corroded;
- a drill, rotary tool, hacksaw, punch, clamp, or extractor is the next step; or
- replacement hardware has not been positively identified.
A mechanic can remove the crank, isolate the work, support the fastener, shield the chainring, and decide which part should be sacrificed. Drilling on the assembled bicycle scatters metal near bearings and creates a poor working angle.
Inspect everything after removal
With the fastener out, clean and inspect:
- the crank-spider and chainring holes for elongation, burrs, cracks, or fretting;
- every bolt and nut thread;
- the driven sockets and slots;
- chainring orientation, tabs, pins, and matched pairs; and
- all remaining fasteners for looseness or inconsistent hardware.
Do not reuse a bolt simply because only the nut looked damaged. Seizure and tool slip can stretch threads or distort both halves. Buy the documented length, thread, head, finish, and quantity for the exact crank and chainring stack.
Reassemble from the manual, not habit
Chainring hardware may be specified with grease, threadlocker, factory thread treatment, new hardware, a staged pattern, or a particular torque. Follow the crank maker’s complete instruction. Our guide to grease versus threadlocker on bike bolts explains why the liquid and torque value form one system.
Install the rings in their correct orientation. Tighten gradually in the documented sequence, holding two-piece nuts when needed. After assembly, turn the crank by hand and verify that the rings run true, the chain engages correctly, and the front derailleur clears. Do not test a questionable repair with a standing sprint.
If the original problem was a recurring click rather than loose hardware, use the pedalling-creak diagnosis instead of tightening chainring bolts beyond specification.
Your next step
Find the crank model and exploded diagram, then photograph both sides of the fastener. If both tool interfaces remain sound, make one controlled attempt with fully seated correct tools. If either side is rounded or the threads are seized, plan to replace the complete bolt set and let a shop perform any cutting or drilling.
Sources and further reading
- Park Tool CNW-2 chainring-nut wrench and fit details
- Park Tool: noisy-drivetrain checks, including holding two-piece chainring hardware
- r/bikewrench reader context: a stripped slotted chainring nut — used as an editorial problem signal; extraction suggestions in replies were not treated as verified procedures.