Rear derailleur adjustment made shifting worse? Reset it in the right order
Stop random screw turning, record the current state, check the wheel and hanger, then reset the high limit, cable, indexing, low limit, and B-gap methodically.
 Field guide / reset-rear-derailleur-after-adjustments-made-worse
Before you buy
Check the starter kit first
Print the one-page buying brief for helmet, lights, water, phone, and repair compatibility before comparing upgrades.
When every adjustment changes two symptoms, stop turning screws. A rear derailleur has separate controls for travel limits, cable position, guide-pulley gap, and sometimes clutch or electronic settings. Random changes hide the original fault and can create a spoke-side chain drop.
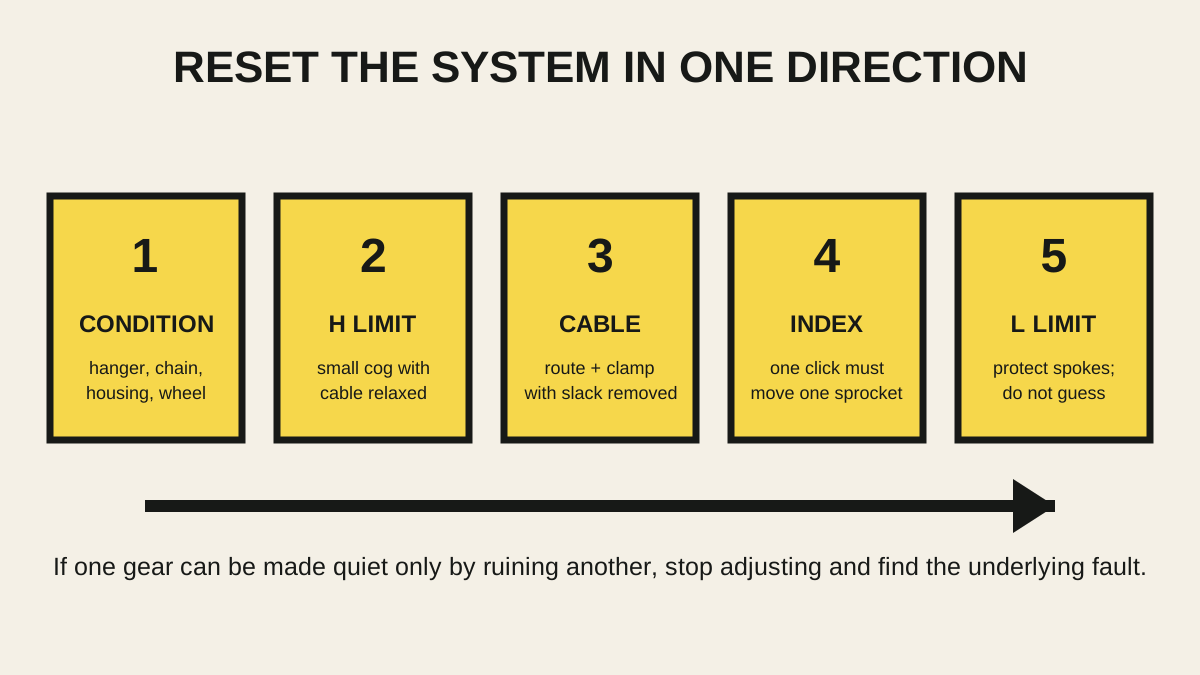
The short answer: photograph the current setup, identify the exact derailleur, and first check the wheel, hanger, chain, cassette, cable, and housing. Then follow the maker’s sequence from a known outer position: high limit with cable influence removed, cable attachment, one-click indexing, low limit, and documented B-gap. If one part of the cassette works only by ruining another, adjustment is not the root fix.
Why the adjustment spiral happens
A high-engagement r/bikewrench thread described a new owner turning derailleur adjustments for hours until the original shifting problem became much worse. Other recurring indexing threads show the same pattern: the rider follows a video but the system has a bent hanger, worn parts, cable friction, incorrect chain length, or installation problem that adjustment cannot remove.
The four controls are not interchangeable:
- H limit: stops outward travel near the smallest sprocket.
- Cable tension or electronic position: aligns each indexed shift with a sprocket.
- L limit: stops inward travel near the largest sprocket and spokes.
- B adjustment or specified gap setup: controls guide-pulley relationship to the cassette.
Some derailleurs add a clutch, setup gauge, mode, trim, or model-specific sequence. Find the model number and its current manual before continuing.
Freeze the evidence
Before resetting anything:
- Photograph both sides, cable routing and clamp, hanger, jockey wheels, cassette, and every screw position.
- Count and record any turns you make from now on.
- Note which shifts fail: harder to easier, easier to harder, one end, middle gears, or only under load.
- Record recent work, wheel removal, impact, cable replacement, chain replacement, or cassette change.
- Confirm the shifter, derailleur, cassette, and chain are a documented compatible combination.
Do not keep riding a derailleur that approaches the spokes. A damaged spoke or derailleur entering the wheel can cause a crash and destroy the wheel or frame.
Pass the condition checks first
Adjustment assumes the mechanical foundation is sound.
Wheel and cassette
Fully seat and secure the rear wheel using the bicycle’s specified axle procedure. Confirm the cassette or freewheel is secure and correctly spaced. A wheel that sits differently after removal changes the derailleur’s apparent alignment.
Hanger and derailleur
Look from behind for obvious twist, impact, loose mounting, cage damage, or pulley play. Visual alignment is only a screening check; precise hanger alignment requires a suitable gauge and a hanger/frame that can be corrected according to the manufacturer. Use how to tell if a derailleur hanger is bent.
Chain and cassette
Check chain wear, stiff or damaged links, correct routing through both pulleys, chain length, and sprocket wear. A new chain on a worn cassette can skip under load even when indexing is quiet in a stand.
Cable and housing
For mechanical shifting, inspect frayed wire, contamination, sharp bends, split housing, loose ferrules, incorrect routing, and a barrel adjuster near the end of its threads. Cable friction can make one shift direction slow and the return direction inconsistent.
If any foundation check fails, repair it before resetting adjustment.
Reset mechanical shifting from a known state
The exact procedure and direction can differ, so the component manual controls. The sequence below explains the logic used by common spring-return rear derailleurs, including the Park Tool reference process.
1. Select the outermost shifter position
Shift to the smallest rear sprocket and continue actuating the shifter until no further release click remains. On a double chainset, many general procedures use the large front ring; follow the derailleur maker if it specifies another position.
Pedal only with the bicycle securely supported. Keep hands, clothing, hair, and tools clear of the moving drivetrain.
2. Remove cable influence from the high-limit check
Thread the barrel adjuster inward as the manual specifies, usually leaving a small amount of future adjustment. If necessary, release the cable at the clamp. The goal is to let the derailleur spring, not residual cable tension, define its outer position.
Park Tool specifically warns that cable pull can make a high limit appear correct when the cable is actually holding the derailleur in place.
3. Set the high limit
Follow the model procedure to align the upper guide pulley with the smallest sprocket without allowing the chain to fall outward. Use small turns and observe the derailleur, not only the screw label. Stop if the screw does not produce the expected movement; you may have the wrong screw or a different design.
4. Attach the cable exactly as documented
Route the cable through the specified groove or side of the clamp. Pull out slack without preloading multiple shifts into the system, then tighten the clamp to the stated torque. Incorrect routing changes leverage and can make indexing impossible.
5. Index one click at a time
One shifter click should move the chain to one adjacent sprocket. If it will not climb to the next larger sprocket, common systems need a small increase in cable tension. If it tries to move two sprockets or rubs toward the larger neighbour, common systems need less. Confirm the direction in the manual.
Make quarter-turn changes after the first coarse correction. Check every sprocket in both shift directions. The barrel-adjuster indexing guide covers this stage in more detail.
6. Set the low limit with extreme care
Shift toward the largest sprocket one click at a time while watching clearance to the spokes. Set the low limit according to the manual so the derailleur reaches the largest sprocket but cannot travel farther inward.
Do not loosen the low-limit screw “for one more gear” when the derailleur is already near the spokes. A bent hanger, wrong spacer, incompatible cassette, or incorrect setup can be the real reason it will not align.
7. Set the B-gap using the model method
Some derailleurs use a stated distance, some a supplied gauge, and some a setup line. Set it in the specified front and rear gear combination. Do not copy the gap from a different-speed derailleur that merely looks similar.
Diagnose the pattern when the reset still fails
| Symptom | More likely checks |
|---|---|
| One end works, other end will not | Hanger alignment, compatibility, cassette spacing, cable routing |
| Shifts up slowly and down quickly | Cable tension, housing friction, contamination |
| Quiet in one middle gear, noisy elsewhere | Hanger, cable friction, incompatible parts, cassette security |
| Fine in stand, skips under load | Chain/cassette/chainring wear, damaged link, freehub issue |
| Changed after wheel removal | Wheel seating, axle security, cassette position |
| Barrel adjuster runs out of thread | Reset cable clamp and barrel position; inspect cable/housing |
| Derailleur approaches spokes | Stop; low limit, hanger, wheel, or compatibility requires inspection |
Do not replace the derailleur merely because adjustment failed. The fault may be upstream in the hanger, cable, wheel, cassette, shifter, or compatibility.
Know when the home attempt ends
Book a competent mechanic when:
- the hanger needs measurement or correction;
- the derailleur, hanger, frame, or spokes show impact damage;
- electronic diagnostics or firmware are involved;
- the shift family cannot be identified;
- correct adjustment at one end makes the other end impossible;
- the chain skips under load after wear-part changes;
- you cannot keep the chain safely away from frame or spokes.
Give the mechanic your photographs, model numbers, sequence, and the exact symptom. “I turned everything” is recoverable; a documented starting state makes recovery faster.
Your next step
Stop adjusting today. Photograph the setup, write down every model number, and pass the wheel, hanger, chain, cassette, and cable checks. Only then restart at the maker’s high-limit step and make one recorded change at a time.
Sources and further reading
- Park Tool: rear derailleur limit-screw and indexing adjustment sequence
- r/bikewrench reader context: a first repair attempt escalating after many simultaneous adjustments — used as a high-engagement troubleshooting signal; replies were not treated as a diagnosis of that bicycle.
- r/bikewrench reader context: indexing still failing after a standard adjustment video — used as a recurring signal that underlying faults must be separated from adjustment.