What to do when a bike pump unscrews the Presta valve core
Recover a removable Presta core from a screw-on pump head, reinstall it safely, and prevent the same surprise during your next roadside inflation.
 Field guide / pump-unscrews-presta-valve-core
Before you buy
Check the starter kit first
Print the one-page buying brief for helmet, lights, water, phone, and repair compatibility before comparing upgrades.
If a screw-on pump head removes the entire Presta valve core, stop and recover the core rather than trying to inflate through the empty stem. Fully deflate the tyre, remove the loose core from the pump head, inspect it, then reinstall it with the proper core tool according to the valve or tube maker’s instructions.
The short answer: the tiny knurled tip you normally open is not the whole core. If the full core comes out, separate it from the pump, check the core and stem threads, reinstall it correctly, and test for leaks. A damaged, bent, or repeatedly loosening core should be replaced.
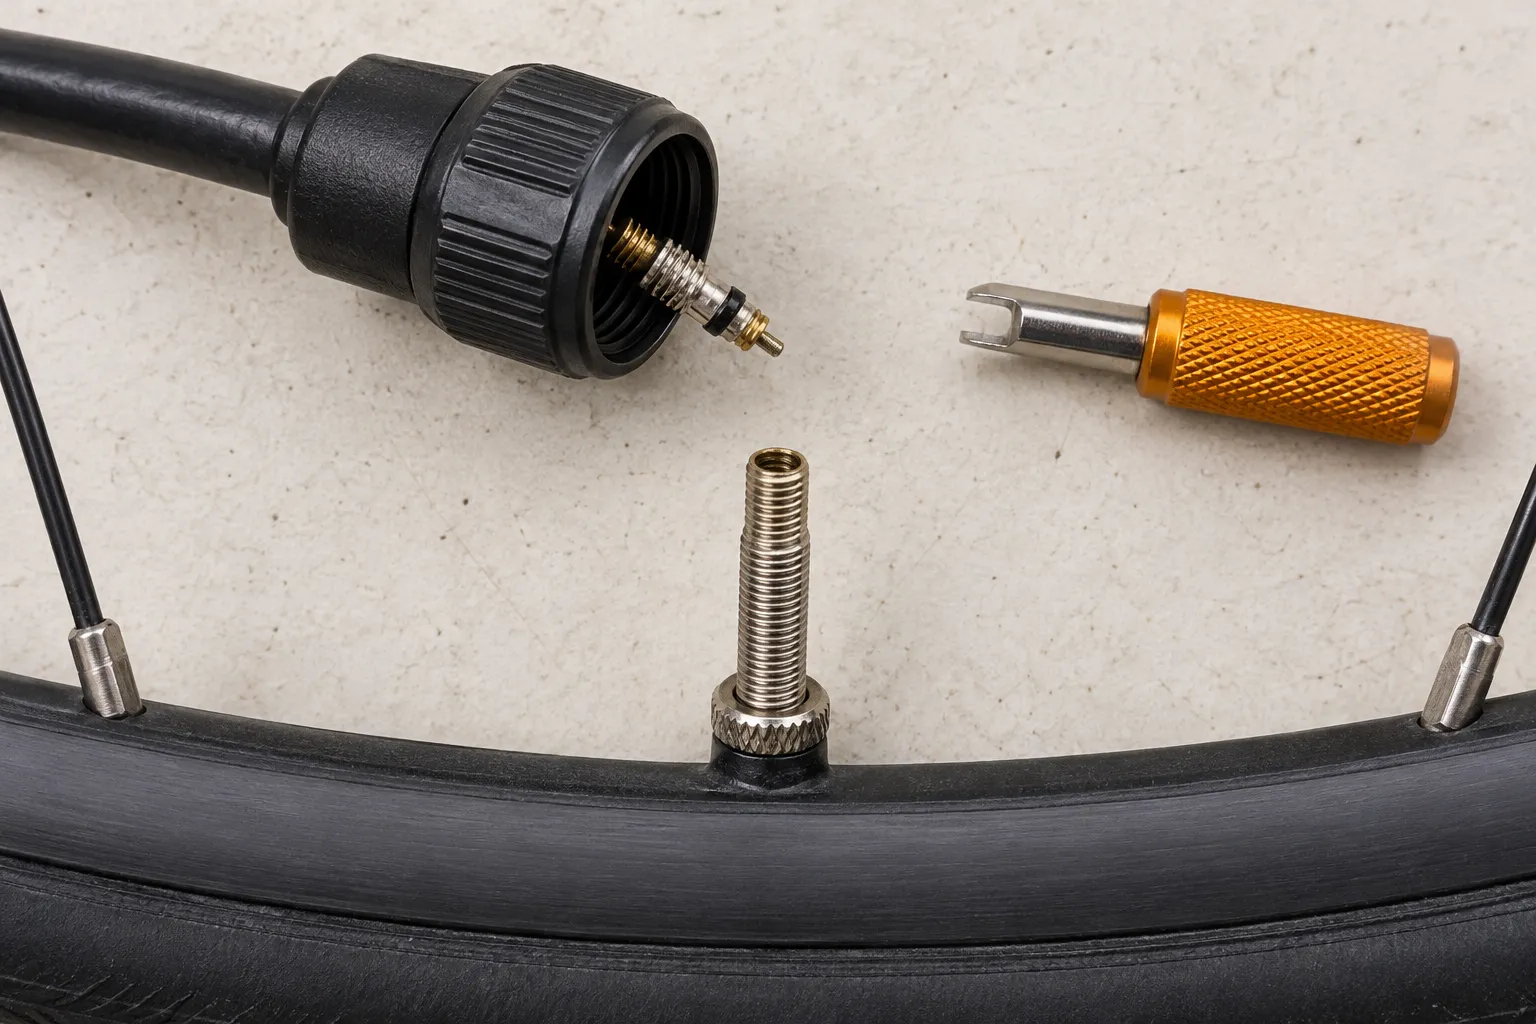
Confirm what actually unscrewed
A recurring r/bikewrench question describes the valve coming out with the pump head. The first useful distinction is between three parts:
- The small valve-tip nut: loosen this before pumping and close it gently afterward.
- The removable valve core: the complete internal unit, threaded into some Presta stems.
- The valve stem: the long tube fixed to the inner tube or tubeless valve base.
If only the small tip is open, nothing is broken. If the whole narrow core body is trapped inside the pump connector and the valve stem is hollow, the removable core has backed out. If the stem itself tears away from an inner tube or separates at a tubeless valve base, that is a replacement problem, not a loose-core repair.
Not every Presta valve has a removable core. Look for small flats on the core body or check the exact tube or valve documentation. Do not twist an unknown fixed valve with pliers.
Make the wheel safe before touching the core
A loose core can retain pressure until its seal shifts. Put on eye protection, keep your face away, and release all remaining air. Confirm the tyre is soft before using a core tool.
For tubeless, rotate the valve toward the top of the wheel and allow sealant to drain away from it. Protect the floor. Removing a pressurised core can eject sealant and the core itself.
If the core is still trapped in a screw-on pump head, disconnect the hose from the wheel and work at a bench. Do not use the wheel as leverage against the pump fitting.
Recover the core from the pump head
The pump manufacturer’s instructions take priority because threaded heads differ. Usually, you need to hold the core by its proper flats with a valve-core tool while unscrewing the pump connector from it.
Avoid gripping the thin pin or tip nut. Bending that section can stop the valve sealing or moving freely. If the pump head can be disassembled for service, follow its manual rather than forcing two threaded parts in opposite directions.
Once separated, inspect the core for:
- bent threads or a bent central pin;
- a torn, missing, or distorted seal;
- dried tubeless sealant blocking the side openings;
- corrosion or rough movement;
- damaged flats from previous plier use.
Replace a questionable core with the exact compatible type. Cores look similar, but proprietary high-flow valves and some tube systems use different parts.
Reinstall without overtightening
Clean the stem opening and core threads with a dry lint-free cloth. For a conventional removable Presta core:
- Start the core by hand so it cannot cross-thread.
- Turn it in until the seal seats.
- Use a proper core tool only as directed by the valve or tube maker.
- Do not add threadlocker, tape, or sealant to the threads unless that maker specifies it.
- Open the small tip nut before attaching the pump.
“Tighter” is not a universal specification. Too little seating can leak; excessive force can damage the core, stem, tool flats, or roadside serviceability. If the manufacturer provides a torque or procedure, use it. Otherwise, ask the manufacturer or a qualified shop rather than inventing one.
Inflate and check the complete system
Attach the pump squarely without using the valve as a handle. Inflate gradually to an appropriate checked pressure below the lowest limit for the tyre and rim.
Then inspect:
- the core for audible or visible leakage;
- the stem base for movement or bubbles;
- both tyre bead lines for even seating;
- the tube around the valve area, if a tube was removed;
- tubeless tape and valve base if air appears at spoke holes.
Soapy water approved for the components can reveal bubbles around a conventional core, but keep cleaners away from brake surfaces and follow manufacturer guidance. If the core continues to leak, replace it. If the whole valve moves or a tubeless rim cavity leaks, investigate the valve base and tape rather than tightening the core harder.
The clogged tubeless-valve guide covers sealant blockages; the Presta inflation guide covers pump-head and tip faults.
Prevent it happening on the road
Before relying on a threaded mini-pump:
- confirm whether each spare tube has a removable core;
- check that every removable core is correctly seated;
- practise attaching and removing the pump at home;
- keep the hose straight so it does not twist the valve;
- unscrew the connector without pulling the stem sideways;
- carry a tiny compatible core tool and one known-good core if your system uses them.
Some riders prefer a push-on or lever-lock pump head because it does not rotate against the core. That can reduce this particular failure mode, but fit, sealing, pressure capability, and valve support still matter. Test the pump you actually carry using the spare tube you actually carry.
With a screw-on head, thread it on only far enough to seal. When removing it, some pump makers recommend releasing hose pressure first. Follow that pump’s sequence; forcing a pressurised threaded chuck can make removal harder.
Do not confuse the rim nut with the core
The small nut against the rim does not secure the removable core. On many systems it helps locate the stem during inflation; it should not be used to pull a failing valve base harder into the rim.
If tightening the external rim nut changes a leak, inspect the tube or tubeless valve base and rim tape. Finger-tight guidance is common, but use the exact product instructions. Pliers can crush a tube’s valve area or hide a tubeless sealing fault.
When to replace more than the core
Replace the inner tube when the valve stem is bent, cracked, separating from the tube, or leaking at its base. Replace or service a tubeless valve when its stem, base, grommet, or retaining hardware is damaged or incompatible with the rim.
Stop and use a shop when:
- the core will not start cleanly in the threads;
- the stem spins in the tube or valve base;
- the valve hole or rim appears damaged;
- tubeless tape has lifted or split;
- the tyre will not hold a safe pressure;
- repeated core loosening continues after correct replacement.
Your next step
Check the valves on your fitted wheels and spare tube. Identify whether the cores are removable, seat them using the correct tool and product guidance, then practise one inflation with your roadside pump. Put the core tool in the same repair kit as your spare tube so the solution is present when the problem occurs.