Can one bleed kit service Shimano and SRAM brakes? Keep the fluid paths separate
A universal case can hold fittings for several brakes, but Shimano mineral oil, SRAM DOT systems, and SRAM mineral-oil systems need model-correct fluid and dedicated wetted tools.
 Field guide / one-bleed-kit-shimano-sram-brakes
One storage case can contain equipment for Shimano and SRAM brakes. One used syringe-and-hose set should not move between incompatible fluids or unverified systems. Identify the exact brake first, then dedicate every fluid-contacting part to that fluid and procedure.
The short answer: Shimano hydraulic bicycle brakes use model-specified Shimano mineral oil procedures. SRAM makes both DOT-fluid and mineral-oil brakes, depending on the exact model. Never identify the fluid by brand alone, never substitute fluids, and never reuse a syringe or hose that has contacted another fluid.
The logo does not tell you the fluid
A current repair question asks for one inexpensive bleed kit for a Shimano brake and a SRAM brake. The hidden problem is that “SRAM” no longer identifies one hydraulic fluid family.
Shimano’s current service documents specify Shimano genuine mineral oil for its hydraulic bicycle brakes. SRAM’s model range includes brakes designed for DOT 4 or DOT 5.1 fluid and other brakes designed for a specified Maxima mineral brake oil. SRAM explicitly warns not to use DOT fluid in its mineral-oil systems and not to use another oil or fluid as a substitute.
Mineral oil is not one universal recipe. Two products can share the label “mineral oil” while using different additives, viscosities, and seal requirements. The brake manual names the fluid; the bottle colour or shop habit does not.
Build a model-and-fluid table first
Before buying a kit or opening a port, record:
| Bike | Lever and caliper model | Required fluid | Procedure revision | Required fittings | Dedicated kit label |
|---|---|---|---|---|---|
| Bike A | Exact Shimano model | From Shimano manual | Document number/date | Funnel, hose, nipple tools | SHIMANO ONLY |
| Bike B | Exact SRAM model | DOT or specified mineral oil | Document number/date | Threaded or Bleeding Edge fittings | SRAM [FLUID] ONLY |
Find model codes on the lever and caliper, not only the groupset name in a bike listing. Mixed builds and replacement calipers are common. If the two ends do not match the same approved system, stop and confirm compatibility with the maker.
What must remain dedicated
Anything that has held, pushed, caught, or been visibly wetted by brake fluid belongs to that fluid family:
- syringe barrel and plunger seals;
- hose and hose clamps;
- funnel, cup, or collection bottle;
- bleed-port fitting and any internal seals;
- fluid bottle cap, transfer bottle, and filling needle;
- used shop towels and fluid-catching bag.
Cleaning a used syringe until it looks clear does not prove that incompatible fluid or solvent has left its seals and dead spaces. SRAM’s mineral-oil manual says not to use syringes that have contacted any other fluid. The safe workshop system is cheap, obvious separation—not faith in rinsing.
Dry hand tools that never contact fluid, such as a suitable torque wrench or external hex key, can usually serve several jobs after correct cleaning. But model-specific torque, bit size, and chemical-resistance requirements still apply.
“Universal kit” has three separate meanings
Sellers use the term loosely. A kit may be universal because it includes:
- Many port adapters. This says nothing about whether they seal correctly on your model.
- Several syringe styles. This does not make one syringe safe for several fluids.
- A case with separate sub-kits. This is the only sensible version for a multi-fluid home workshop.
Check each fitting against the current service manual. Some SRAM systems use a Bleeding Edge interface; others use a threaded port. Shimano road and mountain procedures can differ in funnel, nipple, lever position, and sequence. A fitting that can be screwed in is not necessarily the correct fitting.
Fluid choice is only one part of the bleed
A correct hydraulic-brake service also requires:
- removing the wheel and brake pads as instructed;
- installing the correct bleed block;
- orienting the lever and caliper correctly;
- protecting pads, rotors, paint, skin, and eyes;
- preparing fluid without injecting air;
- using the specified direction and sequence;
- tightening ports and fittings to the stated torque;
- cleaning with the approved method;
- checking for leaks and lever firmness;
- reinstalling pads and wheels correctly;
- performing the maker’s functional check and bed-in process when required.
Skipping these controls can produce a firm-looking lever in the stand and poor braking on the road. If you are learning, practise only with the full manual visible and have the first result checked by an experienced mechanic.
Keep DOT and mineral work physically separate
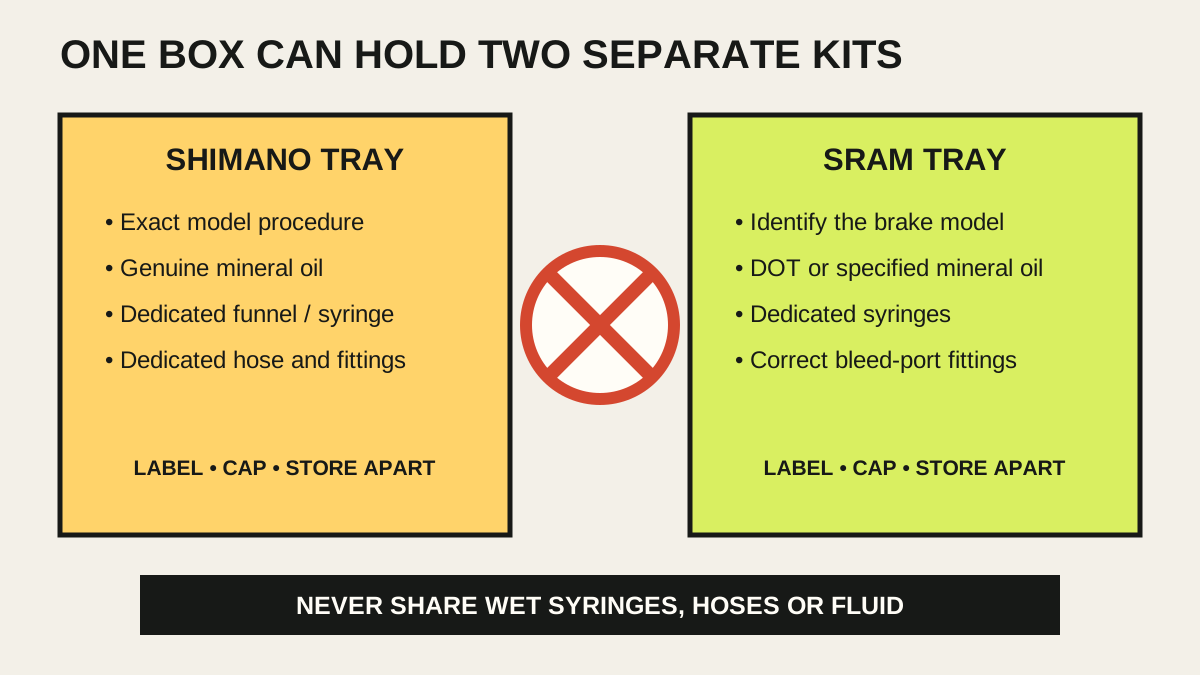
Create two lidded trays or boxes. Use large labels that remain visible while wearing gloves:
DOT ONLY — SRAM [MODEL FAMILY]MINERAL ONLY — SHIMANO- a third dedicated label for any SRAM mineral-oil system, unless the exact manufacturer documentation expressly allows shared tooling and fluid—which should not be assumed.
Store each fluid in its original labelled container, closed and within its stated shelf and storage conditions. Do not decant unidentified leftovers into clear bottles. Do not top one system with another bottle because the liquids look similar.
Schedule different-fluid jobs separately. Clear and clean the bench between them. Fresh gloves prevent a trace of fluid from moving from a syringe to a rotor, pad, lever hood, or painted surface.
If the wrong fluid may already be inside
Do not perform an ordinary flush and call it repaired. Stop using the brake and contact the brake maker or a qualified service centre with:
- exact lever and caliper models;
- the fluid that should have been used;
- the product actually introduced;
- how much entered and how long it remained;
- any swelling, leakage, sticky lever action, paint damage, or changed braking.
Wrong fluid can affect seals and other materials. The necessary remedy may involve replacing more than the liquid. Do not ride until the manufacturer-supported repair is complete.
If any fluid touches pads, follow the maker’s replacement instruction. SRAM’s manuals state that contaminated pads must be replaced and rotors cleaned with isopropyl alcohol. Do not try to rescue a safety-critical pad with heat, sanding, or household solvents.
Decide whether DIY makes financial sense
Separate quality kits, fresh fluid, bleed blocks, torque tools, protective equipment, and replacement pads can cost more than one occasional shop bleed. DIY makes sense when you maintain several known systems, can store chemicals safely, and will follow updated manuals.
A shop is the better choice when:
- the fluid or brake model is uncertain;
- the lever or caliper leaks;
- a bleed screw, port, or hose fitting is damaged;
- the system has been filled with the wrong fluid;
- internal routing requires hose disconnection;
- you cannot verify braking after the service.
Use when your road bike needs a mechanic as a stop-work test, and inspect disc-brake pad wear before assuming a long lever means only air.
Your next step
Read the model code from each lever and caliper. Download the matching current manuals and write the required fluid beside each bike. Buy or label separate fluid-contacting kits only after those four model codes agree with the planned procedure.
Sources and further reading
- Shimano dealer manual: hydraulic brake maintenance and genuine mineral oil replacement
- SRAM: mineral-oil brake installation and bleed manual
- SRAM: brake maintenance guide for DOT and mineral-oil systems
- r/bikewrench reader context: one kit for Shimano and SRAM brakes — used as a current demand signal; replies were not treated as fluid or service specifications.