How to transport a road bike by car without damaging it
Choose between carrying a road bike inside the car or on a rack, remove wheels safely, protect disc brakes, and run a final load check.
 Field guide / how-to-transport-road-bike-by-car
The safest transport method is the one that is compatible with the bicycle, vehicle, rack, and driver—and that you can load correctly every time. Inside a car protects the bike from weather and road debris, but it still needs padding and restraint. An external rack preserves passenger space, but its instructions and load limits become safety-critical.
The short answer: put the bike inside when it fits without forcing or leaving it loose. Remove the front wheel if necessary, install a pad spacer in a hydraulic disc caliper, protect contact points, and secure the bike and wheel. For an external rack, confirm vehicle fit, bicycle compatibility, carbon-frame guidance, weight limits, and legal visibility before buying or loading it.
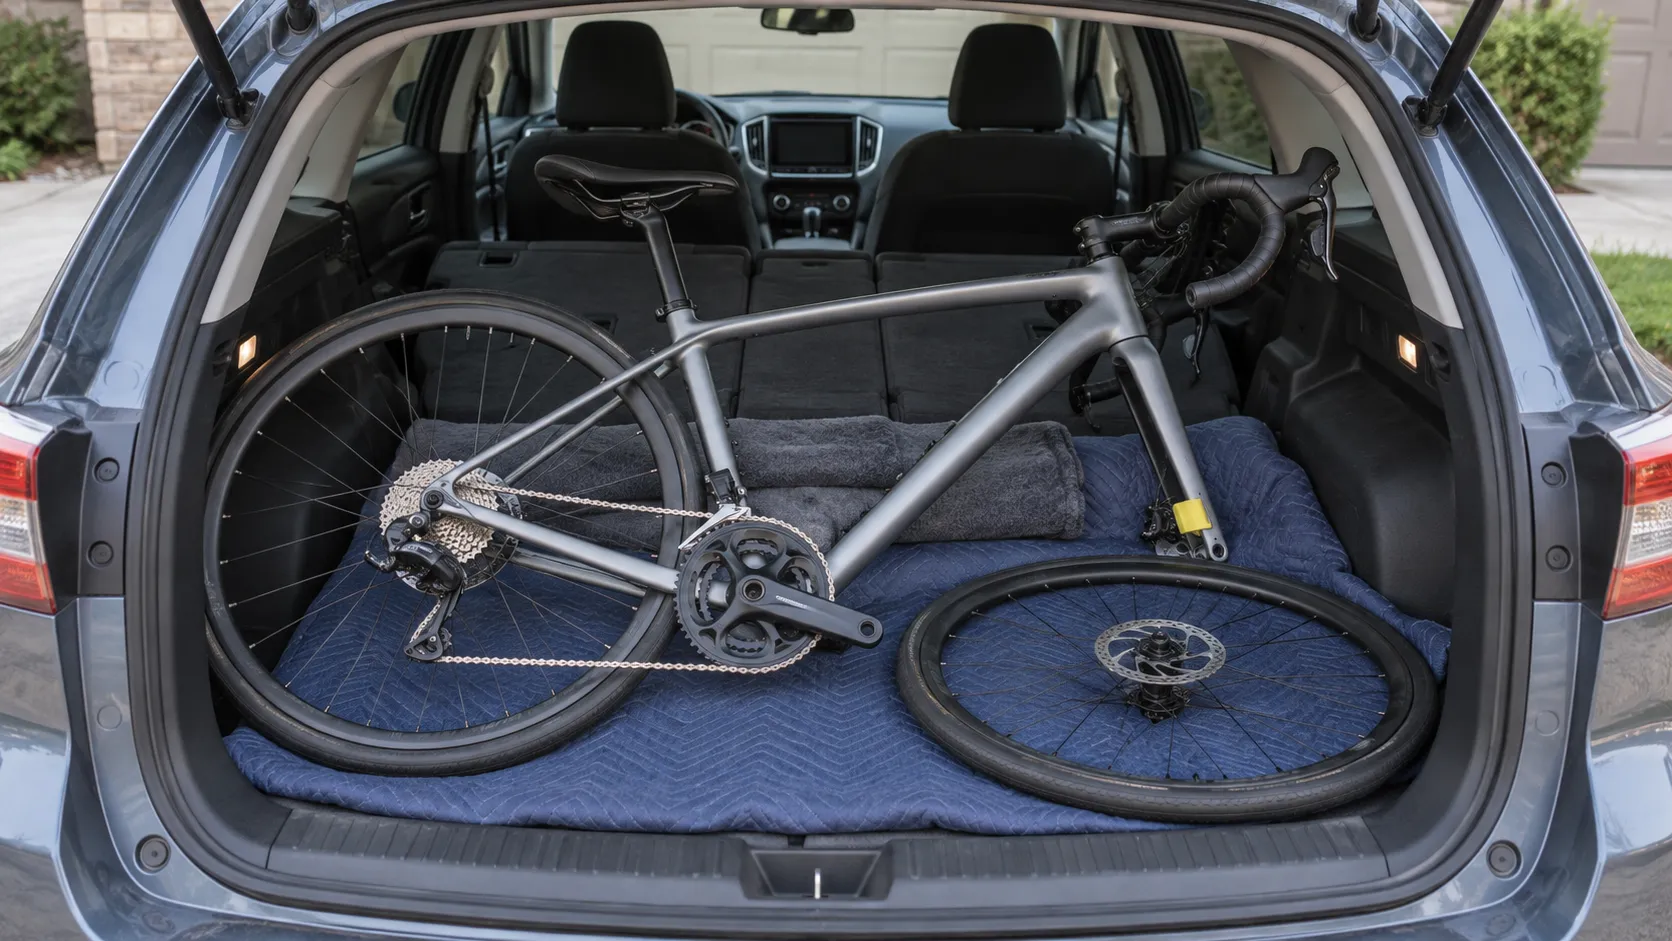
Choose the carrying method before buying hardware
Inside the car
This is a strong option for one road bike when rear seats fold and the bike fits without twisting the handlebar, crushing controls, or placing weight on the derailleur. It reduces exposure to theft, rain, salt, and stone impacts.
The compromise is cabin space. A bicycle, wheel, pump, and tool bag must not remain loose where braking or a collision could launch them toward occupants. Use the vehicle’s approved cargo anchor points and restraint guidance.
Wheel-supporting hitch or roof tray
A tray that secures tyres or wheels without clamping the frame can suit carbon and unusually shaped bikes, provided tyre width, wheelbase, fenders, and bike weight are compatible. Check whether the front-wheel hook touches only an approved tyre area and whether the rack permits carbon rims or deep sections.
Frame-contact rack
Do not assume a padded clamp is safe for every carbon or lightweight frame. Read both the bicycle and rack instructions. Thule’s general carrier safety guidance, for example, tells owners of carbon frames or forks to consult the bike maker or dealer and recommends a specific adapter for some rear-mounted carriers. Its carbon protector is approved only with named carrier types using a torque-limiter knob.
That is the useful rule: compatibility belongs to the complete combination, not a generic claim that “carbon is fine” or “never clamp carbon.”
Put a road bike inside the car in nine steps
- Measure first. Fold the seats and measure the clear floor length, width, and hatch opening. Do not discover the bike is too long while pushing the brake lever into trim.
- Clean the contact areas. Grit trapped between a frame and blanket acts like sandpaper. Wipe mud from the bike and cargo floor.
- Shift the rear derailleur inward. A larger rear sprocket can move the derailleur slightly away from the car wall; do not rotate the drivetrain while loading.
- Remove accessories. Take off bottles, computer, lights, pump, and saddle bag if they may fall or catch. Store them in a closed container.
- Remove the front wheel if required. Follow the fork and axle instructions. Keep axle parts together and do not touch the disc rotor’s braking surface.
- Fit a hydraulic-brake pad spacer. Shimano instructs users not to depress the lever with the wheel removed and recommends a pad spacer so pistons cannot move out unexpectedly. Use the spacer supplied or specified for your brake.
- Lay the bike drivetrain side up. Support the frame on clean blankets or foam at broad, strong areas. Keep weight off the rear derailleur, brake levers, rotors, and cable or hose ports.
- Separate and restrain the wheel. A rotor can bend against luggage or the frame. Use a wheel bag or clean divider, then secure bike and wheel to approved cargo anchors.
- Close the hatch slowly. Watch every contact point. Confirm no bar end, saddle, pedal, or wheel presses into glass, trim, or the closing mechanism.
Never loosen or rotate the handlebar or stem casually to gain space. Cockpit reassembly requires the maker’s alignment, bolt sequence, and torque. If that is the only way the bike fits, a compatible rack may be simpler.
Reinstall the wheel without creating brake rub
Park on level ground and support the bike securely. Remove the pad spacer without squeezing the brake. Put the wheel fully into the fork, guide the rotor between the pads without forcing it, and install the thru-axle or close the quick release using the bicycle and hub instructions.
Then:
- confirm the wheel is centred and retained;
- spin it and listen for heavy contact;
- squeeze the lever until it feels normal;
- test the front brake at walking pace;
- recheck the axle before road speed.
If the rotor rubs after correct wheel seating, use our post-removal disc-rub guide. If quick-release wheel retention is unfamiliar, ask a shop to demonstrate it before transport day.
Check an external rack as a system
Before purchase or each new bicycle, verify:
- the rack is approved for the exact vehicle, roof bars, hitch, tow ball, or rear door;
- total rack load and per-bike load exceed the real bicycle weight;
- tyre width, wheel diameter, wheelbase, frame shape, and fenders fit;
- every clamp point is approved by the bicycle maker;
- carbon-frame or carbon-wheel adapters are required or prohibited;
- the rack does not cover lights, number plate, camera, exhaust, or required warning devices;
- the vehicle remains within roof-load, hitch-load, and gross-weight limits;
- opening the hatch is allowed only in the rack configuration the manual permits.
Do not copy a forum workaround using pool noodles, towels, extra straps, or a homemade top-tube adapter unless both manufacturers approve that exact arrangement. Soft padding can hide excessive clamp force or change how a mechanism locks.
Avoid a full-bike cover on the road unless approved
A cover increases aerodynamic load and can flap against paint, controls, and wheels. It may obscure lights or the number plate and can change rack loading. Some rack instructions require easily removable items—including covers—to be removed before travel because air resistance and vibration can detach them.
Use a cover only when the rack and cover makers explicitly approve the combination, speed, and fit. For ordinary rain, the bike is designed to become wet; clean and dry it after the drive using the post-rain care routine.
Run a departure and first-stop check
Before moving:
- Pull each bike in every direction; the rack or cargo restraint should hold it without relying on a lock.
- Confirm wheels, loose straps, removable batteries, bags, pumps, and covers cannot detach.
- Lock the rack and bike only as an additional theft deterrent—not as load restraint.
- Check lights, plate, reversing camera, tailgate, and exhaust clearance.
- Walk around the vehicle and note its new height or rear overhang.
Stop after a short initial drive and check all fastenings again, then at the interval specified by the rack maker. Drive for the load: allow more space, avoid sudden inputs, and remember a roof-mounted bike before entering garages, car parks, drive-throughs, or low branches.
Your next step
Measure the car and weigh the complete bicycle before buying a rack. If it fits inside, practise wheel removal, pad-spacer installation, padding, and restraint at home. If it needs an external carrier, check the exact vehicle-rack-bike combination in both manufacturers’ instructions—not just a product category or a Reddit photo.
Sources and further reading
- Shimano dealer manual: install a pad spacer and do not squeeze the lever with the wheel removed
- Thule carrier safety instructions: carbon compatibility, adapters, loose items, and legal visibility
- Thule carbon-frame protector compatibility and use limits
- r/cycling reader context: a beginner removing a front wheel to fit a bike inside a car
- r/cycling reader context: comparing inside, roof, and rear-rack transport for a carbon bike
- r/cycling reader context: carbon-frame clamp and cover questions