How to tell if your bike tyres have tubes or are tubeless
Check whether a road-bike tyre is actually set up tubeless, understand why TLR labels and valve colour do not prove it, and inspect it safely.
 Field guide / how-to-tell-if-bike-tyres-are-tubeless
Before you buy
Check the starter kit first
Print the one-page buying brief for helmet, lights, water, phone, and repair compatibility before comparing upgrades.
The words tubeless ready describe what a tyre or rim can do, not what is currently inside it. A shop or previous owner may have installed an ordinary inner tube in a tubeless-ready wheel. Valve colour, a locknut, and a removable valve core are clues, but none is proof by itself.
The short answer: check the paperwork first, then look for sealant through a removable valve core. If that remains inconclusive, fully deflate the tyre and inspect how the valve is attached. A tubeless valve is a separate part fixed through the rim; an inner-tube valve is permanently attached to the tube. Do not unseat a road-tubeless tyre merely to satisfy curiosity if a shop can confirm the setup safely.
Start with what you actually need to know
There are three different questions:
- Is the tyre tubeless compatible? Look for
TLR,TLE,Tubeless Ready, or the maker’s equivalent on that exact model. - Is the rim tubeless compatible? Check the wheel or rim model, tape, valve, and manufacturer instructions.
- Is this wheel currently set up without an inner tube? That requires evidence about what is inside the mounted tyre.
A yes to the first two does not answer the third. Tubeless-compatible tyres can often be used with tubes, subject to the tyre and rim maker’s compatibility rules. This distinction matters when choosing a roadside repair, adding sealant, setting pressure, or ordering a replacement valve.
Use the least disruptive checks first
1. Check the service record
Look at the bike receipt, workshop invoice, seller messages, or setup notes. Useful wording includes “tubeless conversion,” the sealant brand and quantity, or a date for the last sealant refresh. “Tubeless-ready wheels” is not enough.
If a shop set up the bike, ask them for the work record and exact tyre, rim, tape, valve, and sealant combination. That answer is more valuable than guessing from a photograph.
2. Inspect the tyre and rim labels
Record the full tyre model and size, then identify the wheel or rim. Confirm on the manufacturers’ sites that the combination is approved, especially for hookless rims. A compatible system still may contain a tube, but an incompatible one needs attention before riding.
3. Look at the valve without trusting its appearance
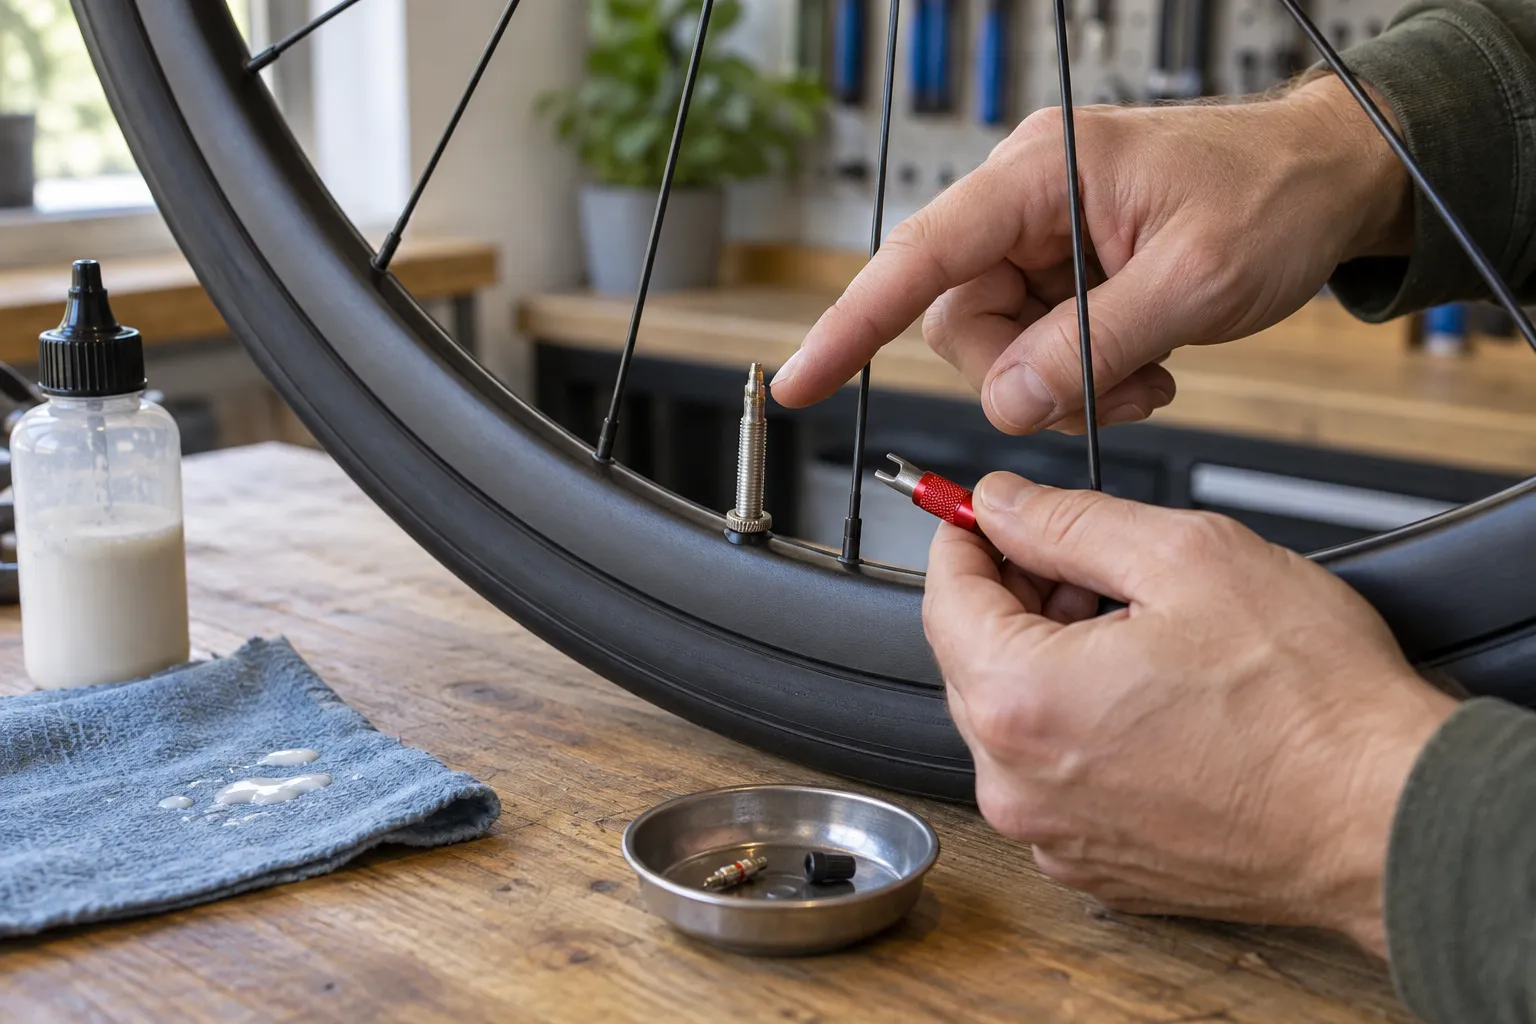
A tubeless valve usually has a retaining nut against the rim and may have a removable core. Many inner tubes have both features too. Black, silver, or brass colour proves nothing. Dried sealant around the core or valve base is evidence of past or current tubeless use, but an old wheel may have been converted back to a tube.
4. Check through a removable valve core
Put the valve near the top of the wheel, fully deflate the tyre, and remove the core only with the correct tool. A sealant dipstick supplied by a sealant maker, or visible liquid on the core, is strong evidence of a tubeless setup.
No liquid does not prove there is a tube. A tubeless system may be dry, and that itself needs correcting. Reinstall the core correctly and inflate only within the lower of the tyre and rim pressure limits.
The definitive valve check
Do this only when you are prepared to reinflate the system and deal with sealant.
- Put the valve at the top so liquid sealant settles away from it.
- Deflate the tyre completely.
- Remove only the external valve retaining nut. Do not loosen unrelated rim hardware.
- Gently press the valve stem a few millimetres toward the tyre.
On a tubeless setup, the valve is an independent part sealed against the rim. Once its nut is removed and the tyre is flat, it can normally move inward separately. On a tube, the valve is bonded to the inner tube; you may feel the tube pull with it rather than finding a separate valve base.
This test can still be awkward on a tightly mounted, dry, or stuck valve. Never force it with pliers. If uncertainty remains, peel back only a small section of one tyre bead in a controlled workspace. Seeing a separate tube is conclusive. Seeing no tube is conclusive too—but now you must restore the tubeless system correctly, including tape and valve inspection, compatible sealant, bead seating, and a pressure-retention check.
What not to use as proof
- “The tyre says TLR.” That describes compatibility, not the installed system.
- “The valve has a locknut.” Many tubes do too.
- “The valve core comes out.” Removable cores also appear on inner tubes.
- “It loses air quickly.” Tubes and tubeless systems can both lose pressure for several reasons.
- “I heard liquid.” Sealant might be inside a tube, or the sound may come from something else in the wheel.
- “The previous owner said it was tubeless.” Treat that as a lead, then verify the hardware and current condition.
Choose the right roadside kit after you confirm
For a tubed setup, carry a correctly sized tube with enough valve length, tyre levers if your tyre requires them, and a working inflator. For tubeless, add a compatible plug tool, but still carry a tube for cuts or failures a plug cannot seal. Our inner-tube size guide explains the markings, while the road-tubeless puncture guide covers the repair sequence.
If you just bought the bike, record the setup in your phone: tyre and rim model, tube or tubeless, sealant brand, installation date, pressure range, and valve length. The next puncture is the wrong time to rediscover all of it.
Your next step
Photograph the tyre and rim labels, find the wheel manufacturer’s instructions, and check your service receipt. If those do not settle the question, use the removable-core check at home with a pump ready. Ask a competent shop to inspect the wheel if compatibility, bead seating, or pressure limits are unclear.
Sources and further reading
- Schwalbe: tubeless wheel, tyre, rim-width, and pressure compatibility
- Schwalbe: hookless tyres may be used tubeless or with a tube only within the stated compatibility rules
- r/bikewrench reader context: why “tubeless ready” and valve appearance caused conflicting answers
- r/bikewrench reader context: recurring tube-or-tubeless identification question