How to remove and install bike pedals without damaging the cranks
Identify left and right pedals, turn each thread the correct way, free a tight pedal safely, and start replacement pedals by hand.
 Field guide / how-to-remove-install-bike-pedals
Before you buy
Check the starter kit first
Print the one-page buying brief for helmet, lights, water, phone, and repair compatibility before comparing upgrades.
The right pedal uses a normal right-hand thread; the left pedal uses a left-hand, or reverse, thread. Remove either correctly installed pedal by turning the tool toward the back of the bicycle when the tool handle starts above the spindle. Install by starting the correct pedal gently with your fingers, never by forcing a wrench.
The short answer: identify the R and L pedals, use the correct tool fully engaged, and remember “back to remove, forward to fit” for a wrench above the pedal axle. Grease and final torque must follow the exact pedal or crank instructions. If it will not thread several turns by hand, stop before the steel spindle ruins the softer crank.
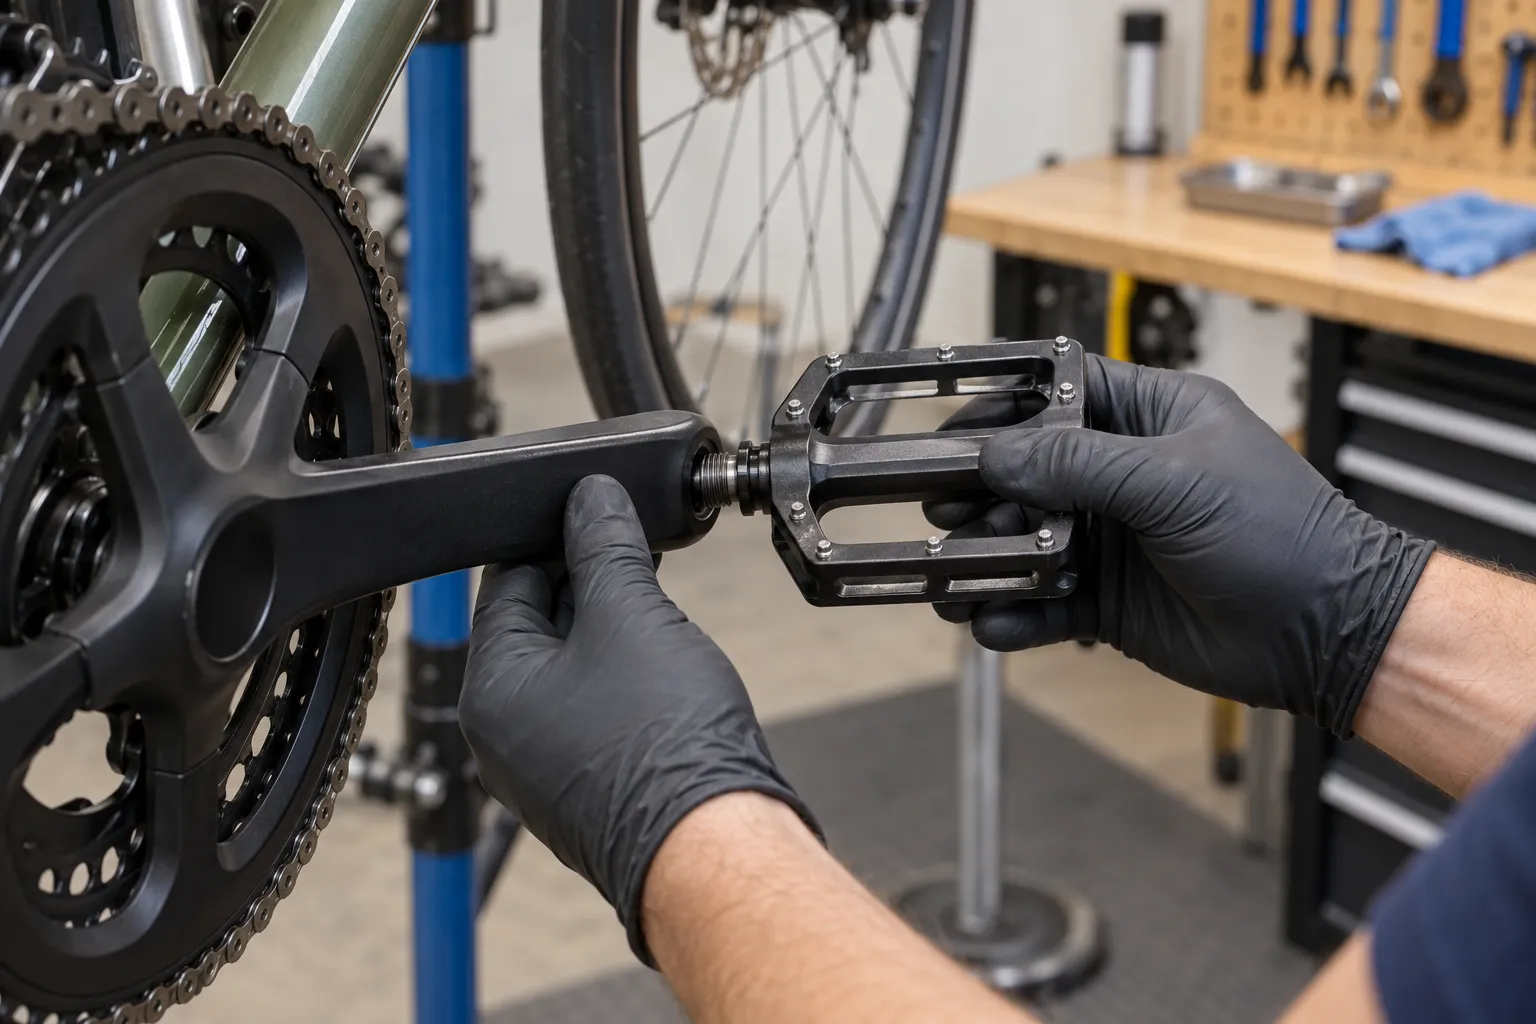
Identify the sides and tool interface
Stand behind the bicycle facing forward. The drivetrain side is the right; the other side is the left. Look for an R or L on each spindle or pedal body before removing both pedals. Keep them separated.
Pedals commonly use one of two tool interfaces:
- 15 mm wrench flats between the pedal body and crank;
- a hex socket at the inner end of the spindle, accessed from behind the crank.
Some have both. Use a pedal wrench thin enough to sit fully on the flats or the exact hex size inserted completely. An adjustable wrench, loosely fitting key, screwdriver, or pliers can round the interface and put your hands in danger.
Understand the thread directions
Viewed from outside each crank:
| Side | Tighten | Loosen |
|---|---|---|
| Right / drivetrain | Clockwise | Counter-clockwise |
| Left / non-drivetrain | Counter-clockwise | Clockwise |
Tool position can make clock directions confusing, especially with a hex key behind the crank. The practical mnemonic works when the wrench or key handle points upward: move the handle toward the rear wheel to remove and toward the front wheel to install.
Confirm the tool’s actual rotation at the spindle before applying force. Internet advice based only on where someone is standing is easy to misread.
Remove a pedal in control
- Shift the chain onto the large chainring if your bike has one. It can cover sharp chainring teeth, but still keep your hands clear.
- Support the bike securely on the floor or in a suitable stand.
- Position the crank so the tool can move without striking the frame, stand, ground, or your knuckles.
- Engage the tool fully and confirm the loosening direction for that side.
- Apply smooth force close to the bike. Avoid an uncontrolled swing.
- Once loose, turn the spindle out by hand while supporting the pedal.
- Mark the pedal side and inspect both sets of threads.
If the pedal suddenly releases, your hand should travel into open space—not the chainring. Gloves help with grime but do not make poor leverage safe.
What to do when a pedal is stuck
First verify the side, viewing direction, and tool interface again. Recent repair discussions repeatedly show beginners applying more force in the tightening direction.
Then check for corrosion, damaged flats, a partly rounded hex, or evidence that the pedal was cross-threaded. Use a proper long pedal wrench before improvising a pipe over a small tool. Extra leverage can slip, break the tool, damage the crank, or tip the bicycle.
Penetrating fluid and controlled workshop techniques may help a corroded metal interface, but keep all chemicals away from brake rotors, pads, rims, tyres, and bearings. Carbon cranks, visibly damaged threads, seized pedals, and rounded interfaces are good reasons to stop and use a competent shop.
Do not heat an assembled crank or pedal casually. Heat can damage finishes, adhesives, seals, bearings, and carbon structures.
Prepare the replacement pedals
Confirm the thread size and crank compatibility in the pedal and crank manuals. Most adult bicycles use the common 9/16-inch pedal thread, but “most” is not a safe parts specification.
Clean the crank threads without removing metal. Inspect for:
- flattened, torn, or missing threads;
- metal shavings;
- a spindle that entered at an angle;
- cracks around the pedal eye;
- movement between crank and spindle.
If threads are damaged, do not treat a pedal that can be forced in as repaired. A shop may be able to assess whether the crank can be chased, fitted with a thread insert, or must be replaced.
Apply the thread preparation stated by the manufacturer. Shimano’s current pedal dealer manual, for example, instructs a small amount of grease and explicitly identifies the opposite thread directions. Do not substitute threadlocker or anti-seize unless the relevant maker specifies it; lubrication affects tightening torque.
Start both pedals by hand
- Match R to the right crank and L to the left.
- Hold the spindle square to the crank.
- Turn it in the tightening direction with fingertips only.
- Confirm it advances smoothly for several full turns without wobbling.
- If it binds immediately, remove it, recheck the side, and realign.
- Finish with the specified tool and manufacturer torque.
A pedal started with a wrench can cut a new, crooked path through an aluminium crank. Starting by hand is the most important protection.
Check the result before riding
The pedal shoulder should sit as its manual shows, with no visible cross-threading or side-to-side looseness. Rotate each pedal and crank. Refit any washers only when the maker requires them.
Test the bicycle in a controlled area. Stop immediately for clicking, loosening, a changing pedal angle, or movement at the crank thread. Check the installation again after the maker’s stated bedding or inspection interval, especially on a new bicycle or newly fitted crank.
If you are changing pedal systems, read flat pedals versus SPD versus SPD-SL and practise release away from traffic. For clipless placement, use the first-time cleat setup guide.
Your next step
Before touching a wrench, find the L and R marks and the torque in the exact pedal manual. Photograph the current washers and spindle seating, set the tool above the axle, and rehearse the correct direction: back to remove, forward to install.
Sources and further reading
- Shimano pedal dealer manual: grease, left/right threads, and model-specific torque
- Park Tool: pedal removal and installation
- r/bikewrench reader context: a beginner identifying the tool and direction for pedal removal
- r/bicycling reader context: recurring confusion about the opposite pedal threads
Reddit discussions were used to identify the recurring task and failure points, not as the technical authority. No usernames or personal stories are reproduced here.